Keycloak configuration documentation
Introduction
This document is dedicated to the configuration of keycloak for proPilot, but the same process can be used for other applications.
Note that Keycloak is not required if you run proPilot as slave application with your existing SSO solution being the master.
proPilot requirements to interact with Keycloak
The following keys will be used in this document: they are required to setup Keycloak configuration in proPilot (see sample configuration at the end of this document).
Each key will be detailed in the following sections.
KEYCLOAK_DOMAIN_NAME : Complete Domain Name
REALM_NAME : Name of the Realm
ADMIN_CLI_CLIENT_SECRET : Client Secret of the “admin-cli” client.
CLIENT_ID : Client id to use to authenticate users
AUDIENCE : Audience Name (More info about audience here https://github.com/keycloak/keycloak-documentation/blob/main/server_admin/topics/clients/oidc/con-audience.adoc )
End to end configuration of a new Realm for proPilot
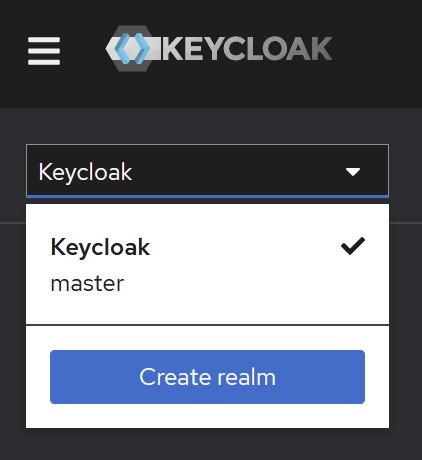
Creation of a new Keycloak Realm: Select realm → Add realm
In keycloack, from the admin account, create a new realm using
Create a new Realm
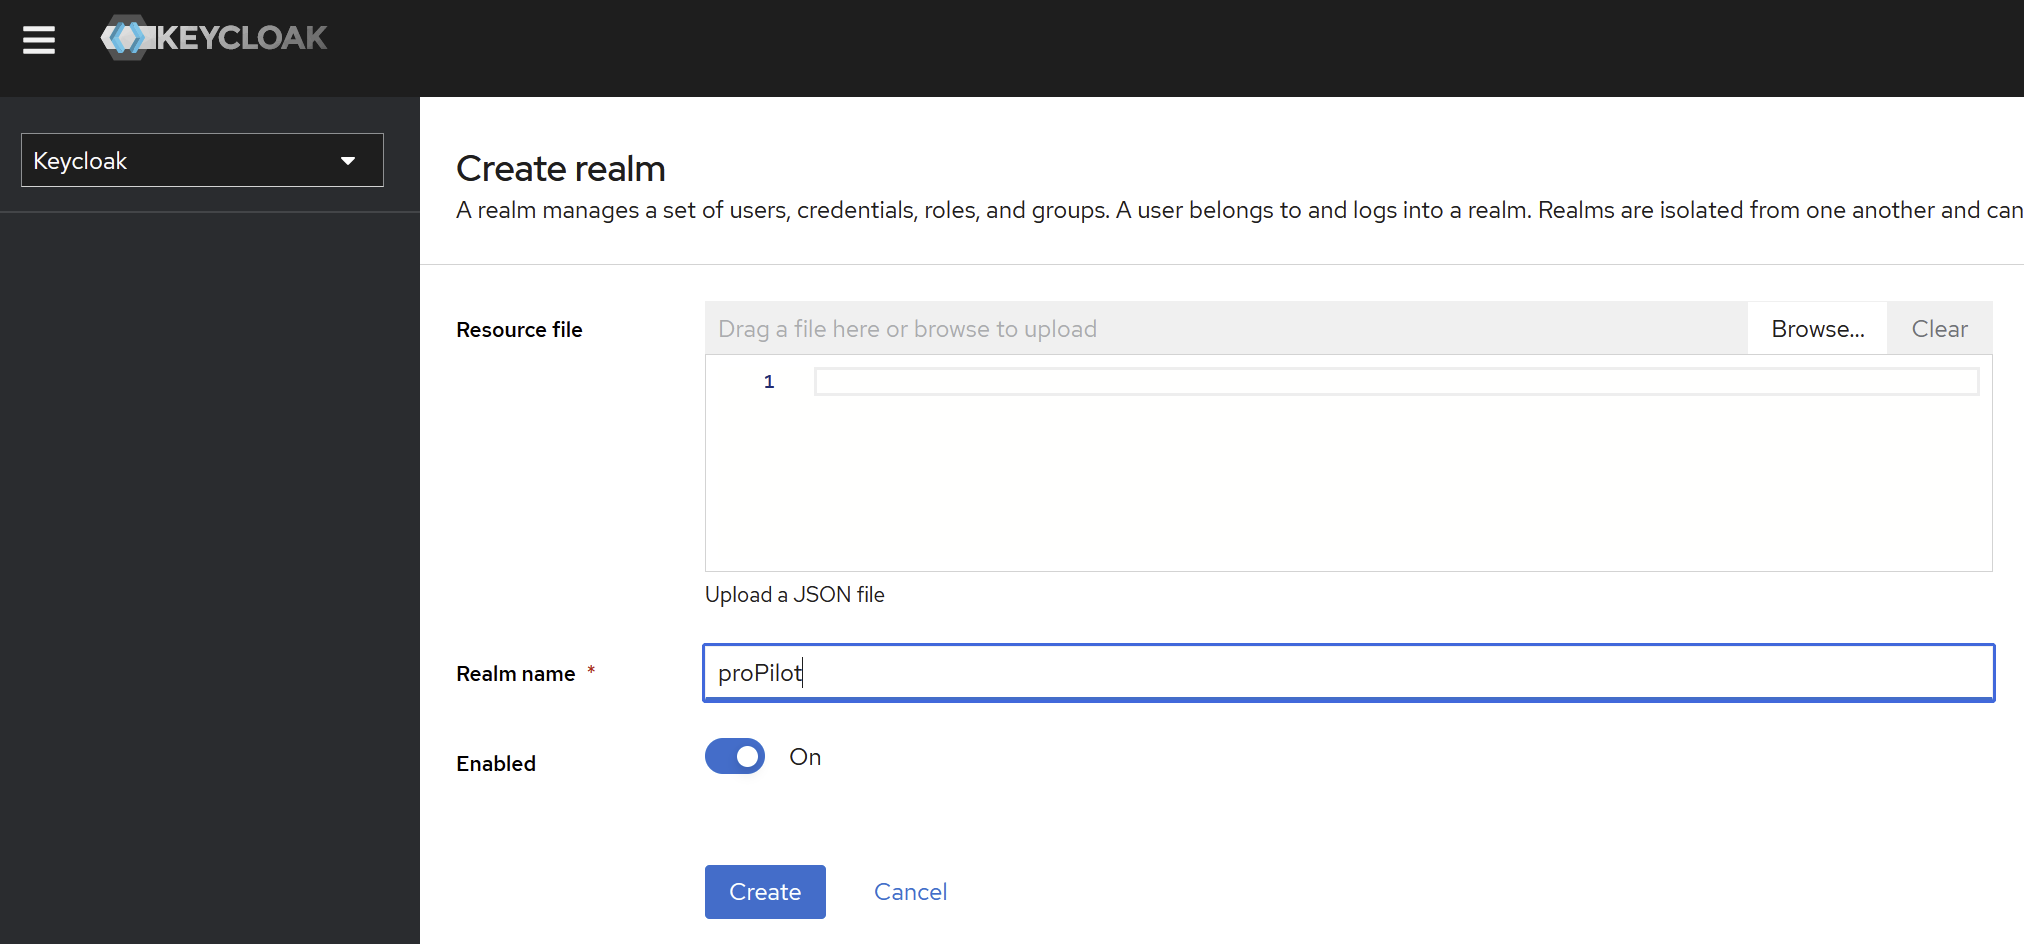
Name: “proPilot” (or another name if your company uses a custom name, but in this document we’ll use proPilot)
This name is the technical name.
Enabled: ON
Click on “Create”.
Configure General information
(left menu section) “Configure” → (menu item) “Realm settings” → (tab) “General”
Display name: proPilot
HTML display name: proPilot
Click on save.
The name will be used in the email generate by Keycloak
Configure login
(left menu section) “Configure” → (menu item) “Realm settings” → (tab) “Login”
In the login tab
User registration: OFF
Forgot password: ON
Remember me: ON
Email settings
Email as username (depends on your organisation)
Login with email: ON
Duplicate emails: OFF
Verify email: OFF
→ Click on “save”.
Configure SMTP server
(left menu section) “Configure” → (menu item) “Realm settings” → (tab) “Email”
Configure SMTP server
By default, in UAT environment, you may configure a Mailcatcher.
From: noreply@yourCompany.com
Activate proPilot Themes
By defaut, keyCloak provides a restricted set of themes, but you may add custom themes.
See official documentation:
https://www.keycloak.org/docs/latest/server_development/#_themes
Do not hesitate to contact the proPilot team to obtain a custom theme, if you want to keep the proPilot look an feel.
→ Click on “save”.
Enable internationalization
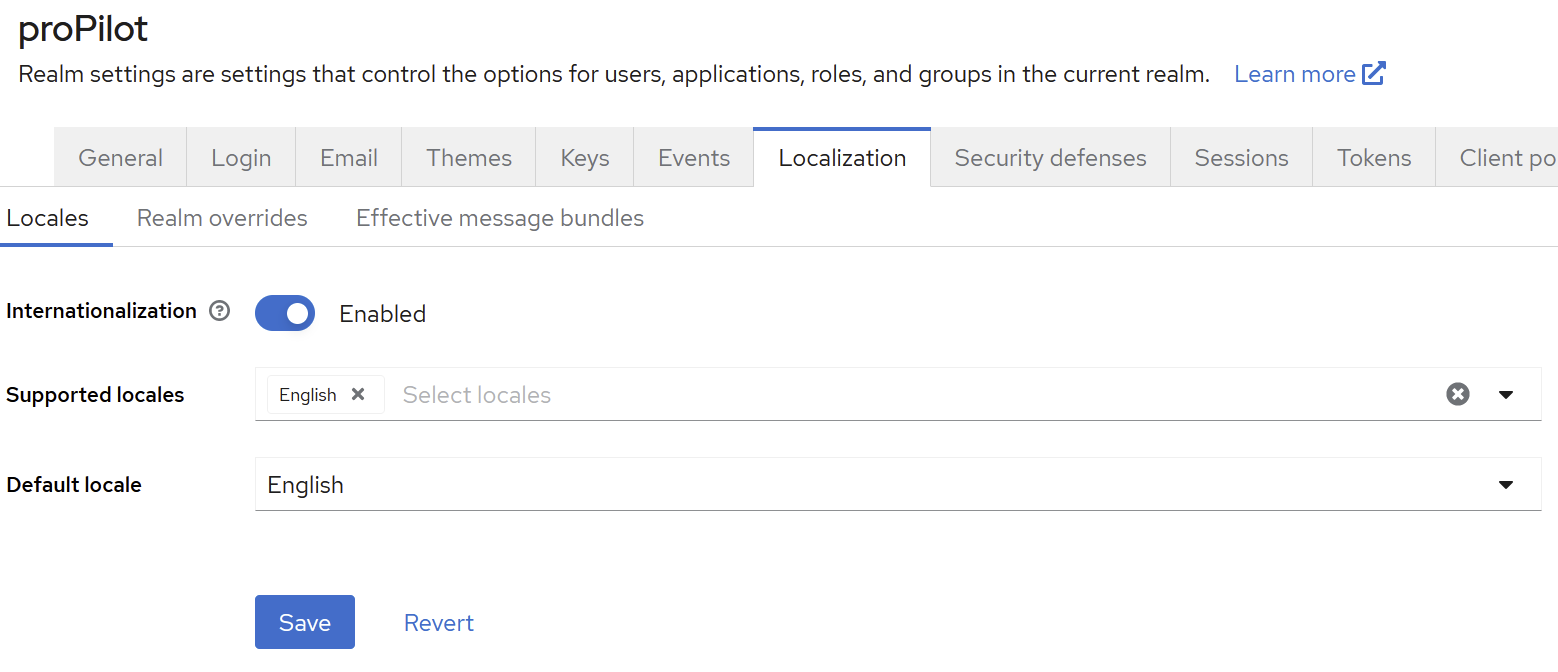
(left menu section) “Configure” → (menu item) “Realm settings” → (tab) “Localization”
Enable the internationalization: ON
Activate “Supported Locales”: en & fr
Default locale: en (by default) fr (for french client)
→ click on save
Secure Realm
(left menu section) “Configure” → (menu item) “Realm settings” → (tab) “Security defense” → (sub-tab) “Brute force Detection”
Select your preferred strategy and customize the default values only when necessary
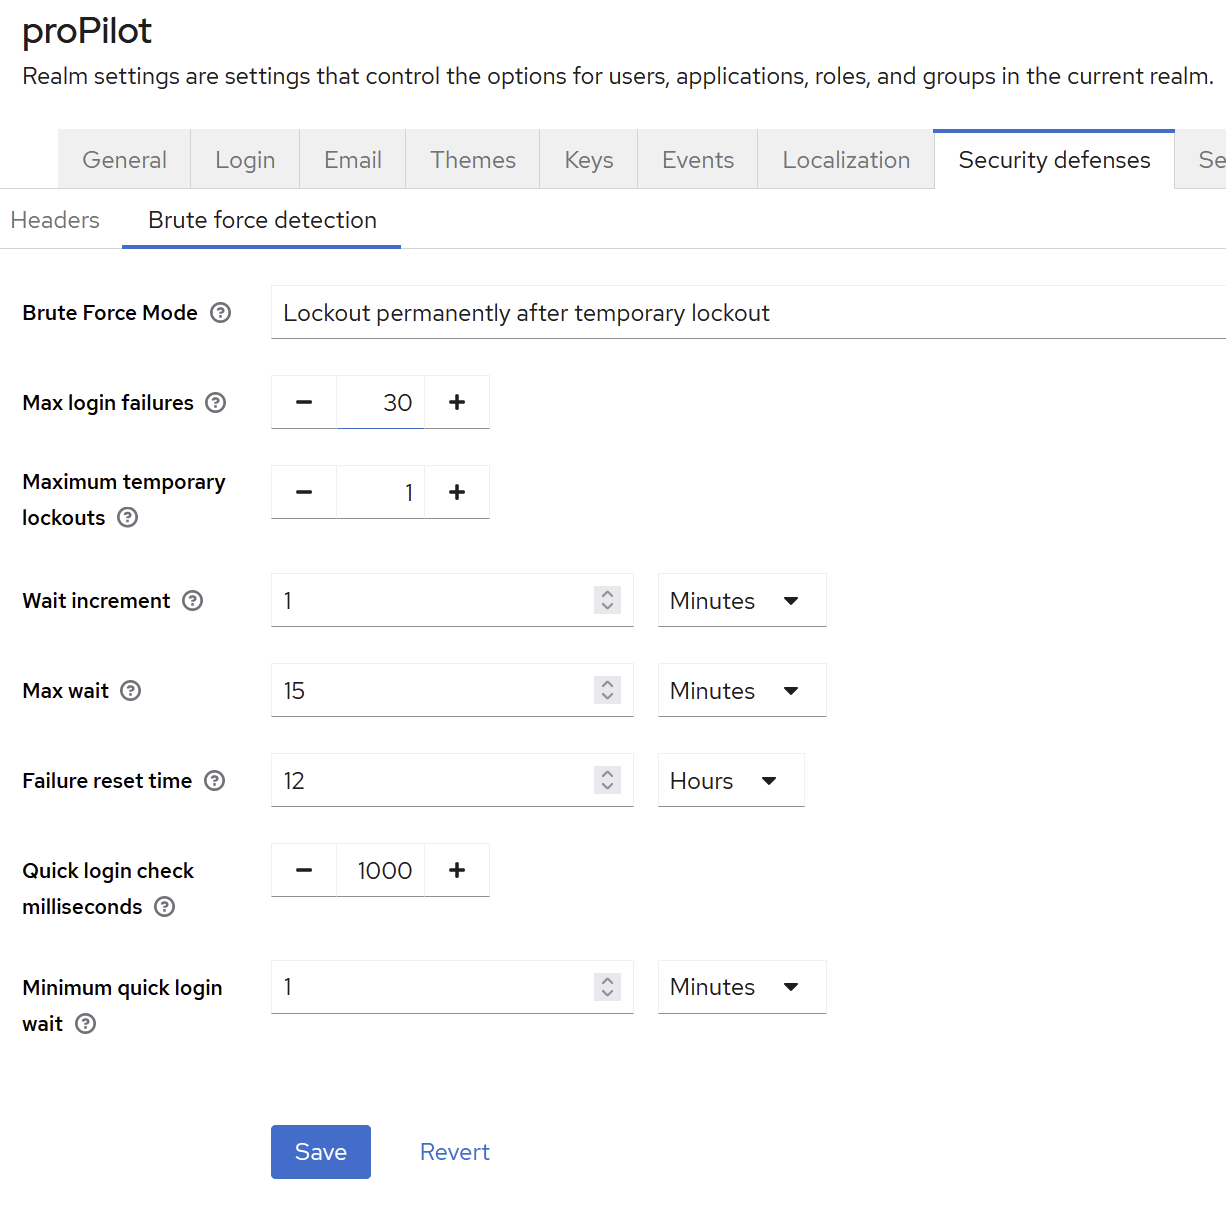
→ Click on save.
SSO Session settings
(left menu section) “Domaine configuration” → (menu item) “Master” → (tab) “Sessions“ → (sub-tab) “SSO Session settings”
Configure the following elements:
Session SSO (standard: 12 hour)
Maximum sessions SSO (standard: 24 hours)
SSO session idle (standard: 96 hours)
SSO session Max (standard: 168hours)
Please adapt the session settings to your IT security rules.
→ Click on save.
Configure Authentification with password policy
(left menu section) “Configure” → (menu item) “Authentication” → (tab) “Policies“ → (sub-tab) “Password policy”
Standard proPilot required password policy is as follow
minimum password length 16 characters
At least one upper case character
At least one lower case character
At least one number
Not user name
Not email
Not recently used (3 last passwords)
Create a keyCloak client for proPilot
(left menu section) “Manage” → (menu item) “Clients” → (tab) “Clients list“
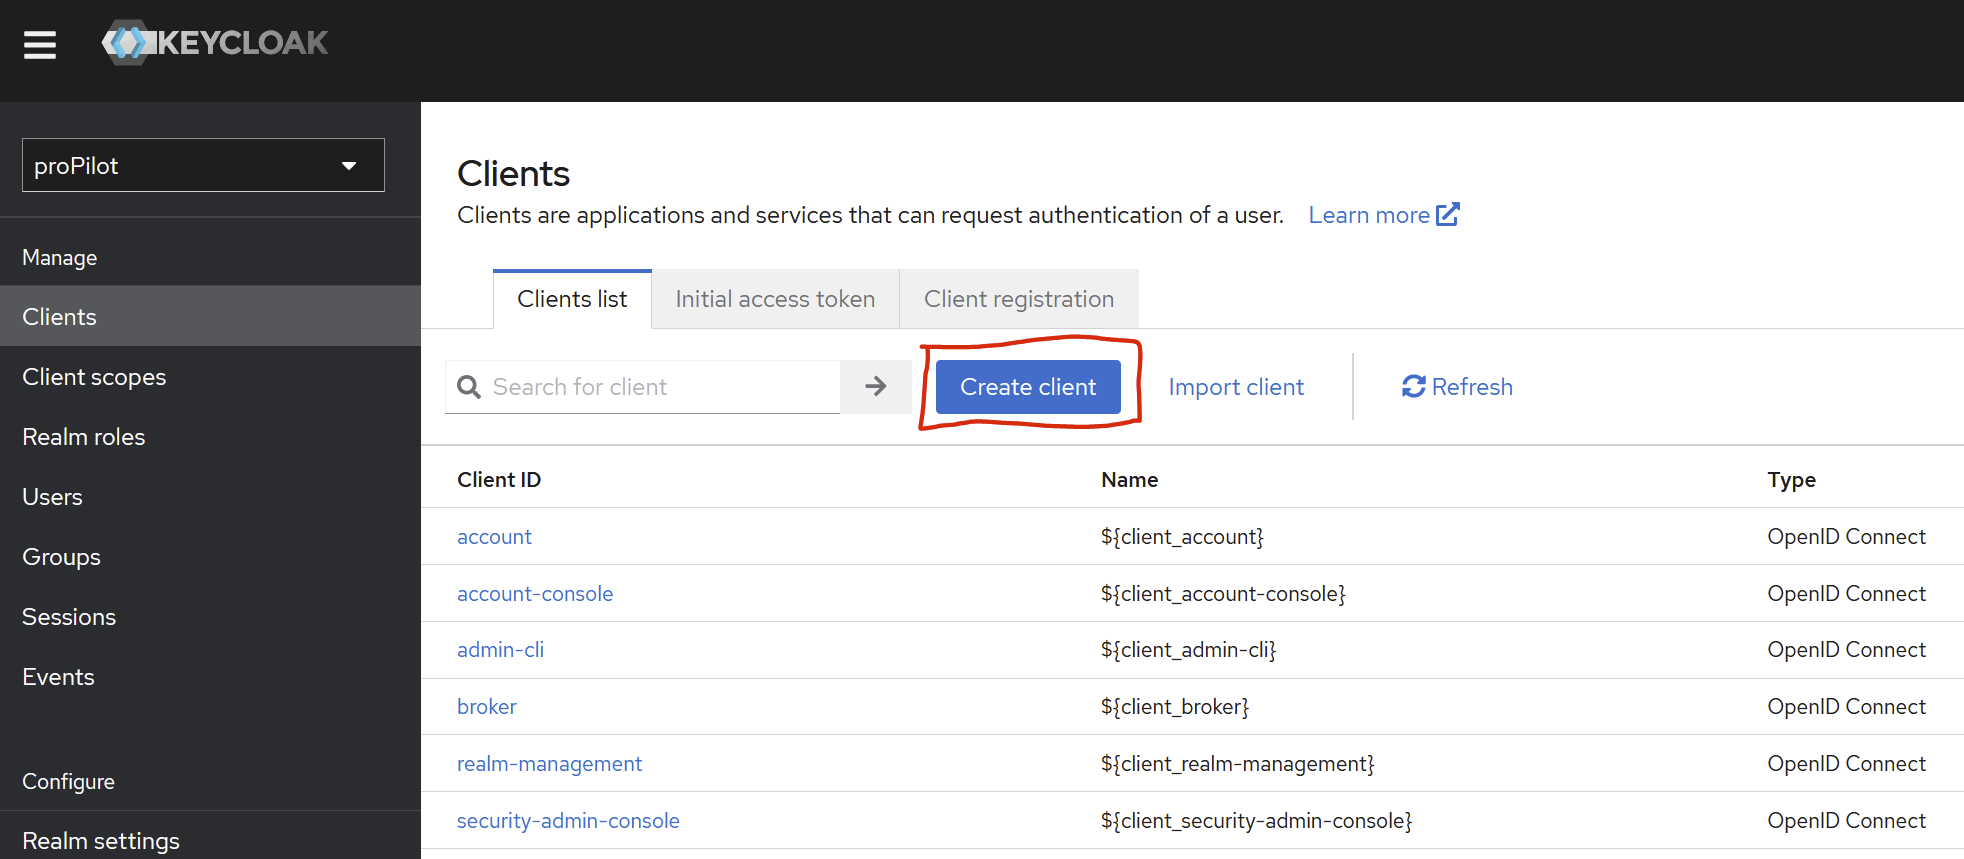
Create a new client in your realm
Set a client id (unique)
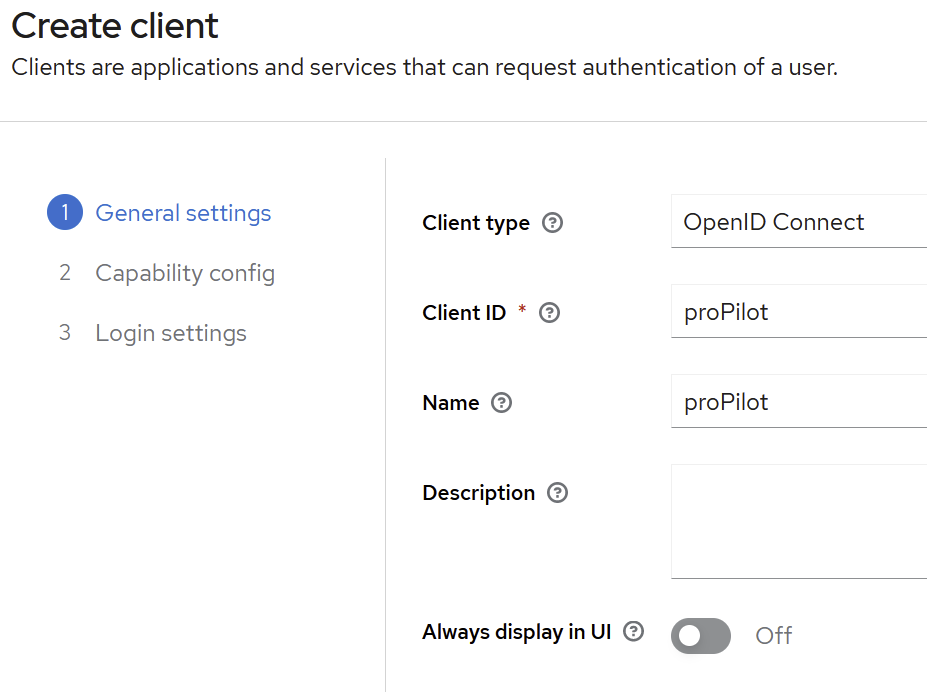
Click “Next”
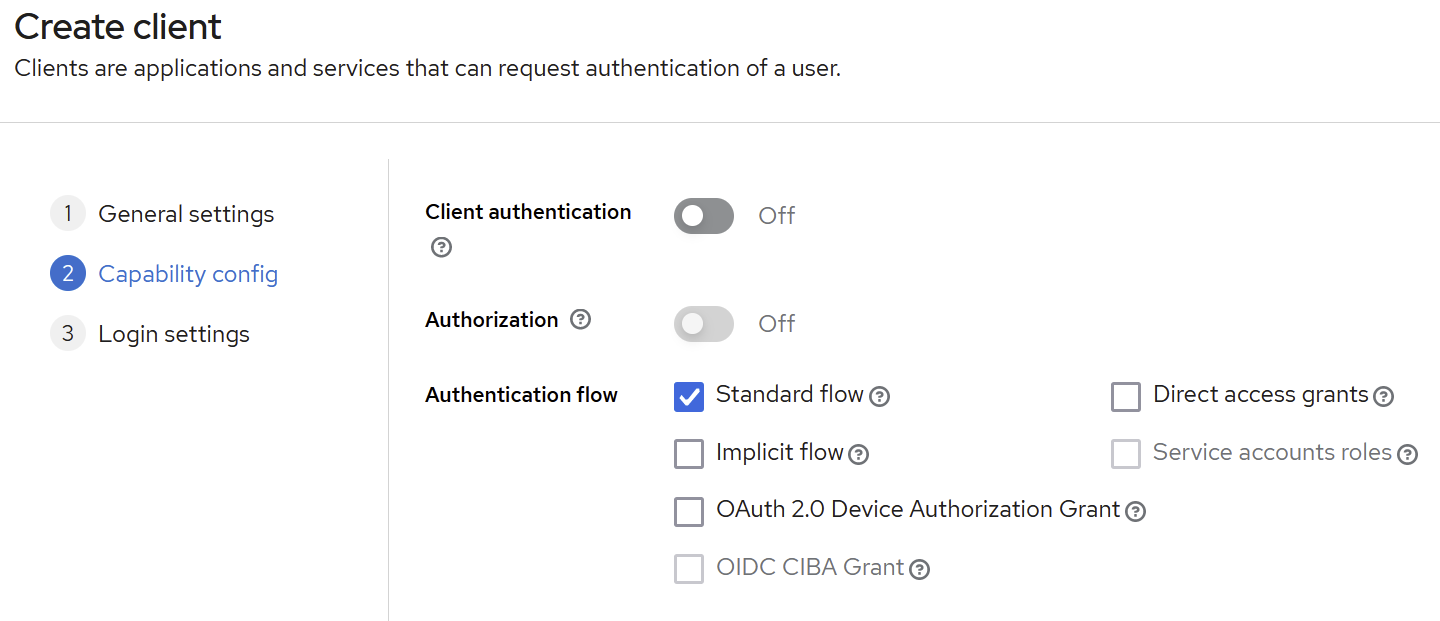
Client authentication: OFF
Authorization: OFF
Standard Flow Enabled: ON
All other flows (e.g. Direct access grant must be disabled): OFF
Specify the “valid redirected URLs”, which specifies the pattern of valid client urls (e.g. http://localhost:4200/* means that all uris beginning by http://localhost:4200/ are considered as valid addresses to redirect to).
Specify as well the Base URL, which must be the entry point of the business application front-end (e.g. http://propilot.dev.dfakto.com/ ). This base URL will be used in the emails sent by keyCloak to link back to the business application.Set Web origins (you can use + or even * ).
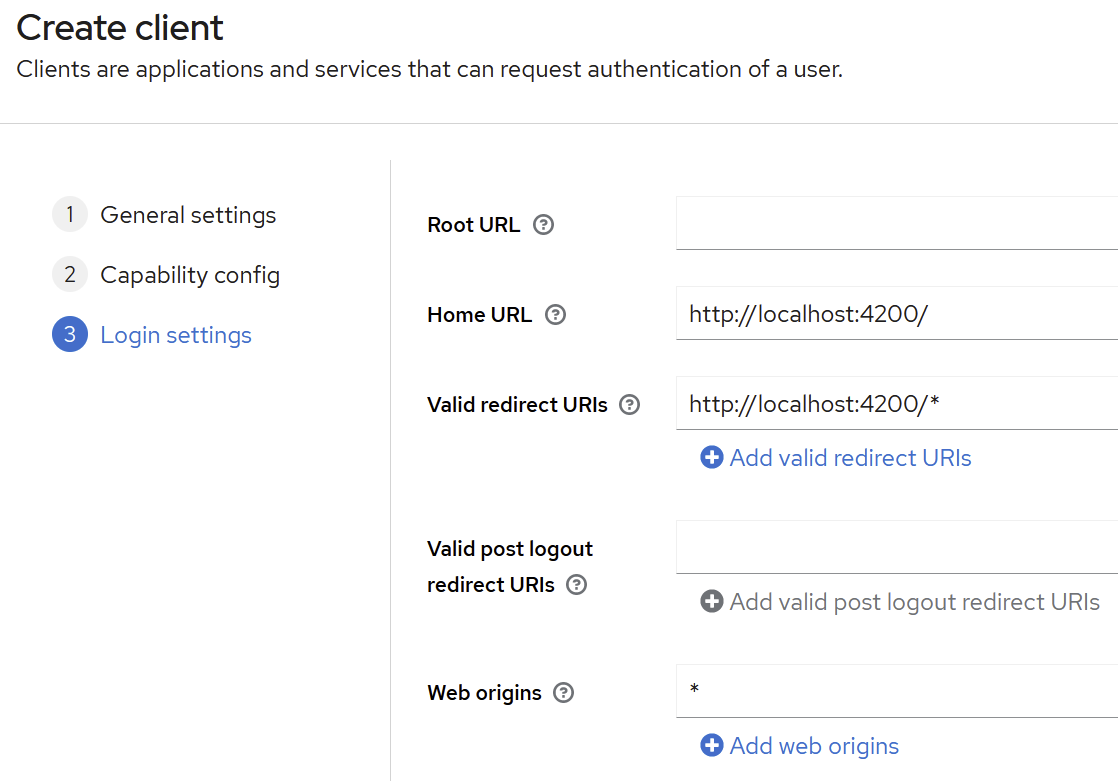
→ Click “Save”
Update the “admin-cli” client
This client is used to access keyCloak through REST api calls (e.g. external applications like proPilot).
To configure clients, go to the administration console
Clients (left menu).
on the correct client.
press the “edit” button.
Edit the “admin-cli” client.
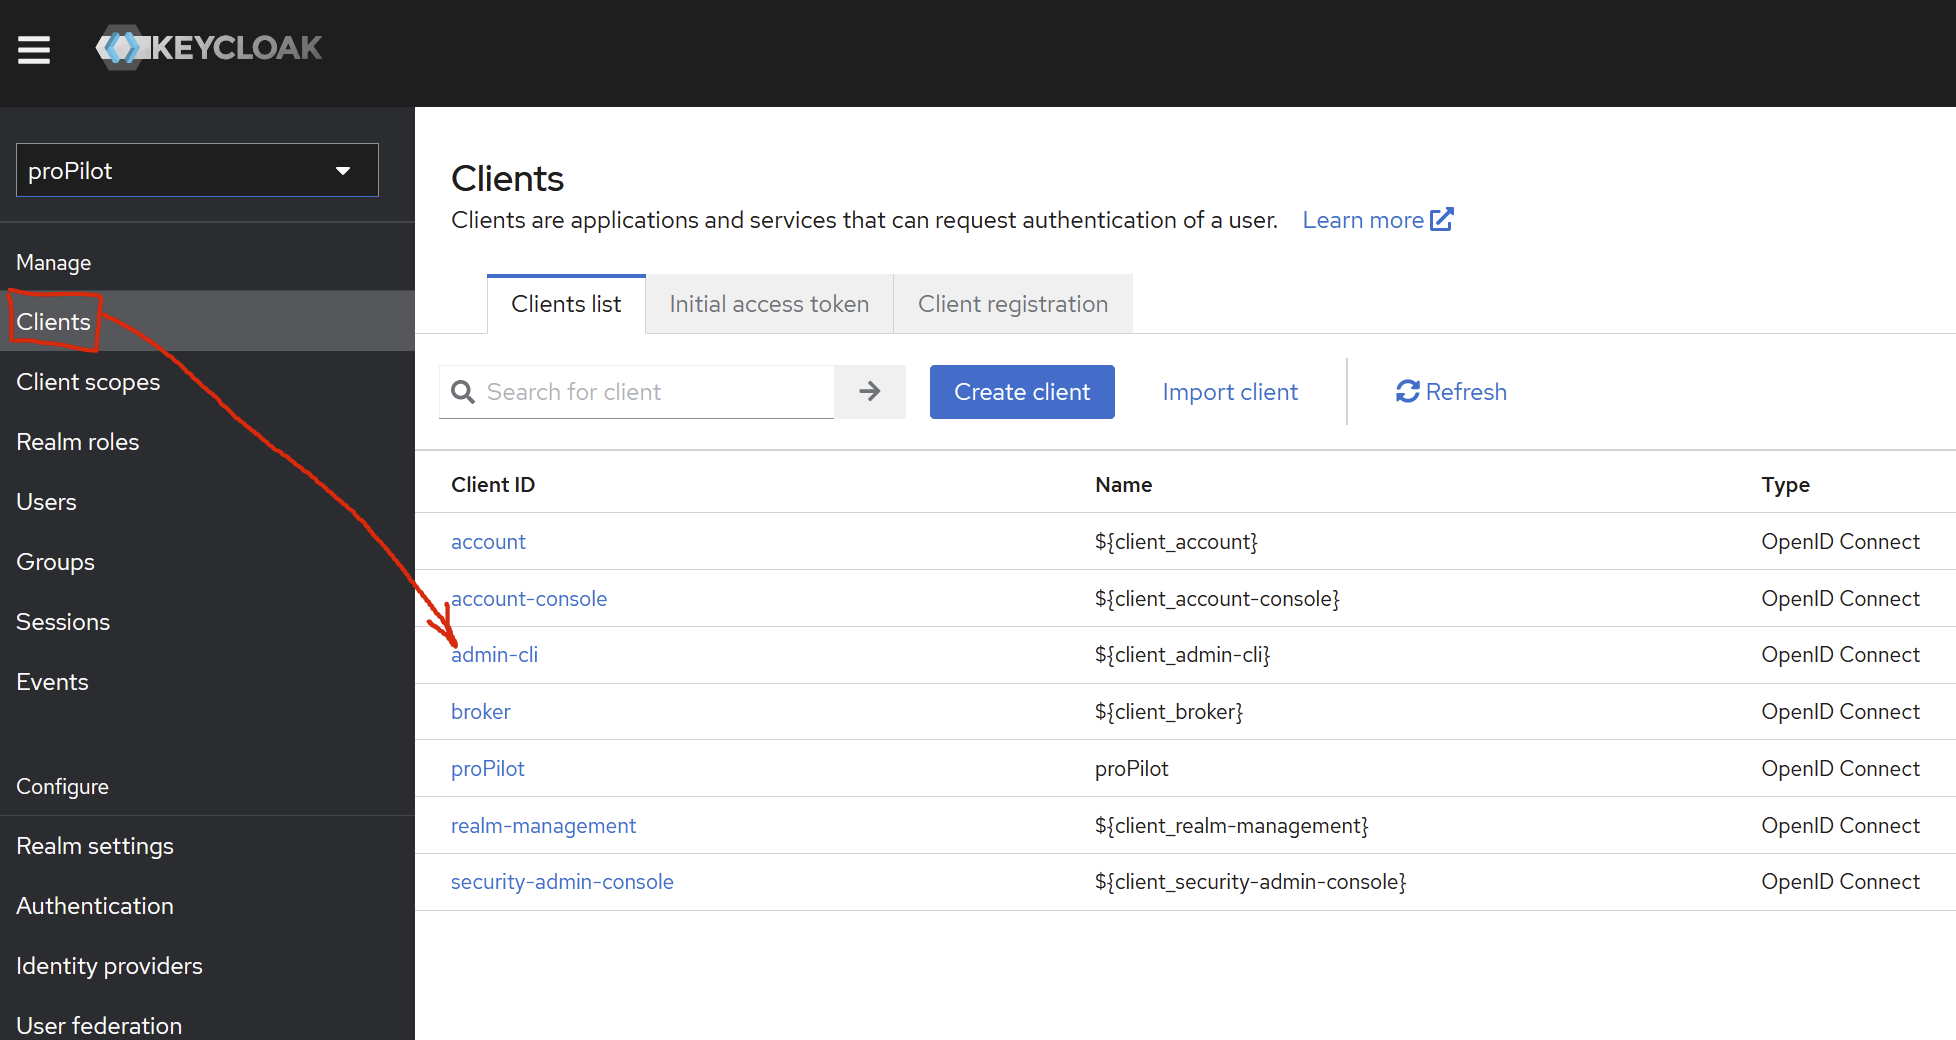
Note that the name must not be changed. It is hard-coded in the C# library we are using right now
In the Settings tab
Activate the client authentication.
Enable Service Account roles (necessary for API calls from our applications) and disable other flows.
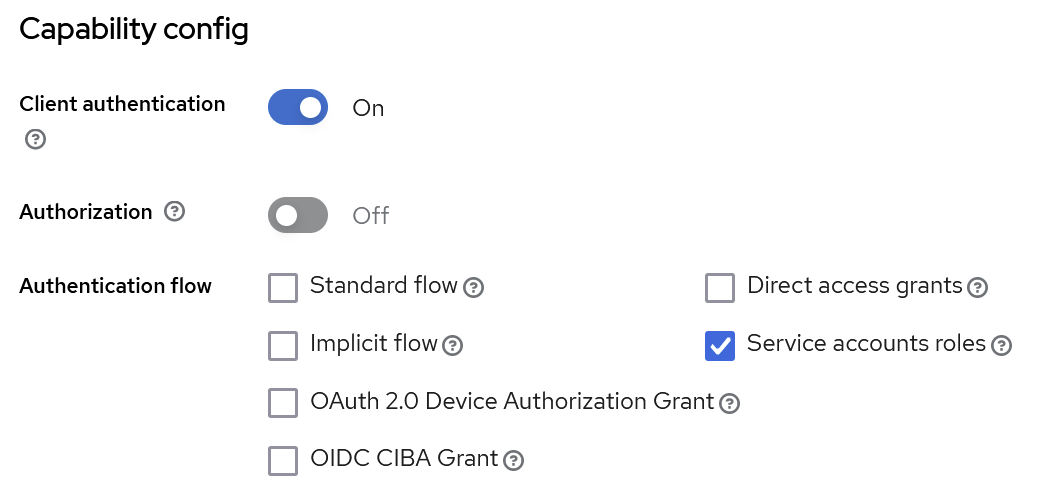
Click Save
In the Credentials tab
If this tab its not visible, ensure that the client authentication is enabled (as shown above), and that you clicked the “save” button in the settings tab, as requested above.
Retrieve Secret content and paste it in your external application parameters (e.g. ProPilot configuration).
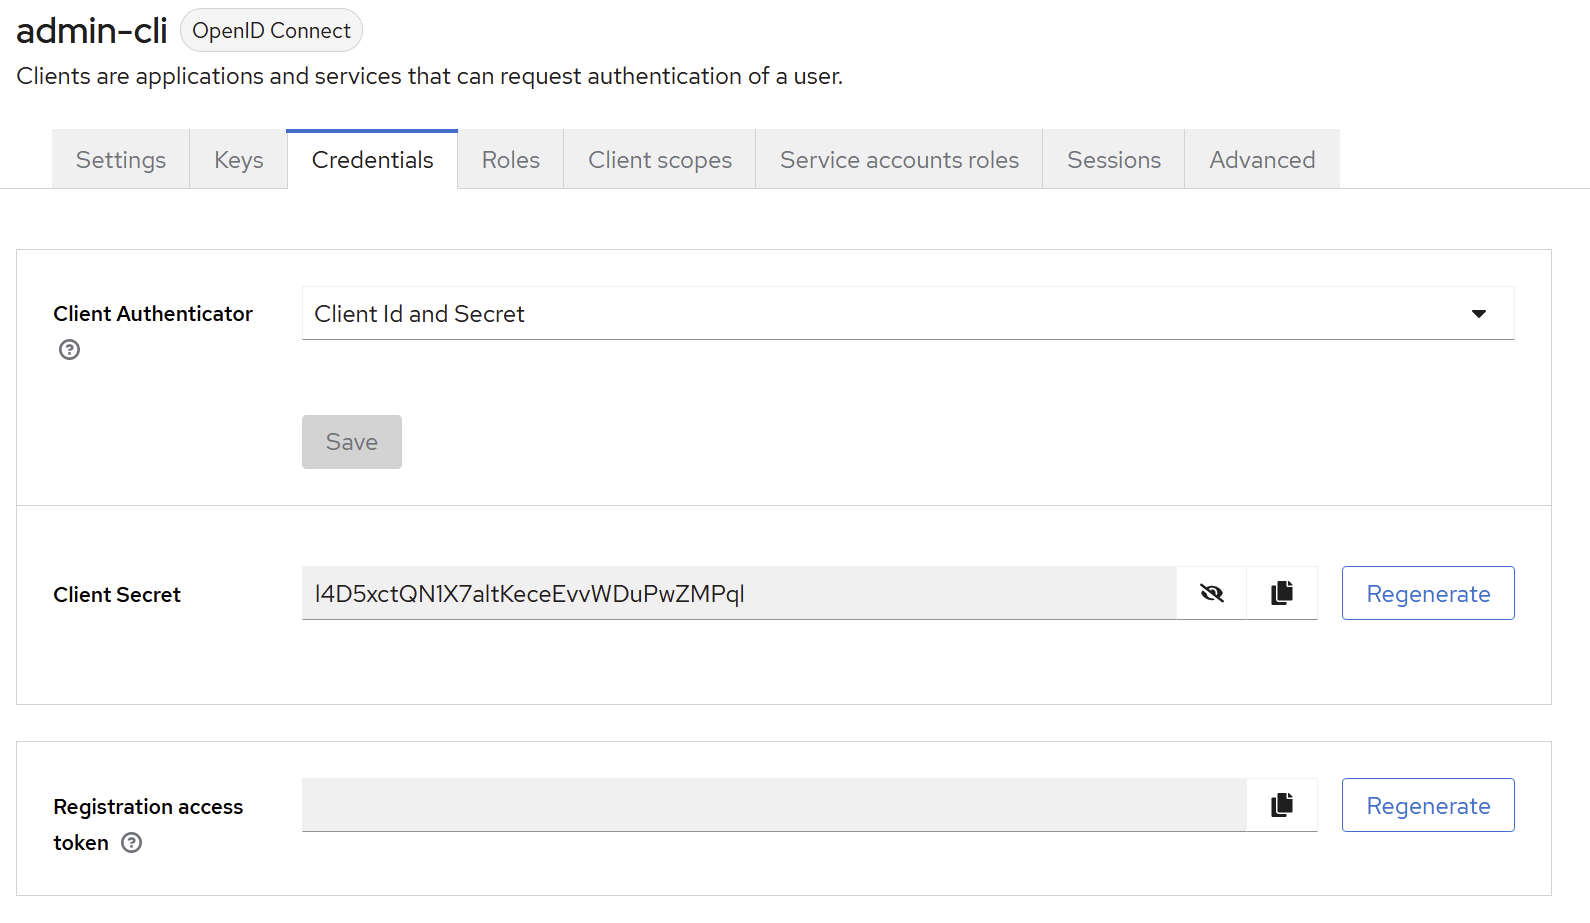
In the Service Account Roles tab
(If this tab is not visible, ensure Service Account Flow is enabled in the settings tab, as requested above).
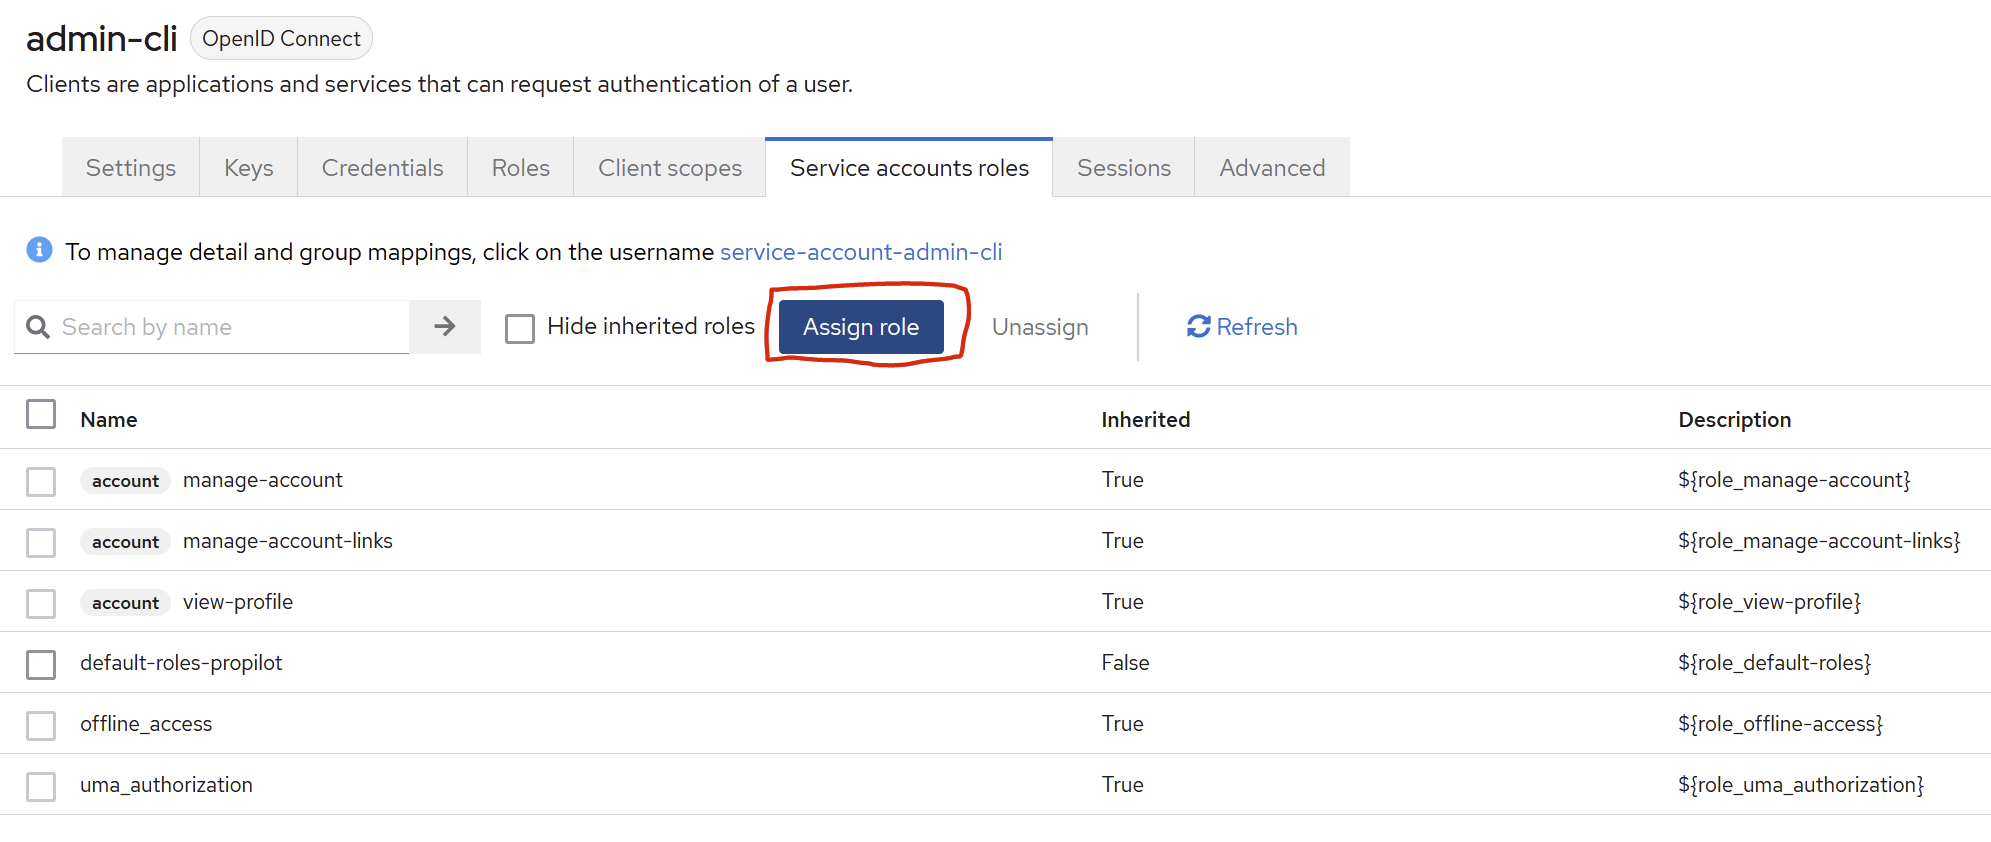
select the “by clients” filter and use the search field to add the roles listed below.
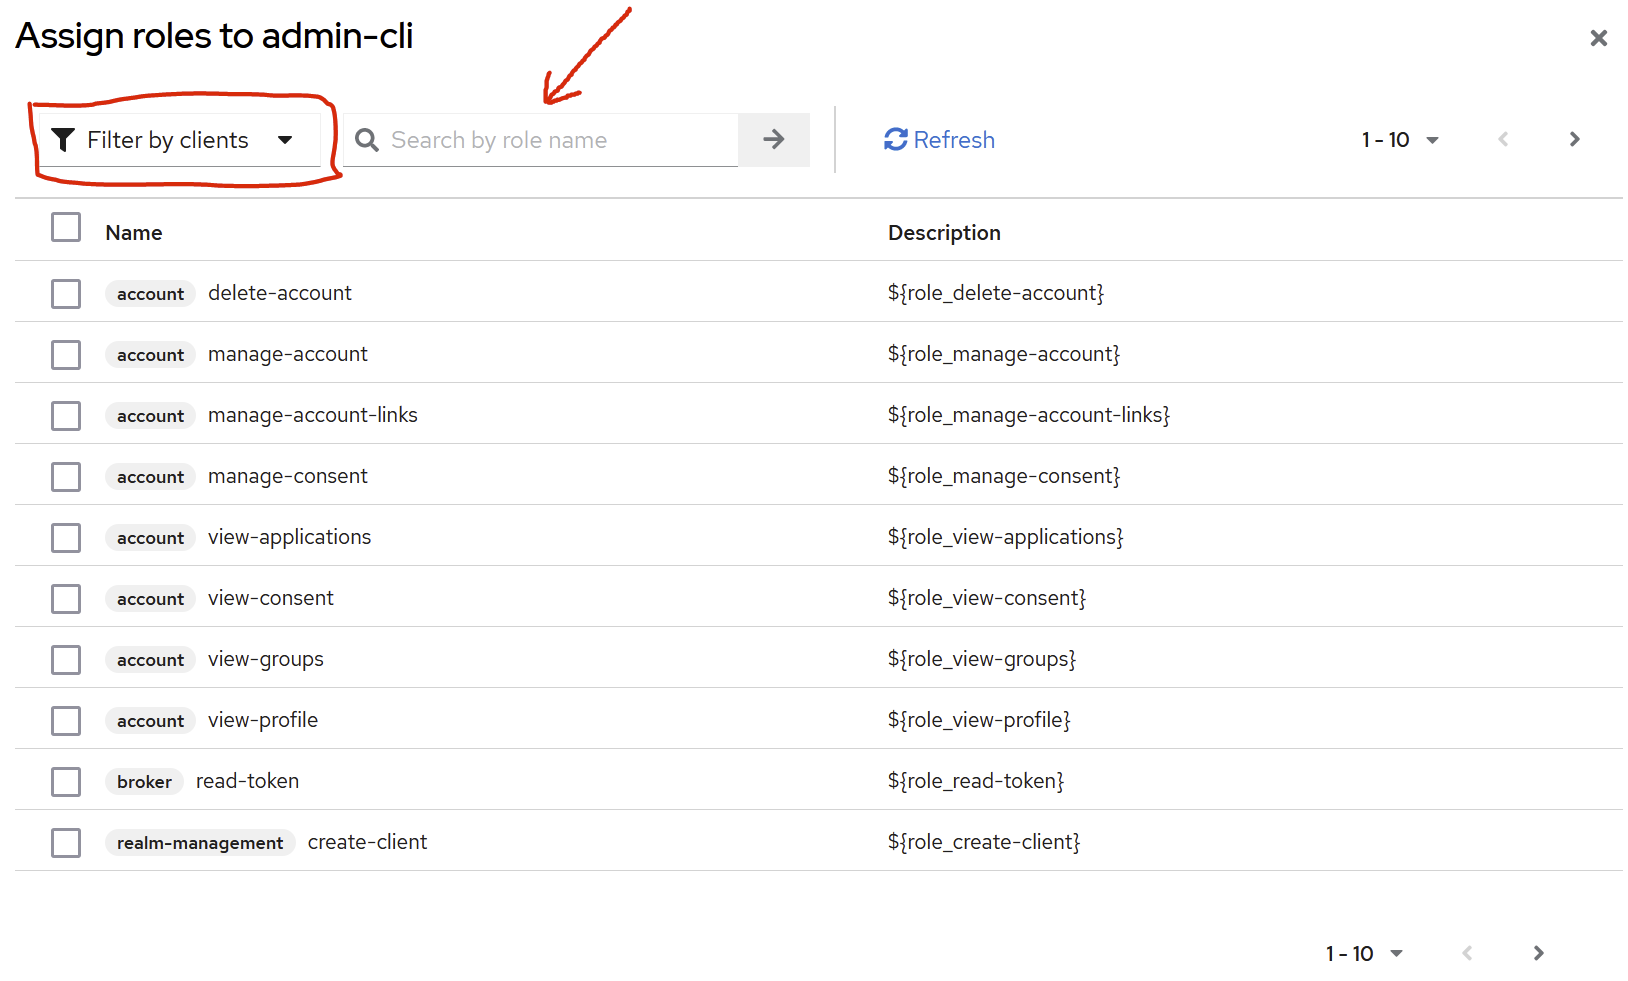
Example
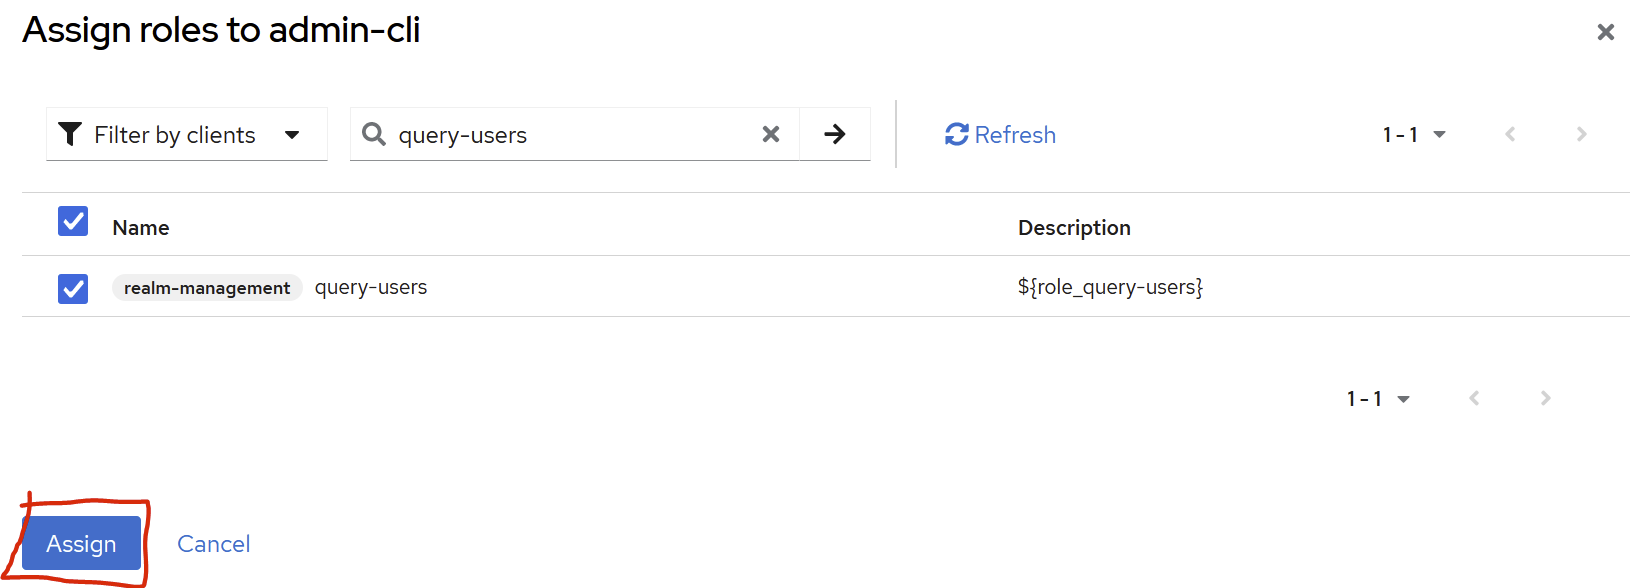
make sure to have the following Assigned Roles
“manage-users”
“query-users”
“view-users”
“view-realm“
Create the first “admin” user in Keycloak
(left menu section) “Manage” → (menu item) “Users”
This main user is required to be able to log in ProPilot the first time.
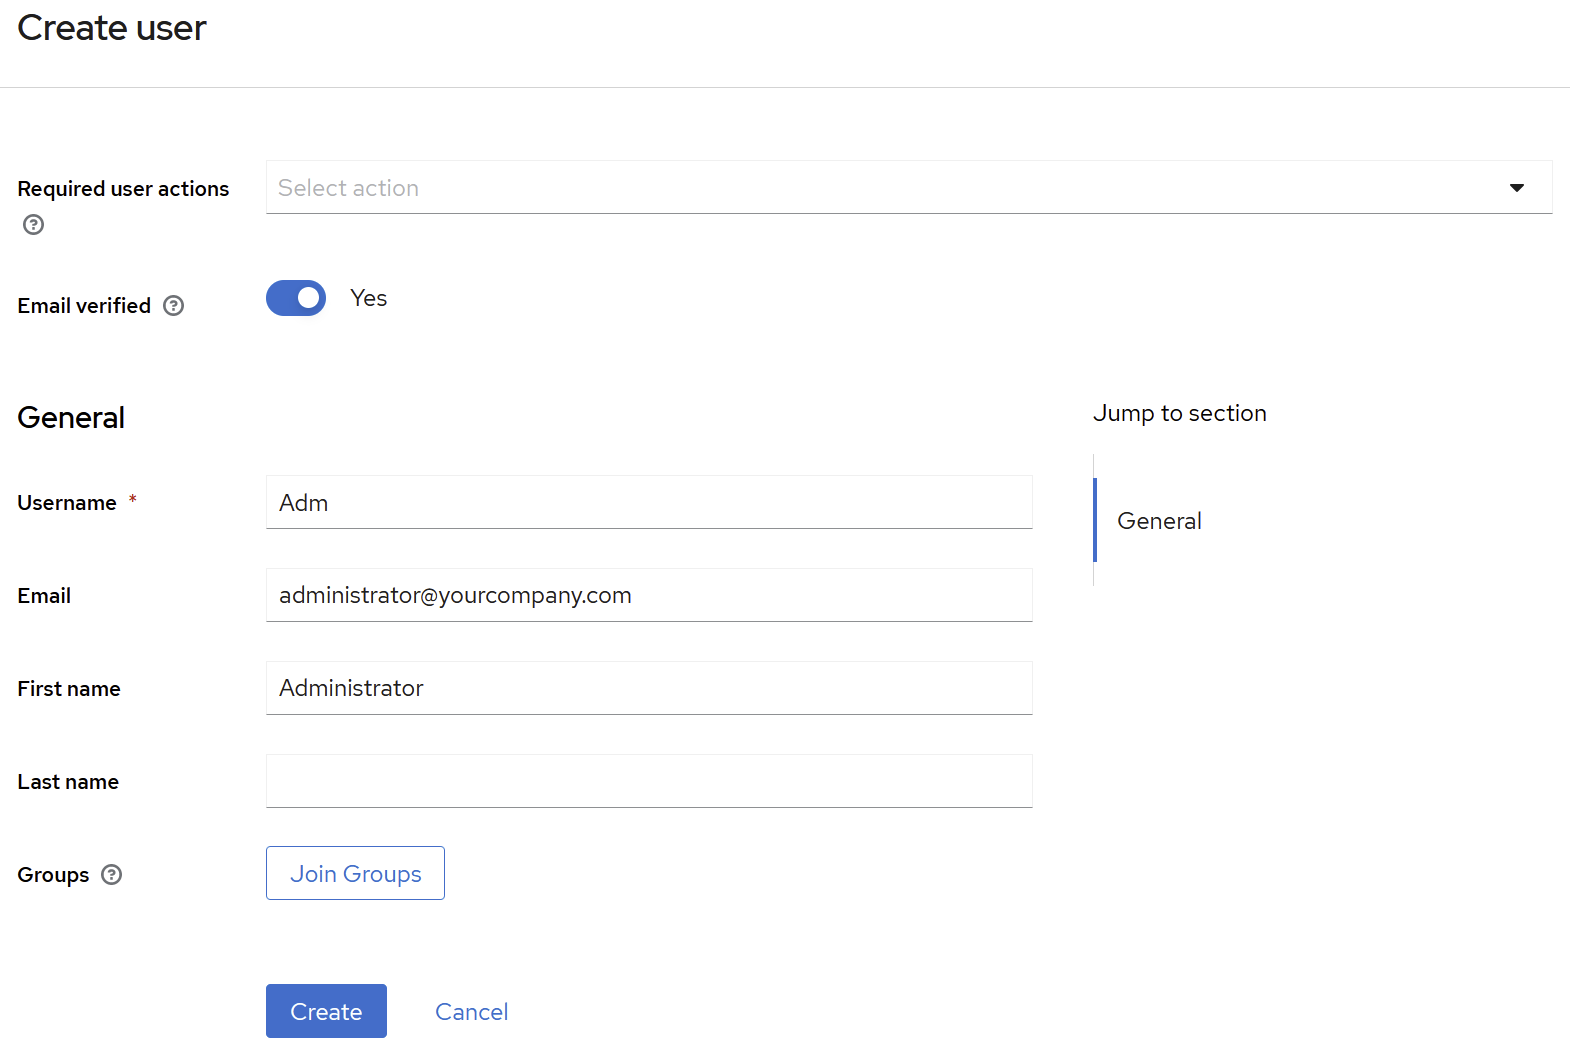
Add user information: Username “Adm”, First Name: “Administrator”, last name can be left empty.
⚠️ The email must be the one configured in proPilot for the first admin parameter in the identity server section (
FirstAdminEmail).Email: email address of the admin account (can be left empty).
Email Verified: ON
Press the “Save” button
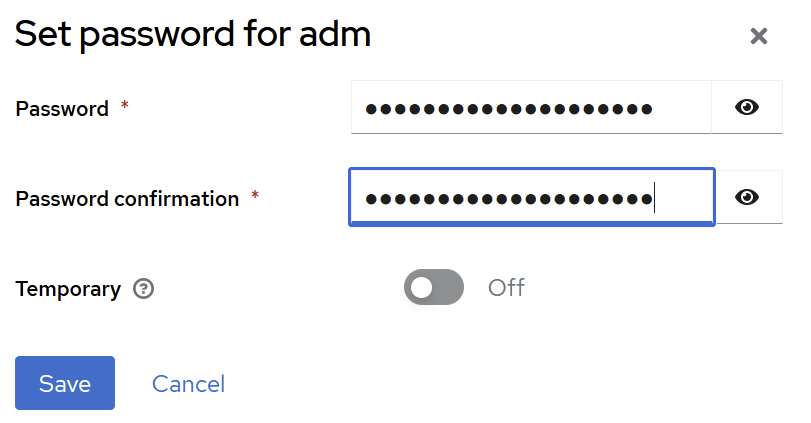
Set password, and do not mark it as temporary or the user will have to change it at next logon)
Please apply dFakto security standards during the creation of first admin password. Do not use the same password for many admin accounts.
Sample configuration for Backend and Frontend in proPilot
Configuration files of proPilot will be described again in the dedicated document, but we give the specific keycloak section here below.
In the configuration file, replace the [[CONFIGKEY]] by the actual value retrieved from Keycloak (described in this document).
Example:
Backend & service
<add key="propilot:identityServerHost" value="https://[[KEYCLOAK_DOMAIN_NAME]]/auth/realms/[[REALM_NAME]]" />
<add key="propilot:keycloak:identityServer" value="https://[[KEYCLOAK_DOMAIN_NAME]]" />
<add key="propilot:keycloak:identityServerSecret" value="[[ADMIN_CLI_CLIENT_SECRET]]" />
<add key="propilot:keycloak:audience" value="[[AUDIENCE]]" />
<add key="propilot:keycloak:clientId" value="[[CLIENT_ID_OF_PROPILOT_CREATED_IN_KEYCLOAK]]" />
Frontend
{
  "applicationName": "Propilot",
  "environment": "dev",
  "sentryDsn": "https://d0f23c72bb804fc59cbded8b30162a6f@sentry.dfakto.com/20",
  "lang": "fr",
  "languagesAvailable": [
    "en",
    "fr"
  ],
  "client": "dFakto",
  "authConfig": {
    "responseType": "code",
    "scope": "openid email profile",
    "showDebugInformation": true,
    "clientId": "[[CLIENT_ID]]",
    "issuer": "https://[[KEYCLOAK_DOMAIN_NAME]]/auth/realms/[[REALM_NAME]]",
    "strictDiscoveryDocumentValidation": false,
    "silentRefresh": true,
    "useHttpBasicAuth": true
  }
}