
Create a "Multiple Selection List" Information Type
-
Click the “Create Information” button.
-
Add a technical name and a display name.
-
Choose “Multiple Selection List” from the dropdown menu.
-
Select “Visible to all” (except for specific exceptions).
-
Specify the section where the information will be displayed.
-
Select the update behaviour :
-
No validation required: If the update does not need to go through a validation cycle.
-
Validation required by the responsible party: If a validation cycle is deemed necessary before updating the information.
-
Updates restricted to administrators only.
-
-
Include a description visible in the information's section
. (Optional)
-
If this information must be filled out during the creation of an entity using it, check the “Mandatory” box. (Optional)
-
Click “Submit” to finalize the creation.

To add some items among a dropdown list, check the documentation hereunder.
Edit entries in a "dropdown list" information type
For information of the "Multiselectlist" type, you need to add or remove elements from the list. To do this:
-
In the left menu, select "Workspace configuration" then "Information".
-
Click on the "Information" tab.
This module allows you to manage the different information and associated settings.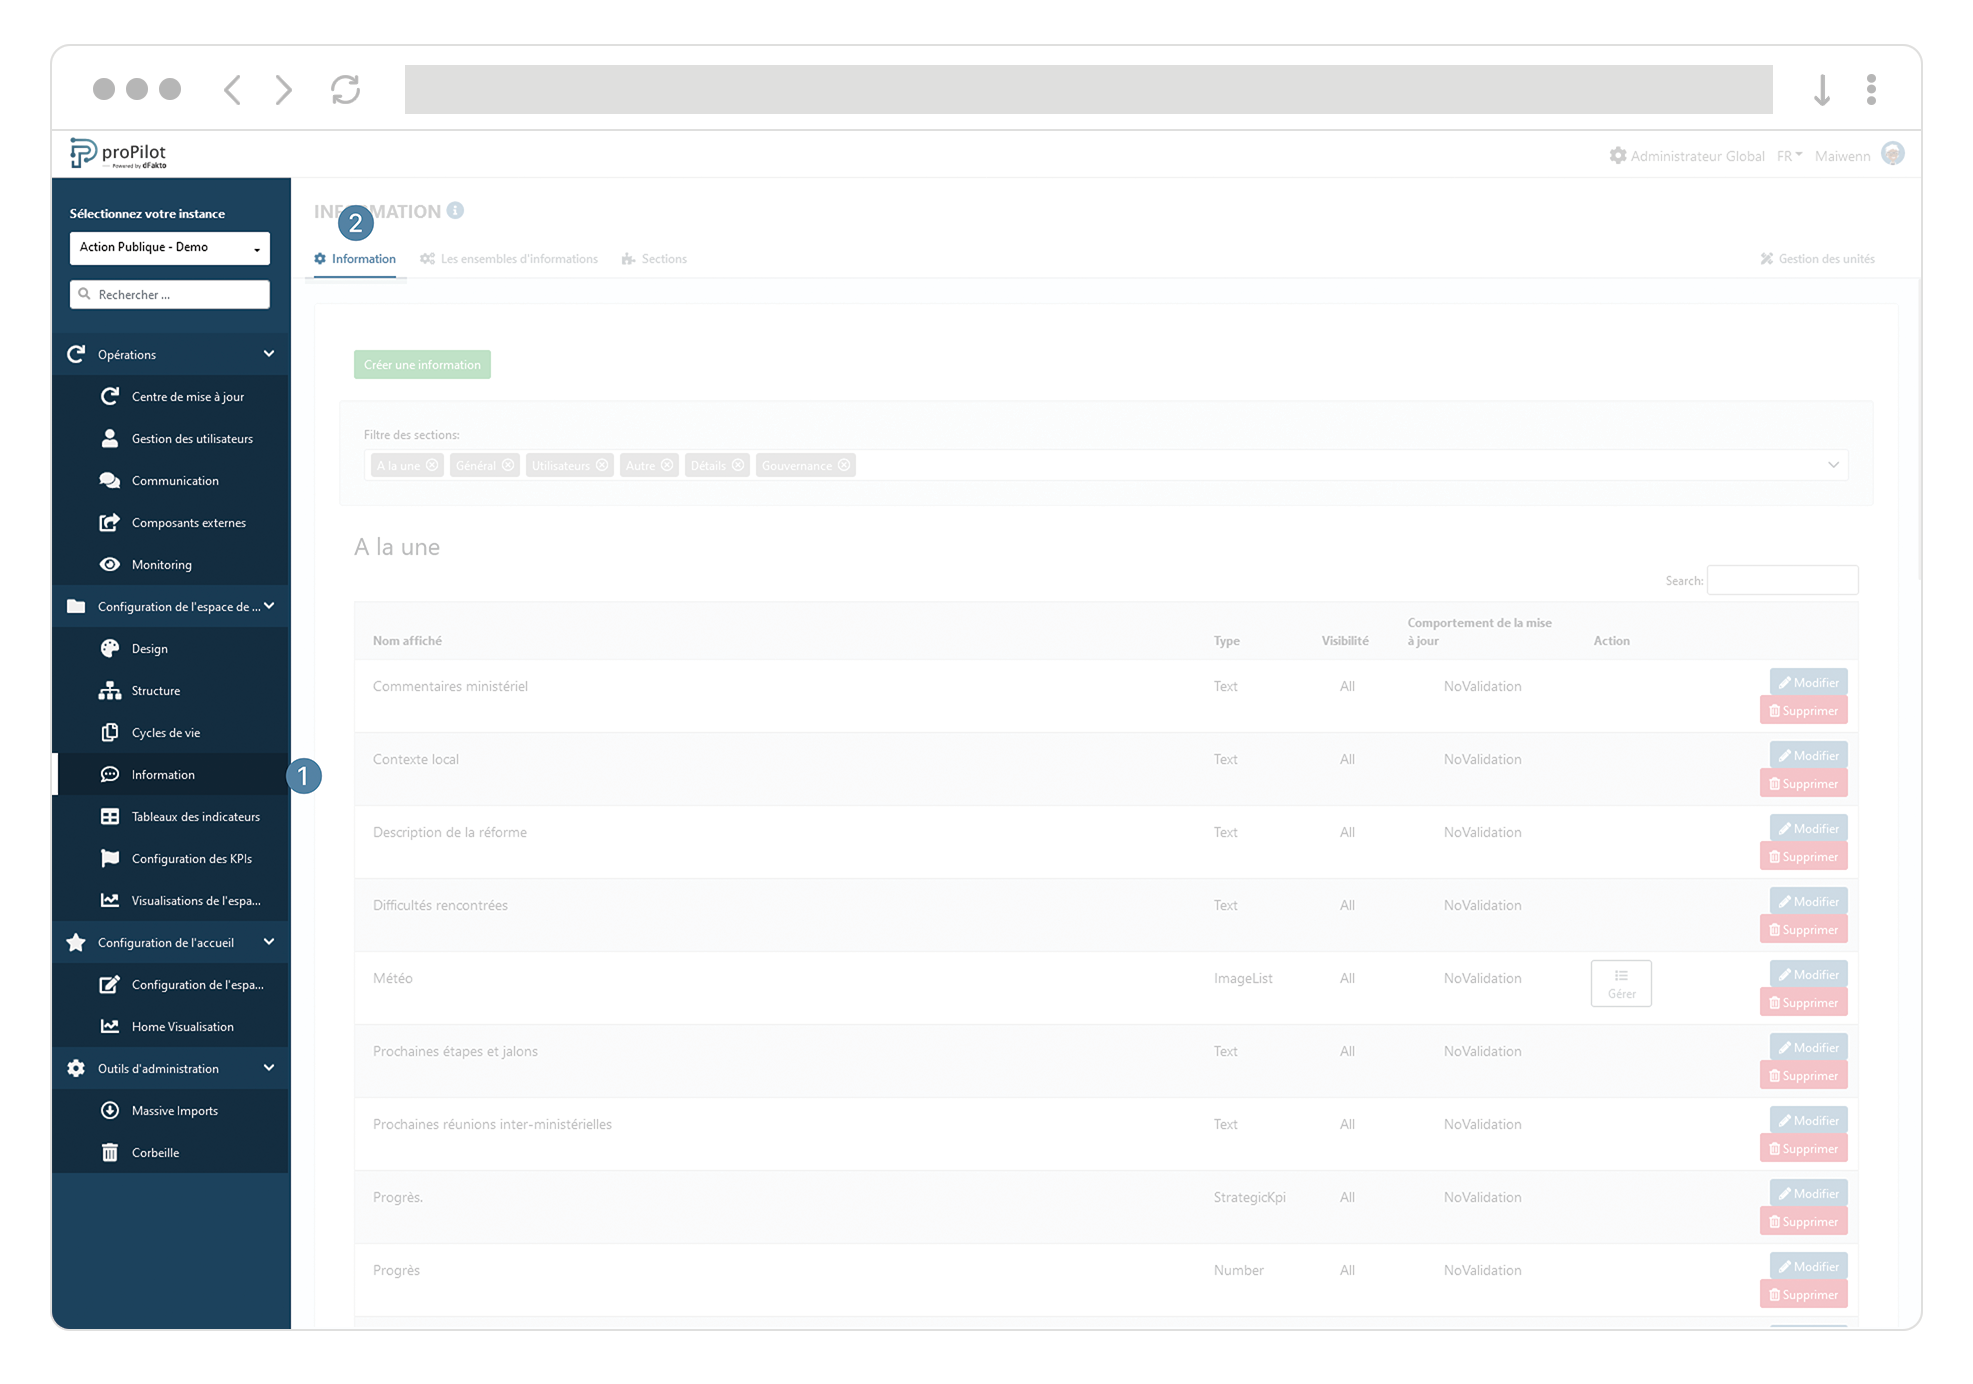
-
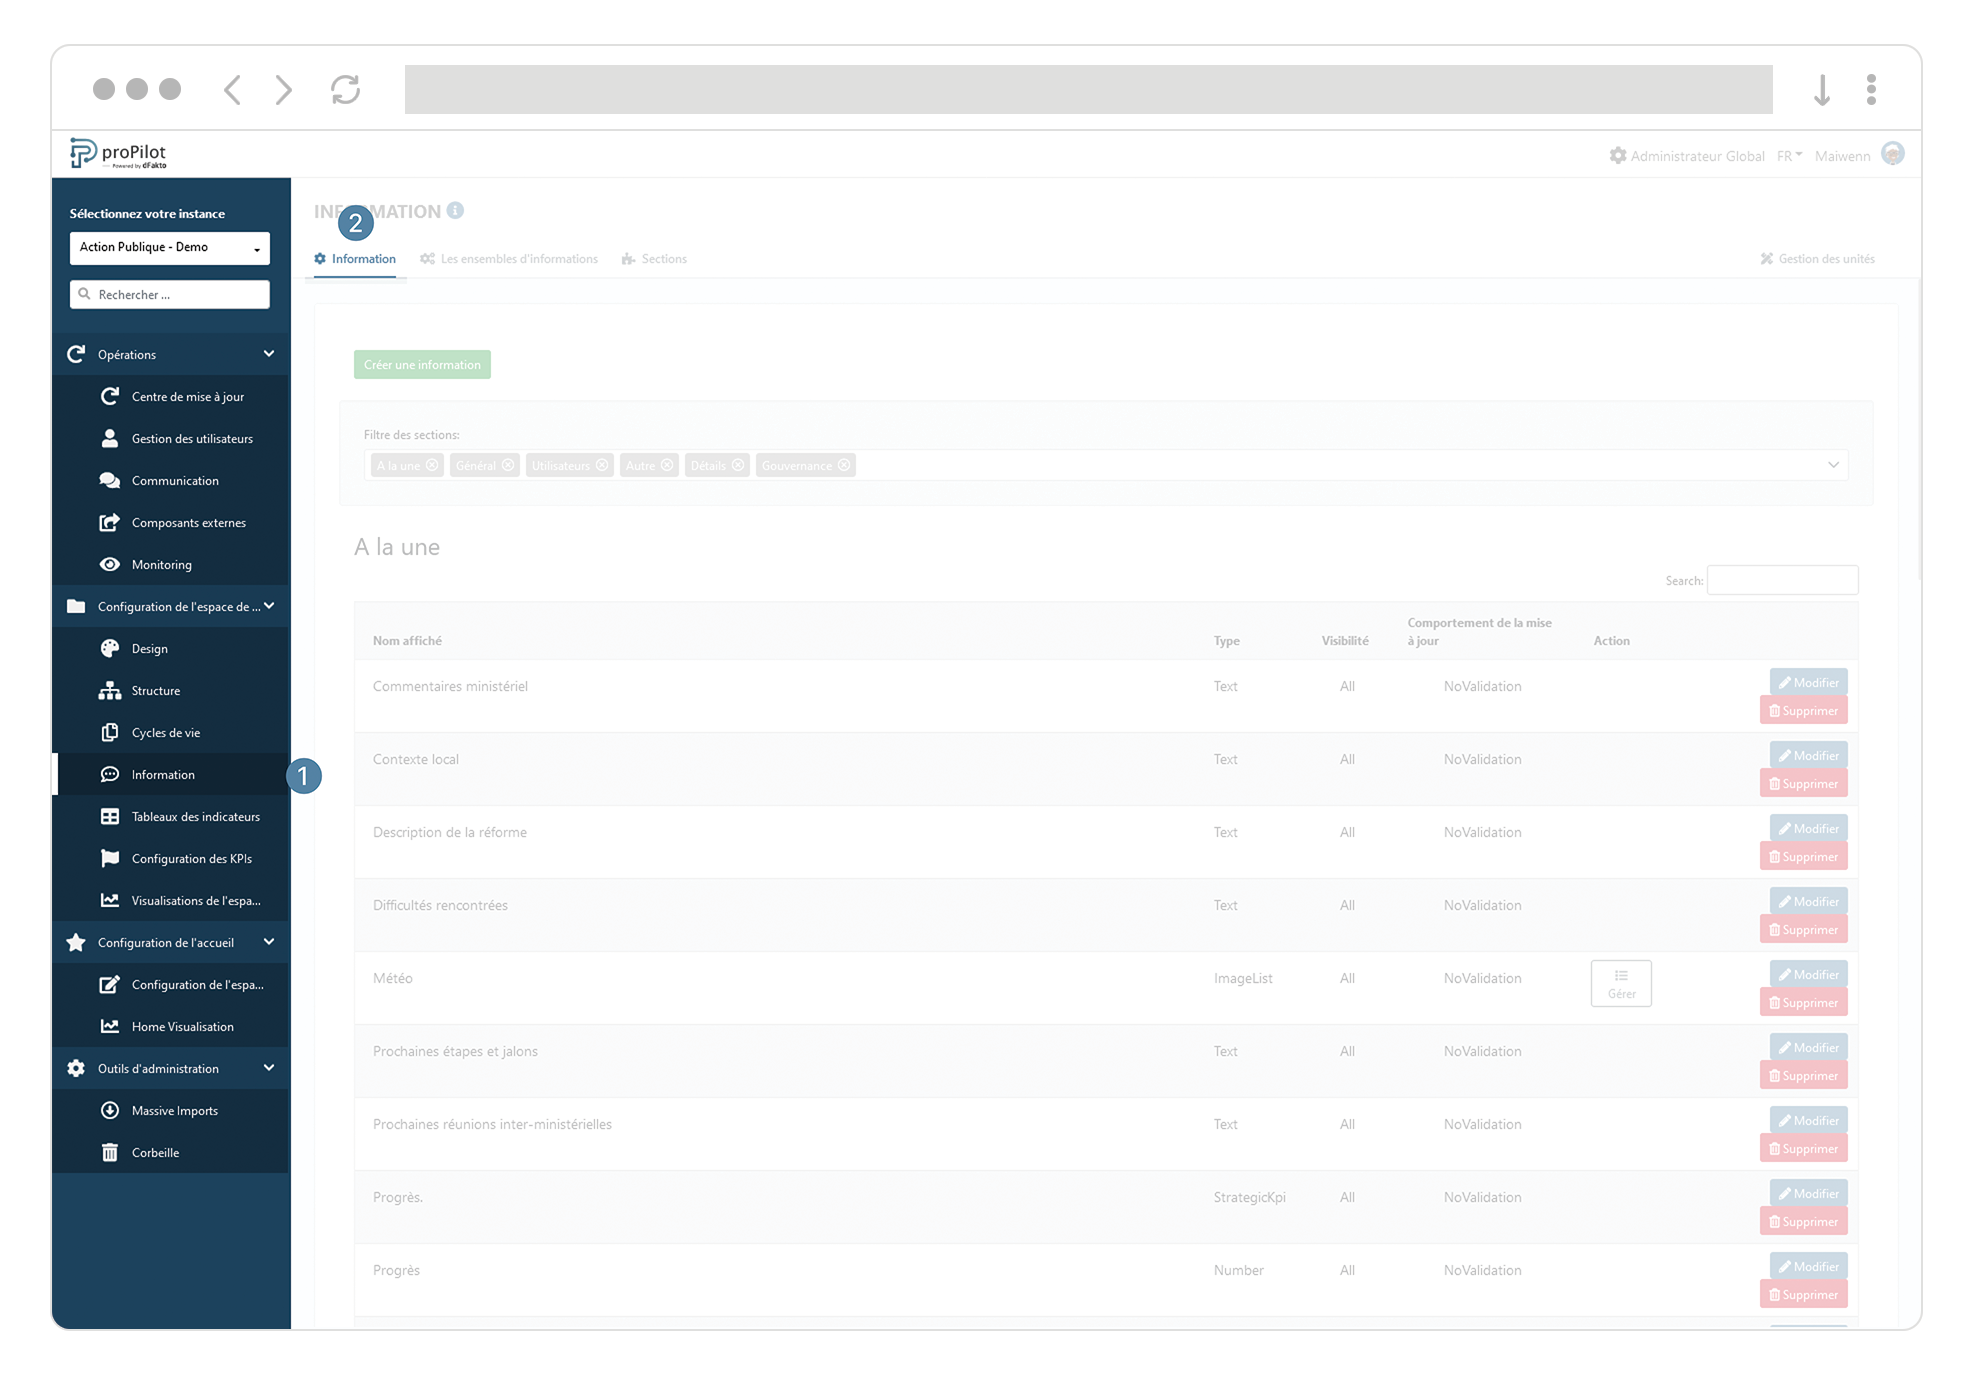
Select the information type "Multiselectlist" and click on the associated "manage" action button.
-
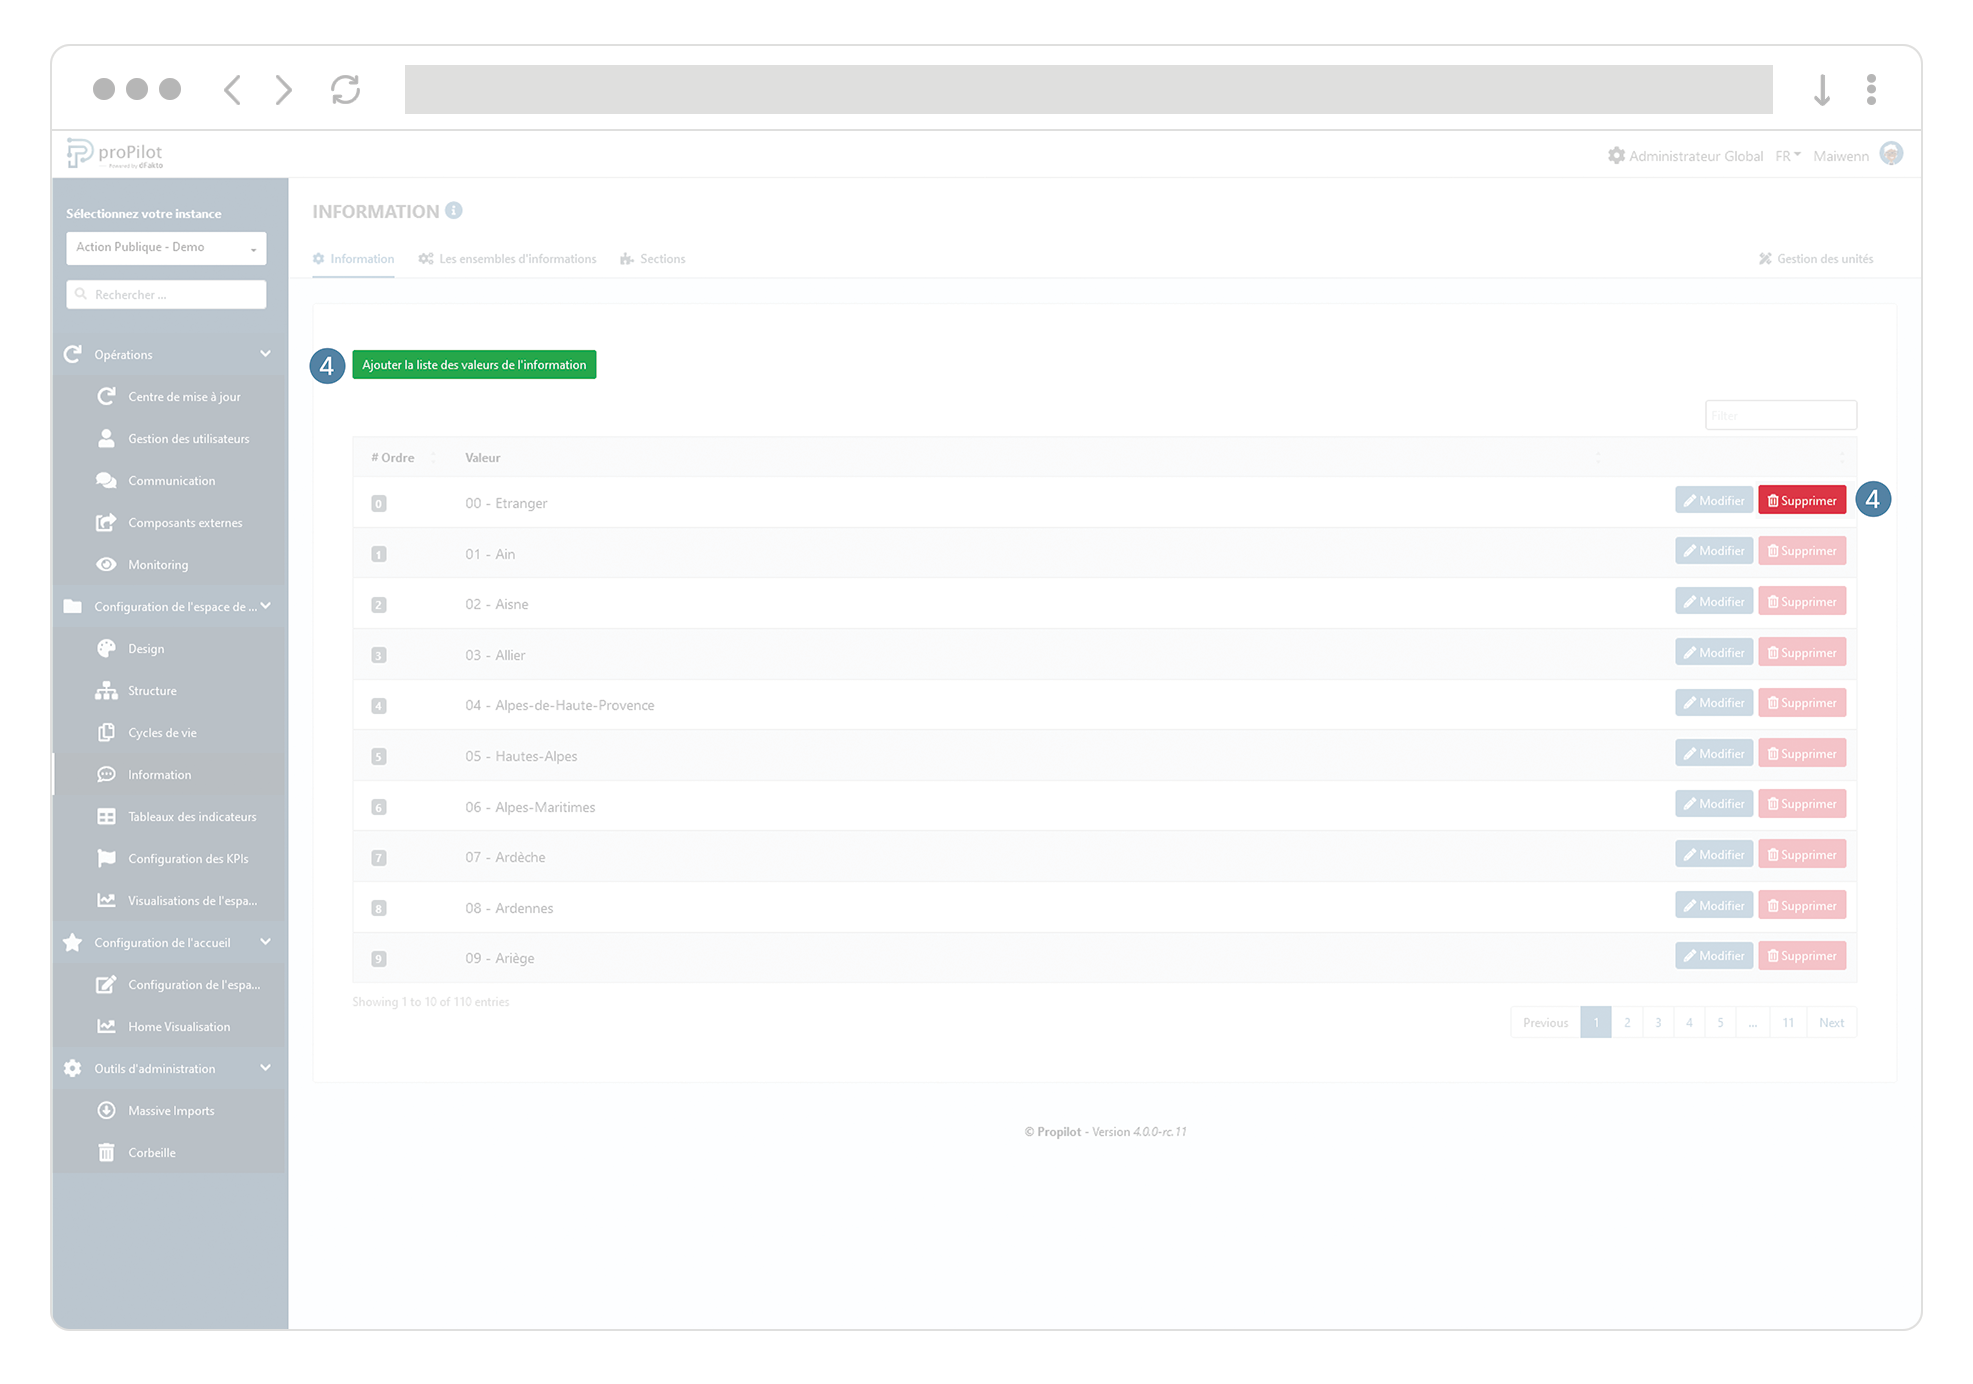
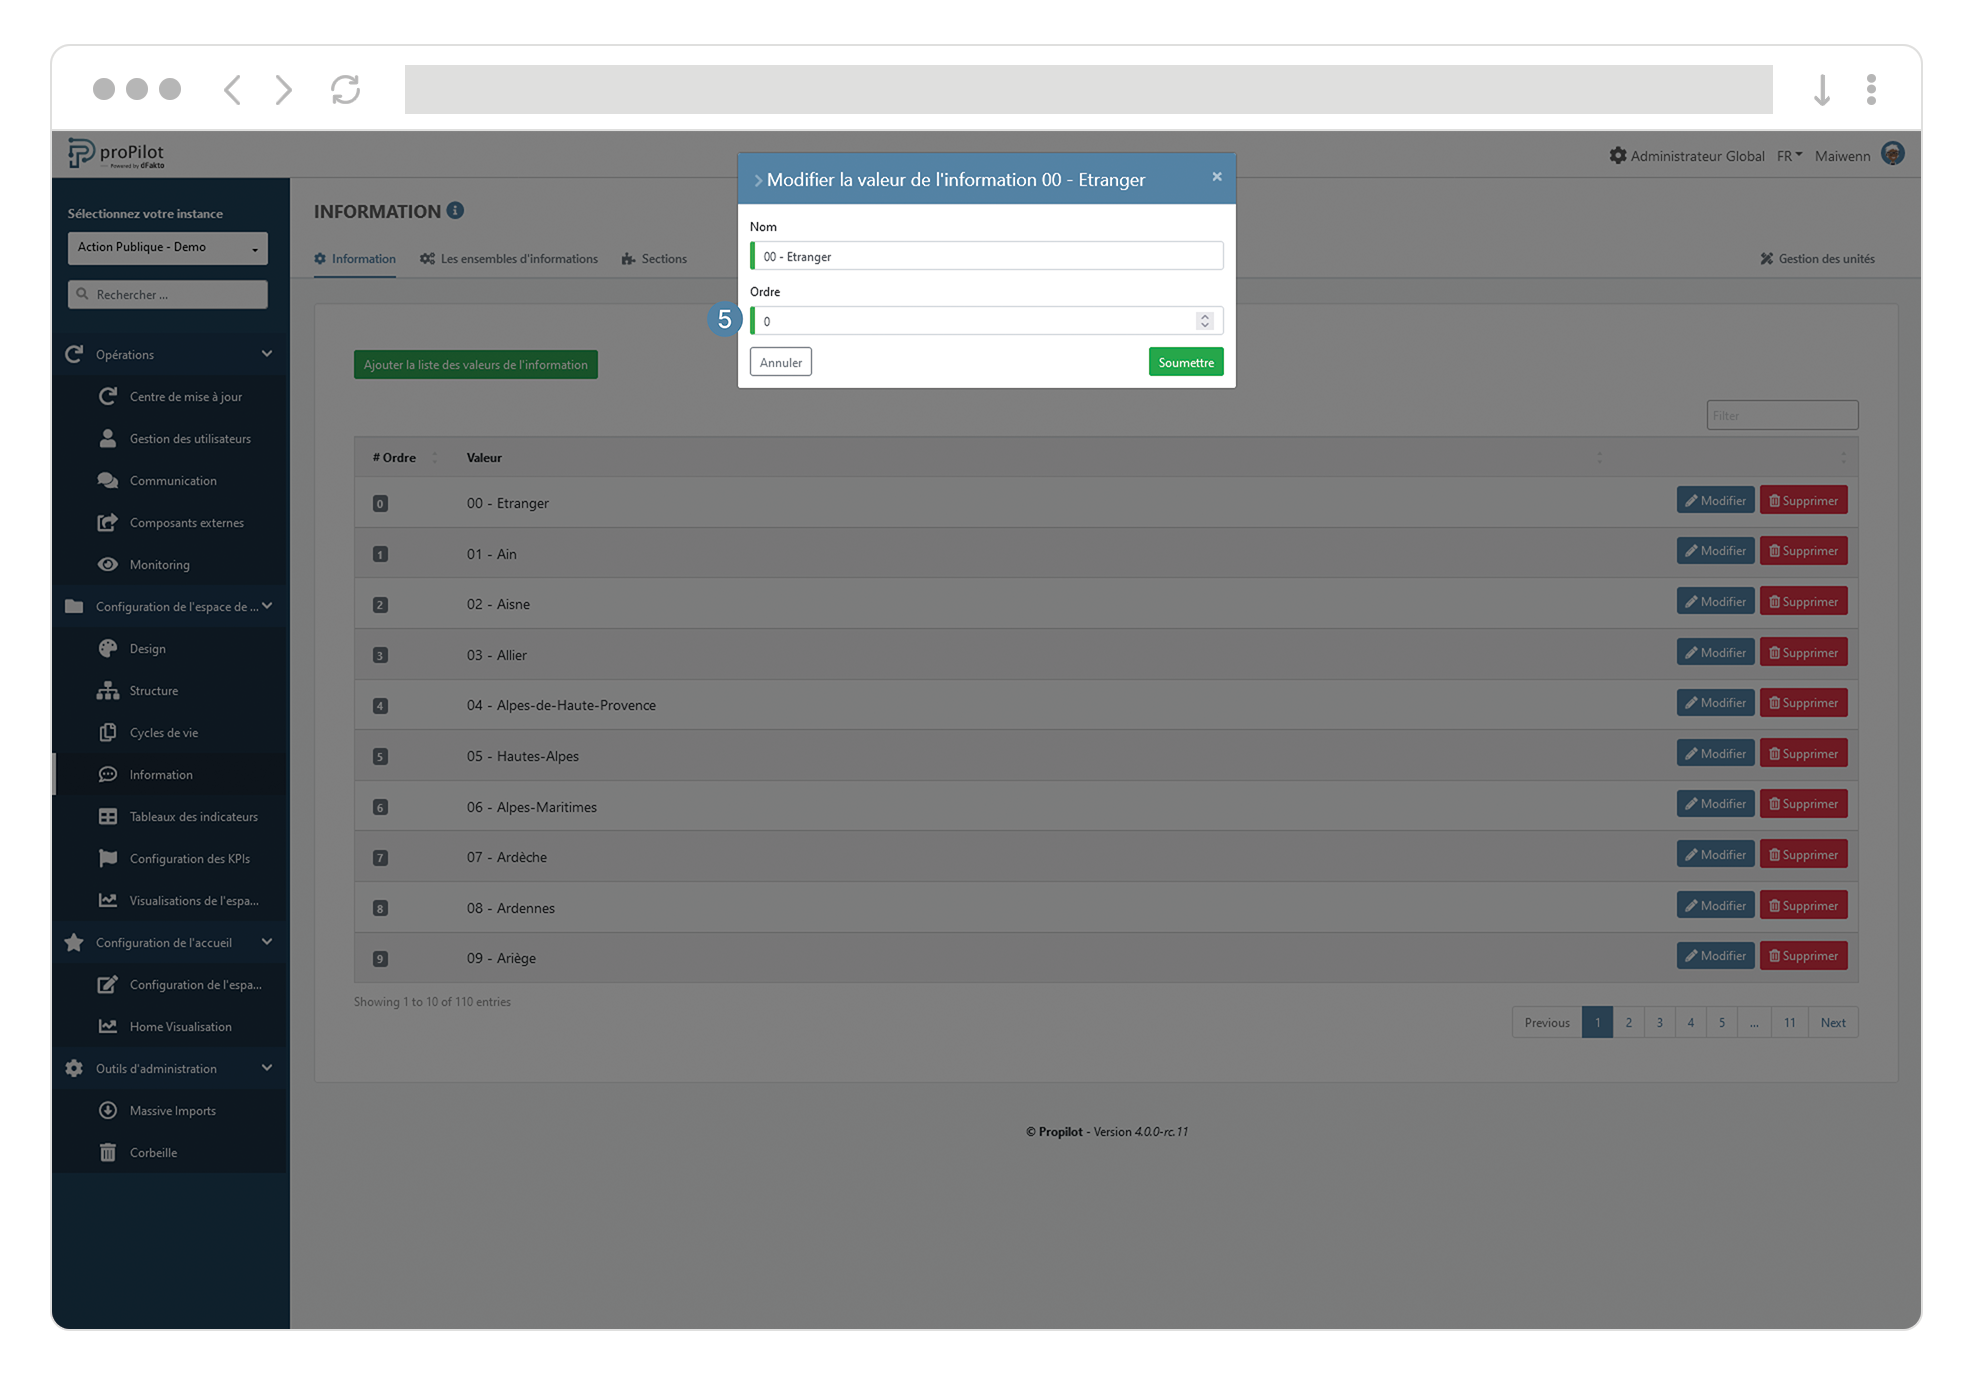
Add and remove items from the list, by clicking on "add" and "remove".
-
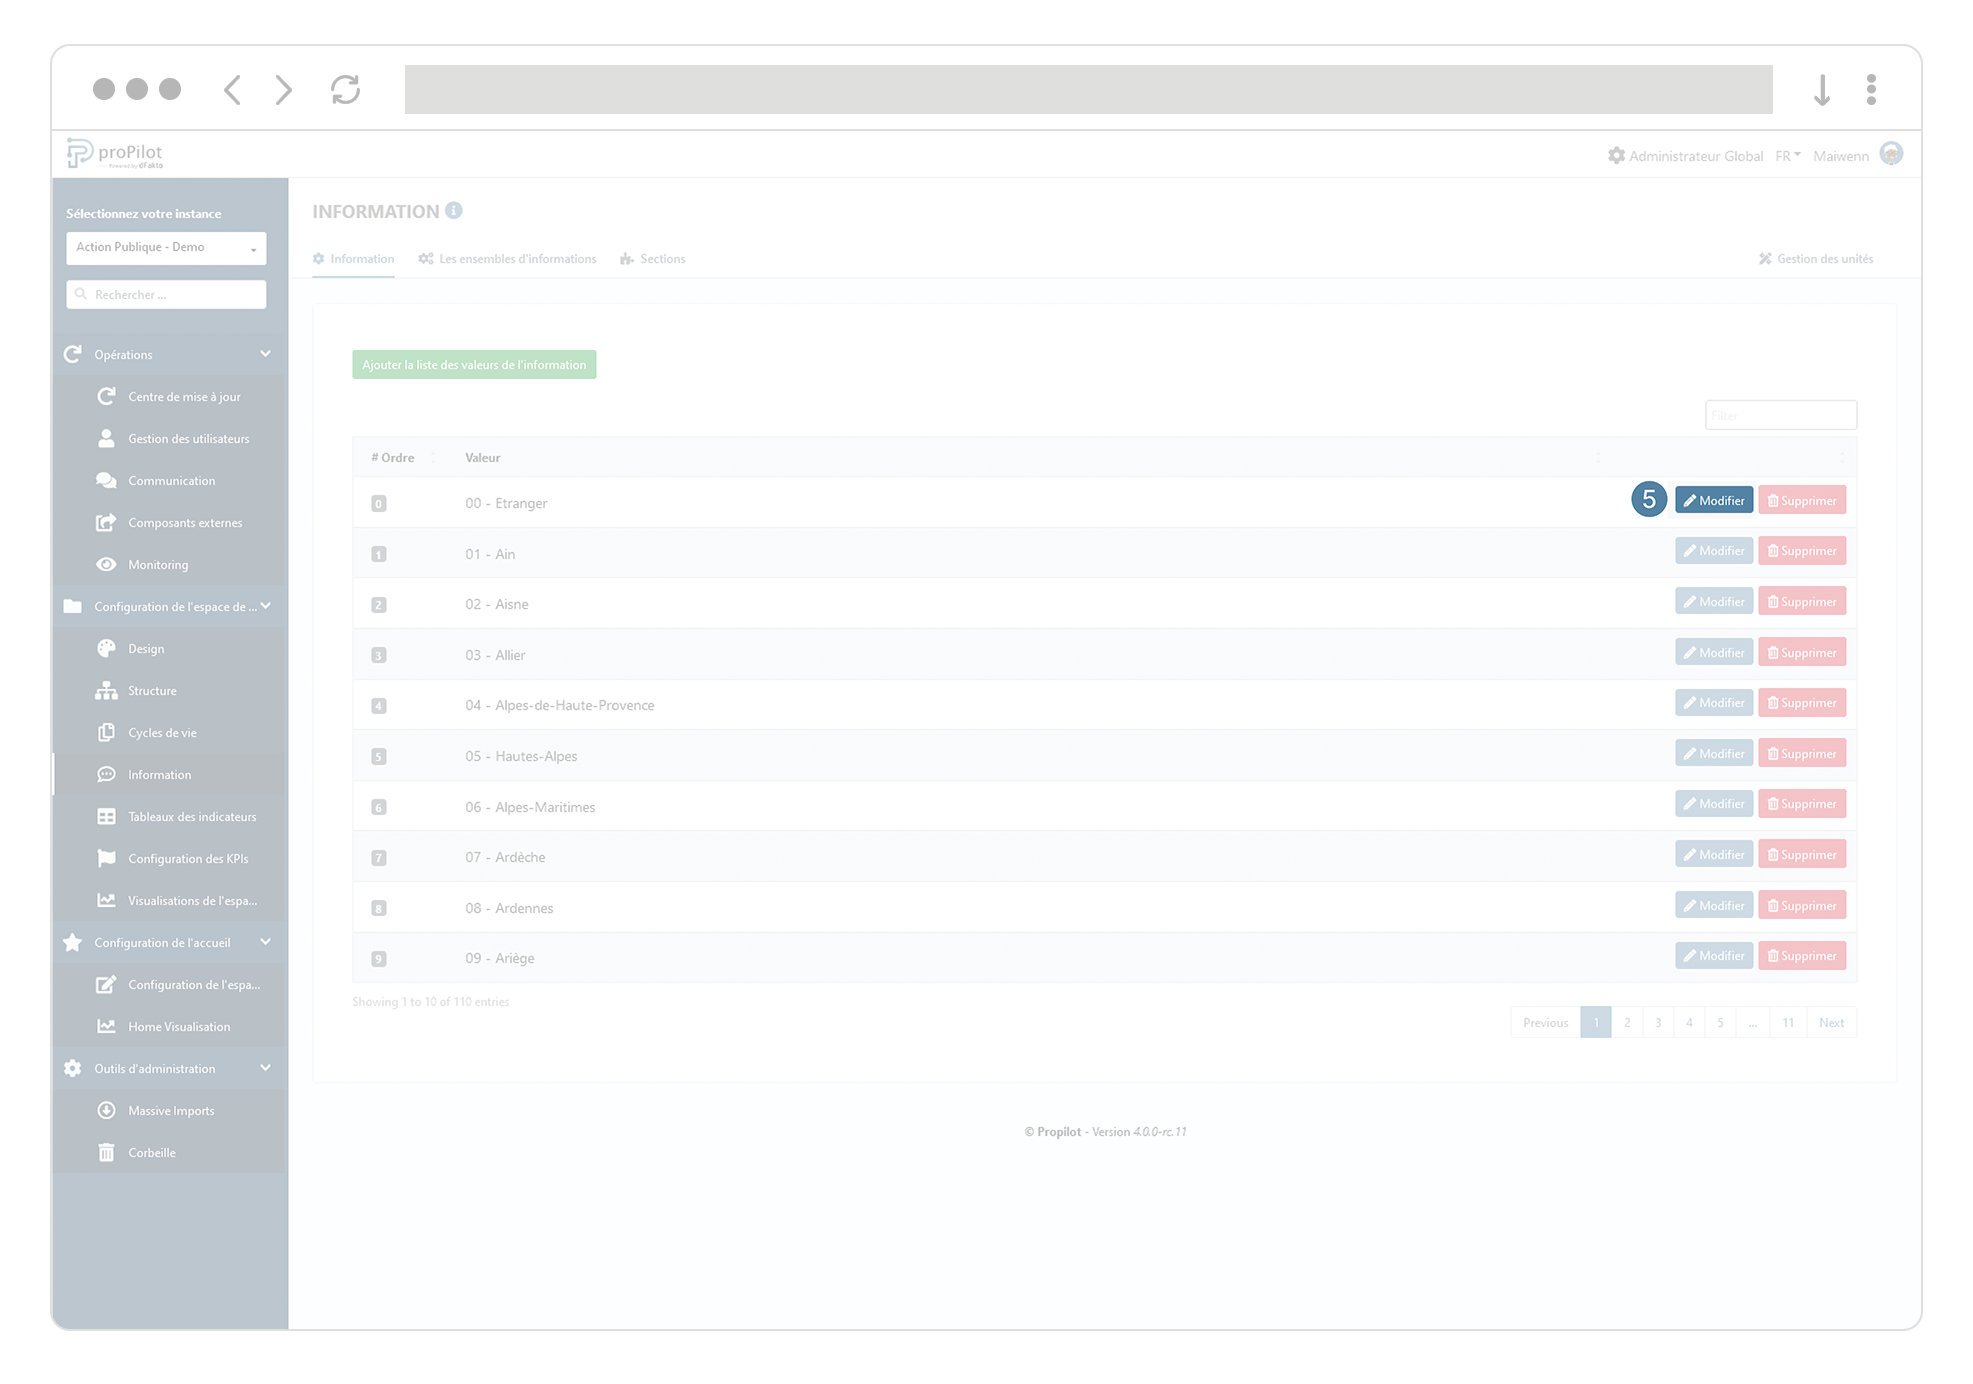
For each item you can determine an order of your choice by filling in the "order" information
Edit Available Values Through Massive Import
You can manage, add, and update your list values through bulk import, saving time and ensuring reliable and consistent reference data.
When you click “Manage”, two import features are available:
-
Download the import template
-
Import a completed template
Download the import template
-
Click “Download the import template”
-
Open the downloaded Excel file. It contains two tabs:
-
Update items: this tab contains, among other things, the technical identifier, order, and label of each value. You can modify the order and label. The technical identifier must not be modified.
-
Create items: this tab allows you to add new values by entering their order and label.
-
You can update existing values and create new values in the same file.
-
Save the completed file.
.svg?cb=3077f3cdff031554b1209f129744d3f8)
Import the completed template
-
Click “Browse…”.
-
Select the completed Excel file from your computer.
-
proPilot automatically checks the file’s compliance during the data quality control step.
-
Review the result:
-
If the check is successful, the file can be imported.
-
If errors are detected, proPilot displays the issues so that you can correct them in the file.
-
If the check is successful, confirm the import execution.
-
Once the import is complete, a success message is displayed, and the new values or modifications are available in the List information field