Interdependencies: Enable the tracking of mutual impacts and cross-Links
Introduction
This module allows you to organize the interdependencies between the different entities in your proPilot. By activating the appropriate dependency references at the right levels, you enable the collection and shared understanding of the various links and impacts between your initiatives represented in the entities.
For each level, you can configure one or more types of interdependencies corresponding to different themes. For each type of interdependency, create a comprehensive referential of interdependencies that will be available to users.
Interdependencies are easily created and visualized by users in a dedicated section of the entity's information tab within the workspace.
Create a New Interdependency
Within a given instance, via the drop-down menu at the top left of the administrator interface, select “Workspace Configuration” and then “Information.”
Click on the “Interdependency Management” tab.
Click on “Create an Interdependency.” A pop-up window will appear.
Enter the name and display name of the view (and optionally, a description).
You can modify this configuration by clicking the “edit” button.
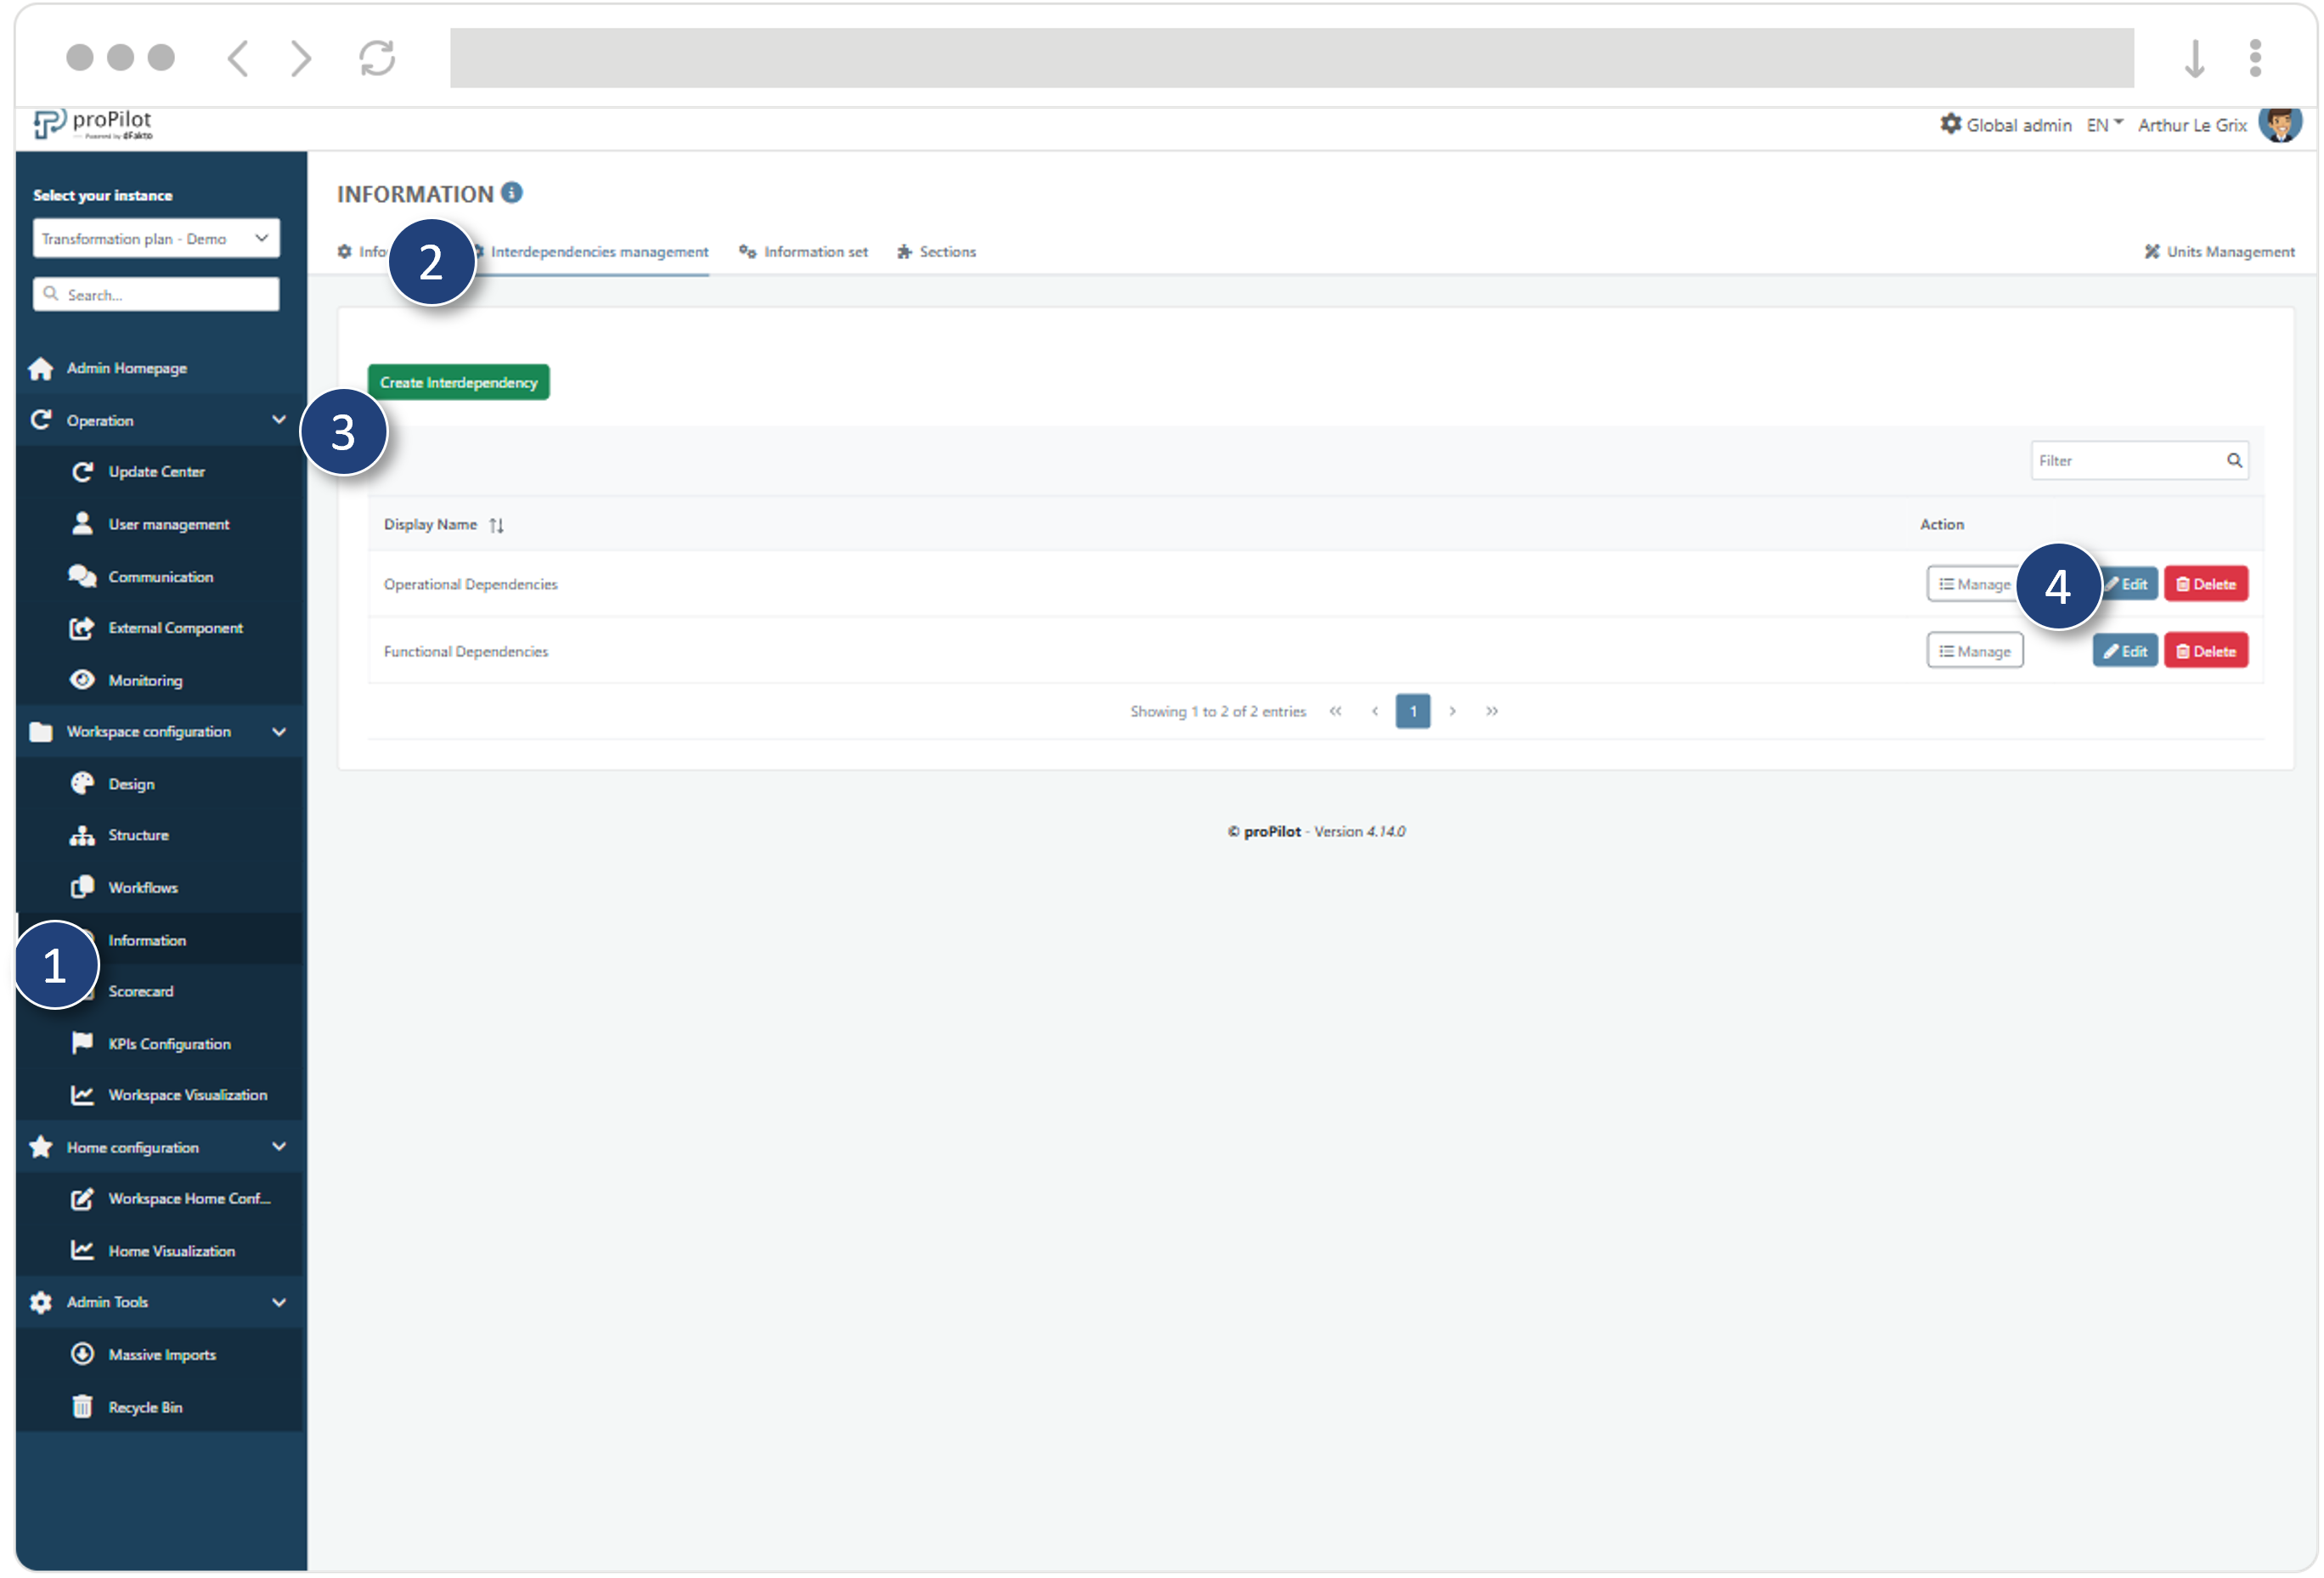
Configure an Interdependency
Once the interdependency is created, click on “Manage.”
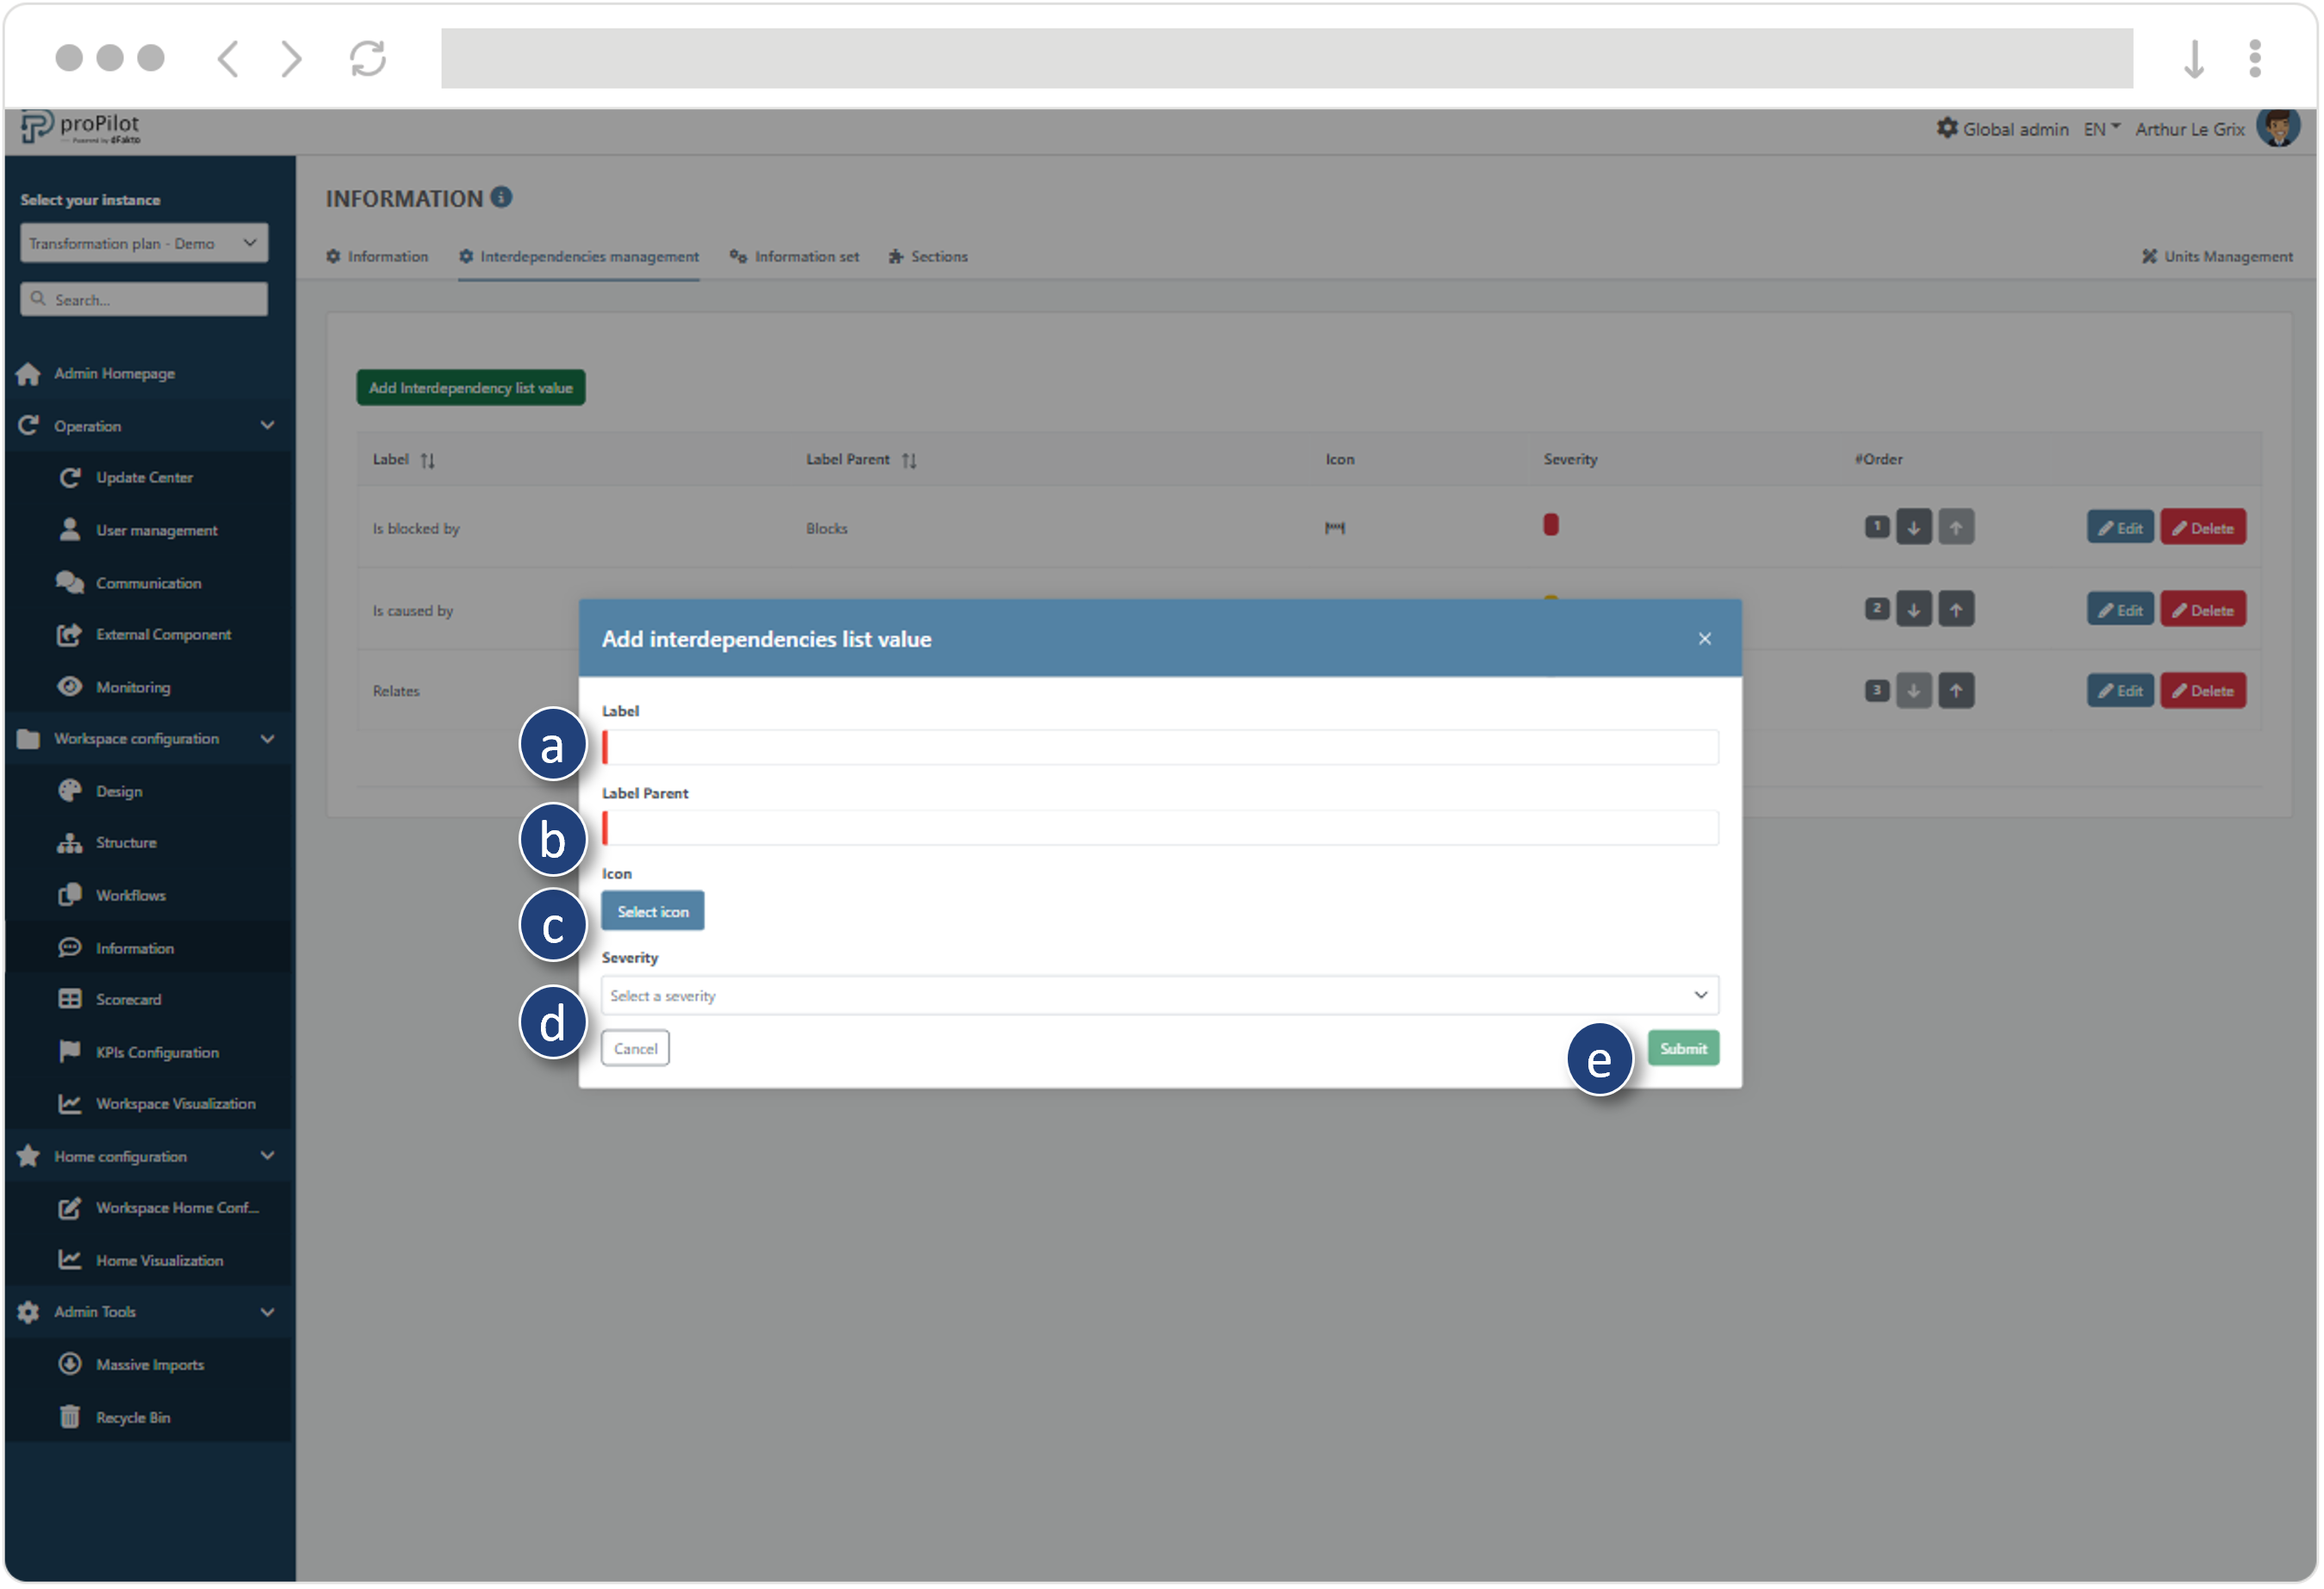
On the list value management page, click on “Add a value to the interdependency list.” A pop-up window will open:
Define the label for the value (this label will appear on the collection entity, e.g., “blocked by”).
Define the parent label for the value, which is the mirrored information (this label will appear on the target entity, e.g., “Blocks”).
Define an icon for the value (optional).
Set a severity for the value in the form of a color.
Click on “Submit.”
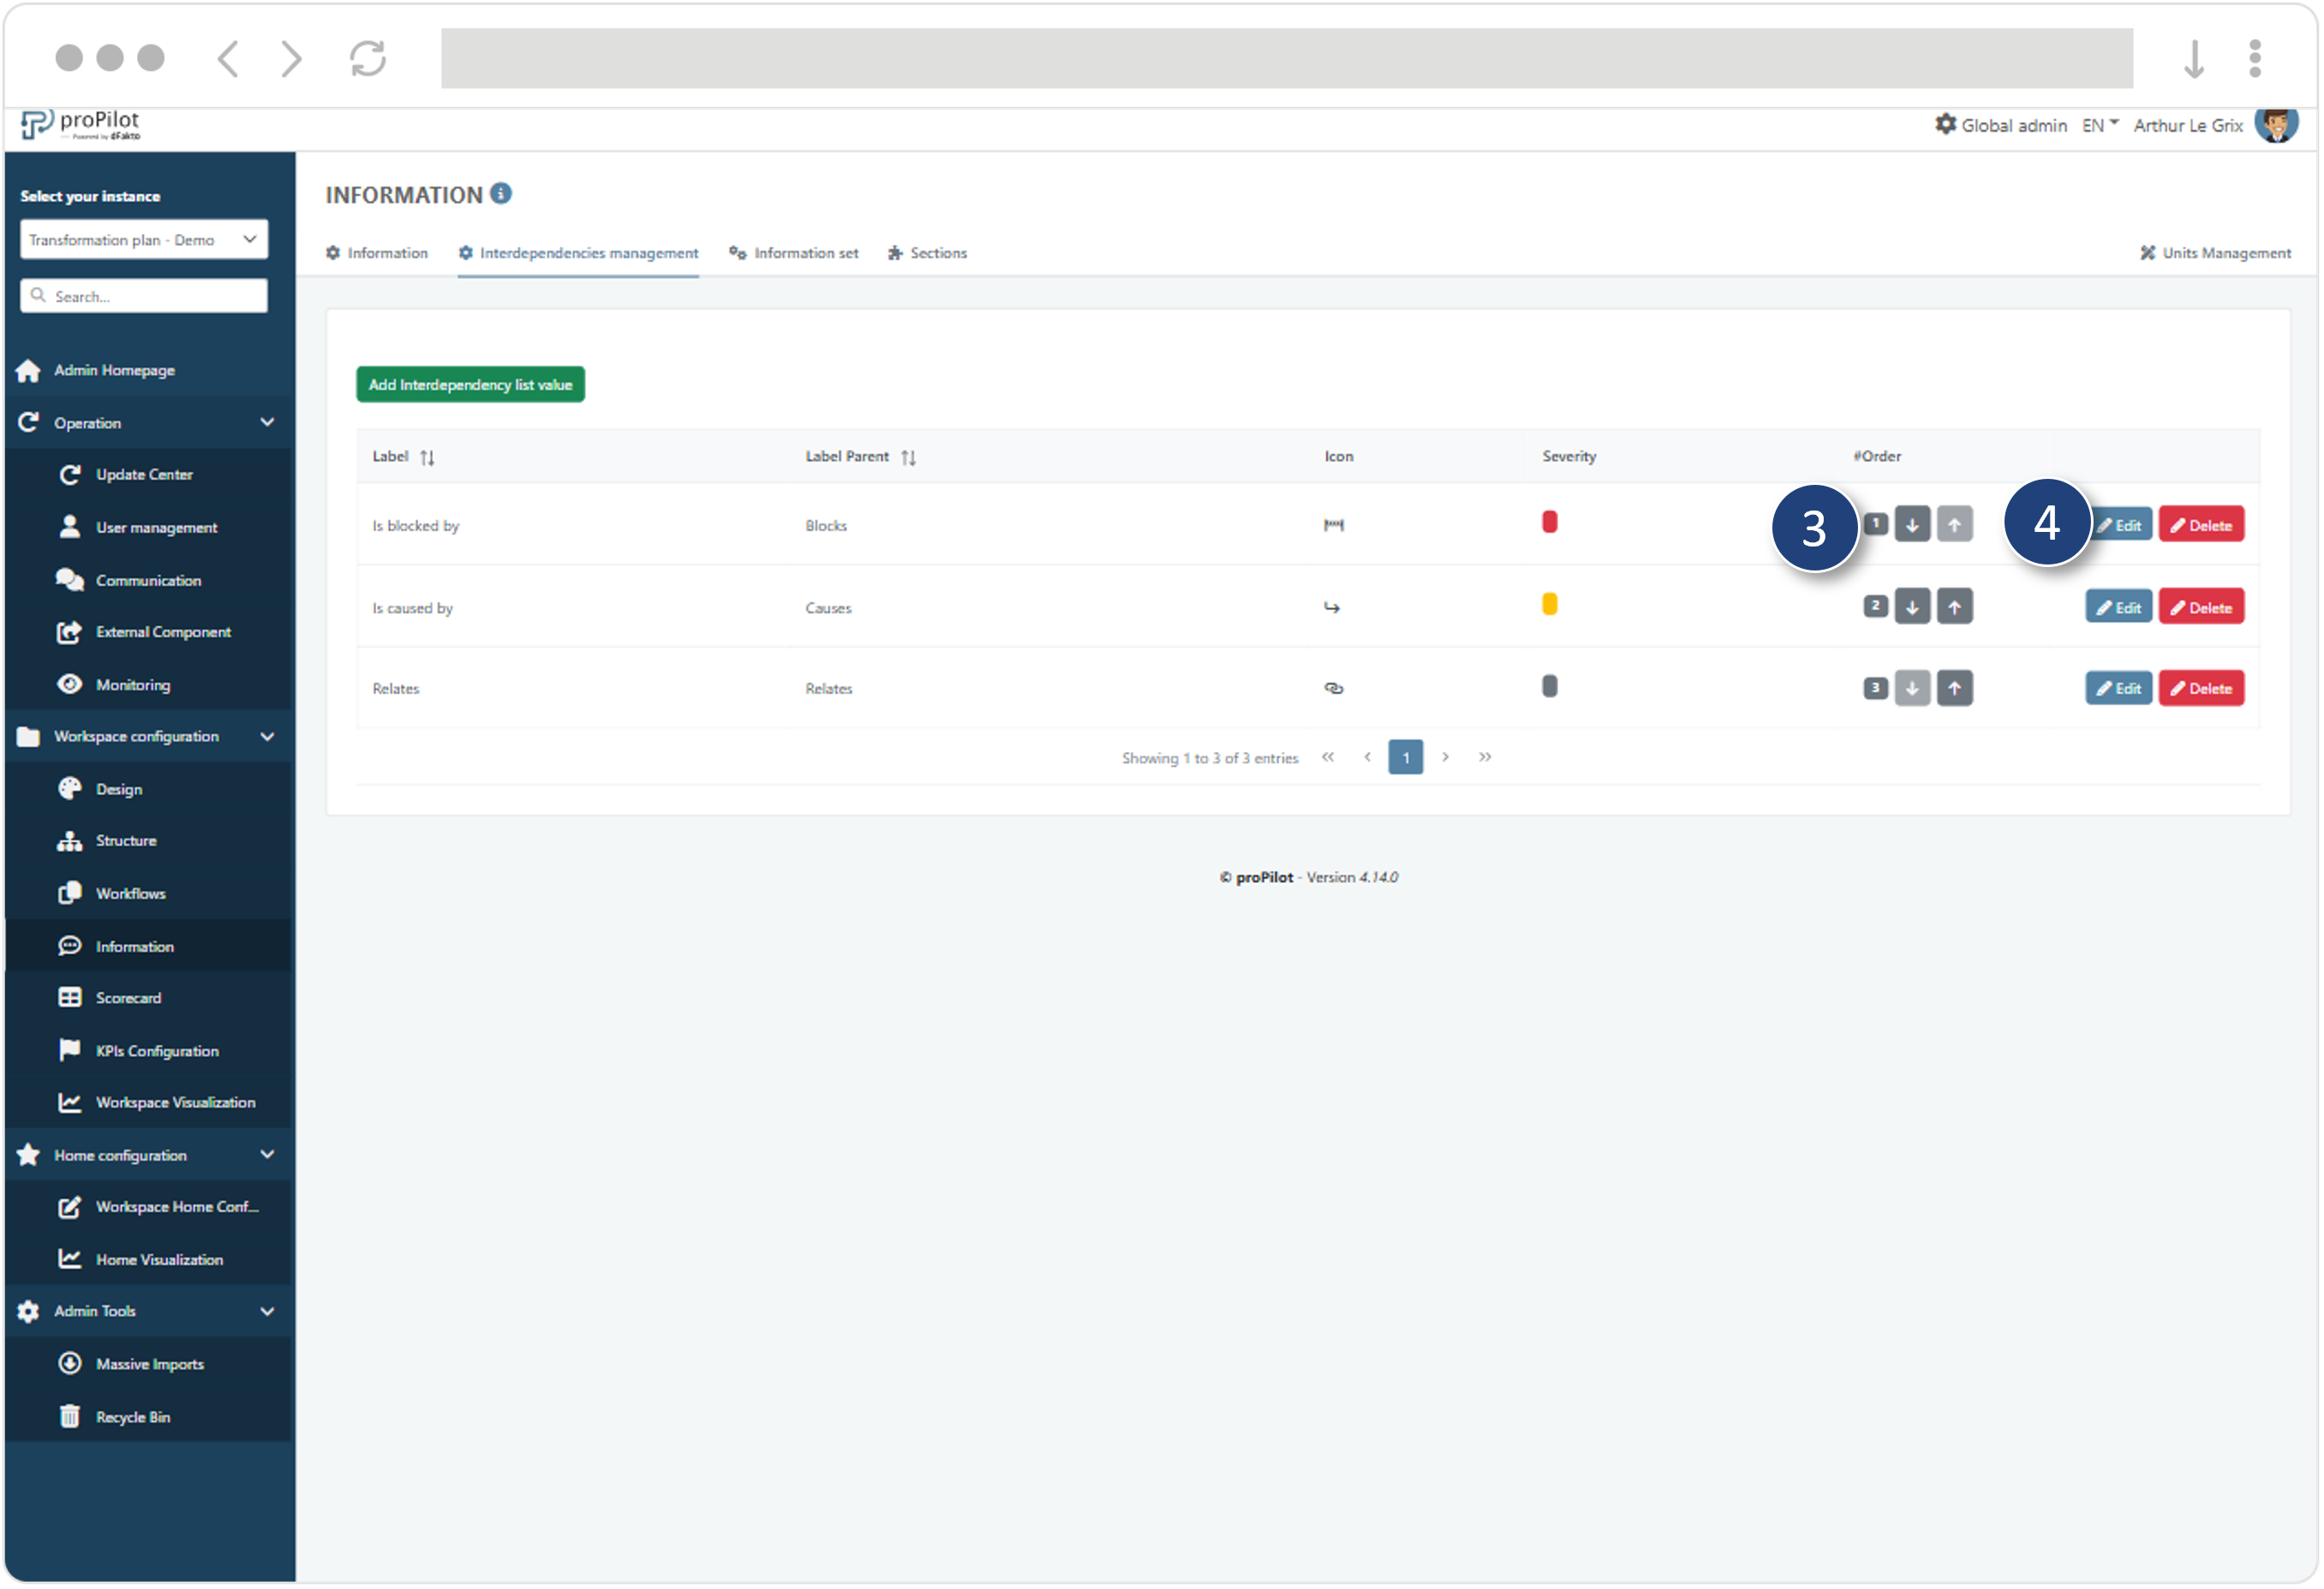
Manage the order of appearance of the list values for the user by clicking on the arrows.
Modify or delete an existing list value by clicking on the dedicated buttons.
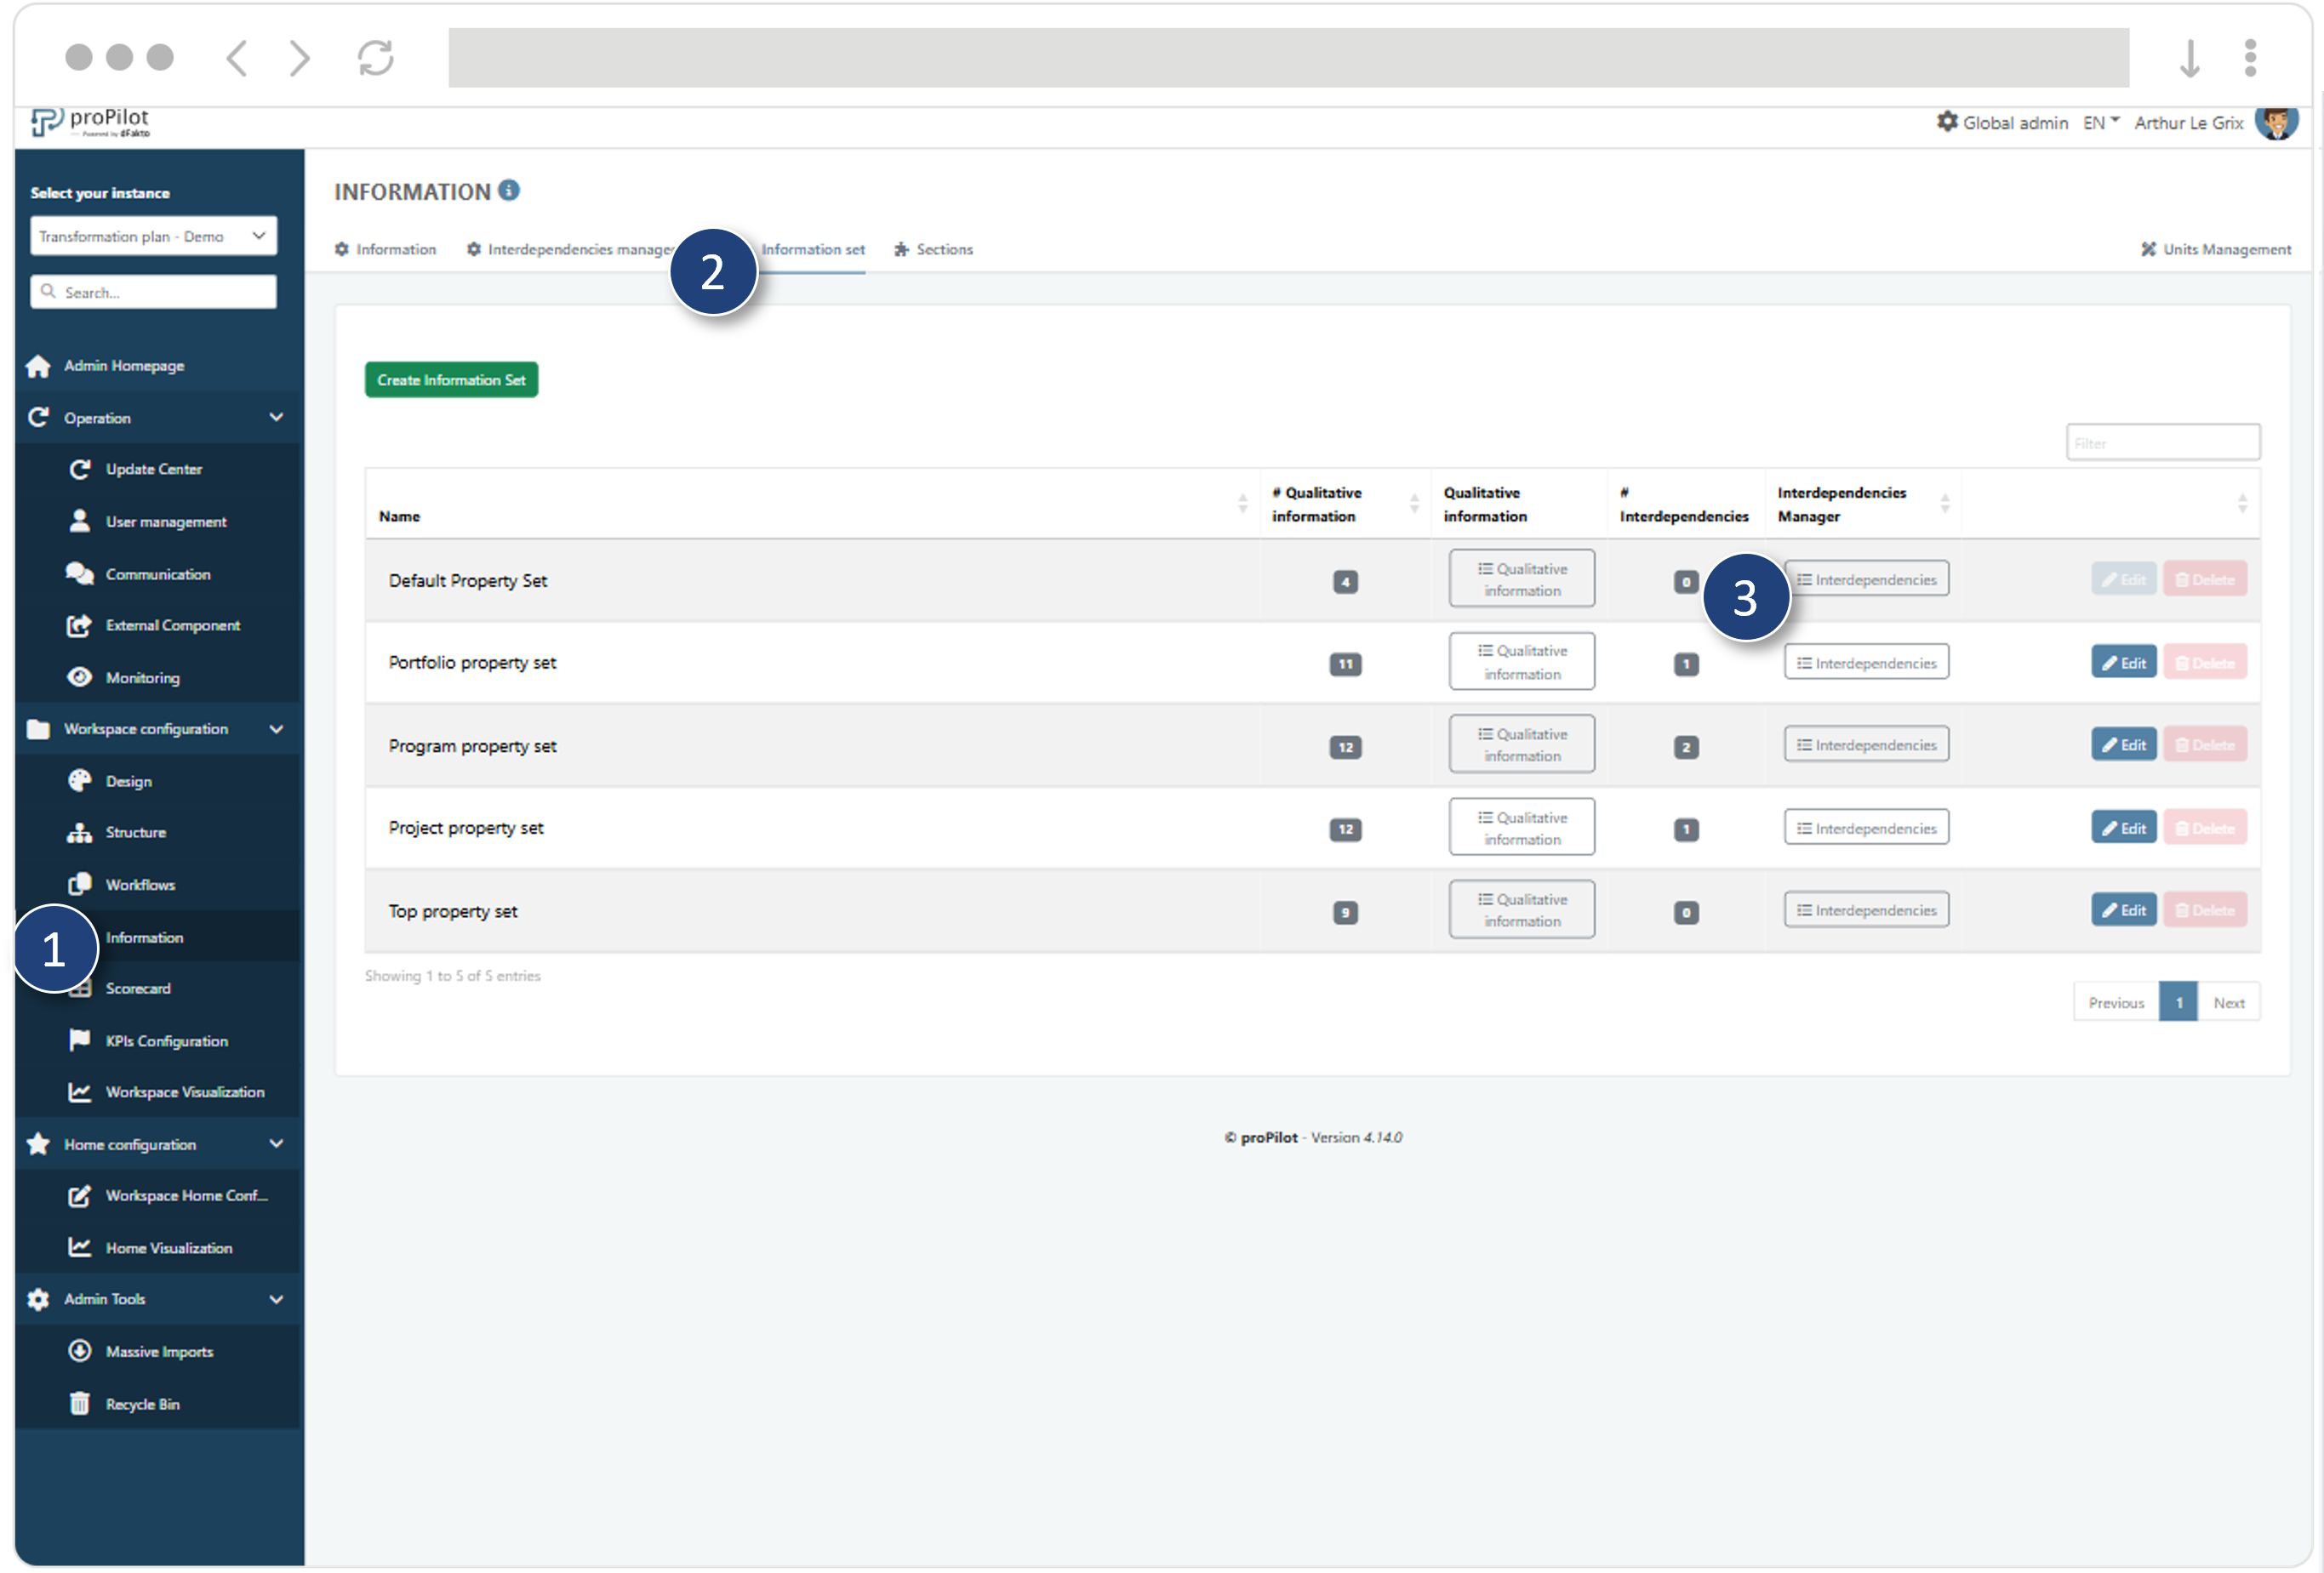
Add one or more interdependencies to the information set.
The interdependencies will appear for the user in the “information” section. It is necessary to configure the interdependencies that will be visible in this section.
In the left-hand menu, select “Workspace Configuration” and then “Information.”
Click on the “Information Set Management” tab and select the one you want to update.
Click on the “Interdependencies” button associated with it.
Click on “Add a New Interdependency.” A pop-up window will open.
Select an interdependency from the drop-down list. You will only see existing interdependencies that have not yet been integrated into this set.
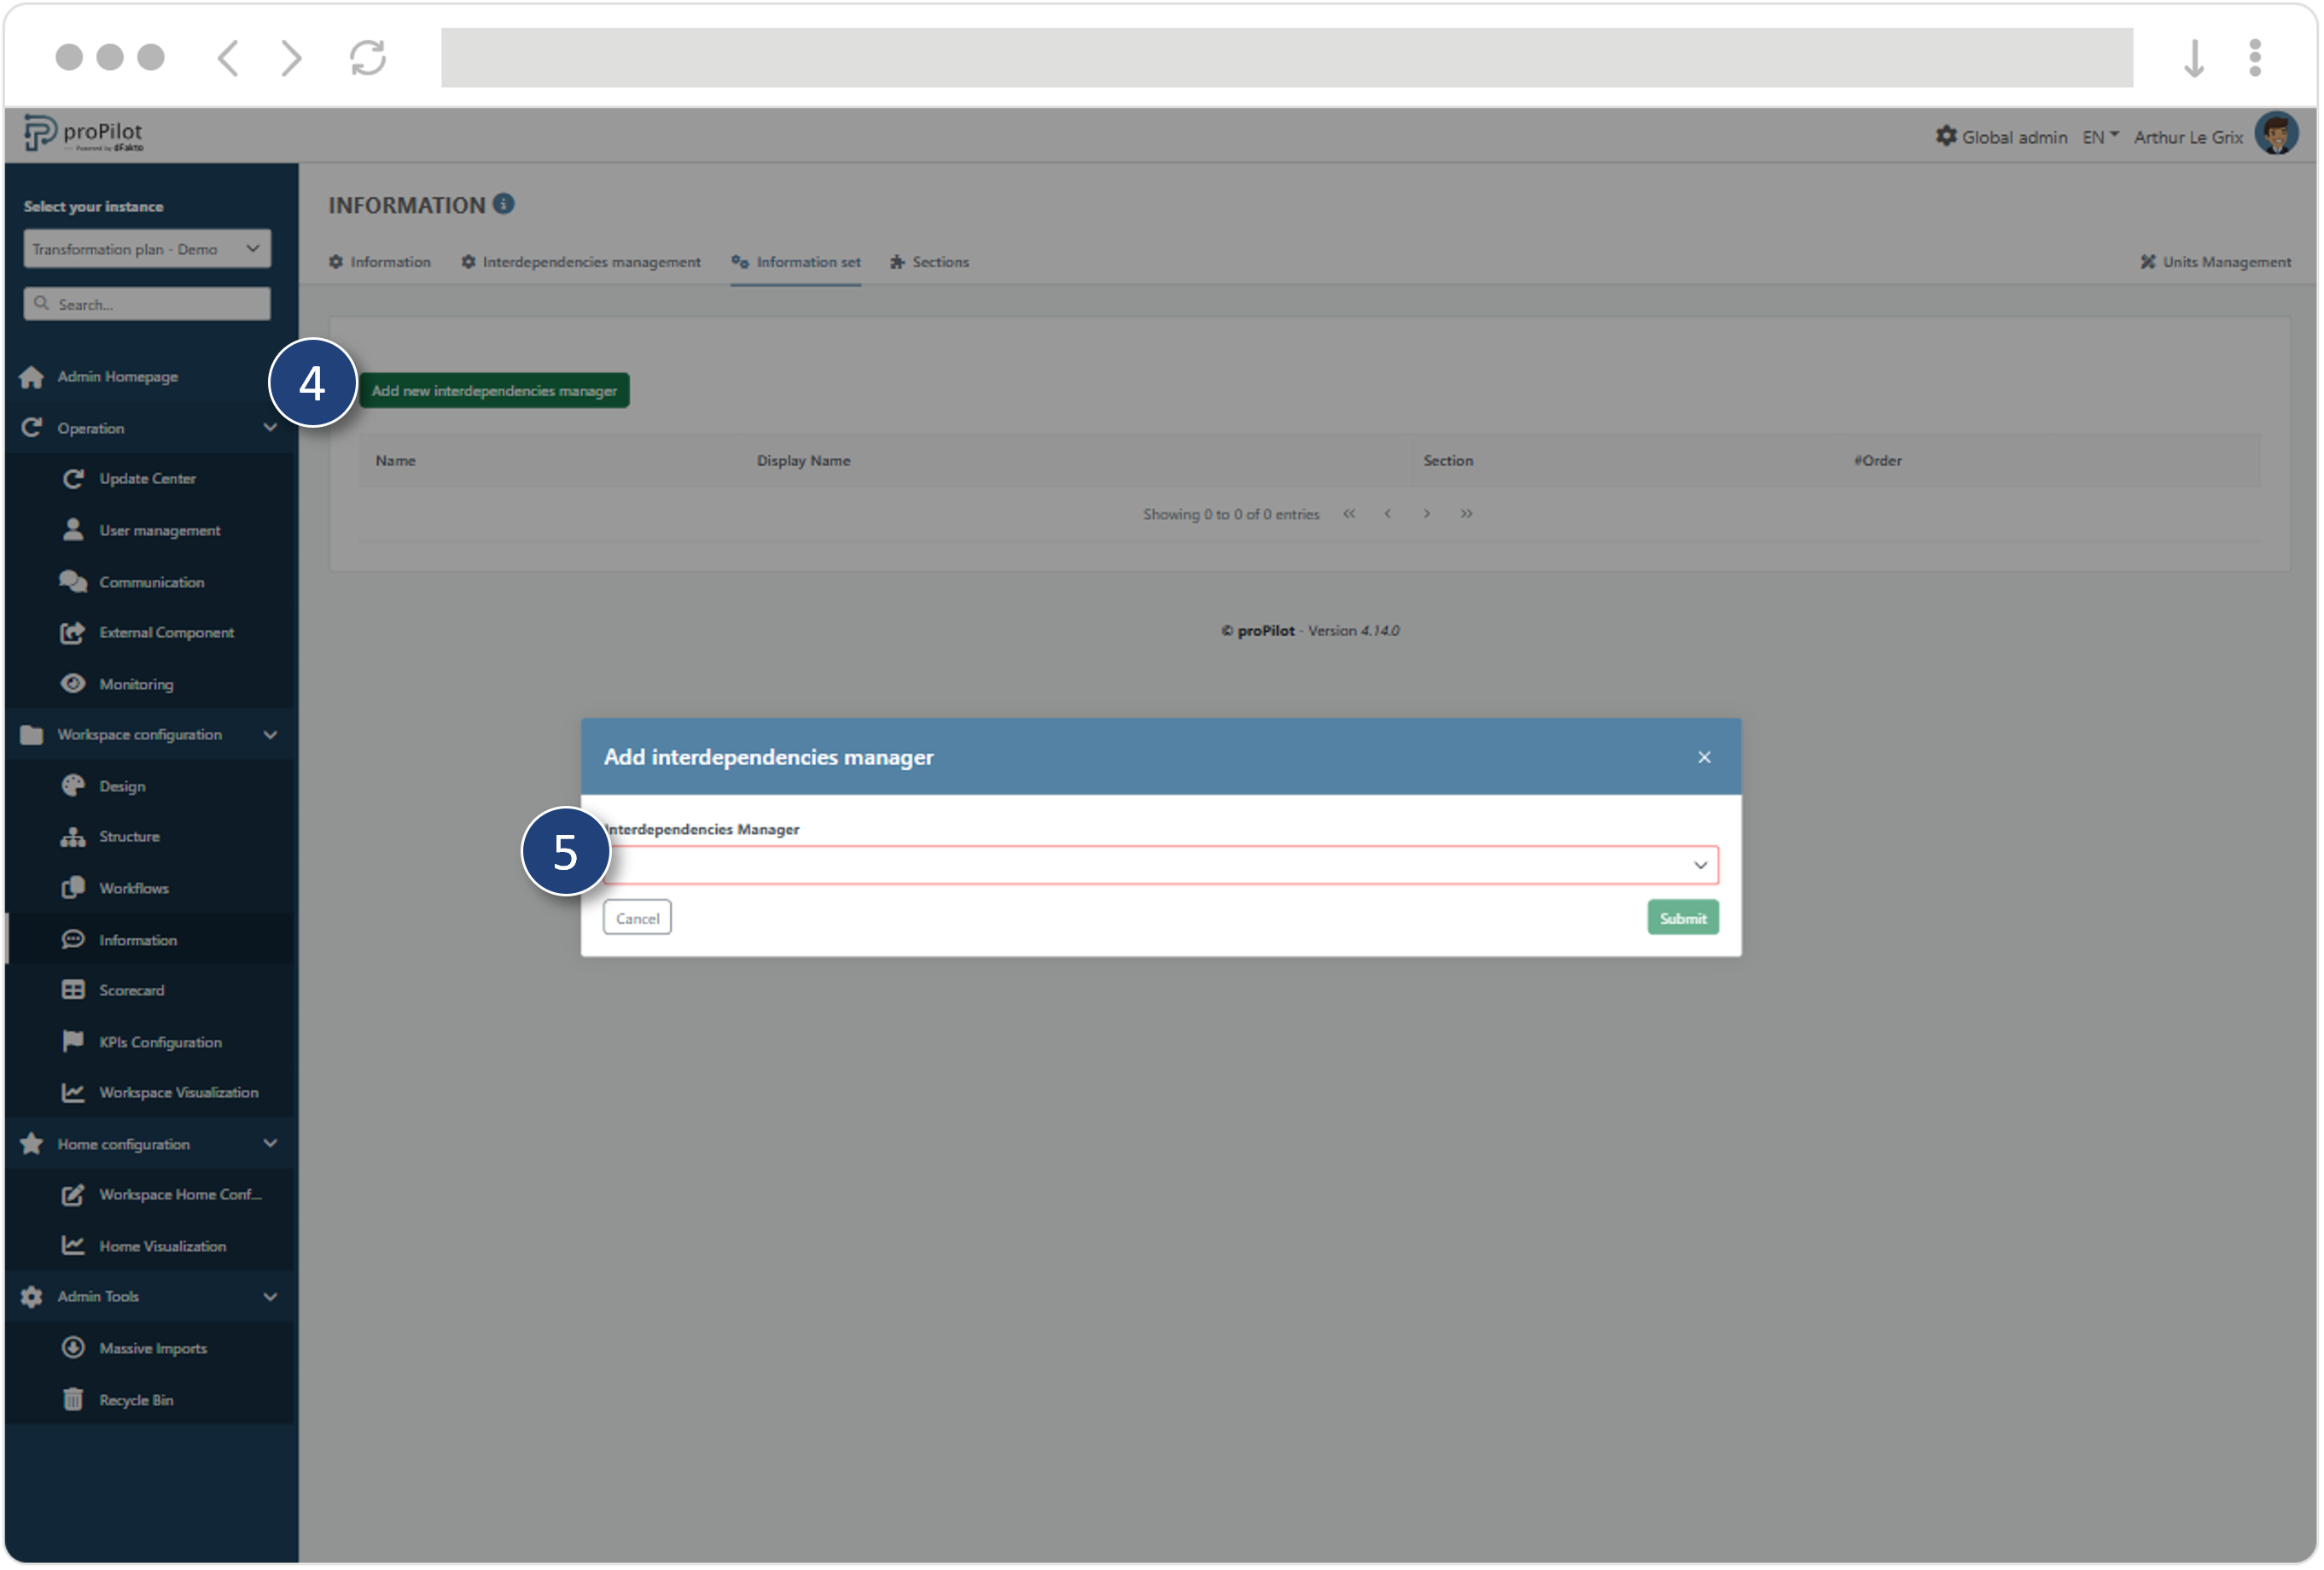
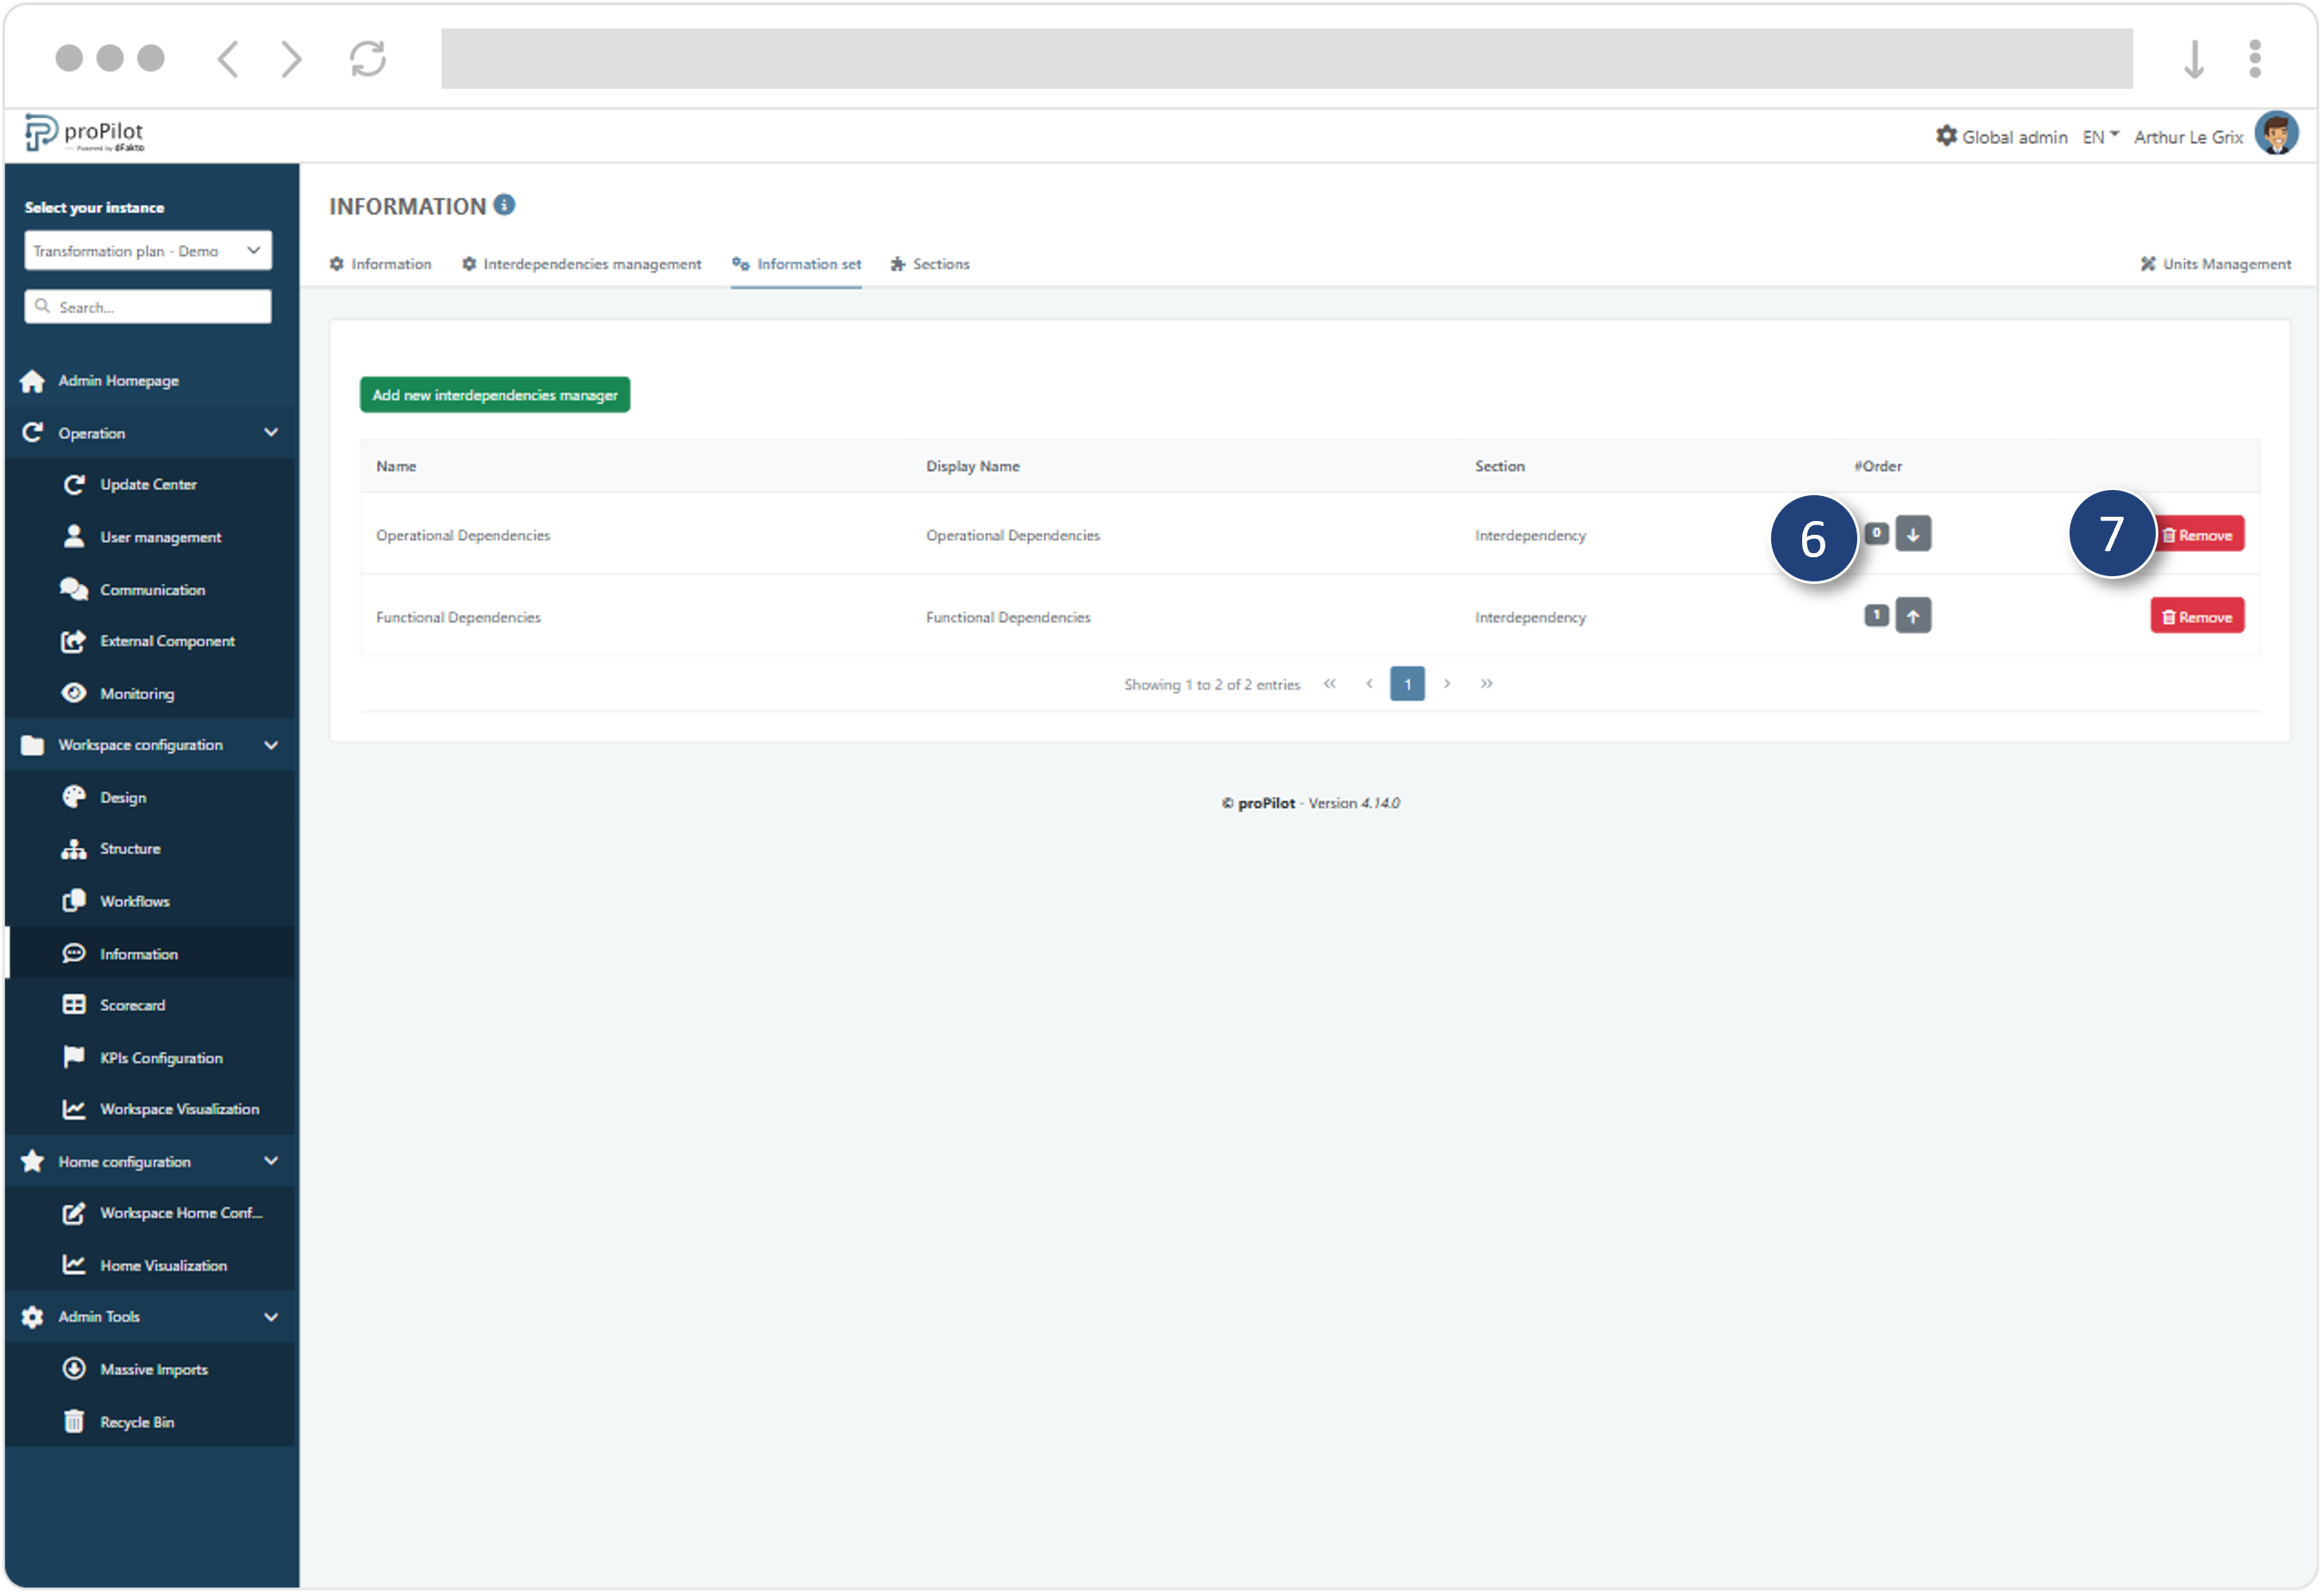
Define a value in the “order” section to determine the order in which the interdependencies appear for the user.
You can delete an interdependency by clicking the “delete” button. In this case, all associated information in the workspace will be removed.
For more information about configuring information and assigning it within the proPilot structure, please refer to: Information: create efficient qualitative data collection
Manage the Order of Appearance of Interdependencies in Information
In the left-hand menu within a chosen instance via the drop-down menu at the top left of the administrator interface, select “Workspace Configuration” and then “Information.”
Click on the “Sections” tab.
This module allows you to manage the different sections that will be available when displaying entities to the user.A section dedicated to interdependencies is present (by default, “Interdependencies”). Click on “Edit.” A pop-up window will appear.
Enter the name you wish to display in the administration interface, and set the order to define the order of appearance of the interdependencies section within the information.
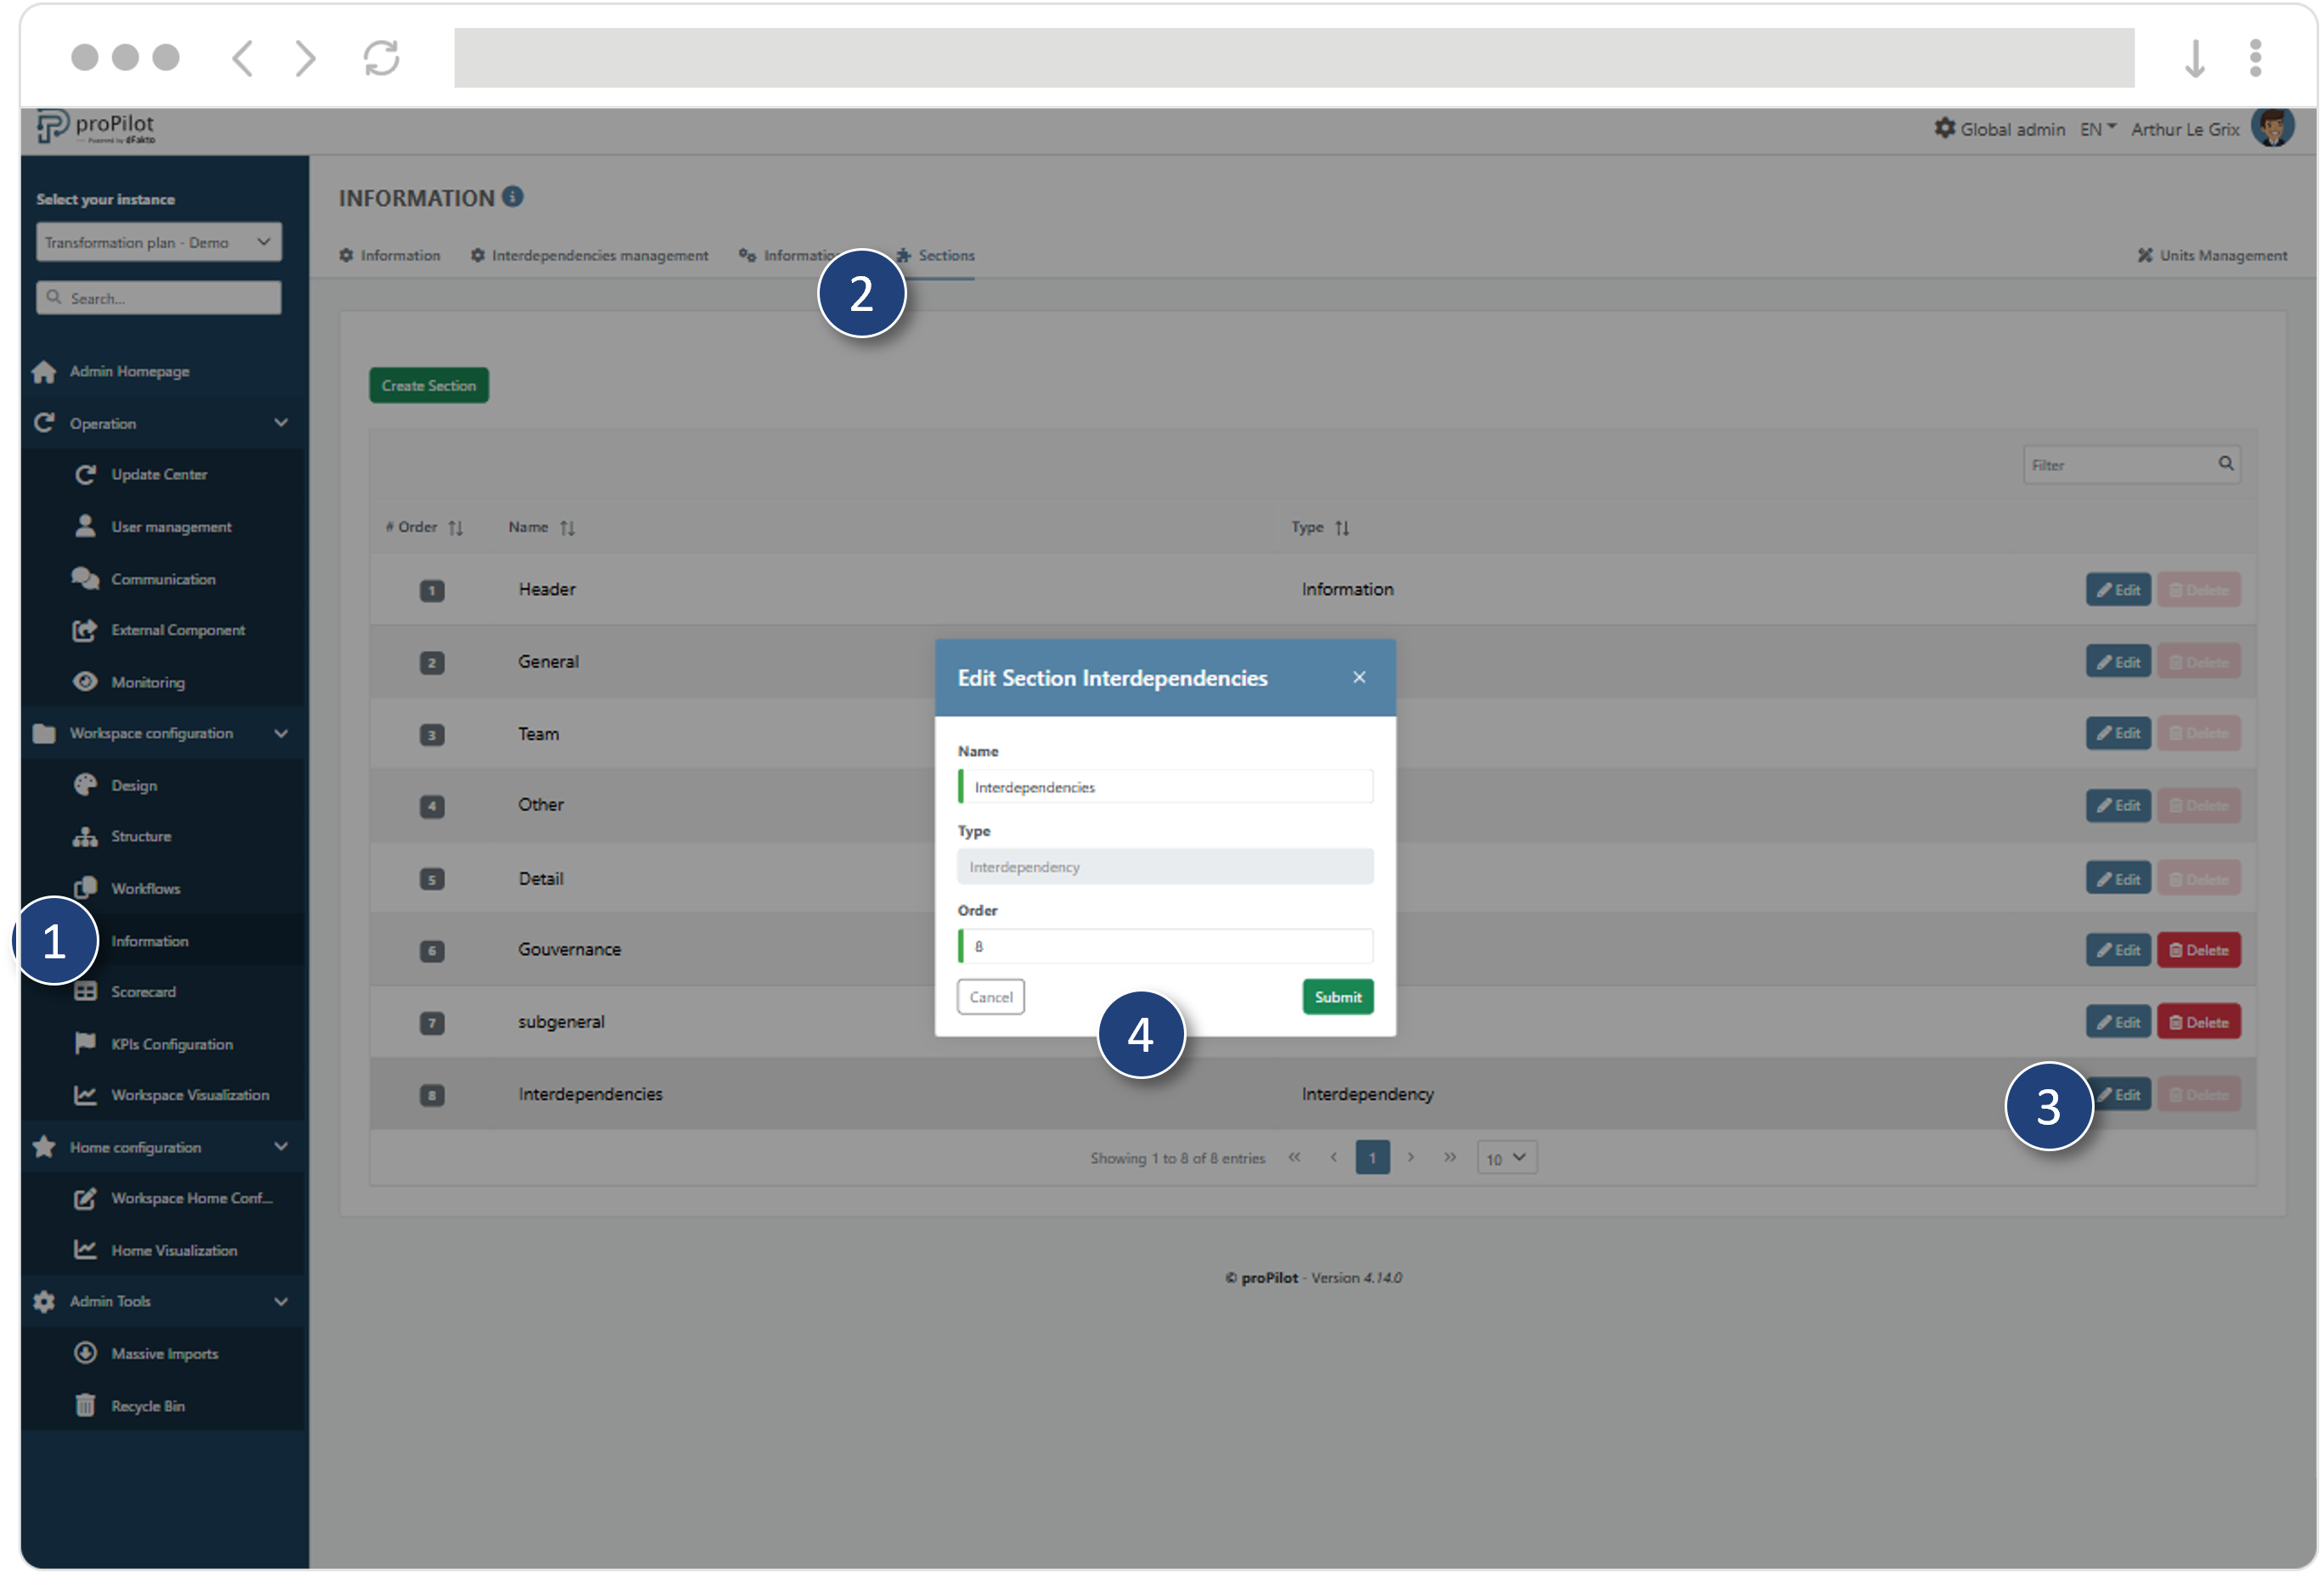
Interdependencies will always appear in the dedicated section, in the configured order of appearance.
