Introduction
In proPilot, you can directly integrate reports created in the Toucan Toco solution from version 3 onwards. From connection to integration for your users, you have a no-code interface to enhance the proPilot experience with Toucan Toco's data storytelling.
You can refer to the Toucan Toco documentation at any time: https://docs.toucantoco.com/index.html
To find out more about Toucan Toco visualisation, visit https://www.toucantoco.com/fr/
Connect proPilot to your Toucan Toco application
Add the Toucan Toco visualization solution to proPilot :
-
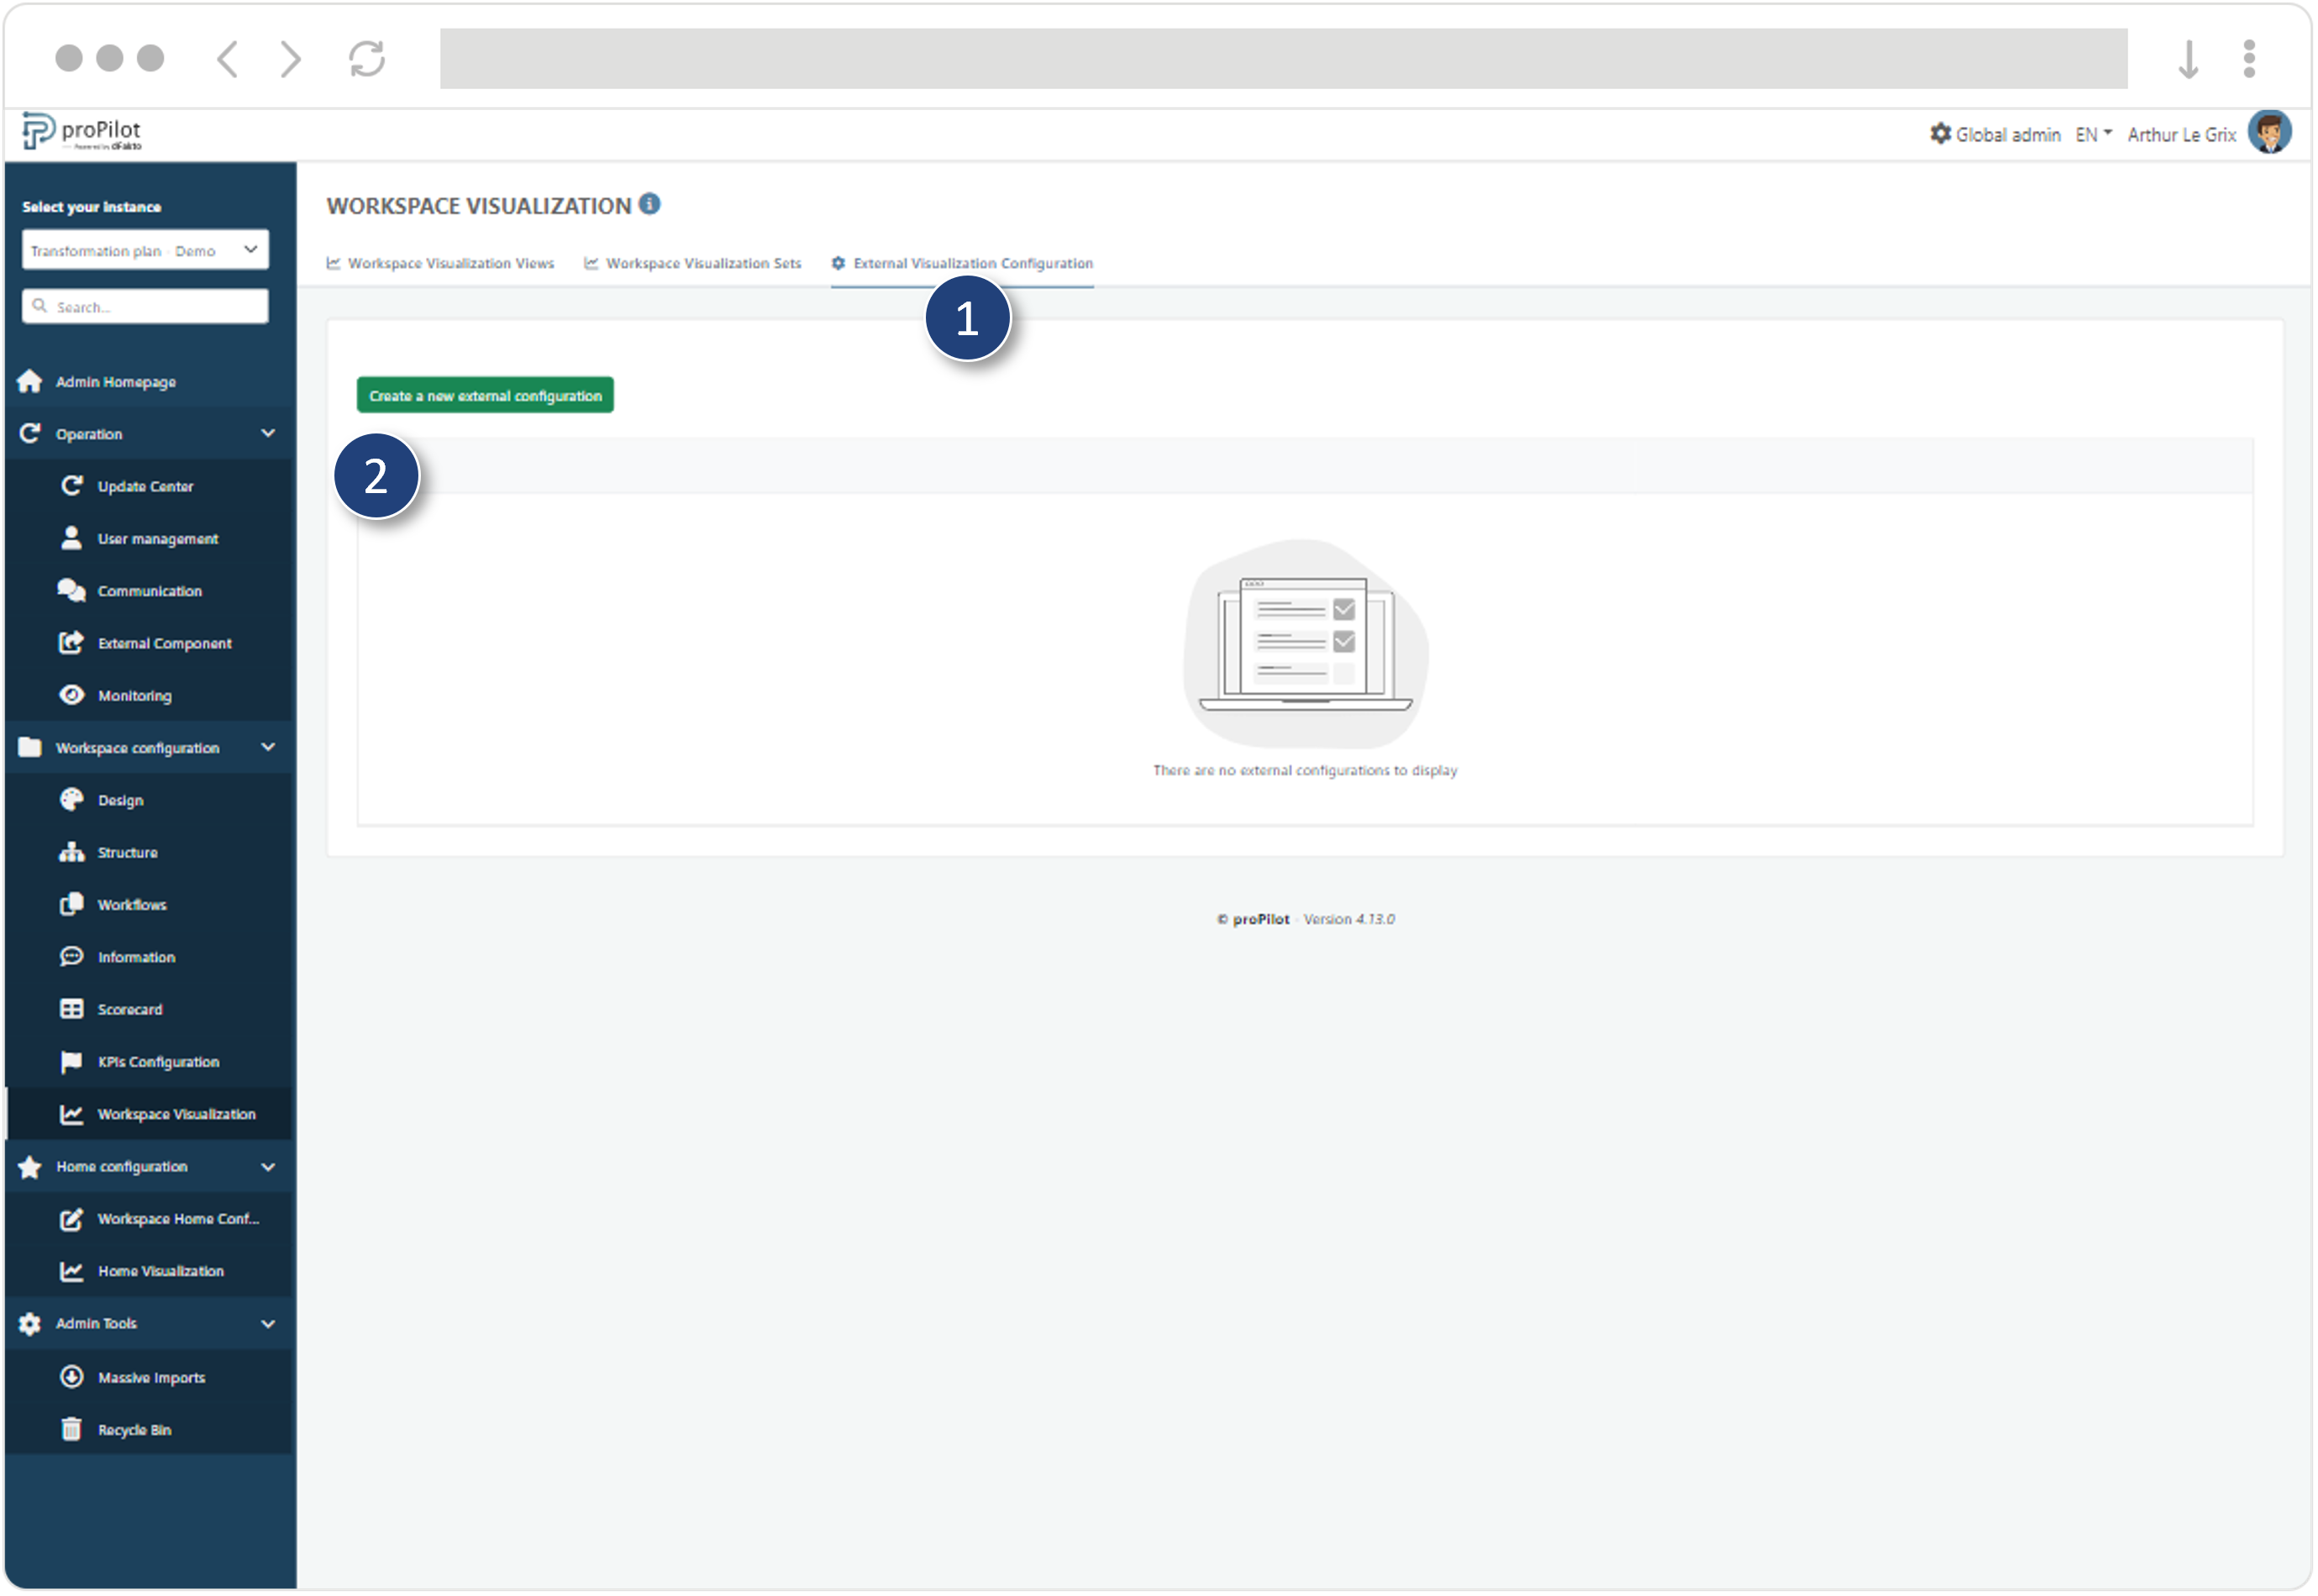
Go to the external visualization configuration tab.
-
Create a new external configuration.
-
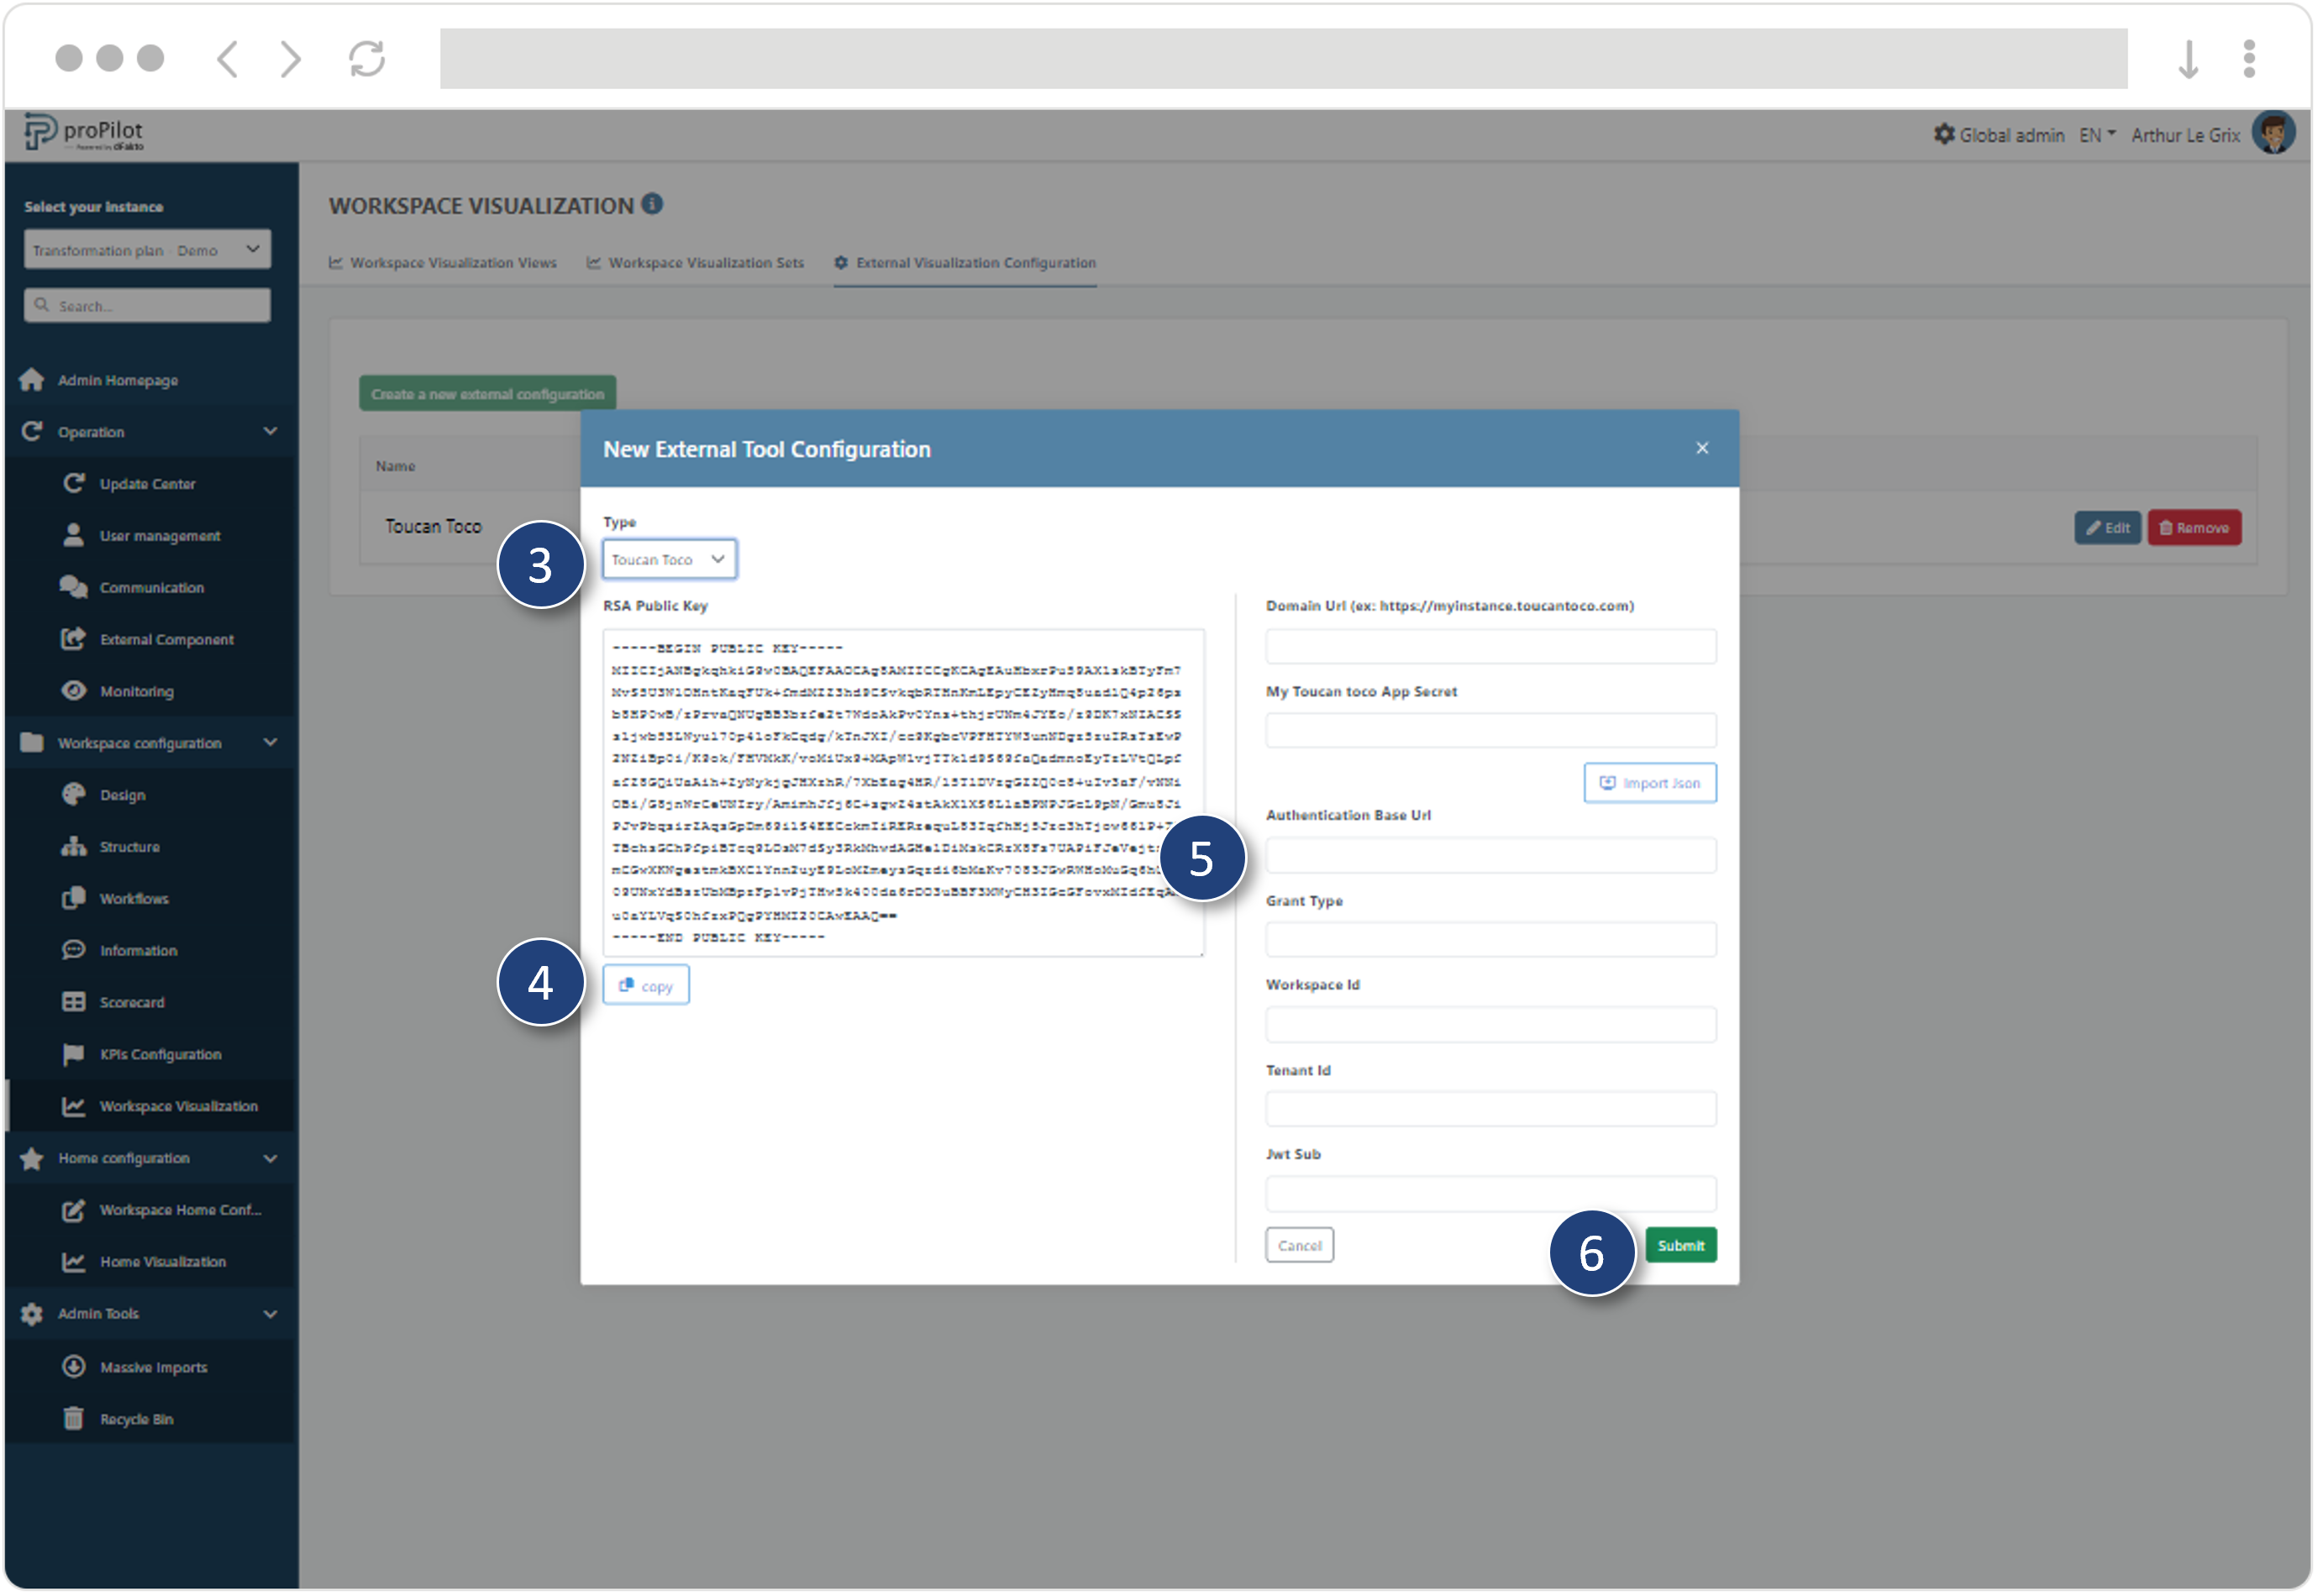
Select the type ‘Toucan Toco’.
-
Copy and paste the public part of the proPilot RSA key into the embed manager part of the visualization solution.
-
Fill in the various fields to enable identification and authorisation of the Toucan Toco embed.
For further information, the Toucan Toco documentation is available here: https://docs-v3.toucantoco.com/visualizations-and-layouts/embedding
-
Click on ‘Submit’.
Your Toucan Toco solution is now recognised in proPilot.
Configuration of Toucan Toco visualization view
-
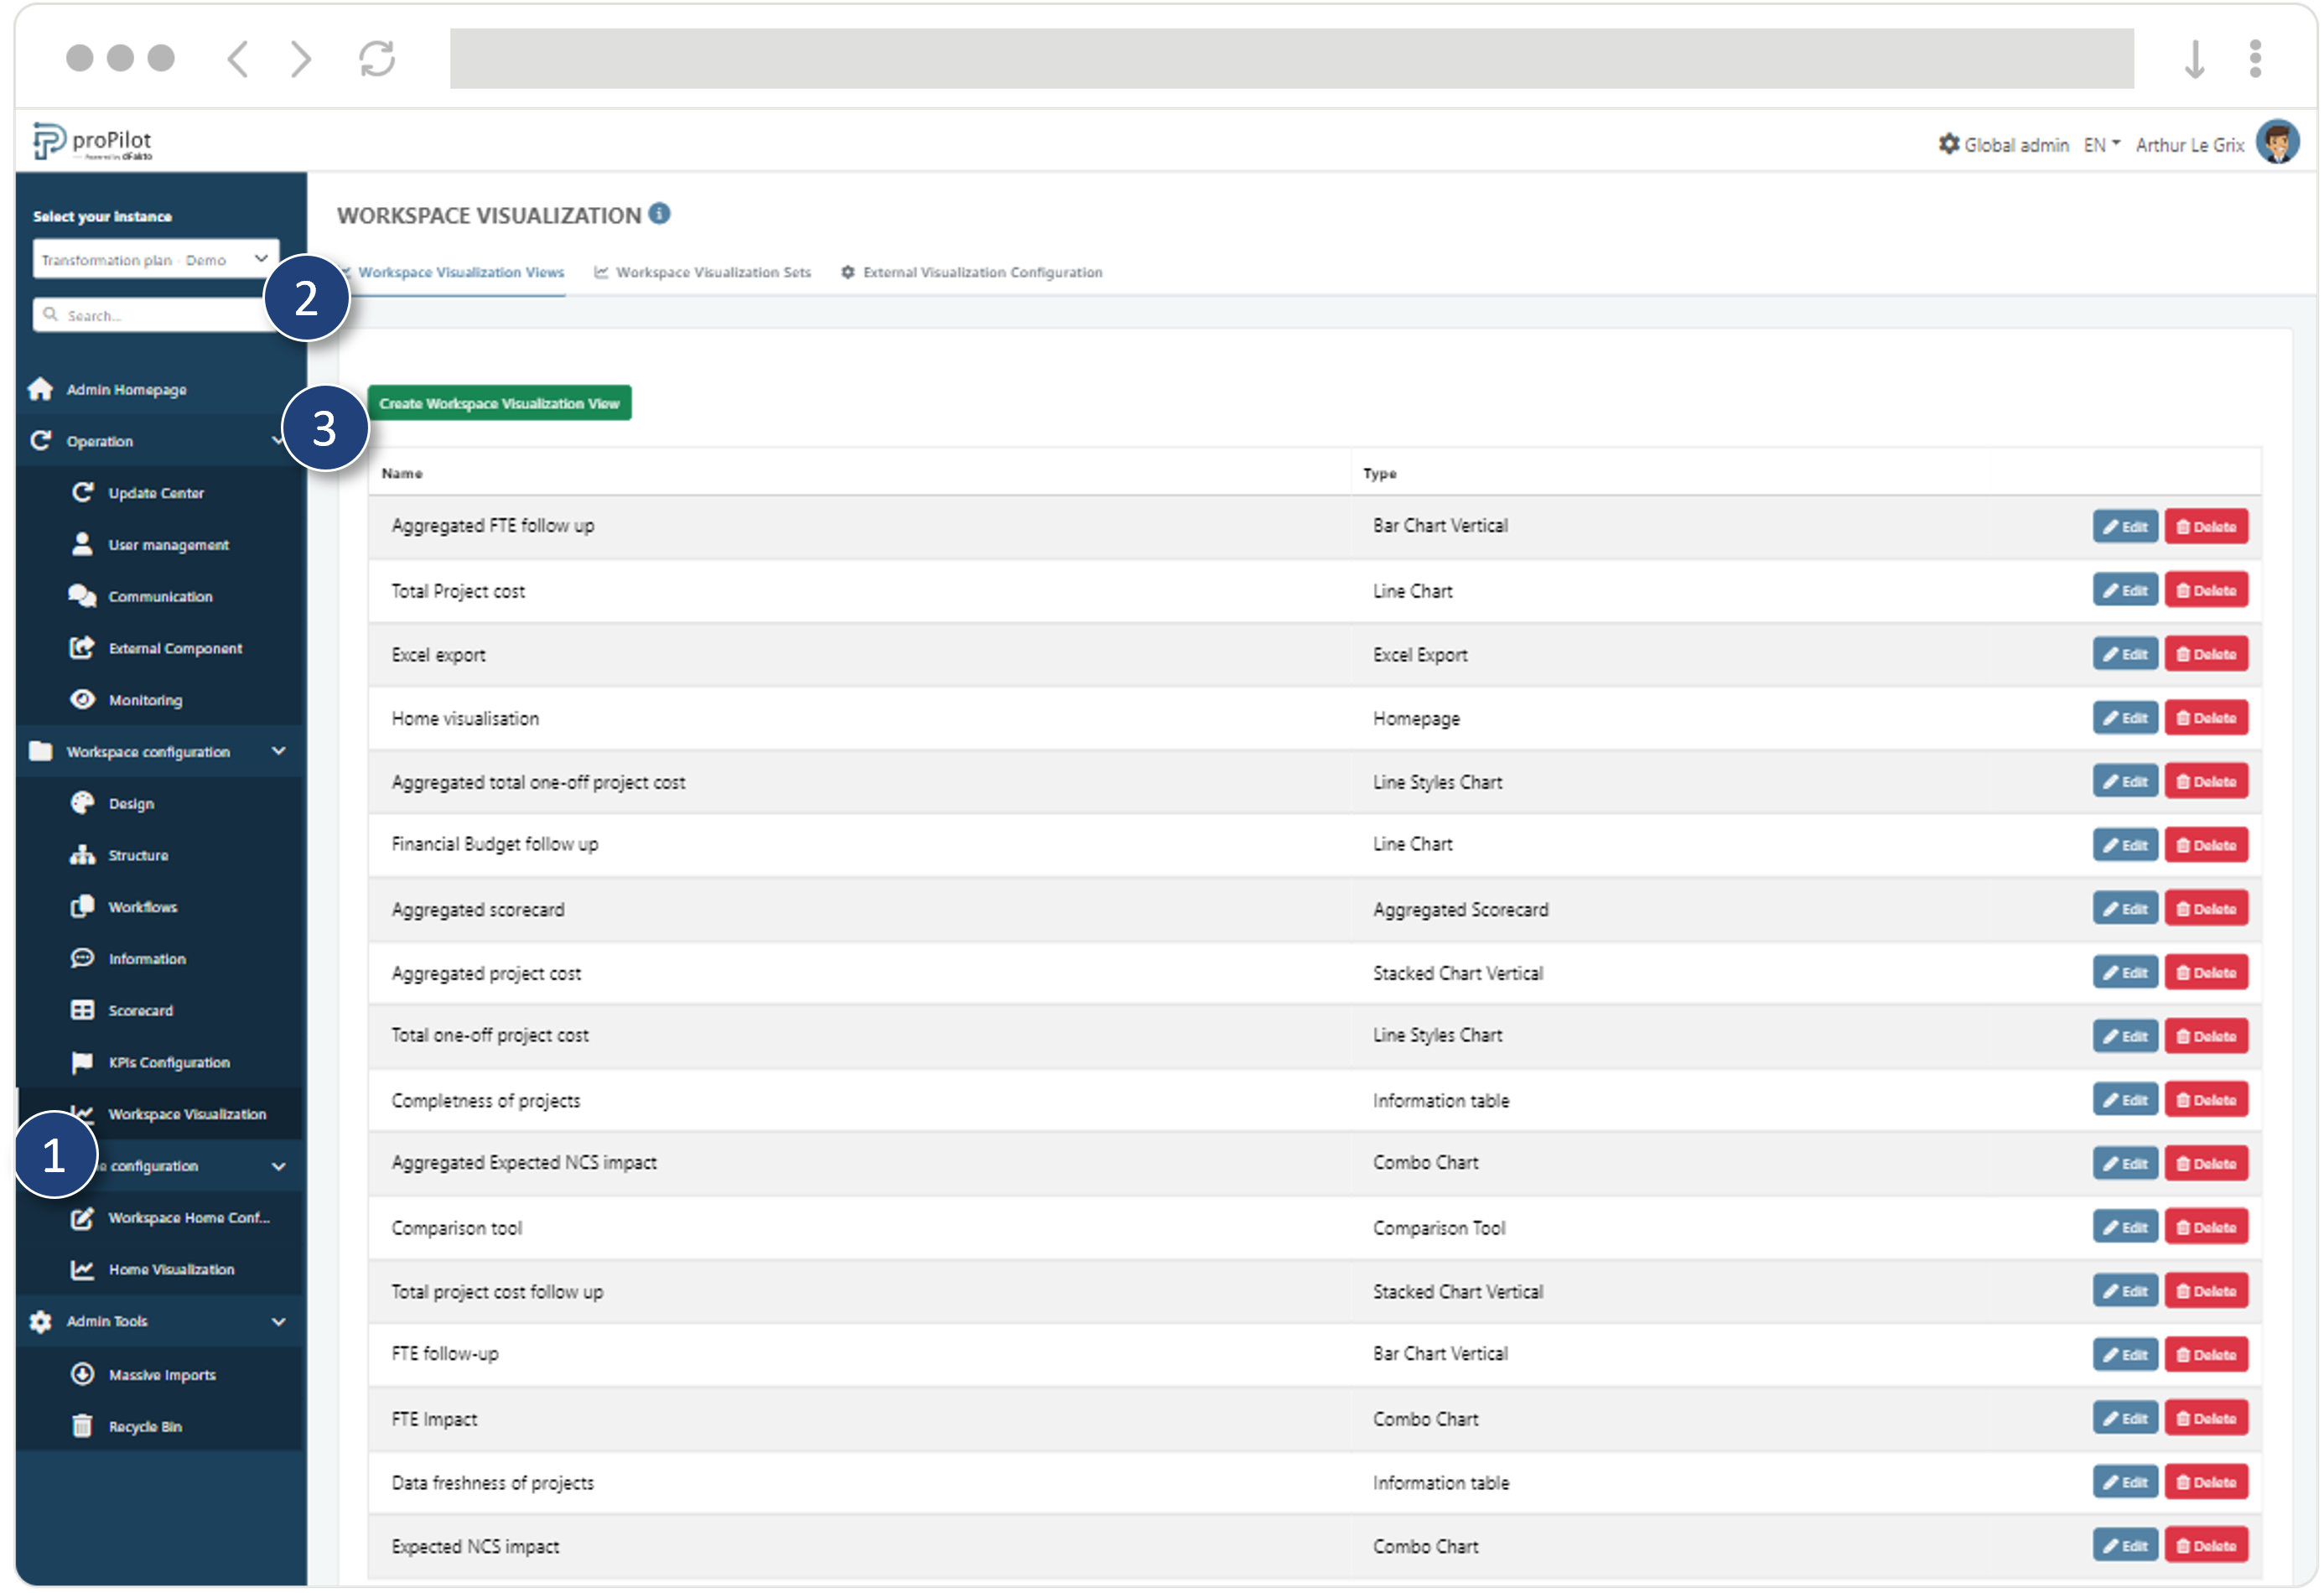
In the left-hand menu, select ‘workspace configuration’ and then ‘workspace visualization’.
-
Then click on the 'Workspace visualization views’ tab.
-
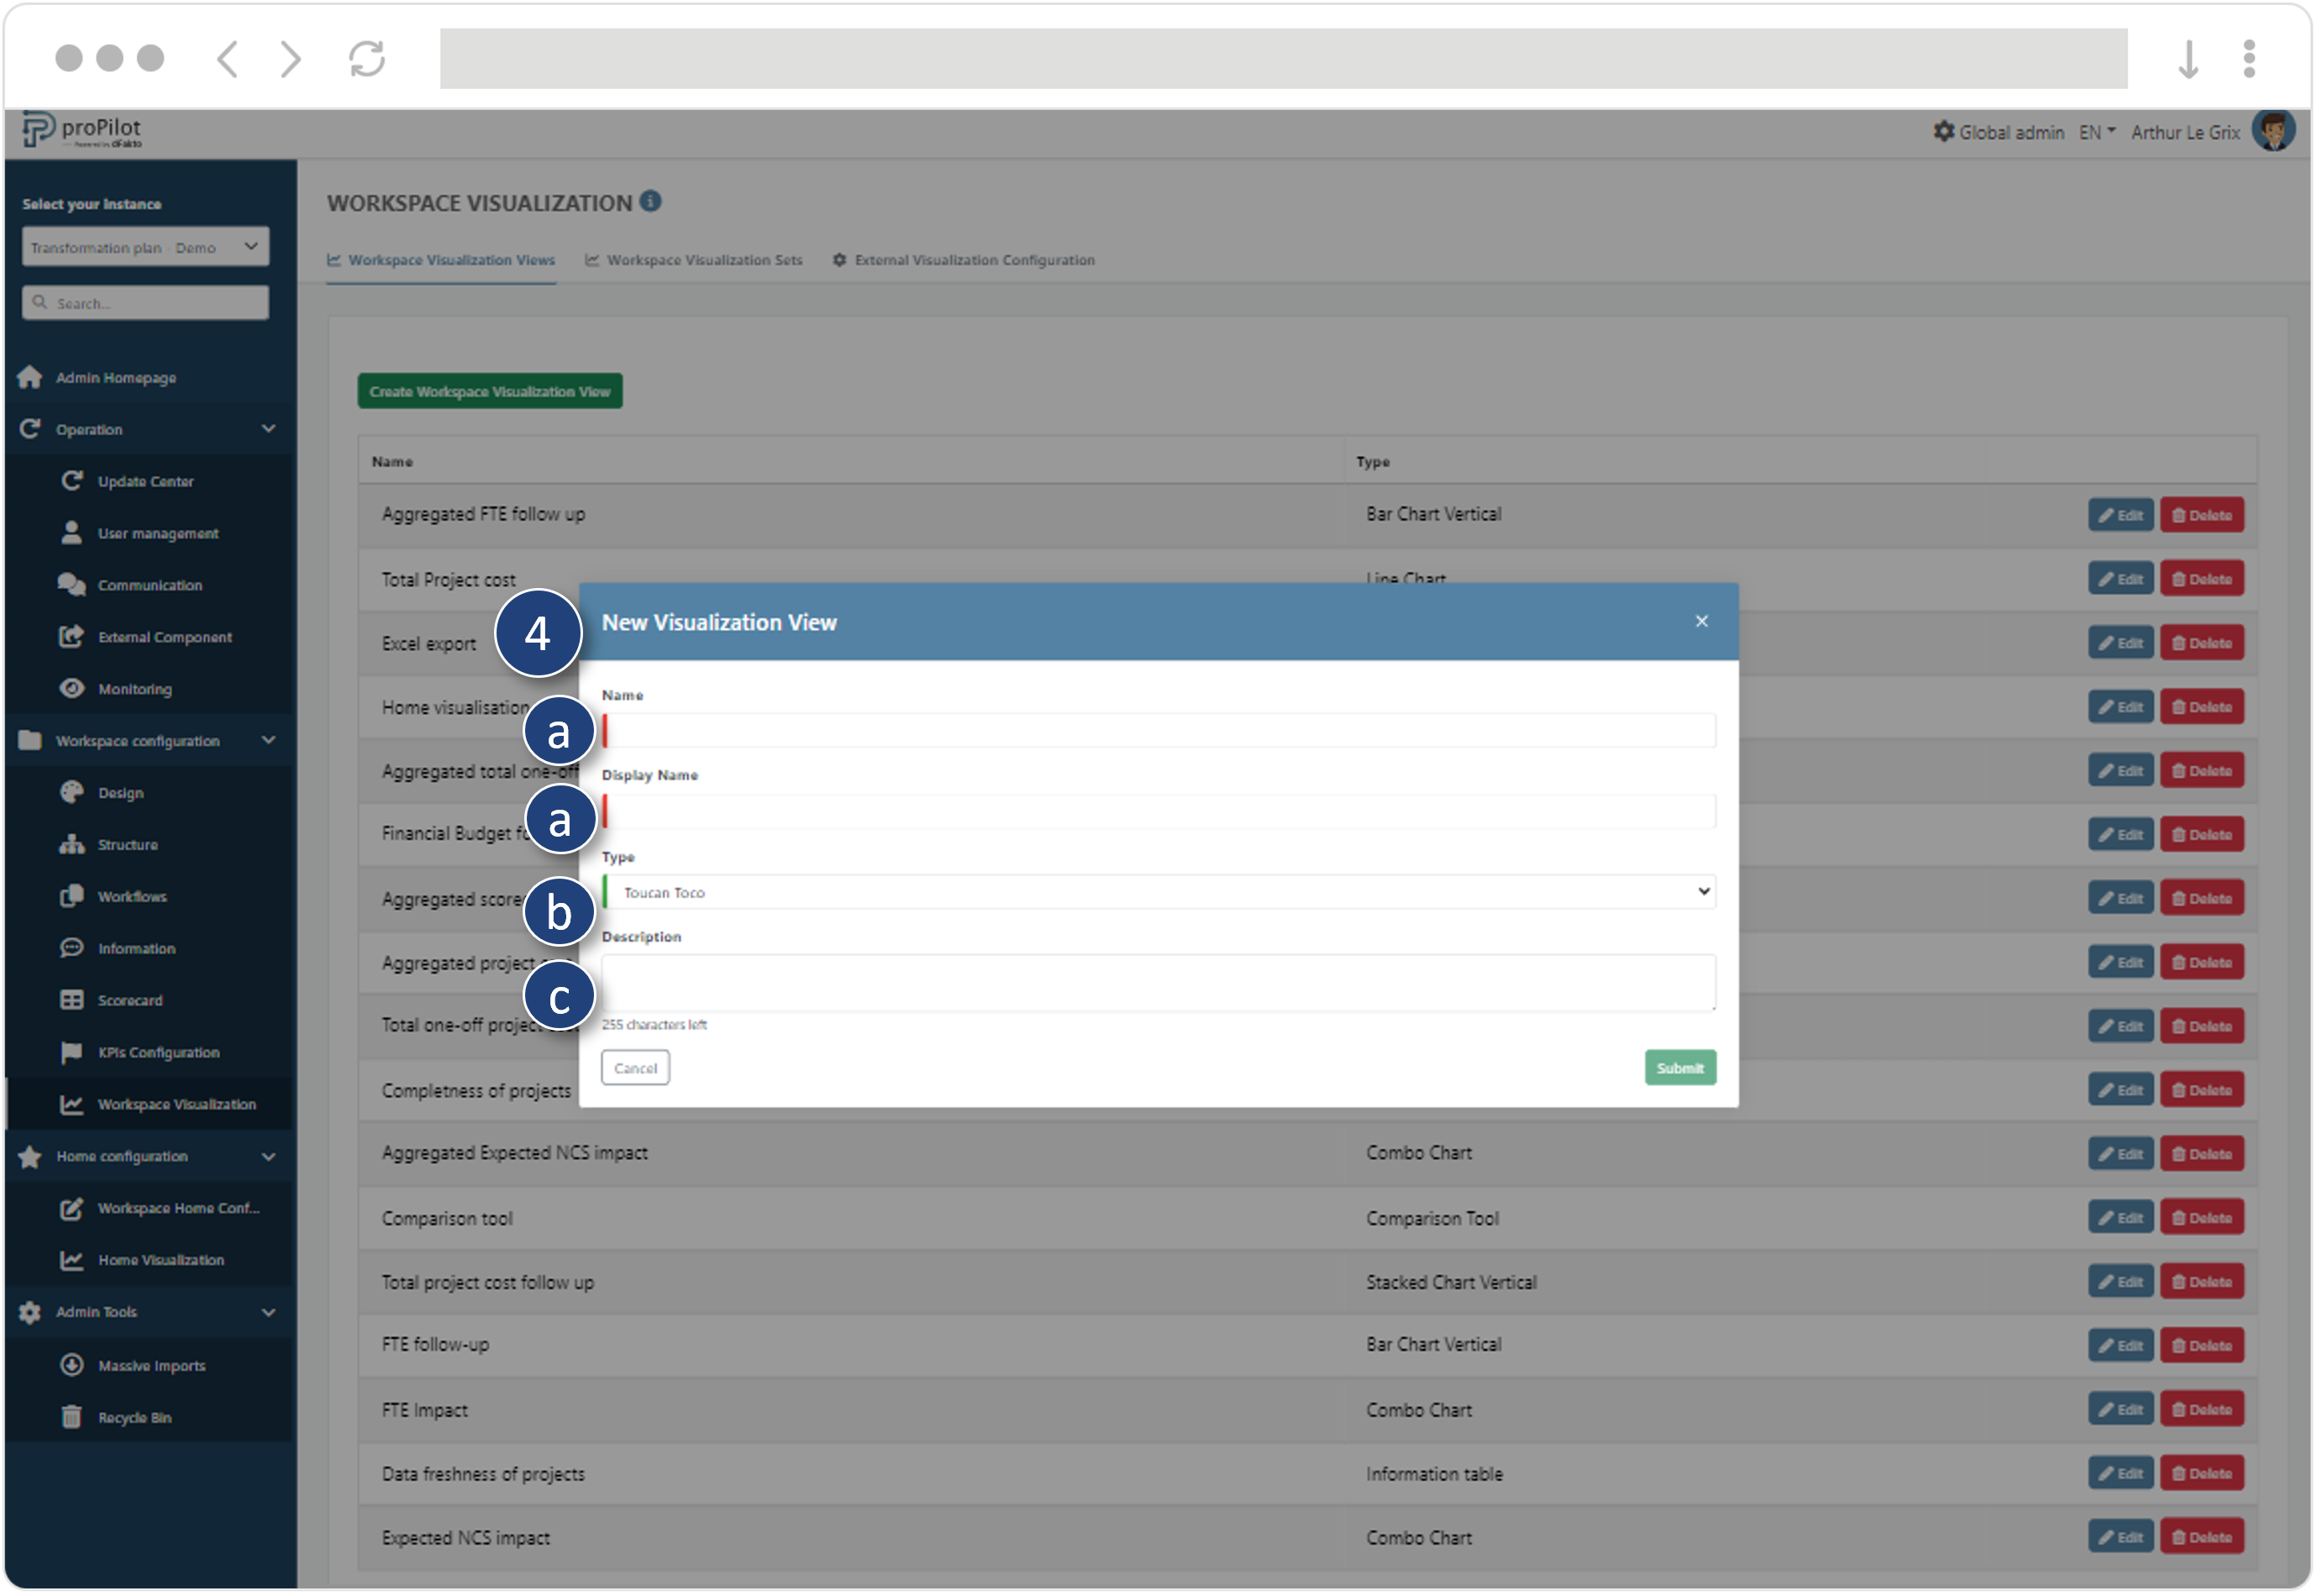
Click on the ‘Create Workspace Visualization View’ button. A pop-up window opens.
-
Fill in the following fields:
-
Name (technical) and Display name
-
Choose the ‘Toucan Toco’ display type
-
Add a description if required
-
-
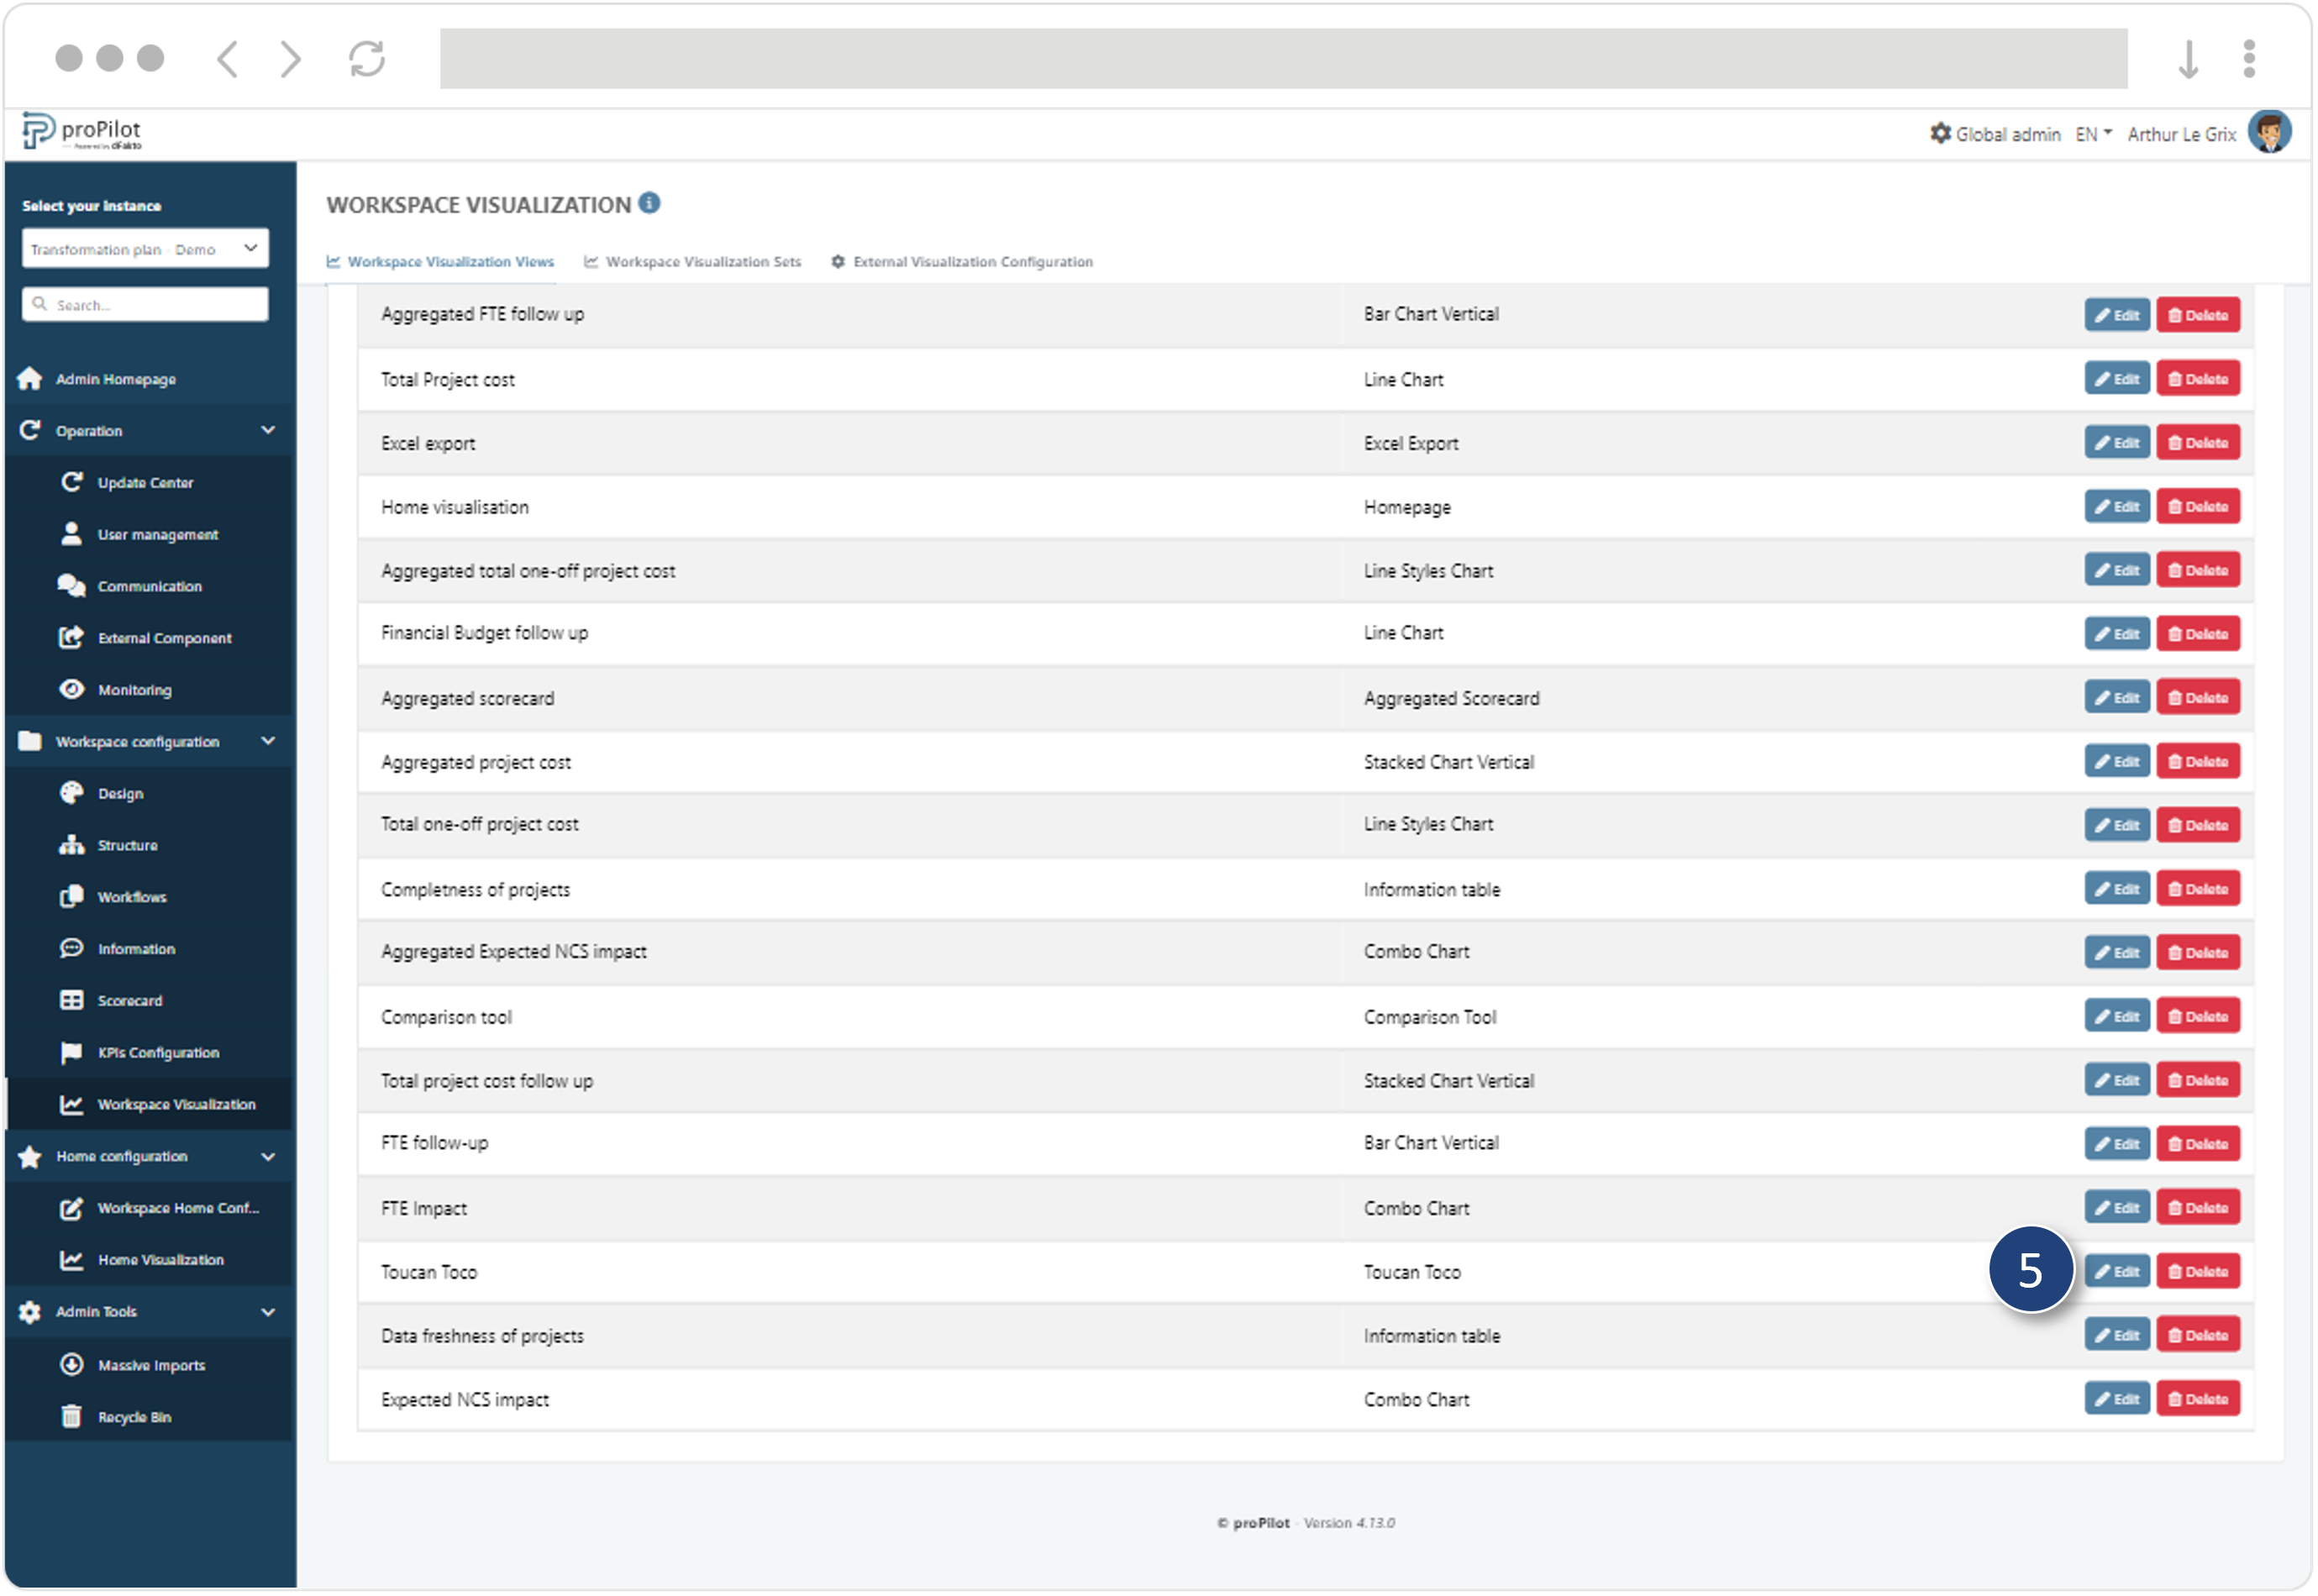
Submit the view, then click on “Edit”
-
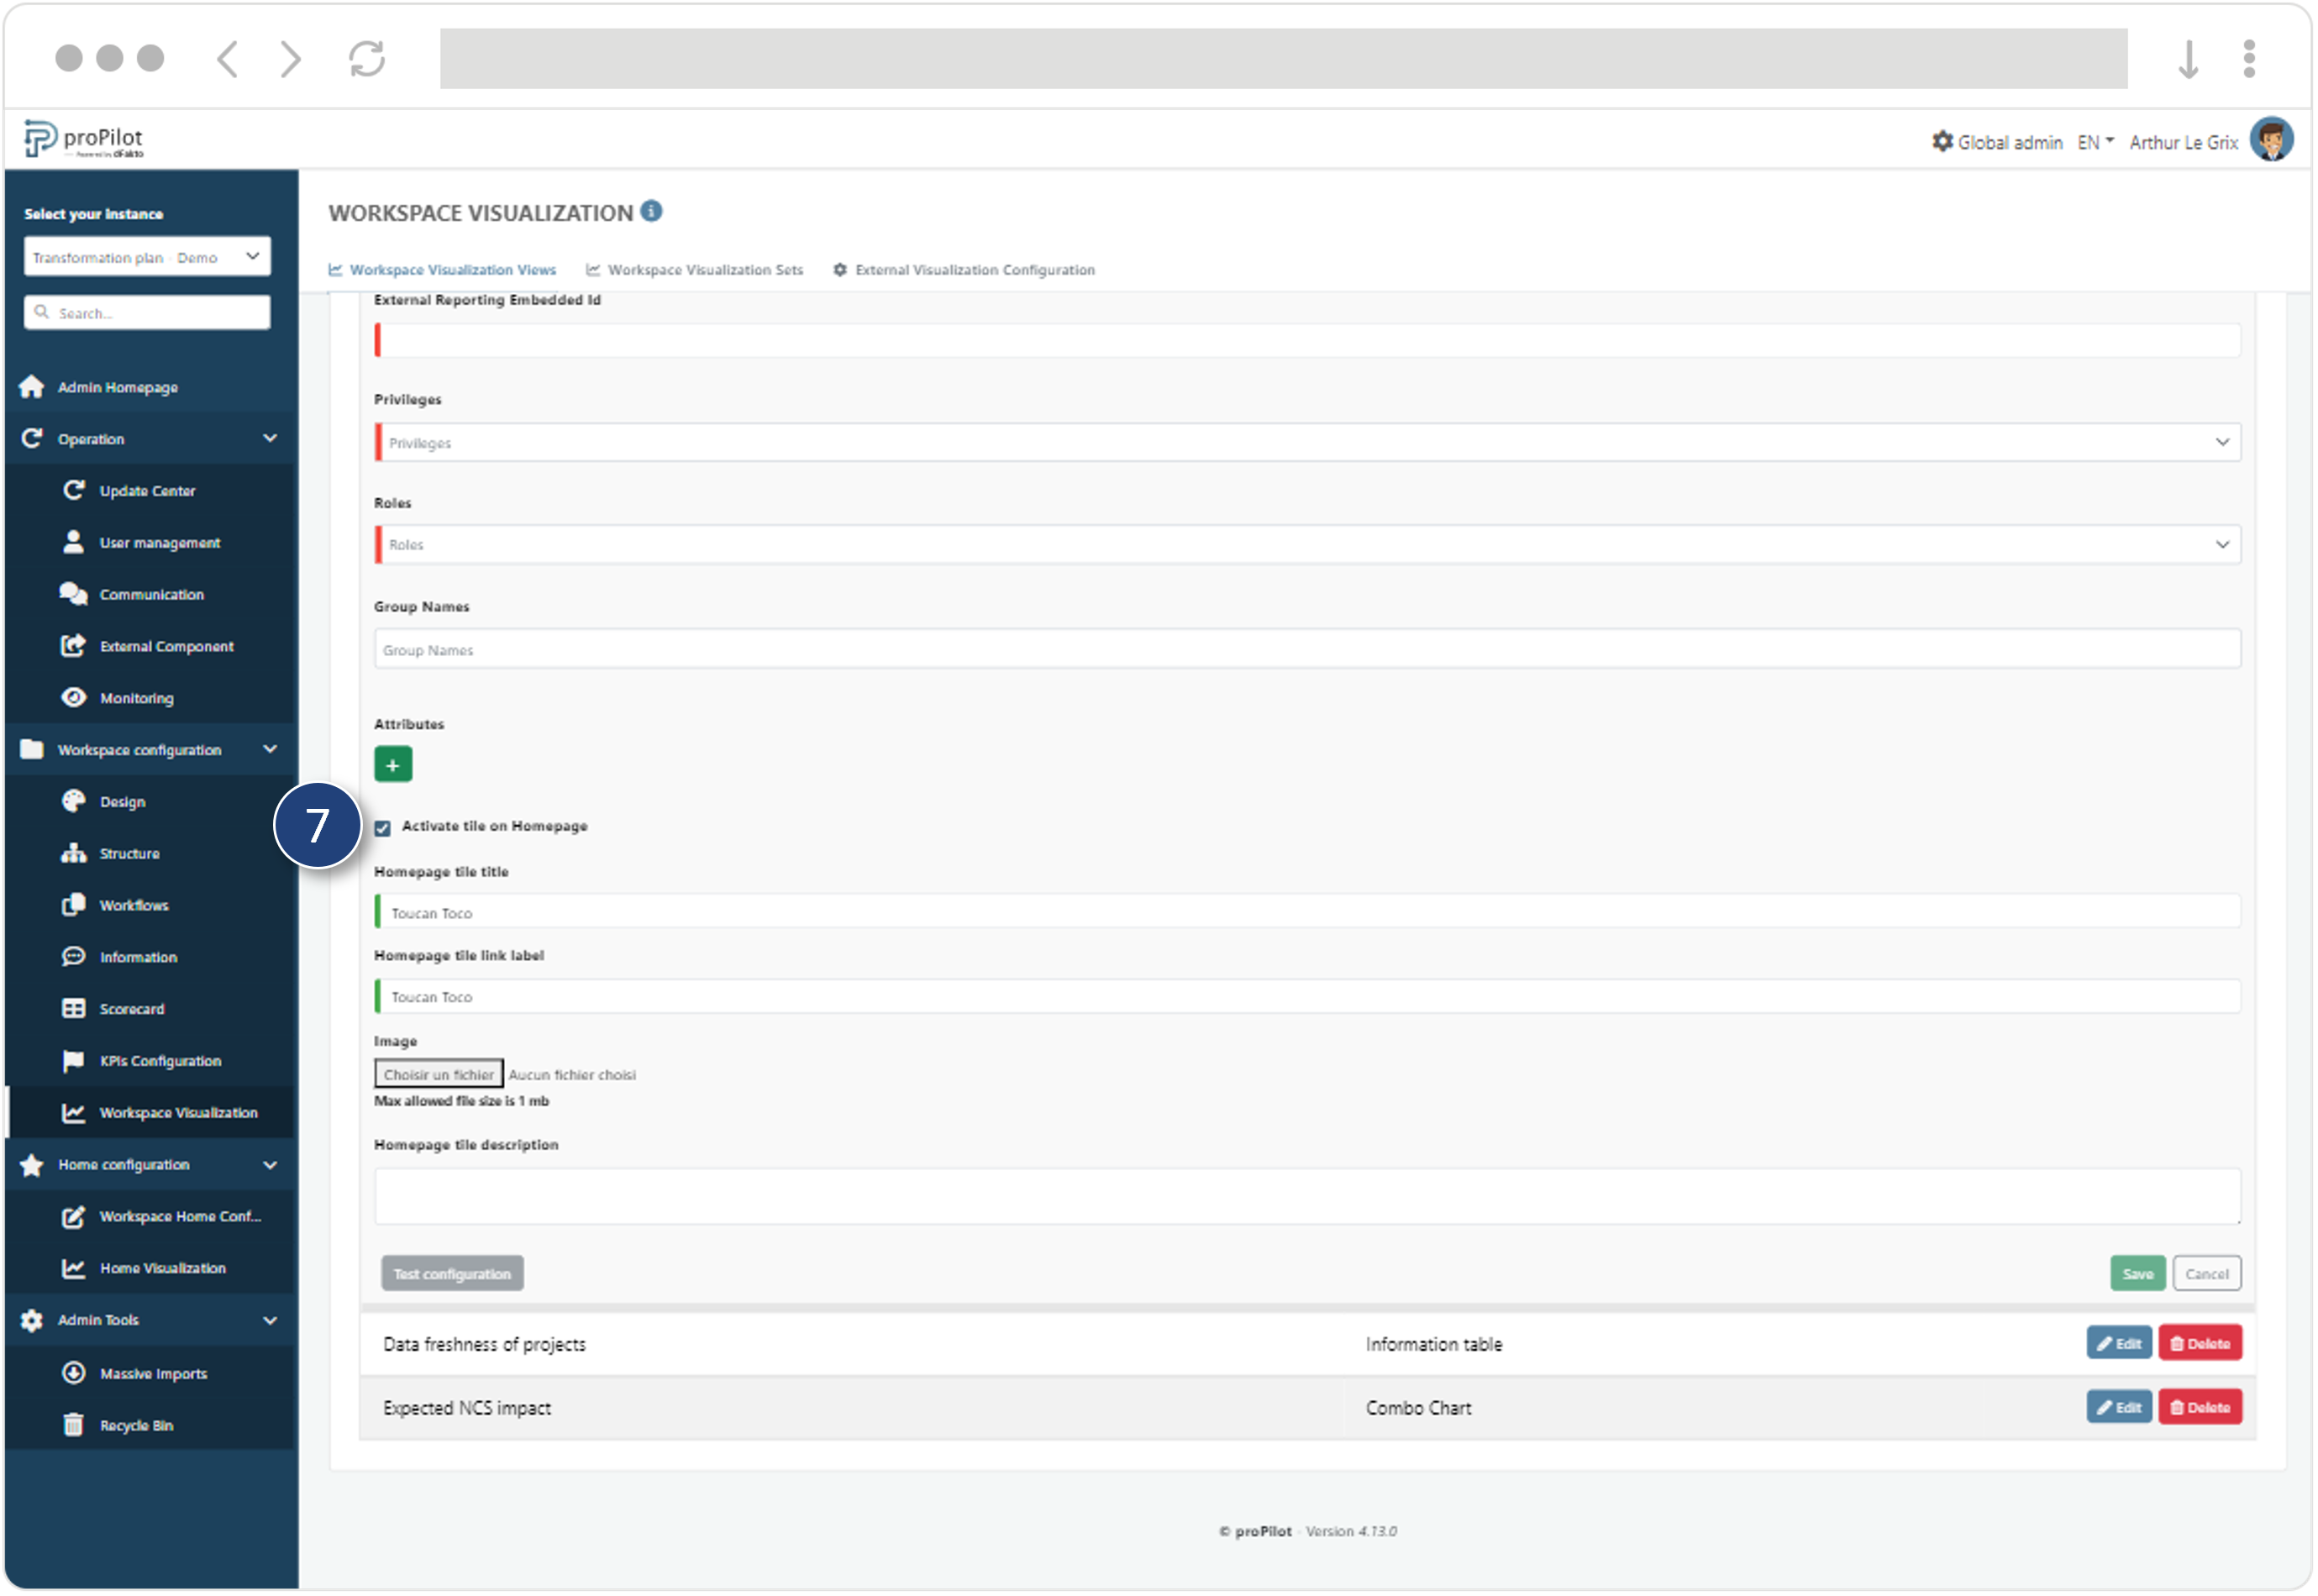
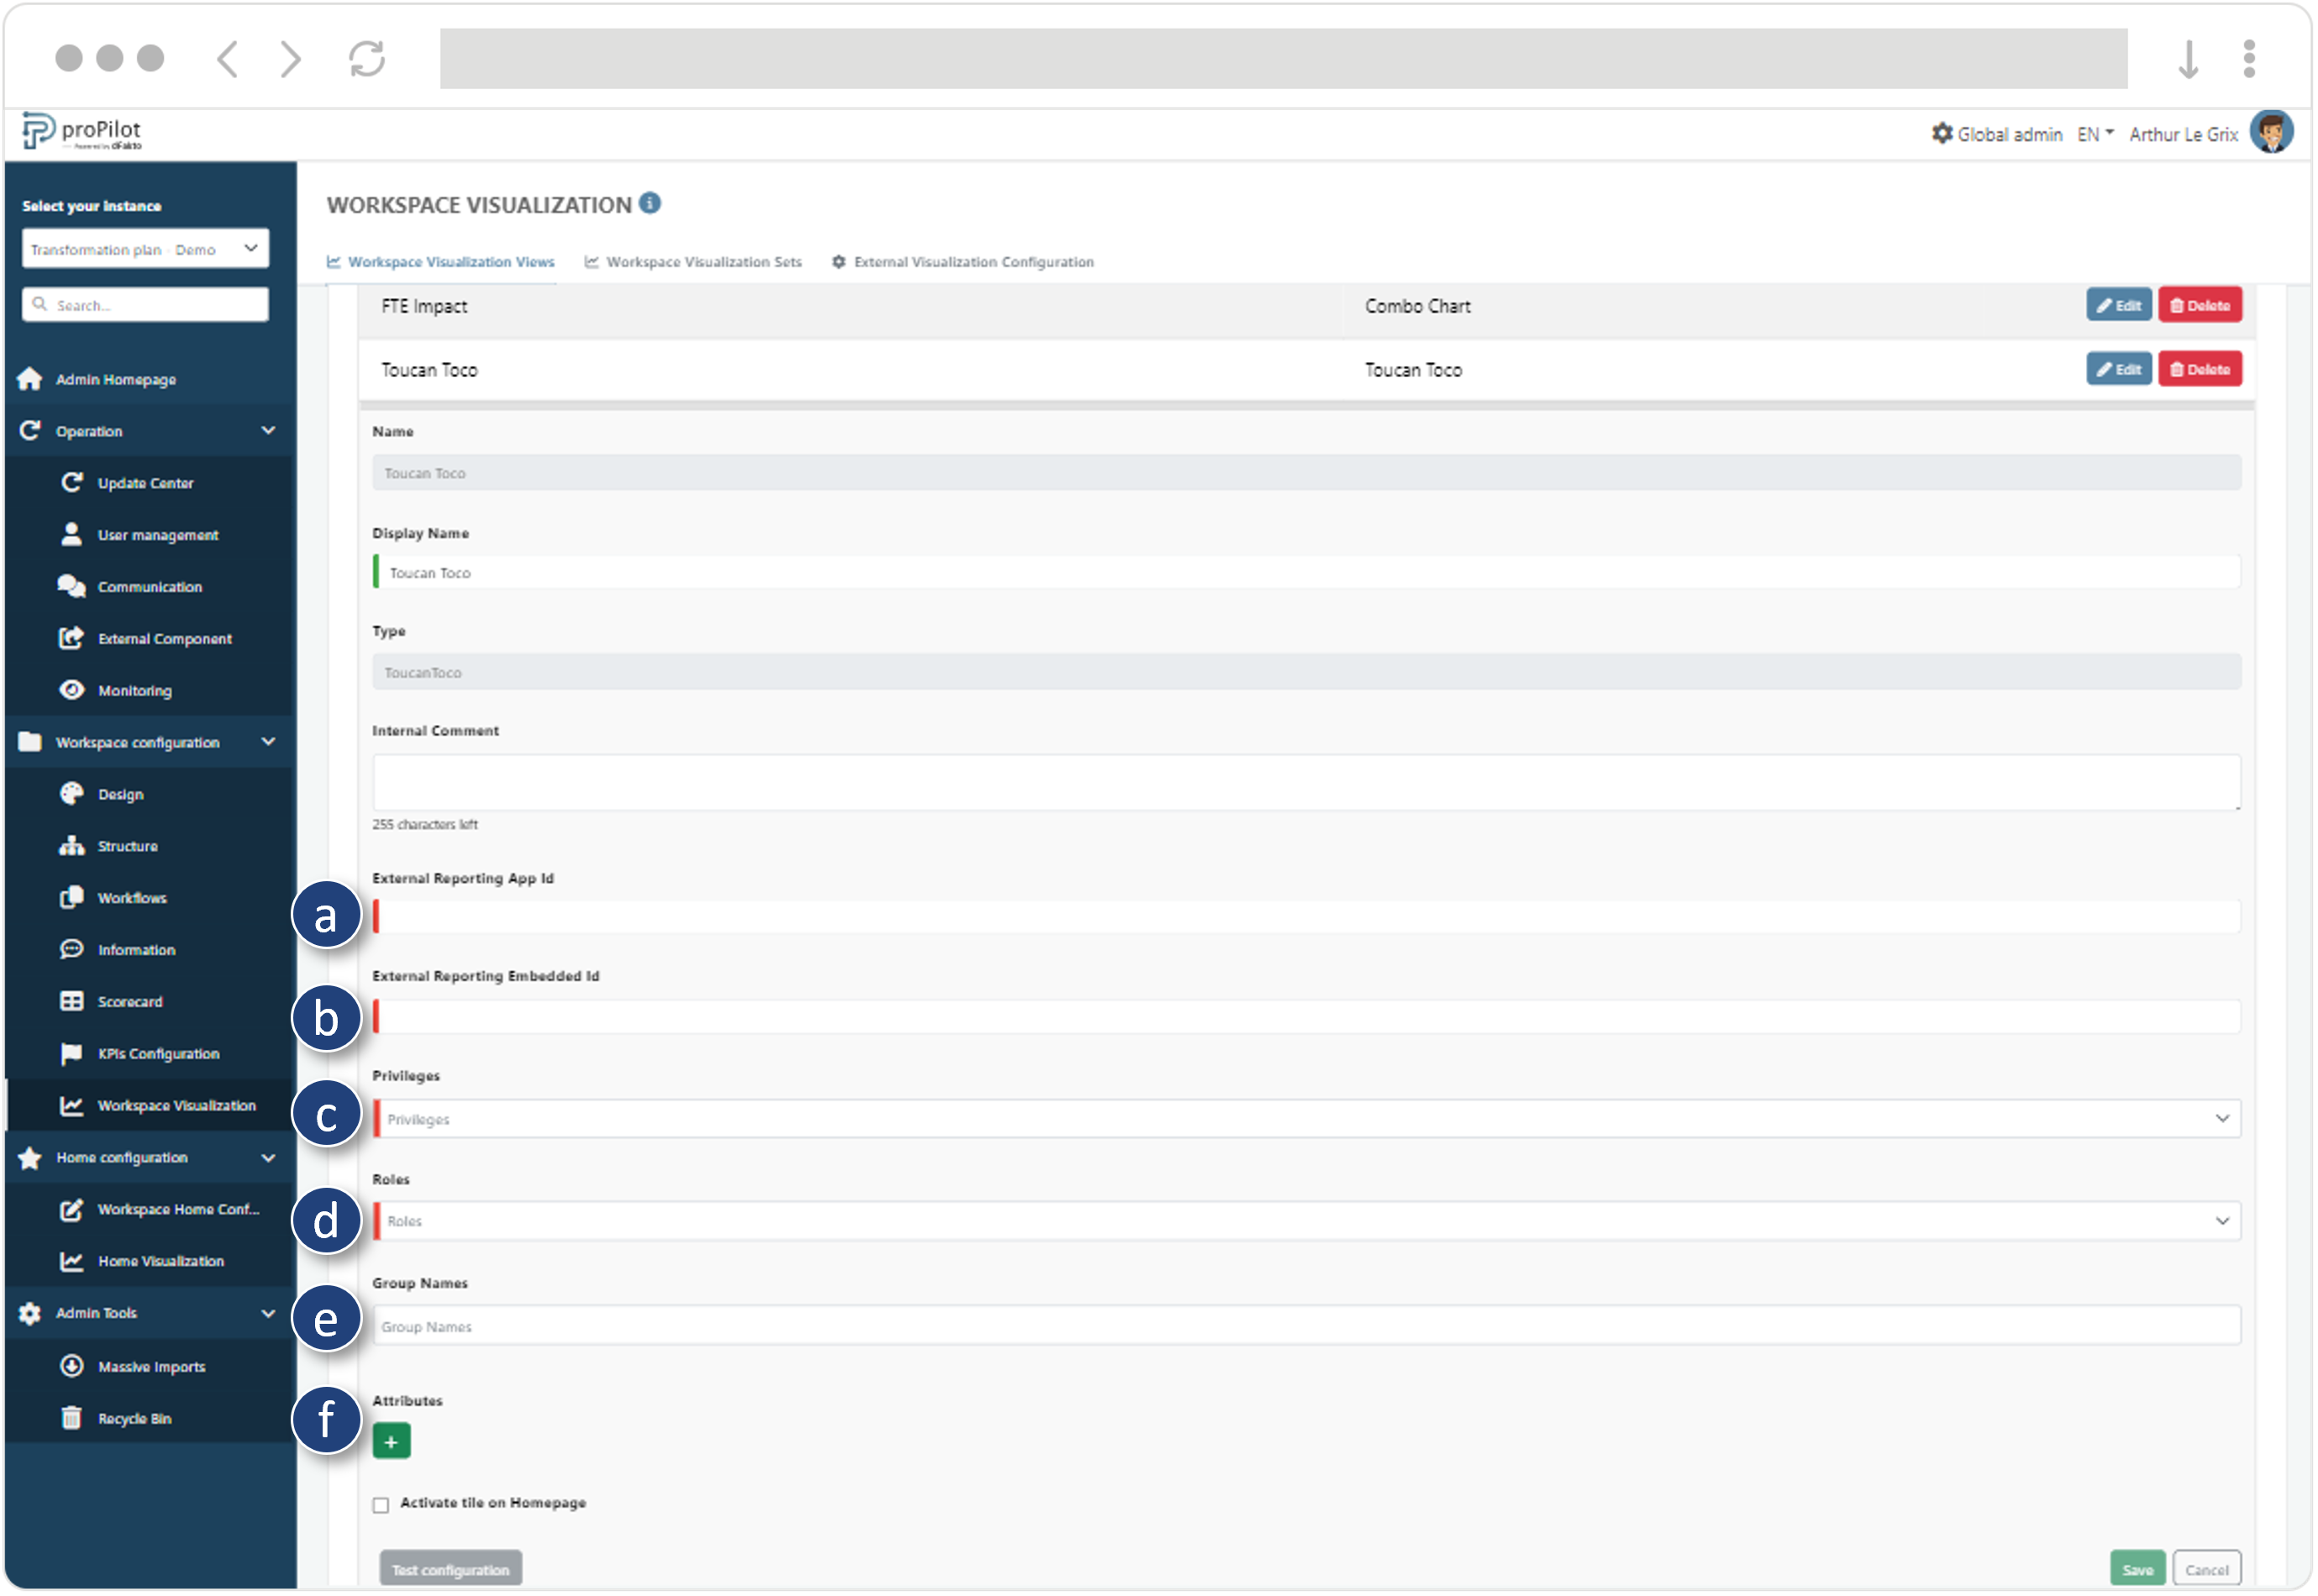
Configure the Toucan Toco view
-
Enter the Toucan Toco application ID.
-
Enter the visualisation embedded ID.
-
Enter the privileges associated with the view
-
Enter the roles associated with the view.
-
If rights are managed by group, add the group name.
-
If attributes/values keys apply, please enter them.
-
-
Activate the tile on the visualization home page of the entity to highlight your visual for users of the workspace.