Introduction
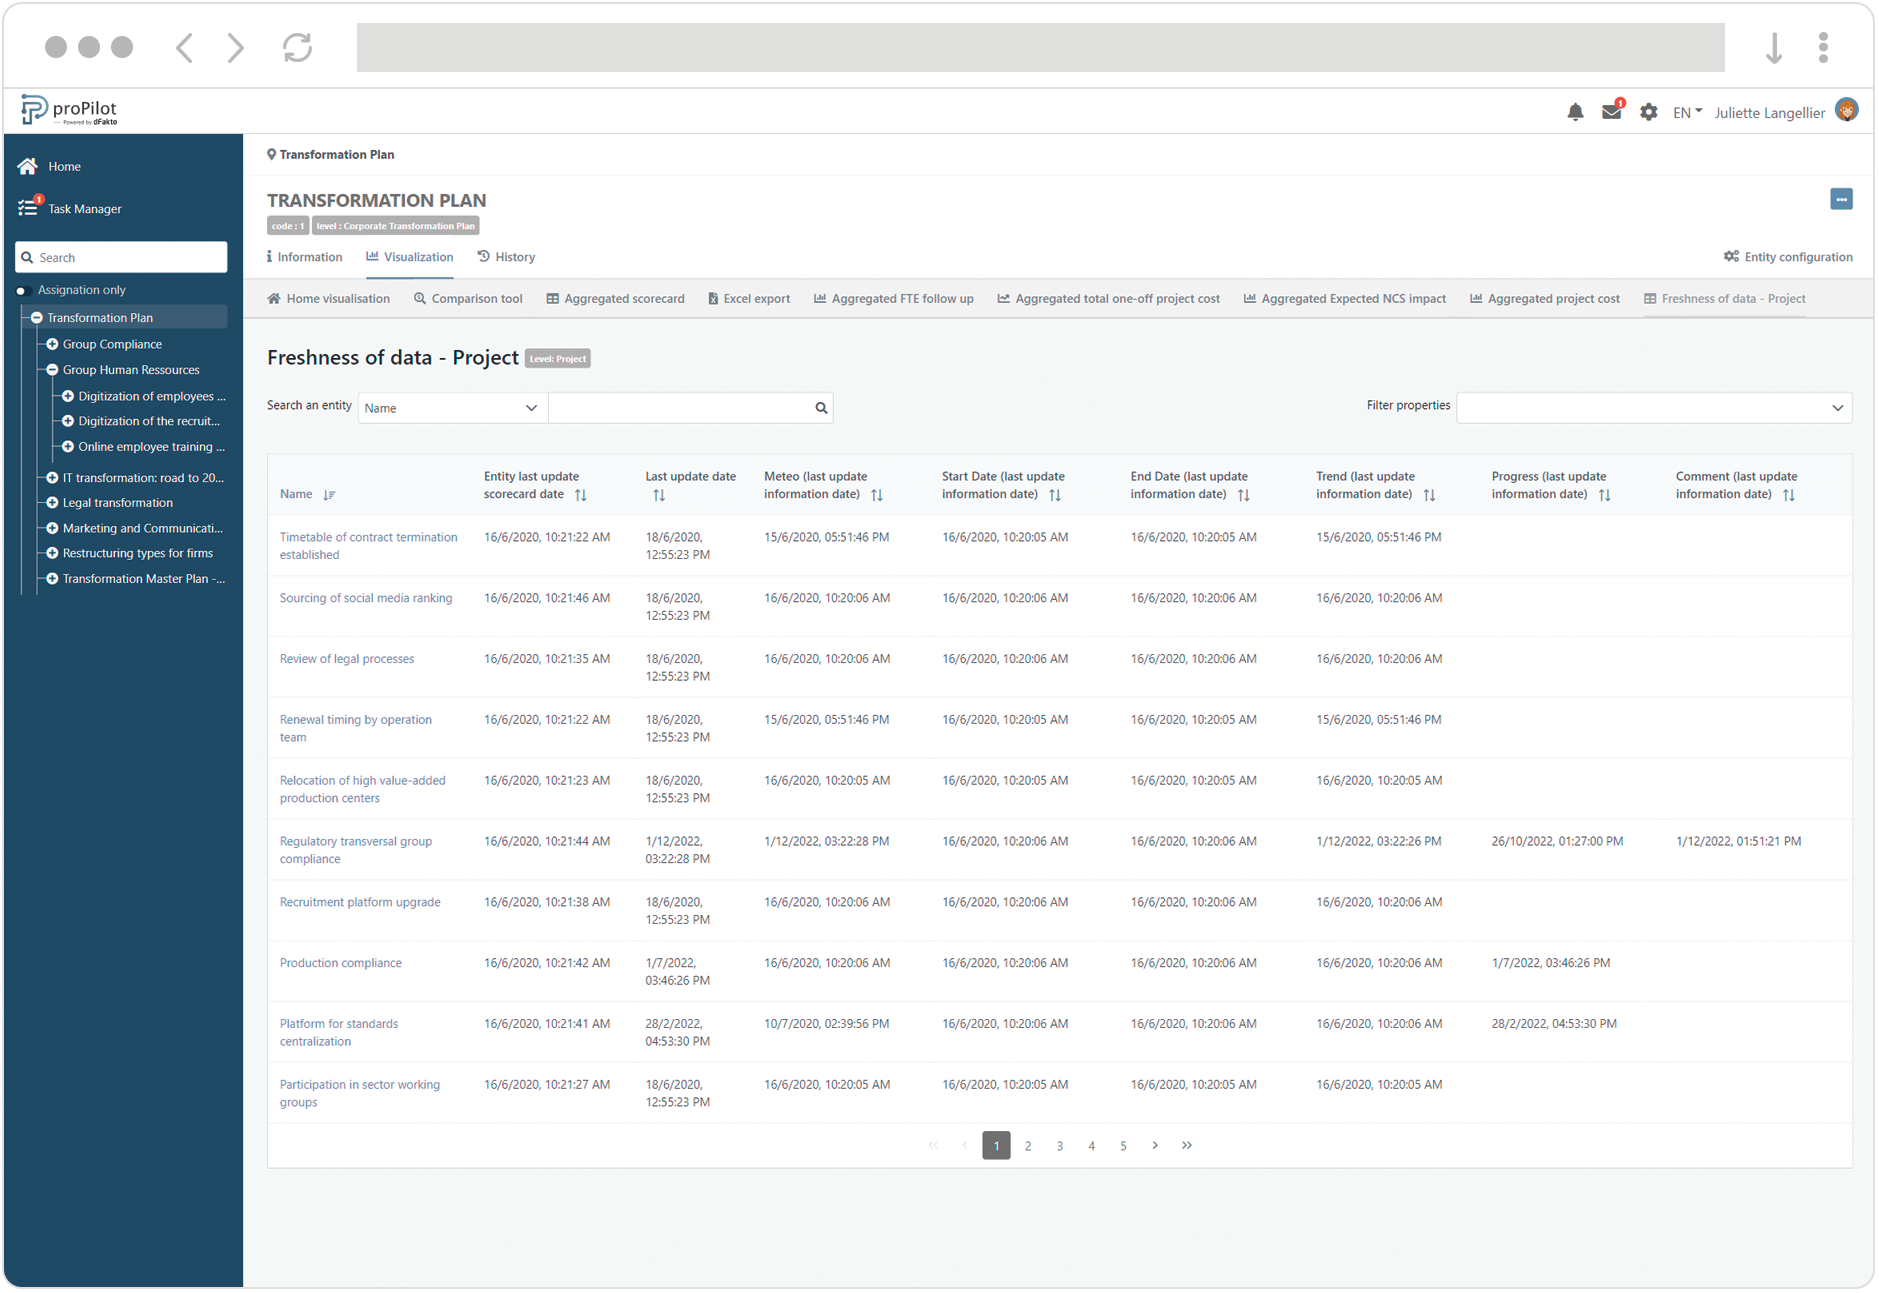
The Information Table displays the information collected in the perimeter of the current entity, at a given level of the plan. In this table, you can integrate the information values as well as their last update dates. You can filter the information and make specific searchs, directly in proPilot.
Create an information table
-
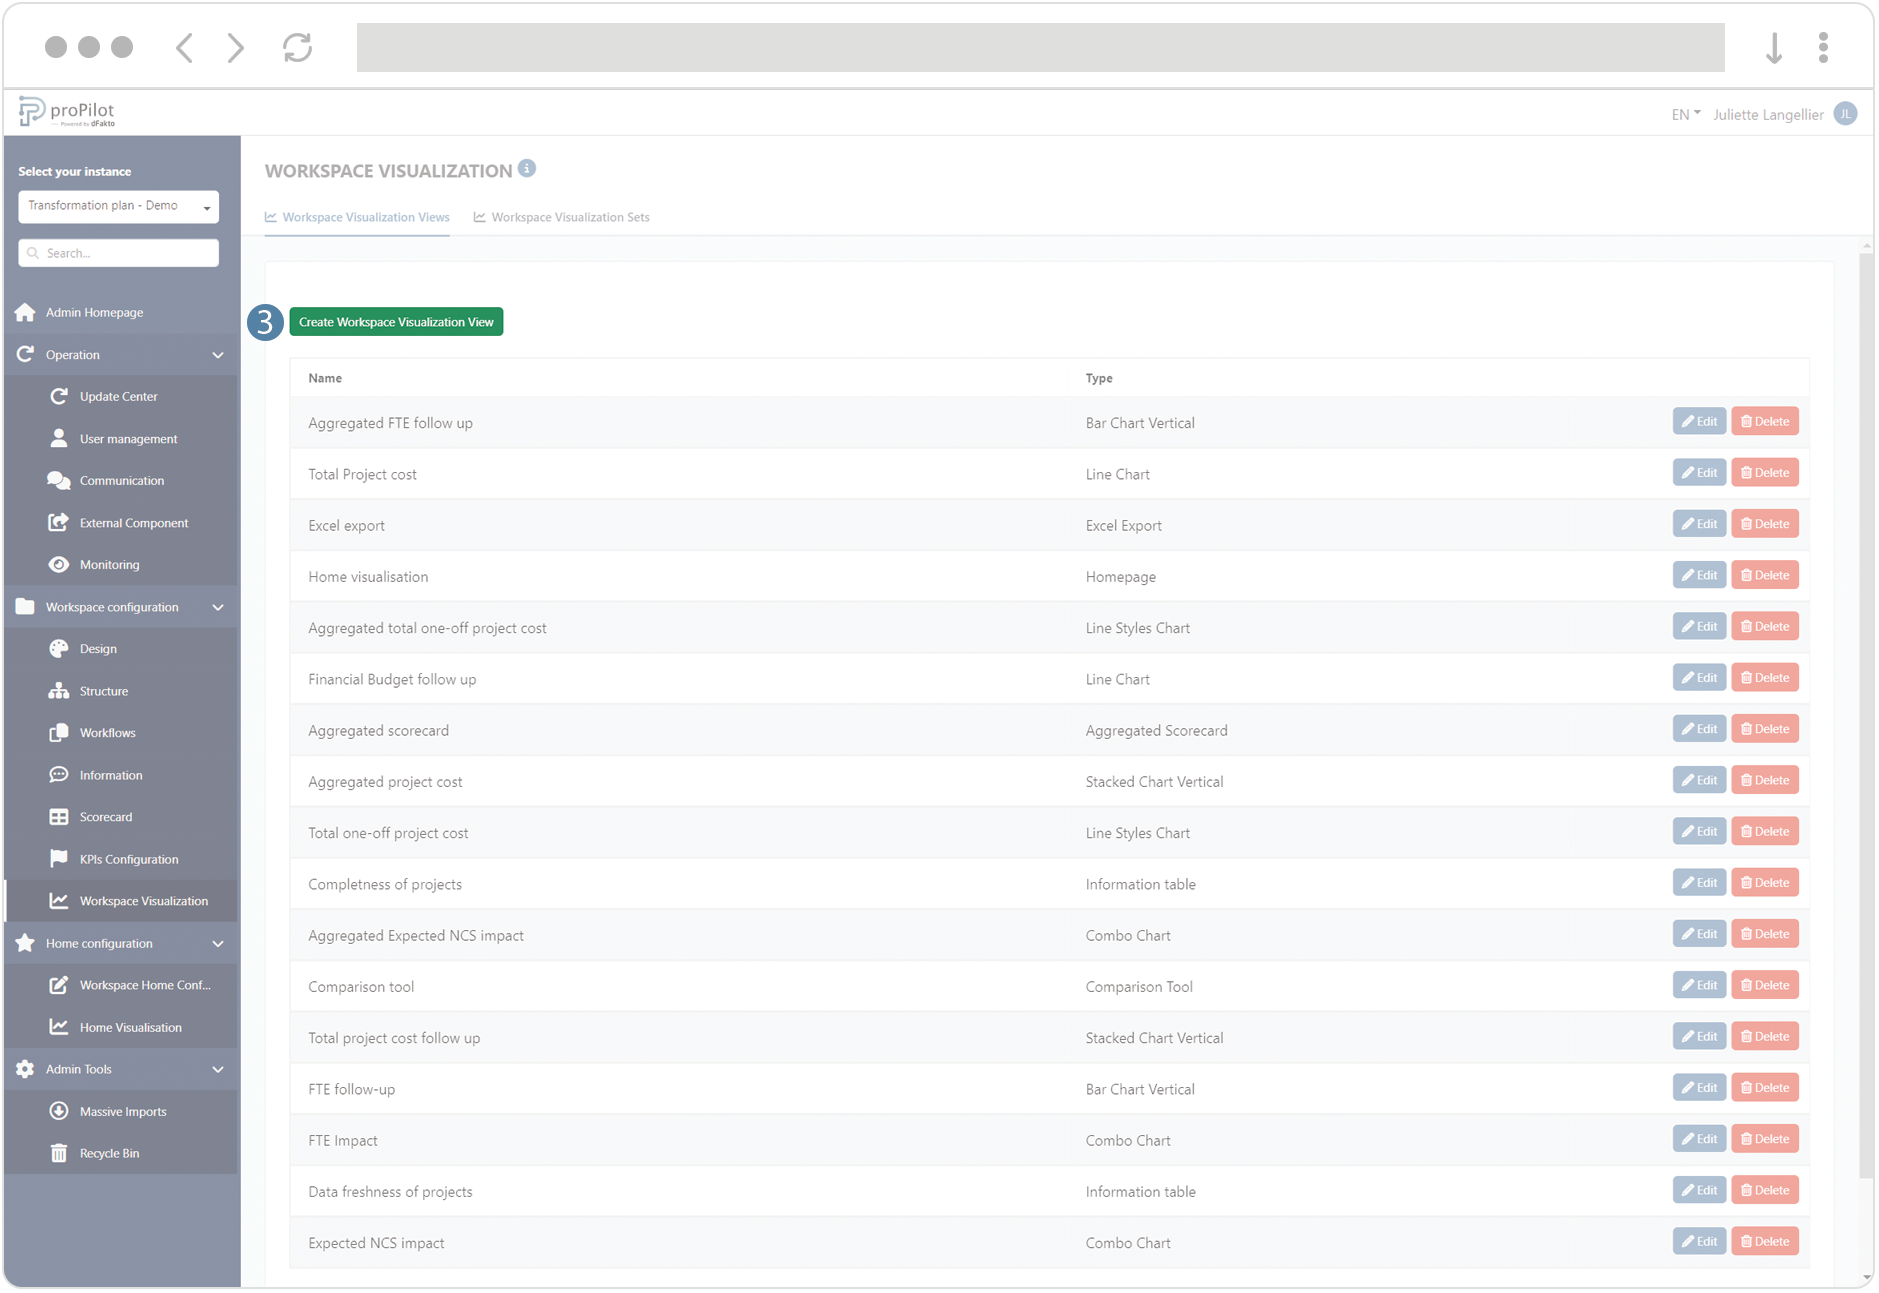
In the left menu, select "workspace configuration" and then "workspace visualization".
-
Then click on the "workspace visualization views" tab.

-
Click on the "create workspace visualization view" button. A pop-up window will open.
-
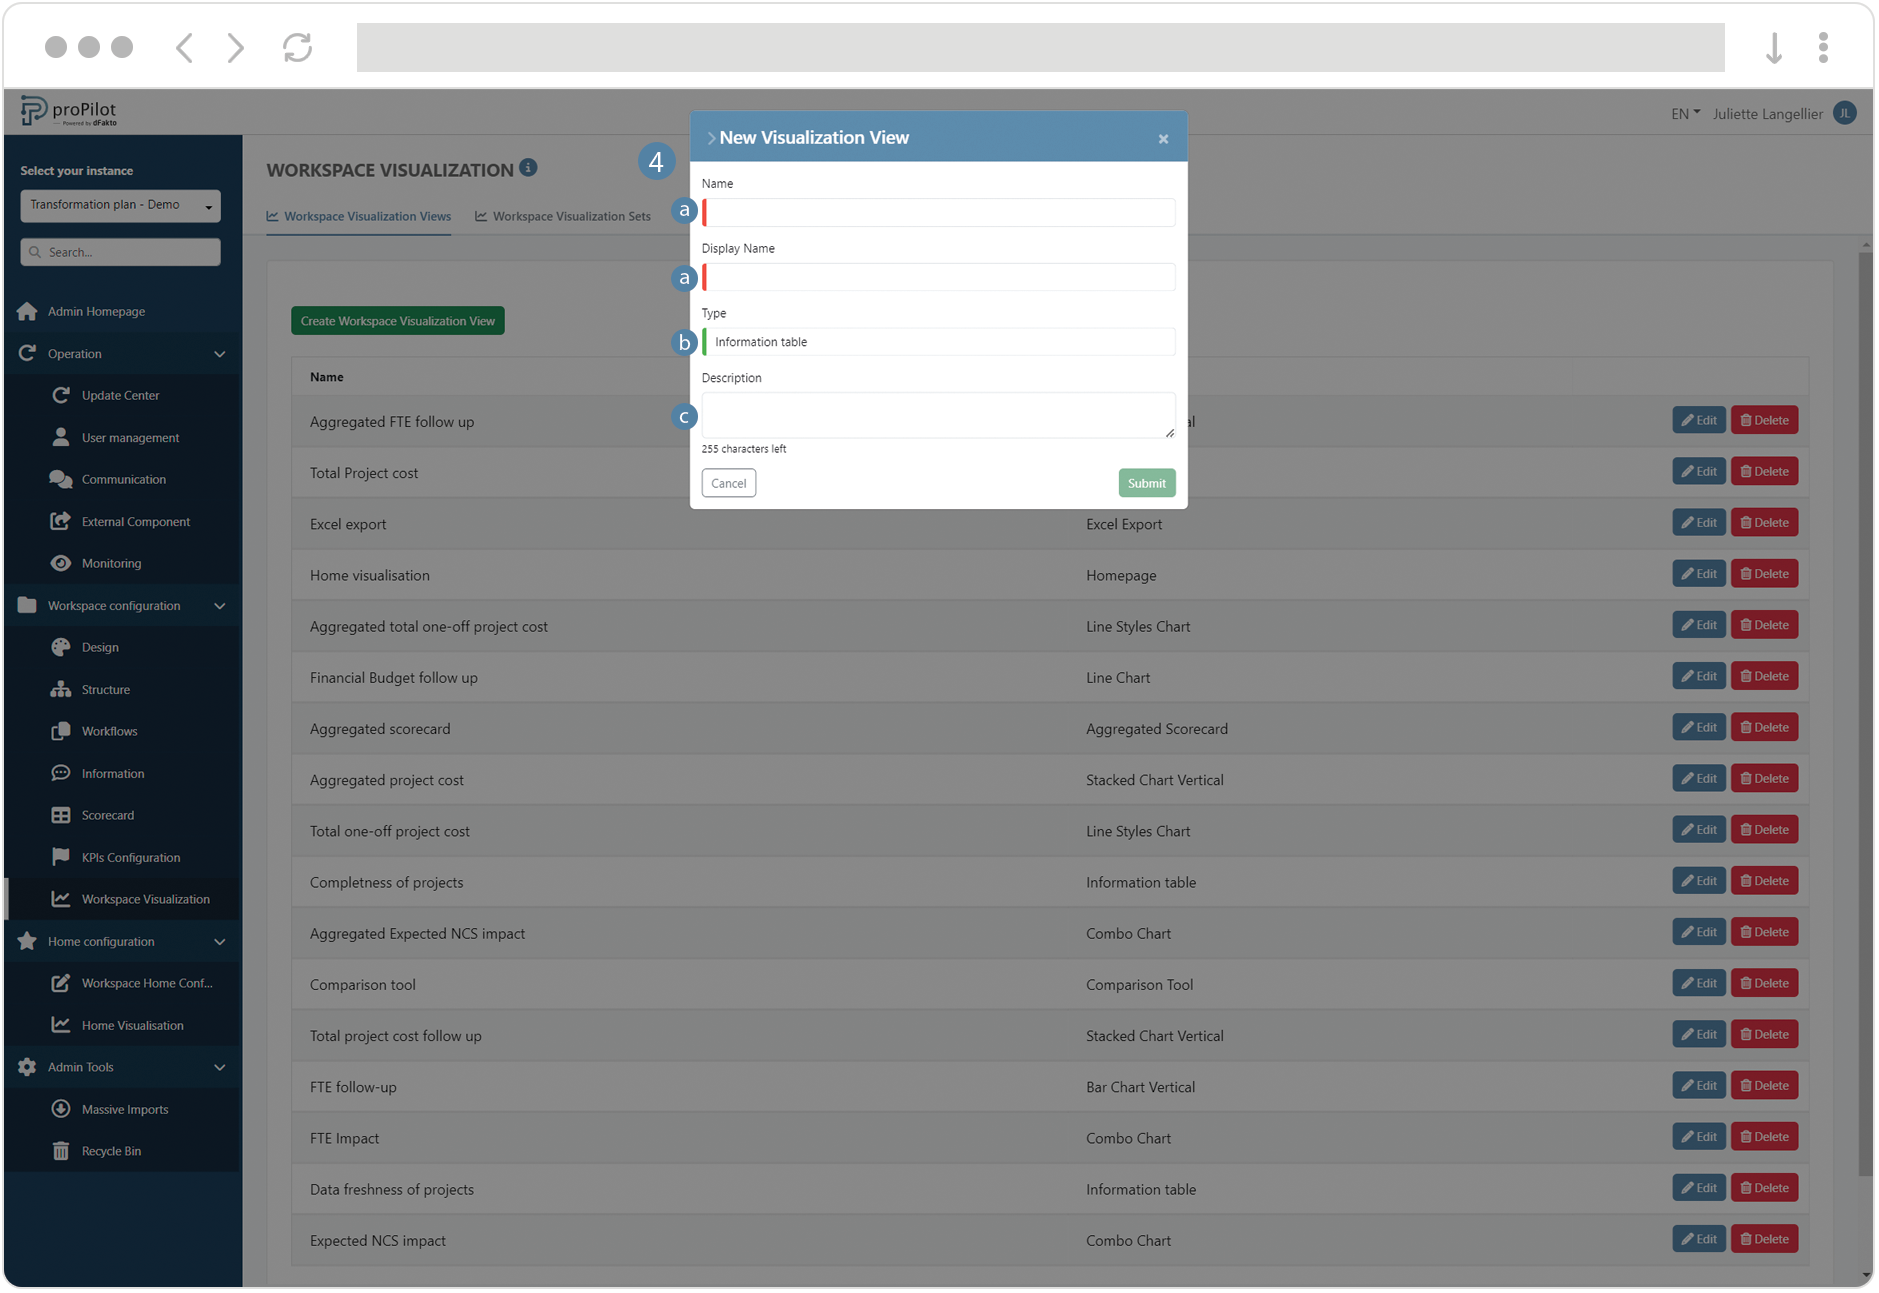
Fill the following fields :
-
(technical name) and display name
-
Choose the type of visualization "Information Table"
-
Add a description if necessary
-
-
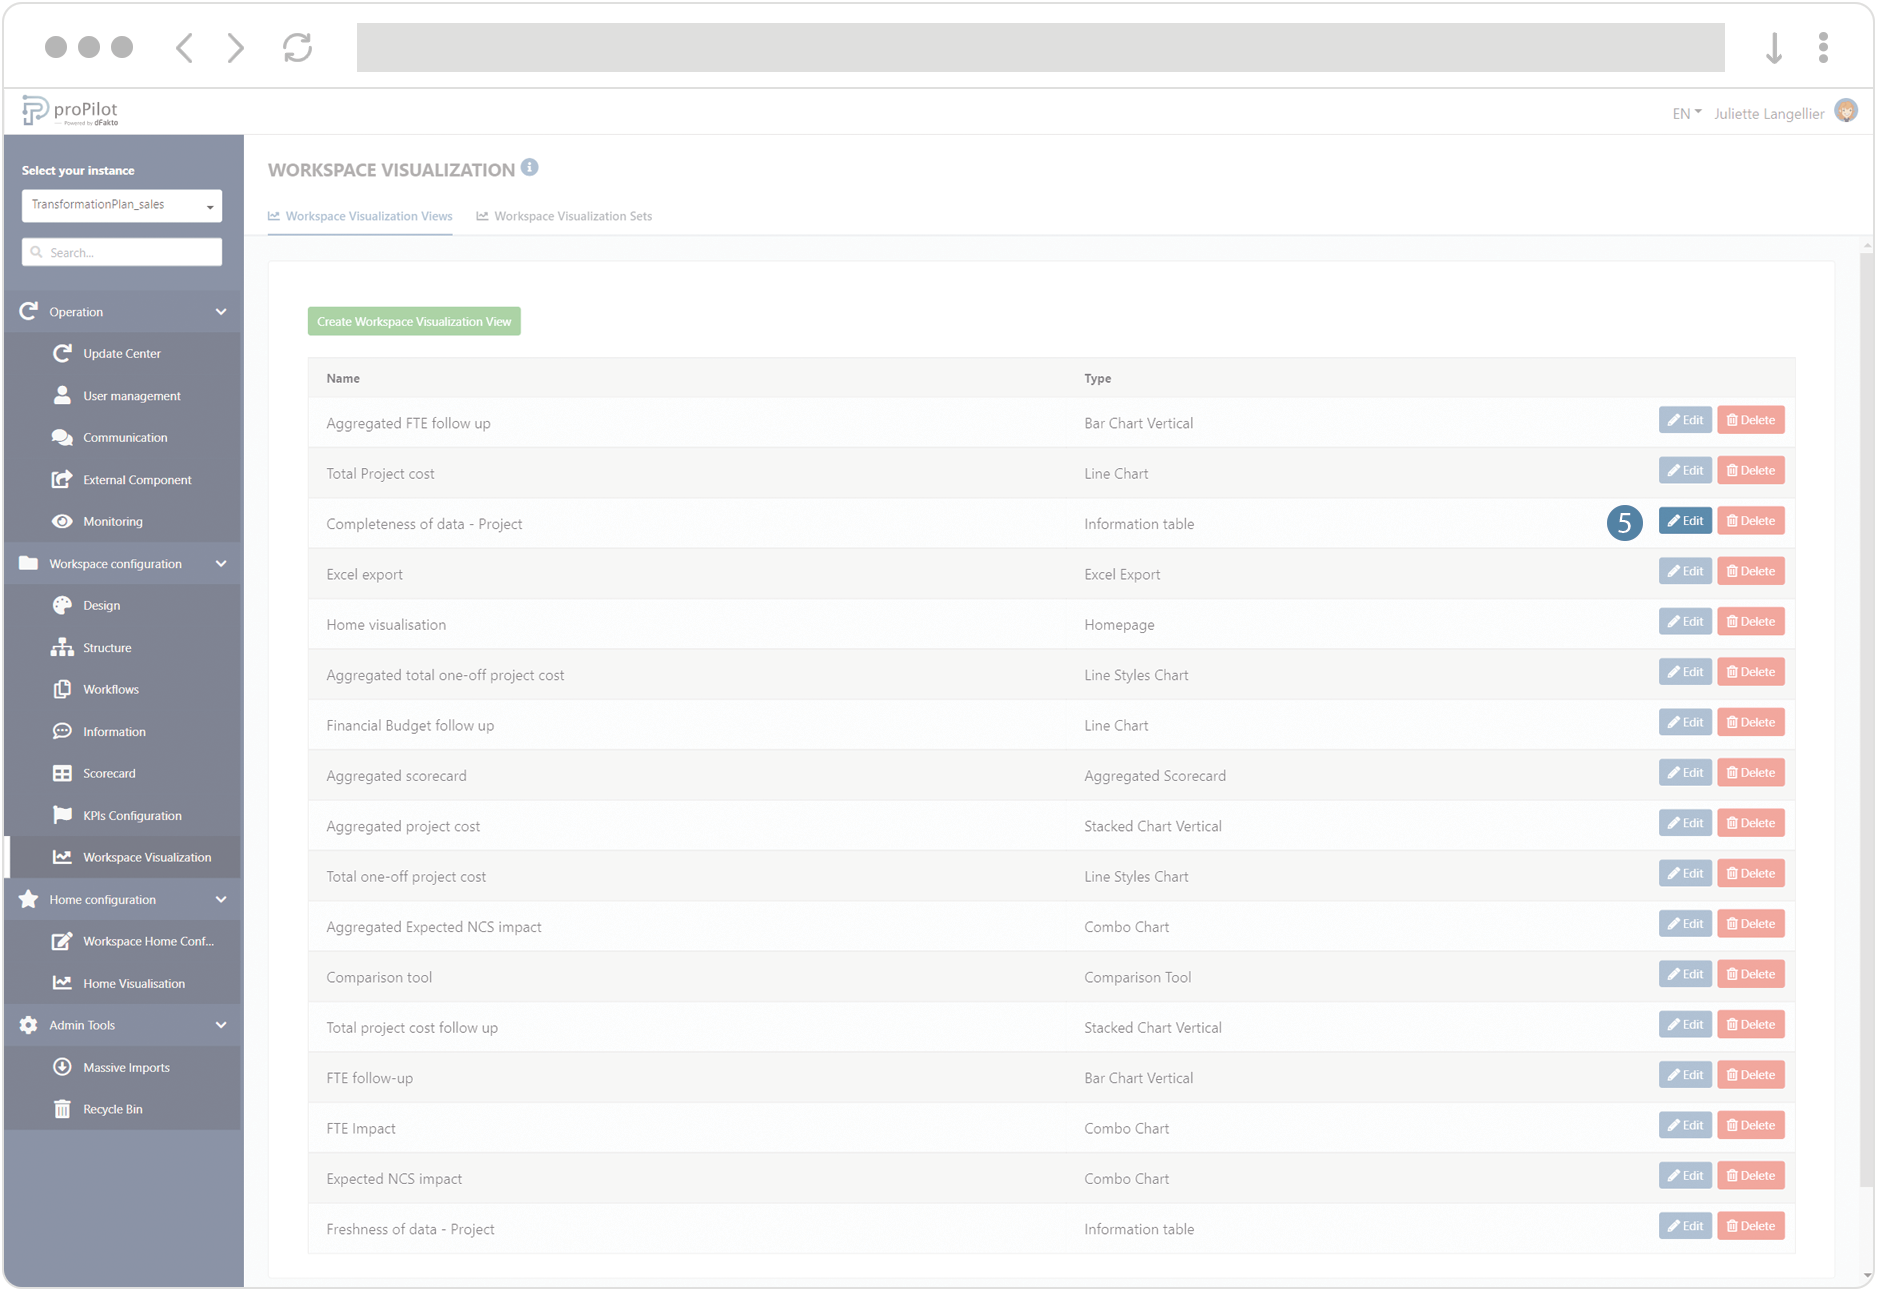
Save the visualization view, then click on the “Edit” button.
-
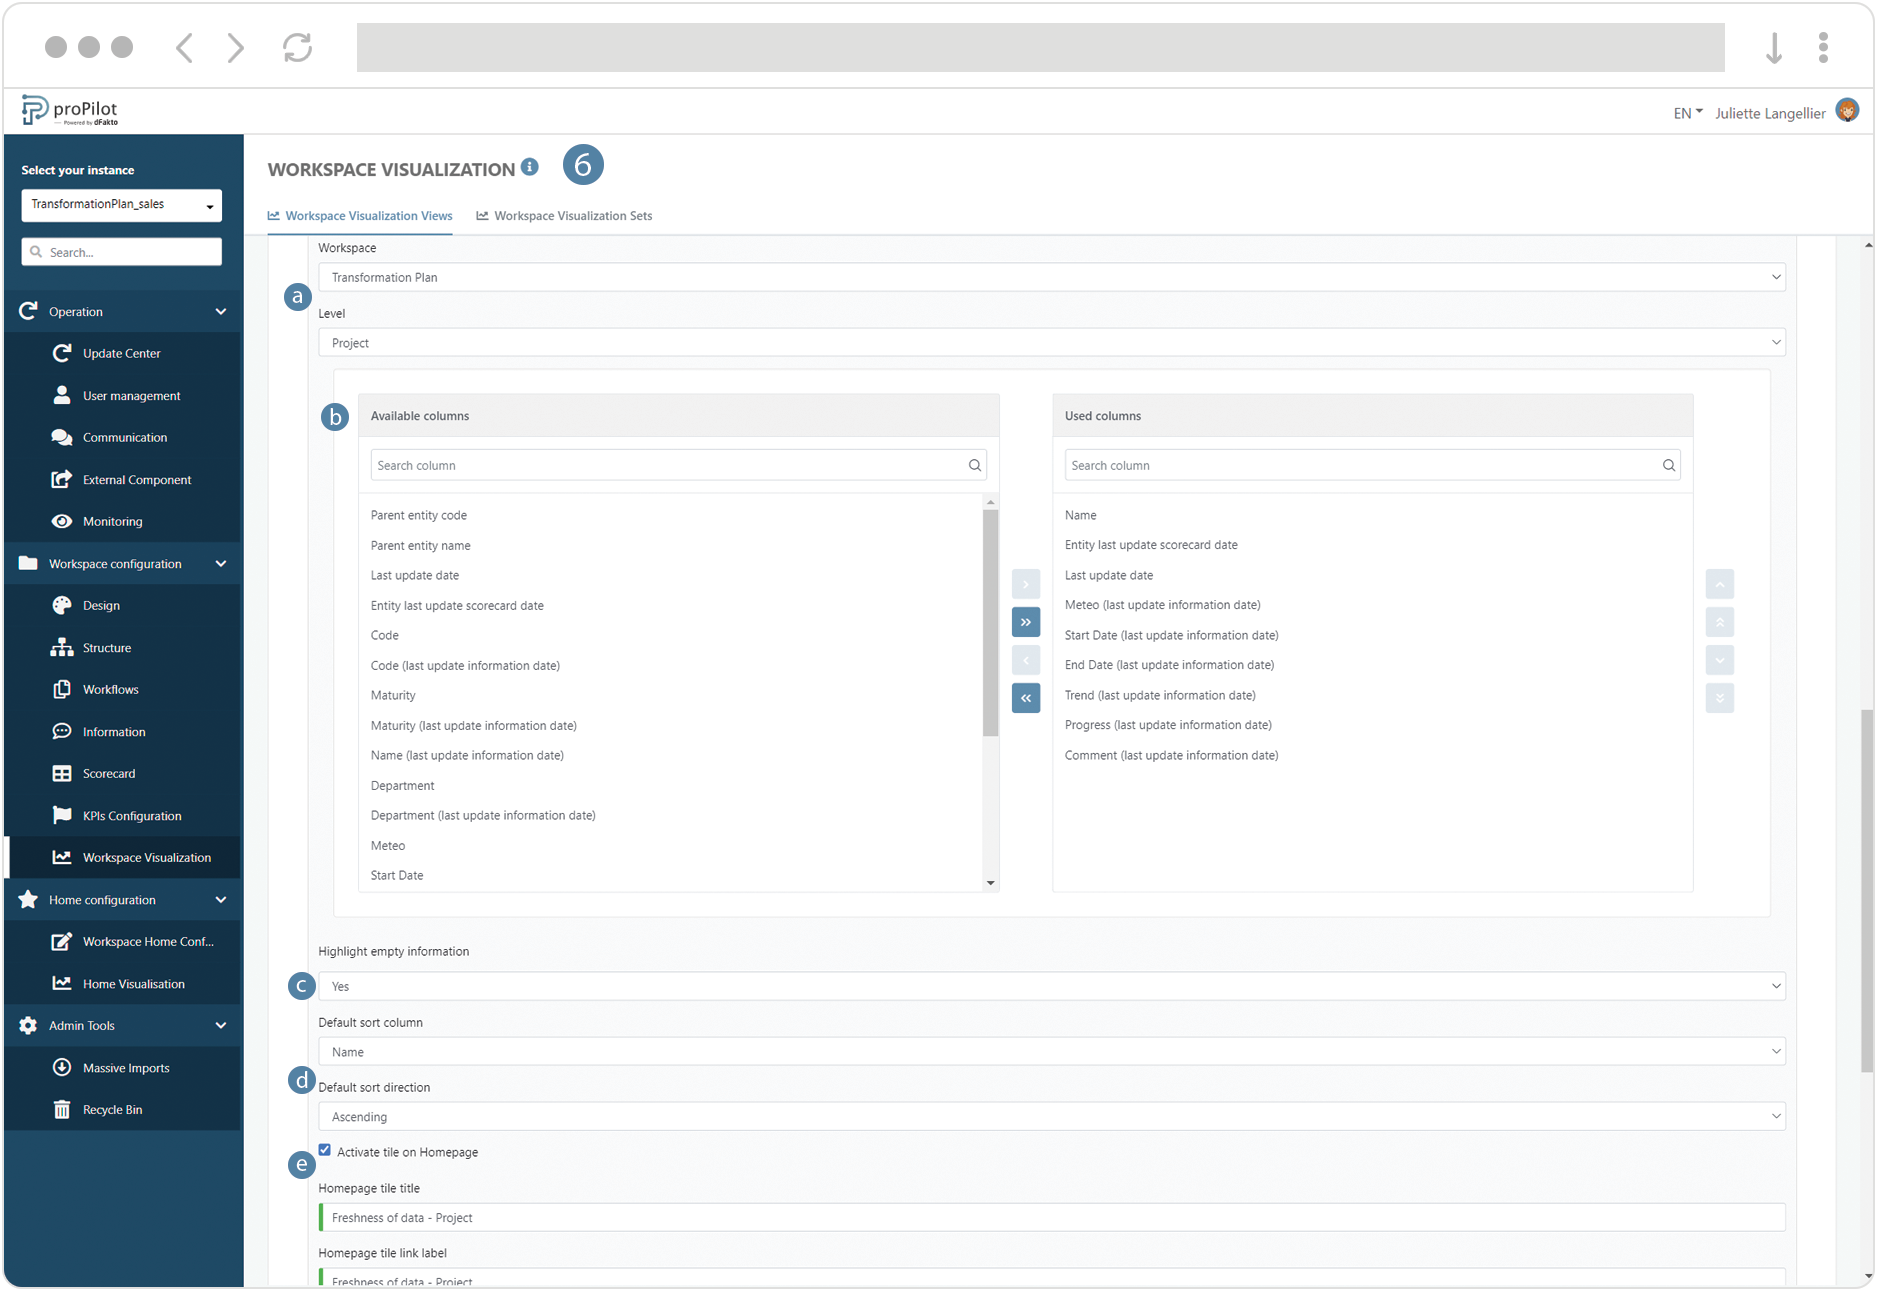
Configure the information table :
-
Select the workspace and the level for which you want to display information
-
Add the information to include in the table
-
Choose whether to highlight entities for which some pieces of information are missing
-
Choose the default sort column and default sort order
-
You can activate the tile for the homepage of the visualization module in the entity and configure its title, description, label link and image
-