Workspace: Digitalize your plan to collect and share information
Introduction
Discover your workspace. Here you can go through your entire plan according to your assignments. You can also update or adapt it in real time.
Navigating in the workspace
Browse through your workspace
Use the side banner on the left side of your screen to navigate through your organization’s overview.
Click on the + to expand the tree view.
Activate the My Assignments Only button to display only the entities to which you are assigned.
Easily find your entities using the search bar, search for entity names or codes.
Click on the Home tab to return directly to the home page

Create, move and delete entities via the action menu
Create new entities in your plan in a few clicks
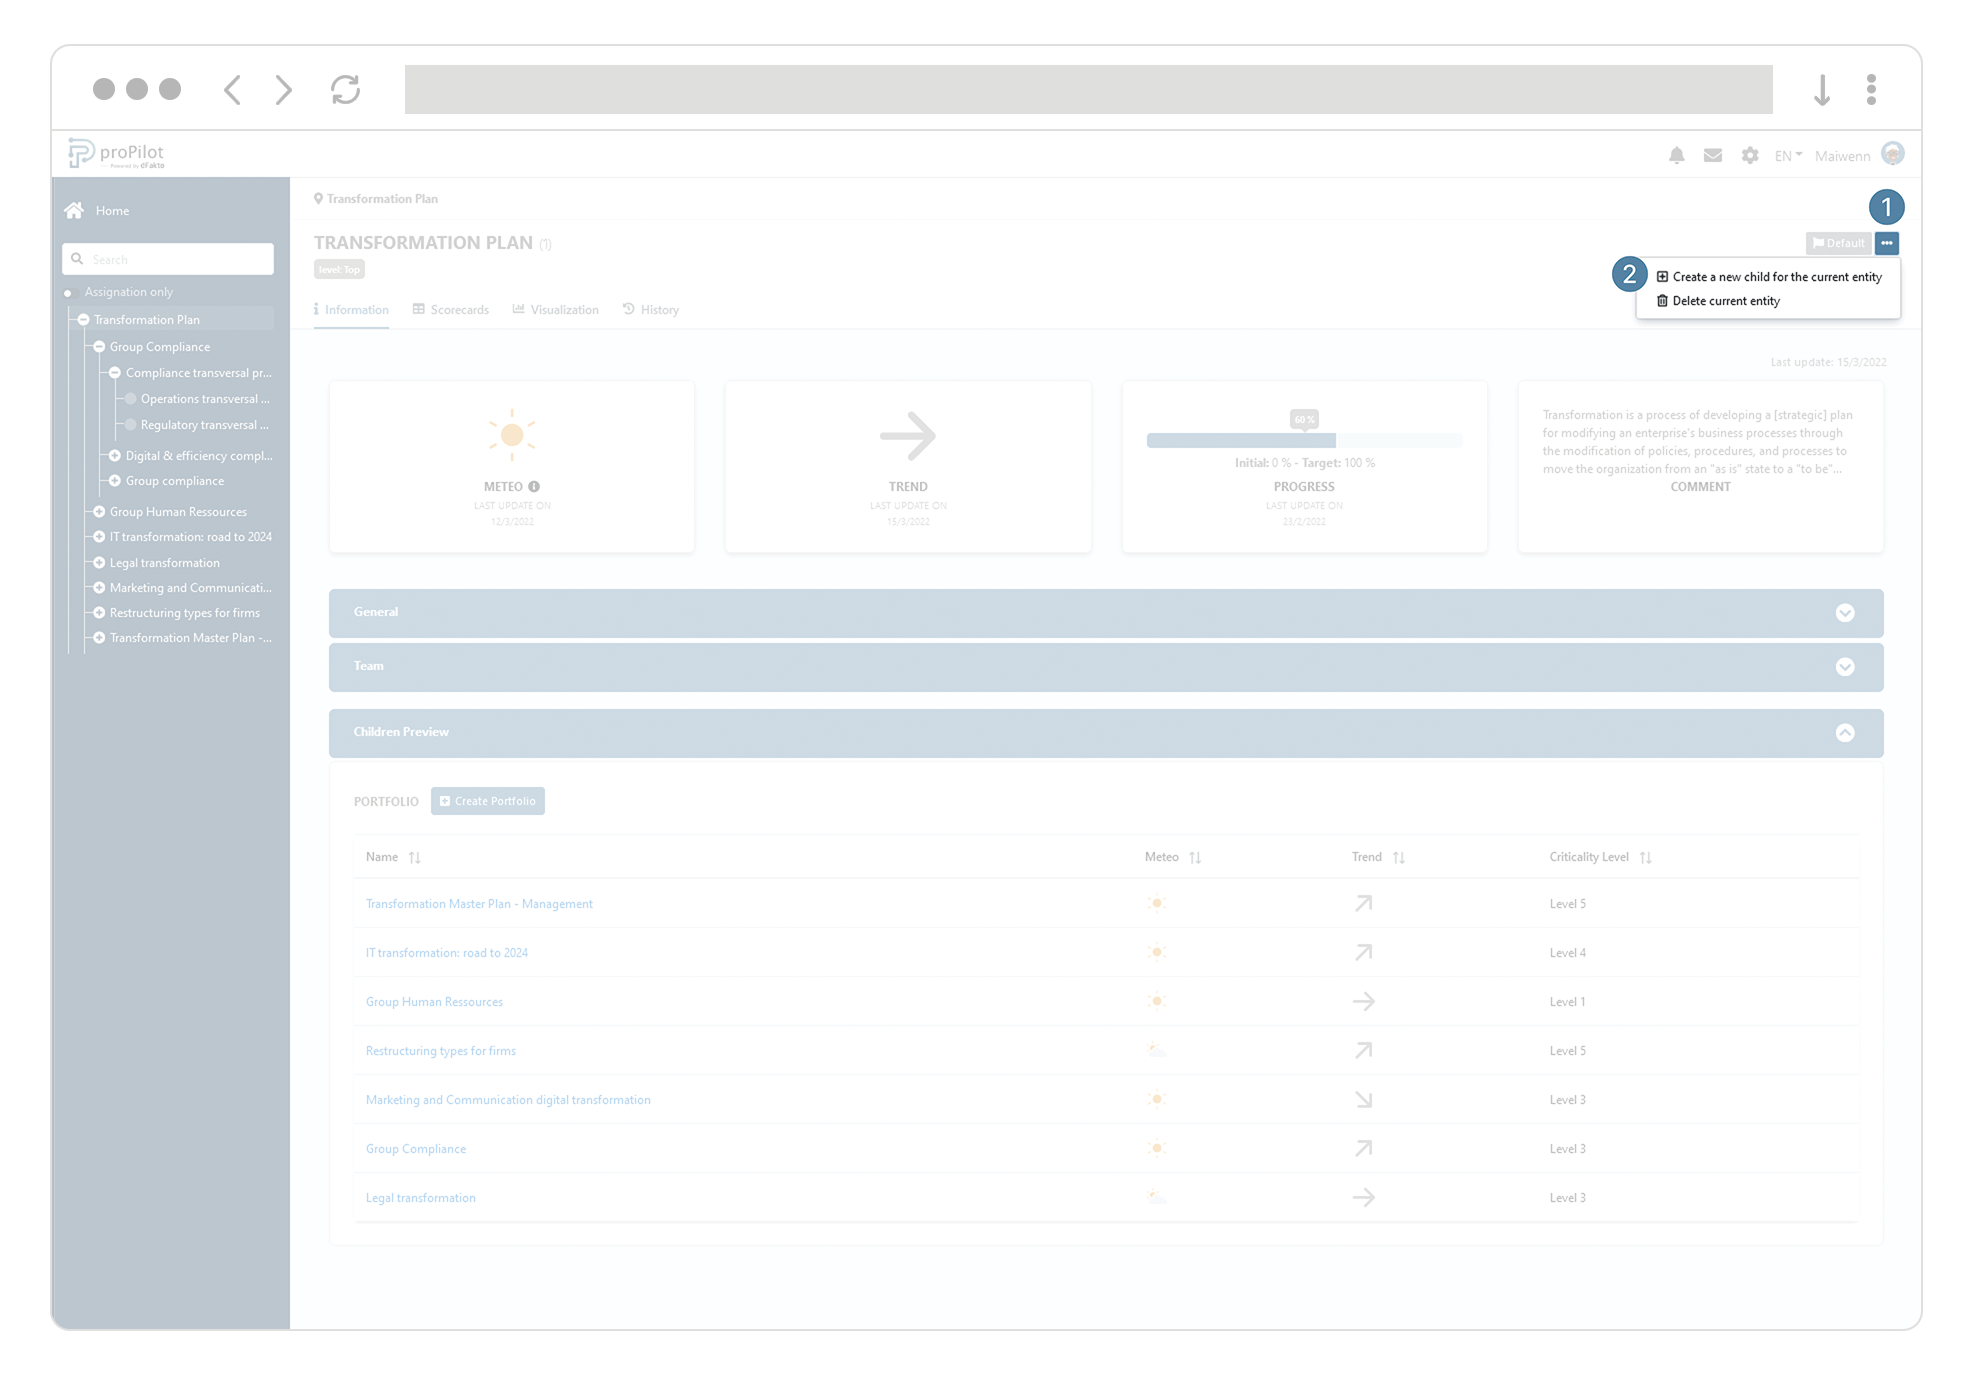
On the right side of your entity’s screen, click on the three dots '...' to access the action menu.
Click on "Create a new sub-entity", fill in the required information and confirm.

Move your entity through your plan.
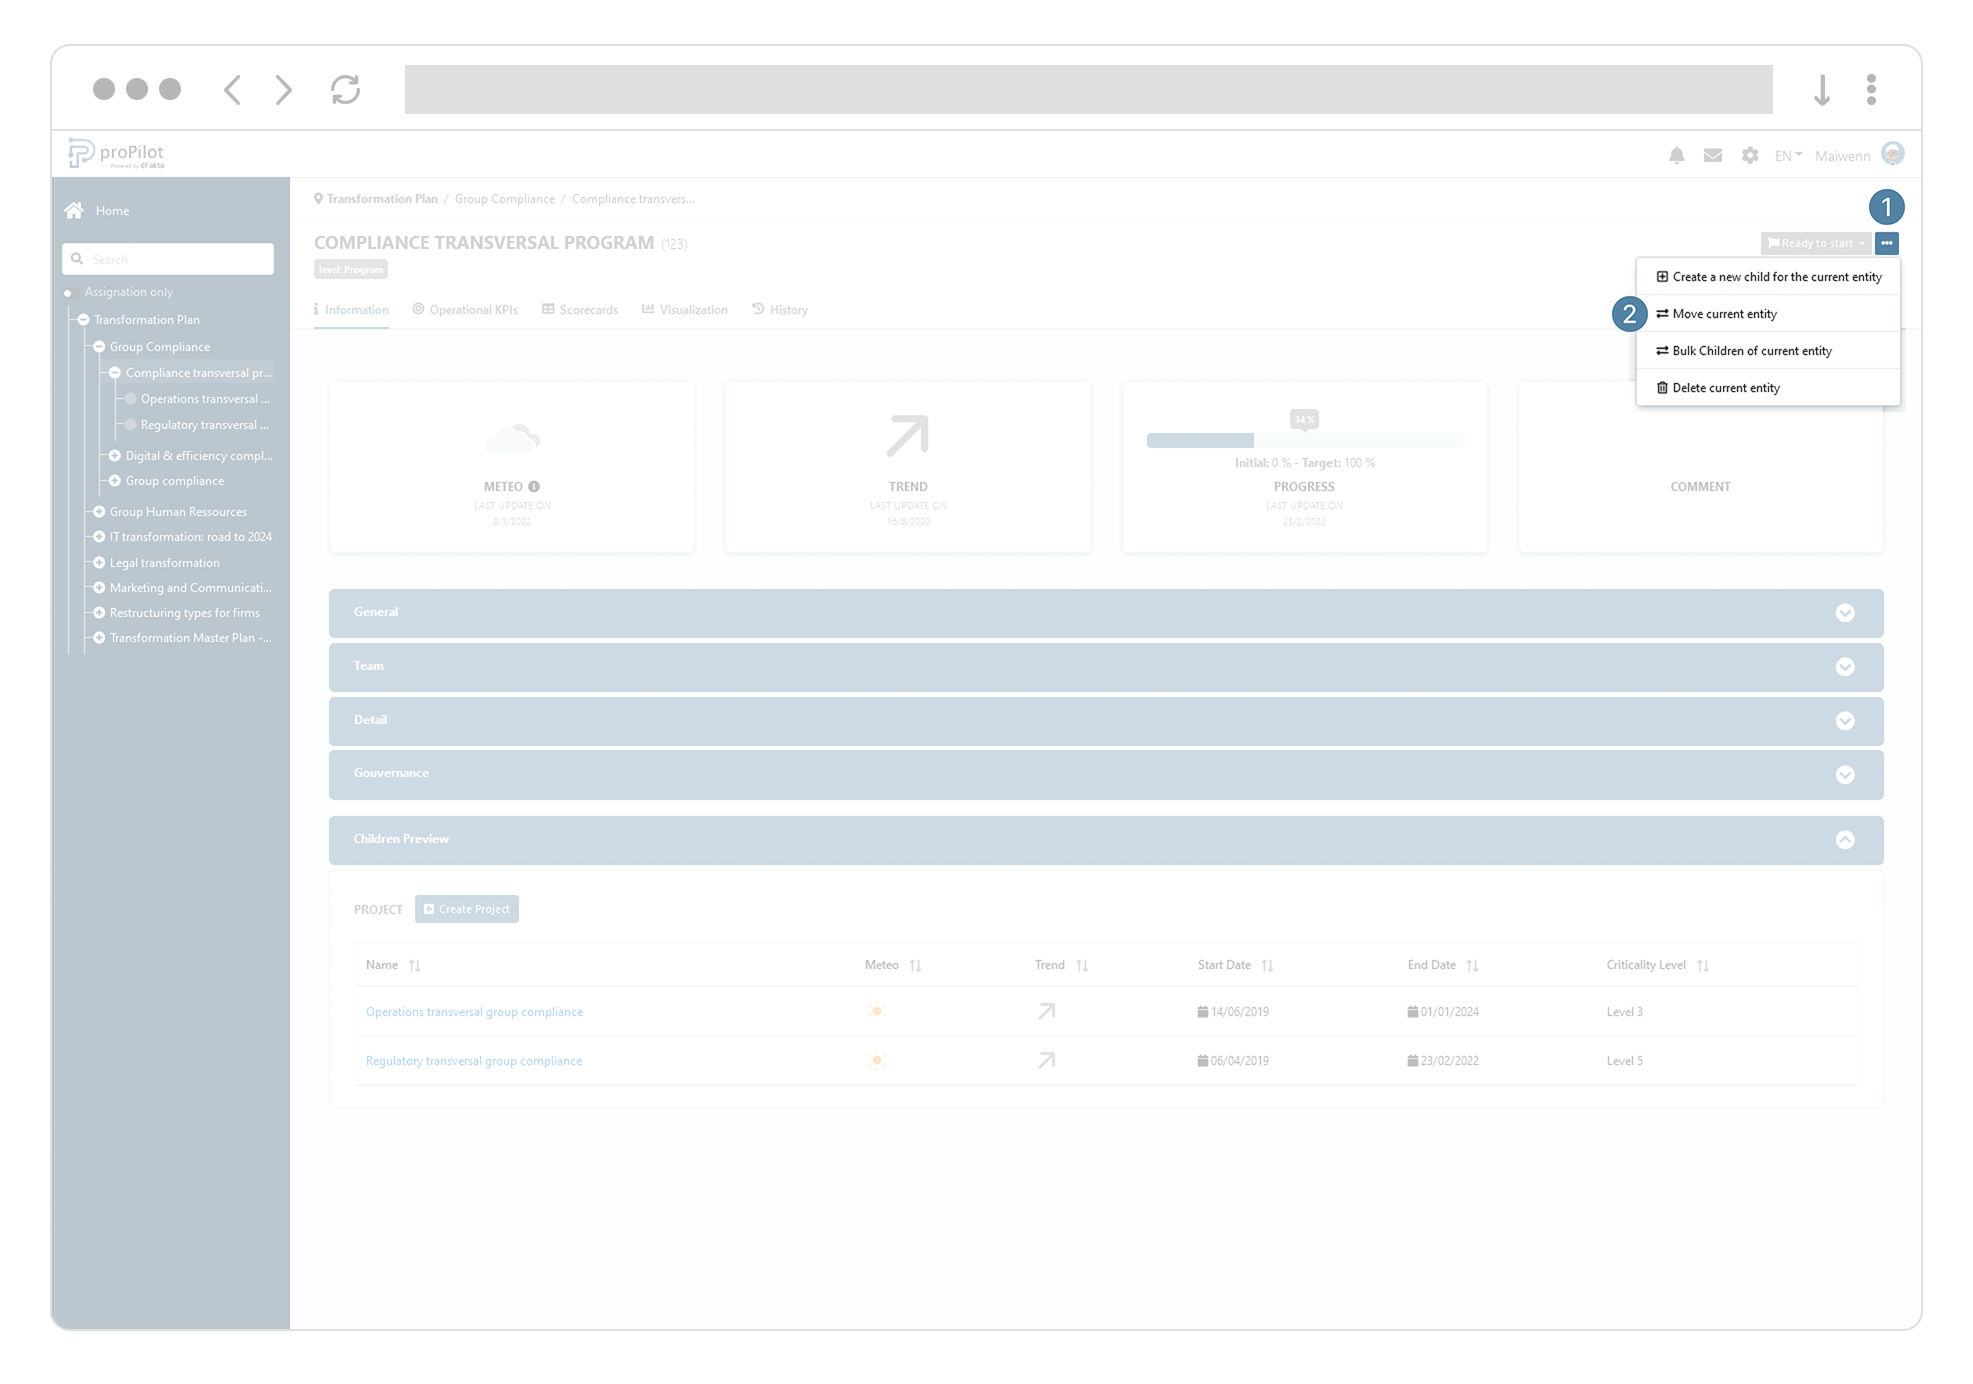
On the right side of your entity’s screen, click on the three dots '...' to access the action menu.
Click on "move the current entity".
Select the destination
Confirm your choice.
Massively edit sub-entities accross your plan.
On the right side of your entity’s screen, click on the three dots '...' to access the action menu.
Click on "Bulk edit sub-entities".
Select the sub entities to move
Choose the action to perform.
Confirm your choice.

Delete entities
On the right side of your entity’s screen, click on the three dots '...' to access the action menu.
Click on "delete an entity" and confirm.
The entities located under the entity you are going to delete will also be deleted.

Following up on the lifecycle state of an entity
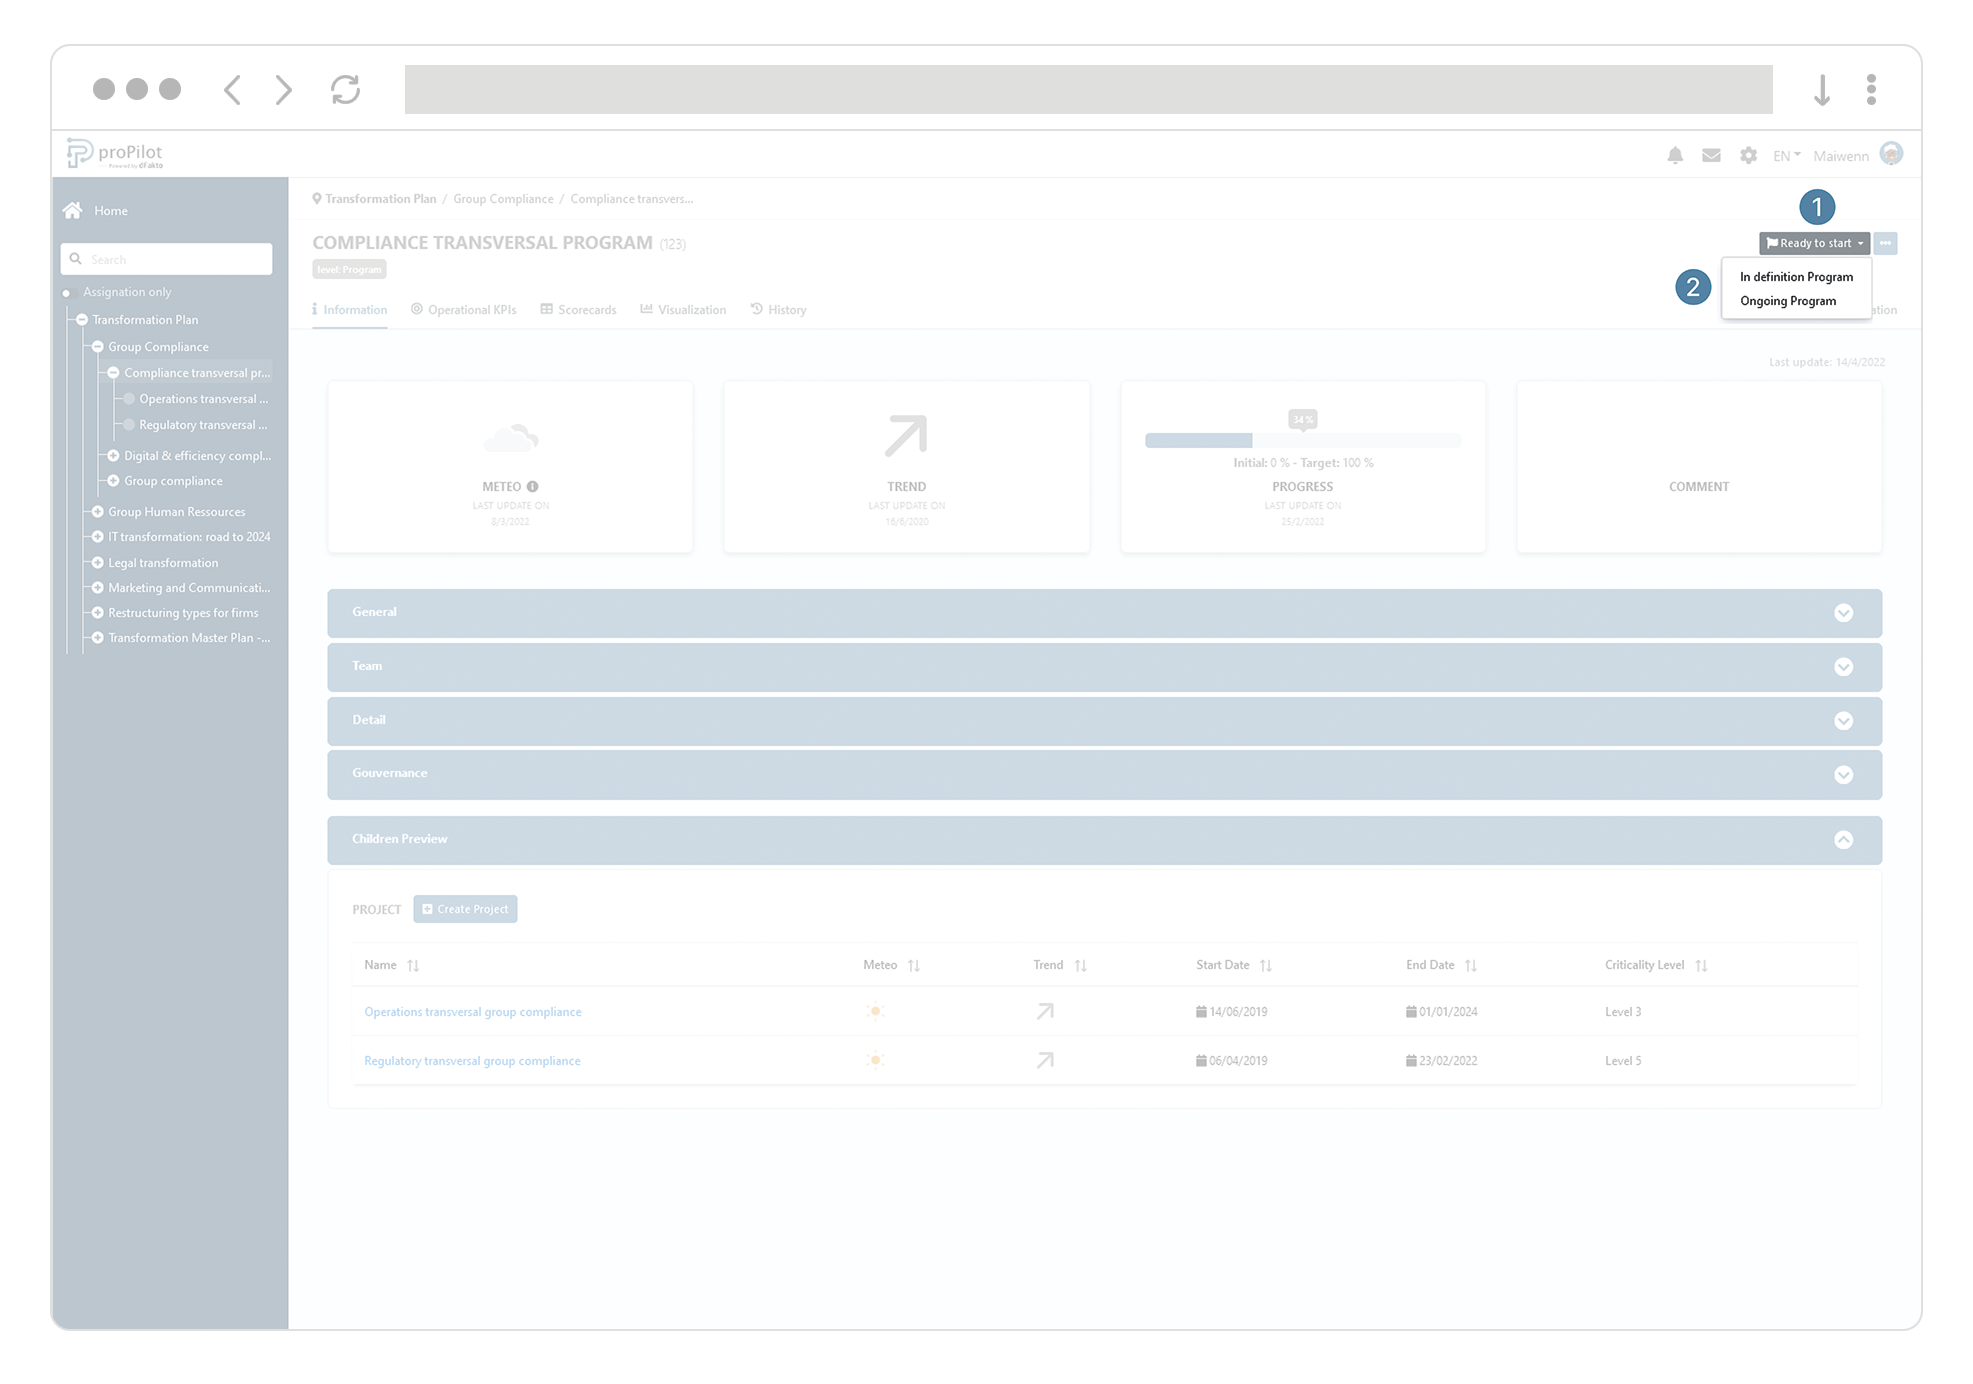
Move your entity from one workflow status to another
On the right side of your entity’s screen, you can modify the maturity according to the defined workflow.

