Introduction
The Workflows module allows you to define the desired life cycle for each of the levels.
Each Workflow consists of one or more statuses, which can switch from one step to another as needed.
For example, a "project" level will probably need to track whether the project is in preparation > ongoing > closed / suspended... while a more general initiative might require a simplified Workflow.
You can then decide to integrate the statuses of your choice and define the desired flow.
Manage your entity workflow status
Create a Workflow that can be integrated in all entities of a level
-
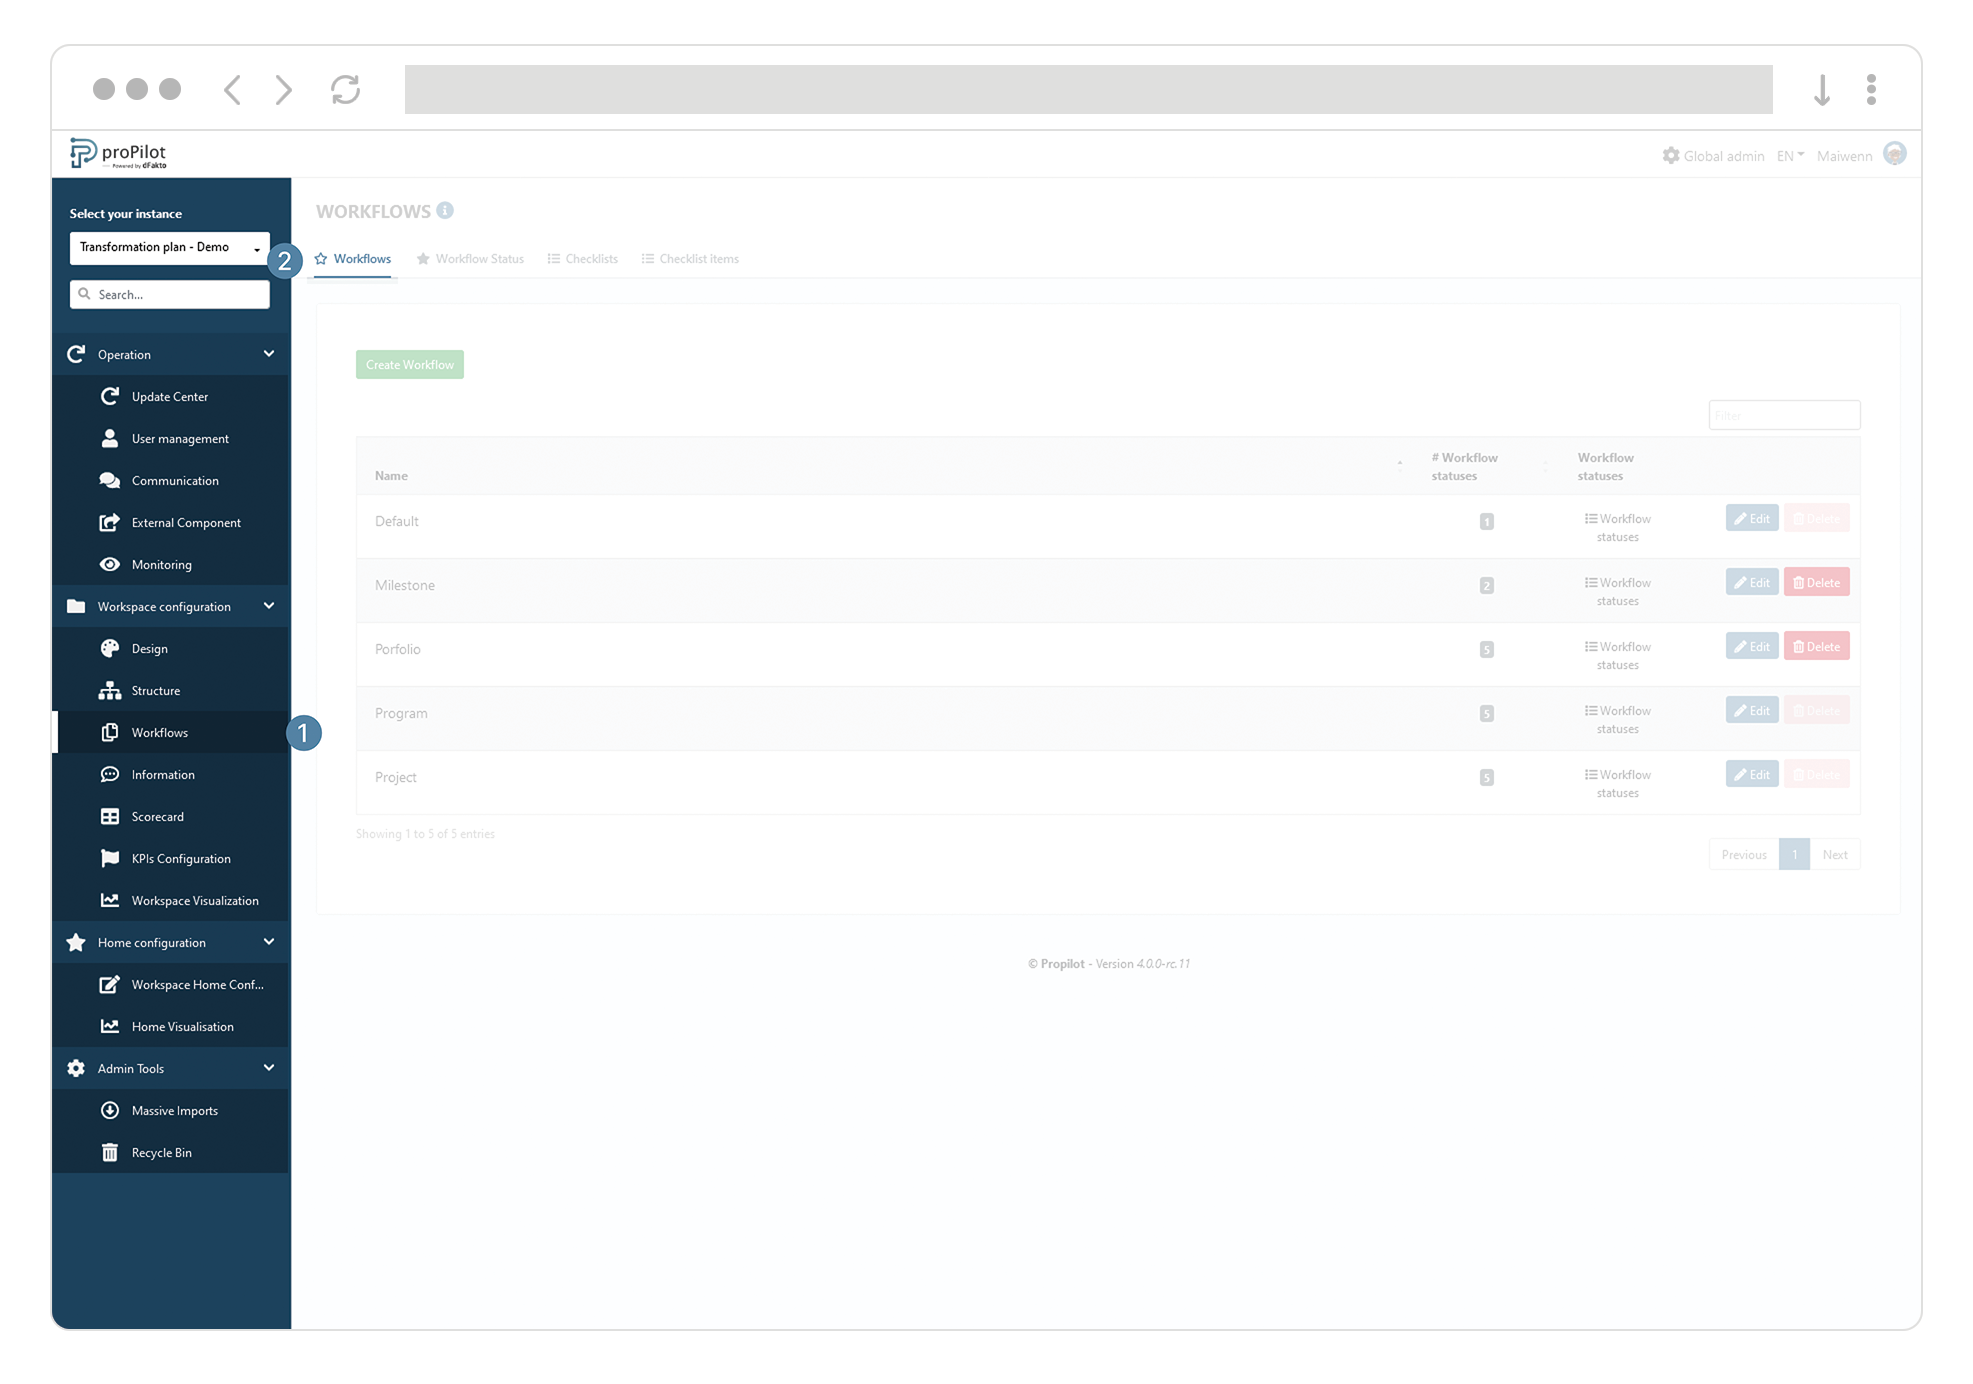
In the left menu of an instance, select "Workspace configuration" then "Workflows".
-
This module allows you to create a Workflow that can be applied to all entities of a level.
-
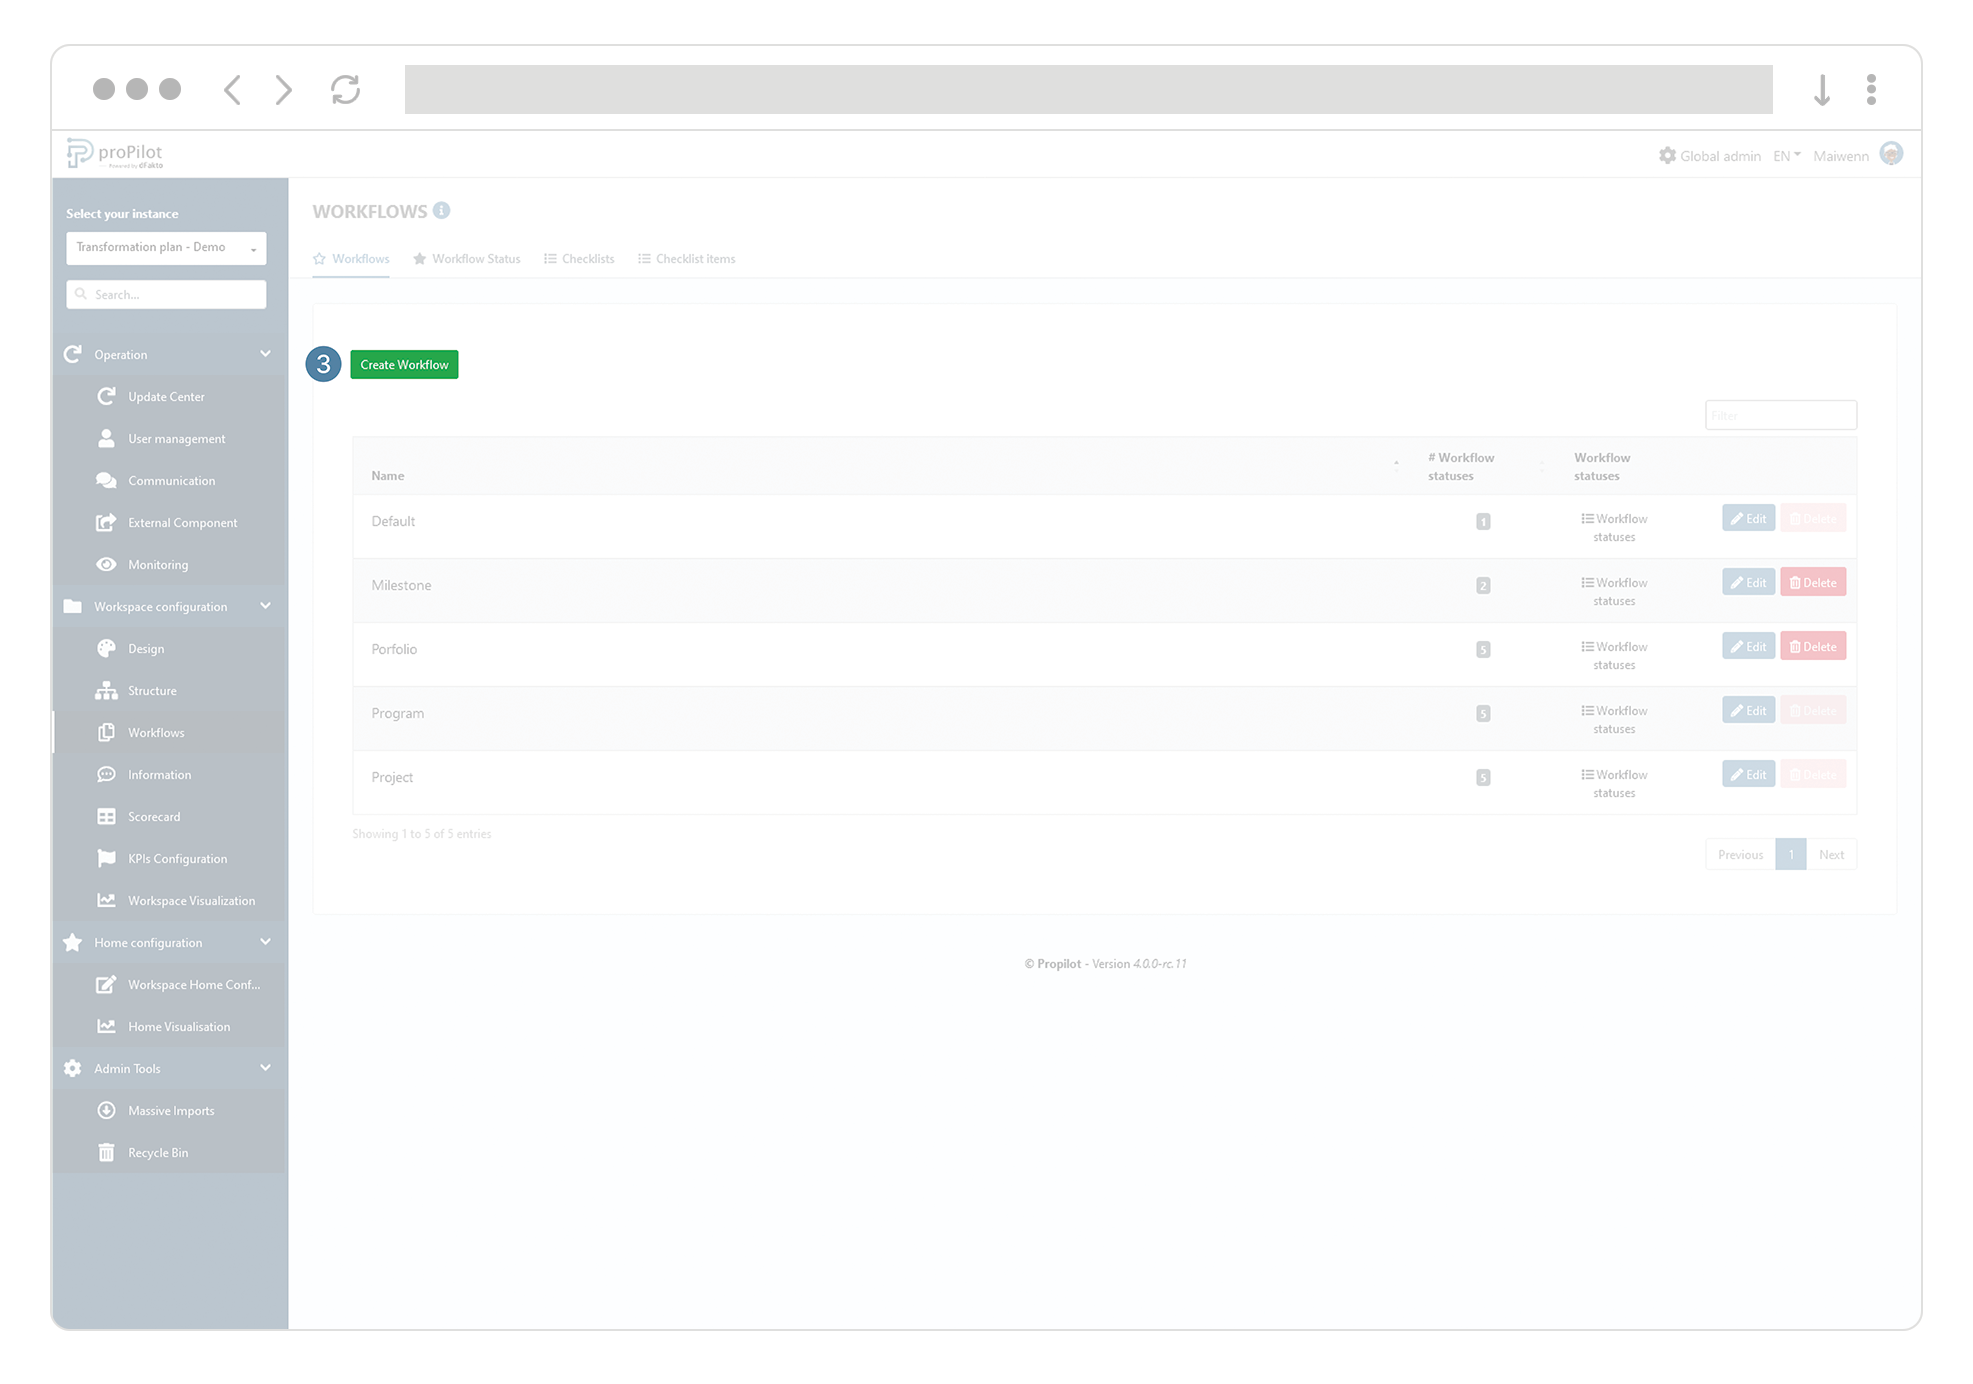
Click on "Create a Workflow".
Create worklflow statuses with different options for each one of them.
-
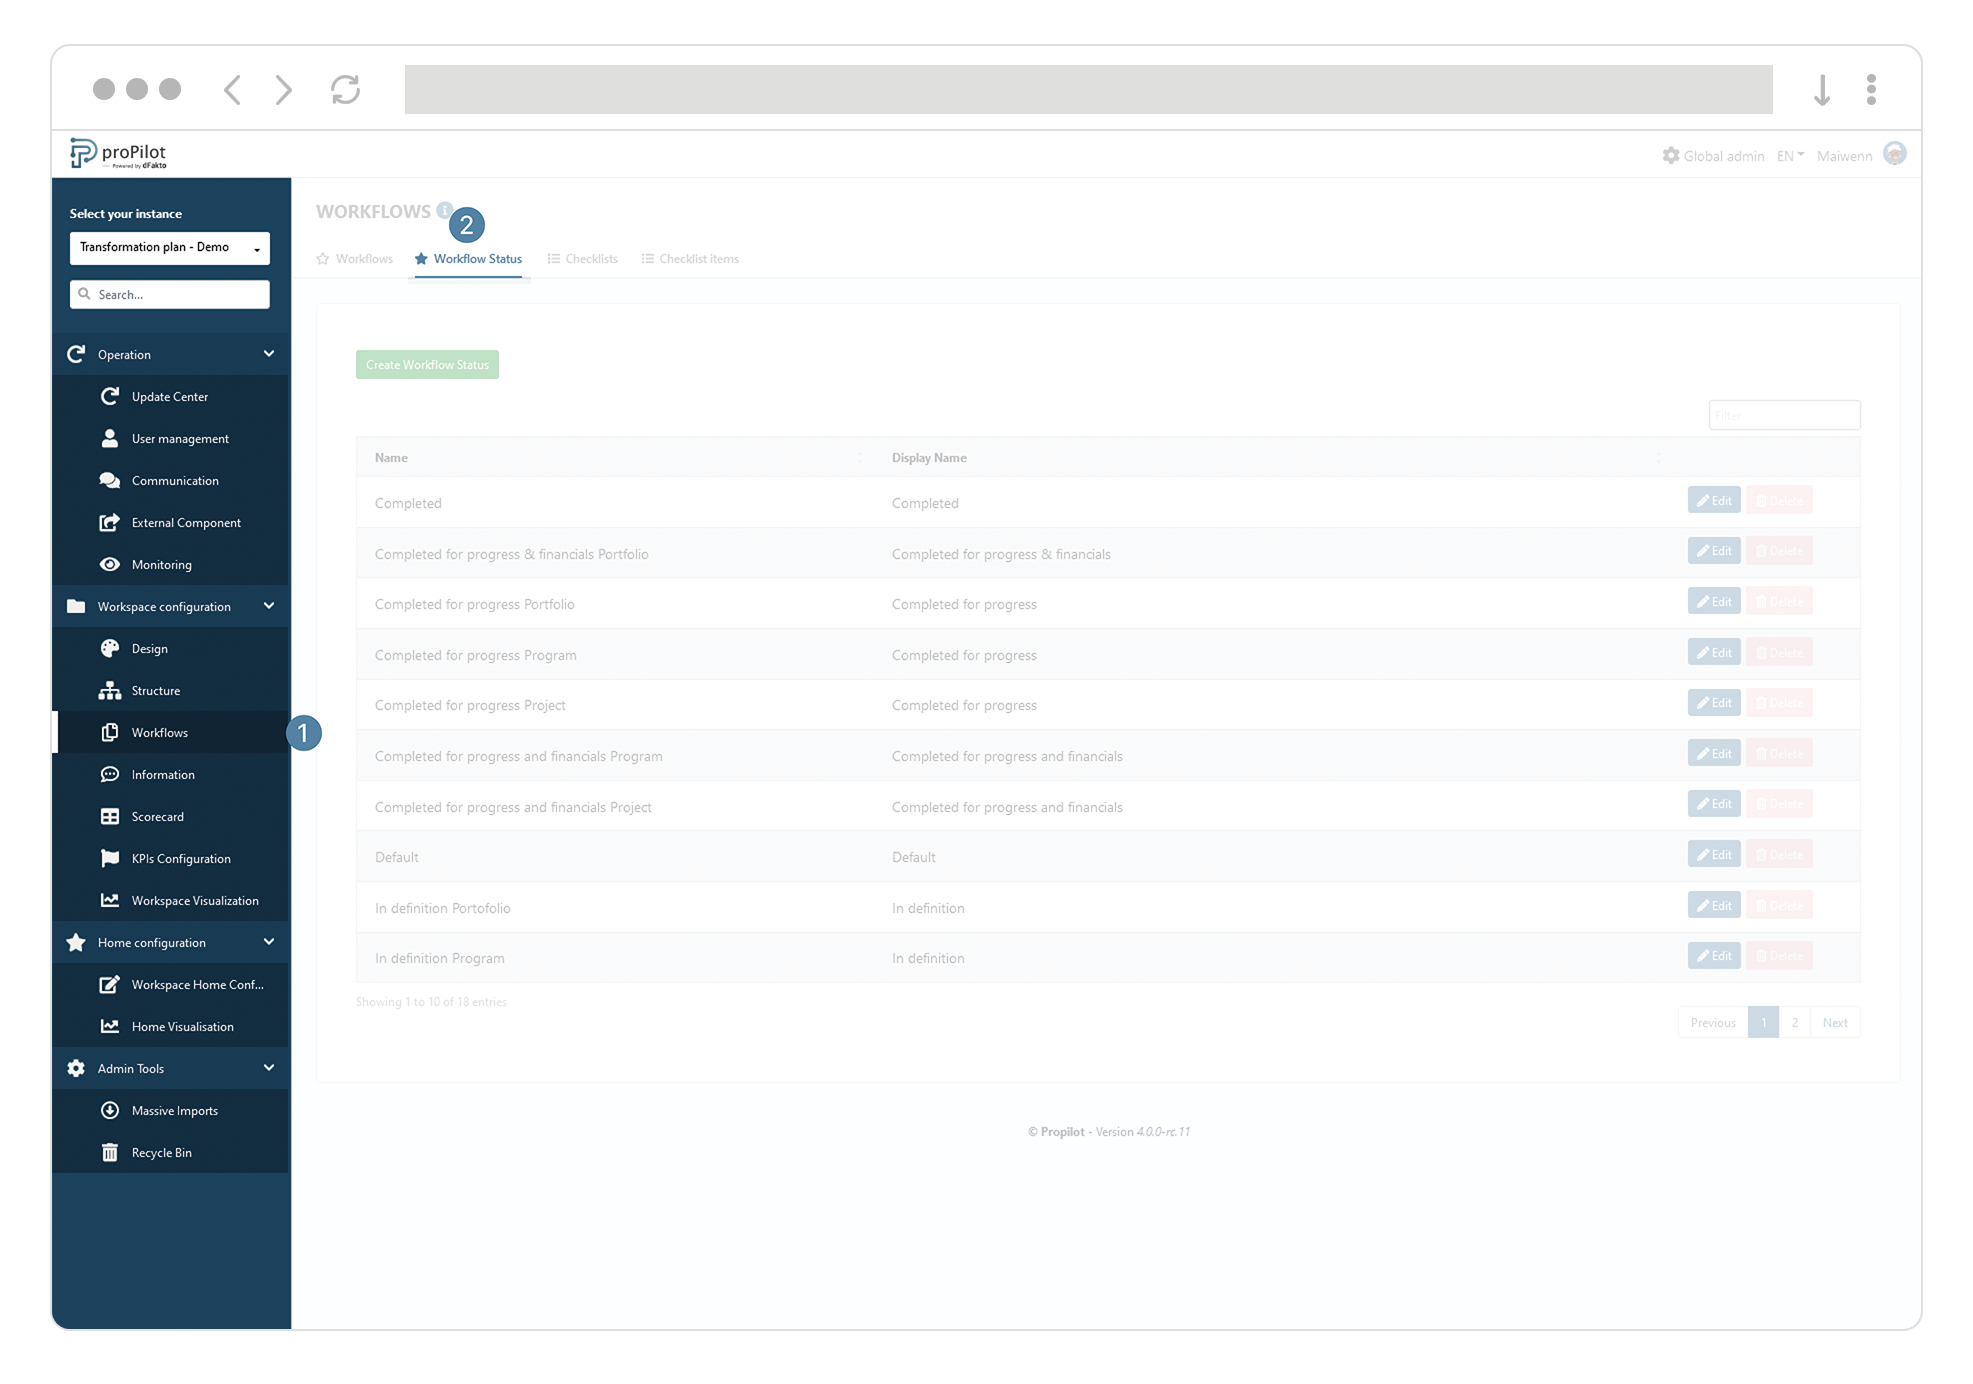
In the left menu, select "Workflow configuration" and then "Workflow".
-
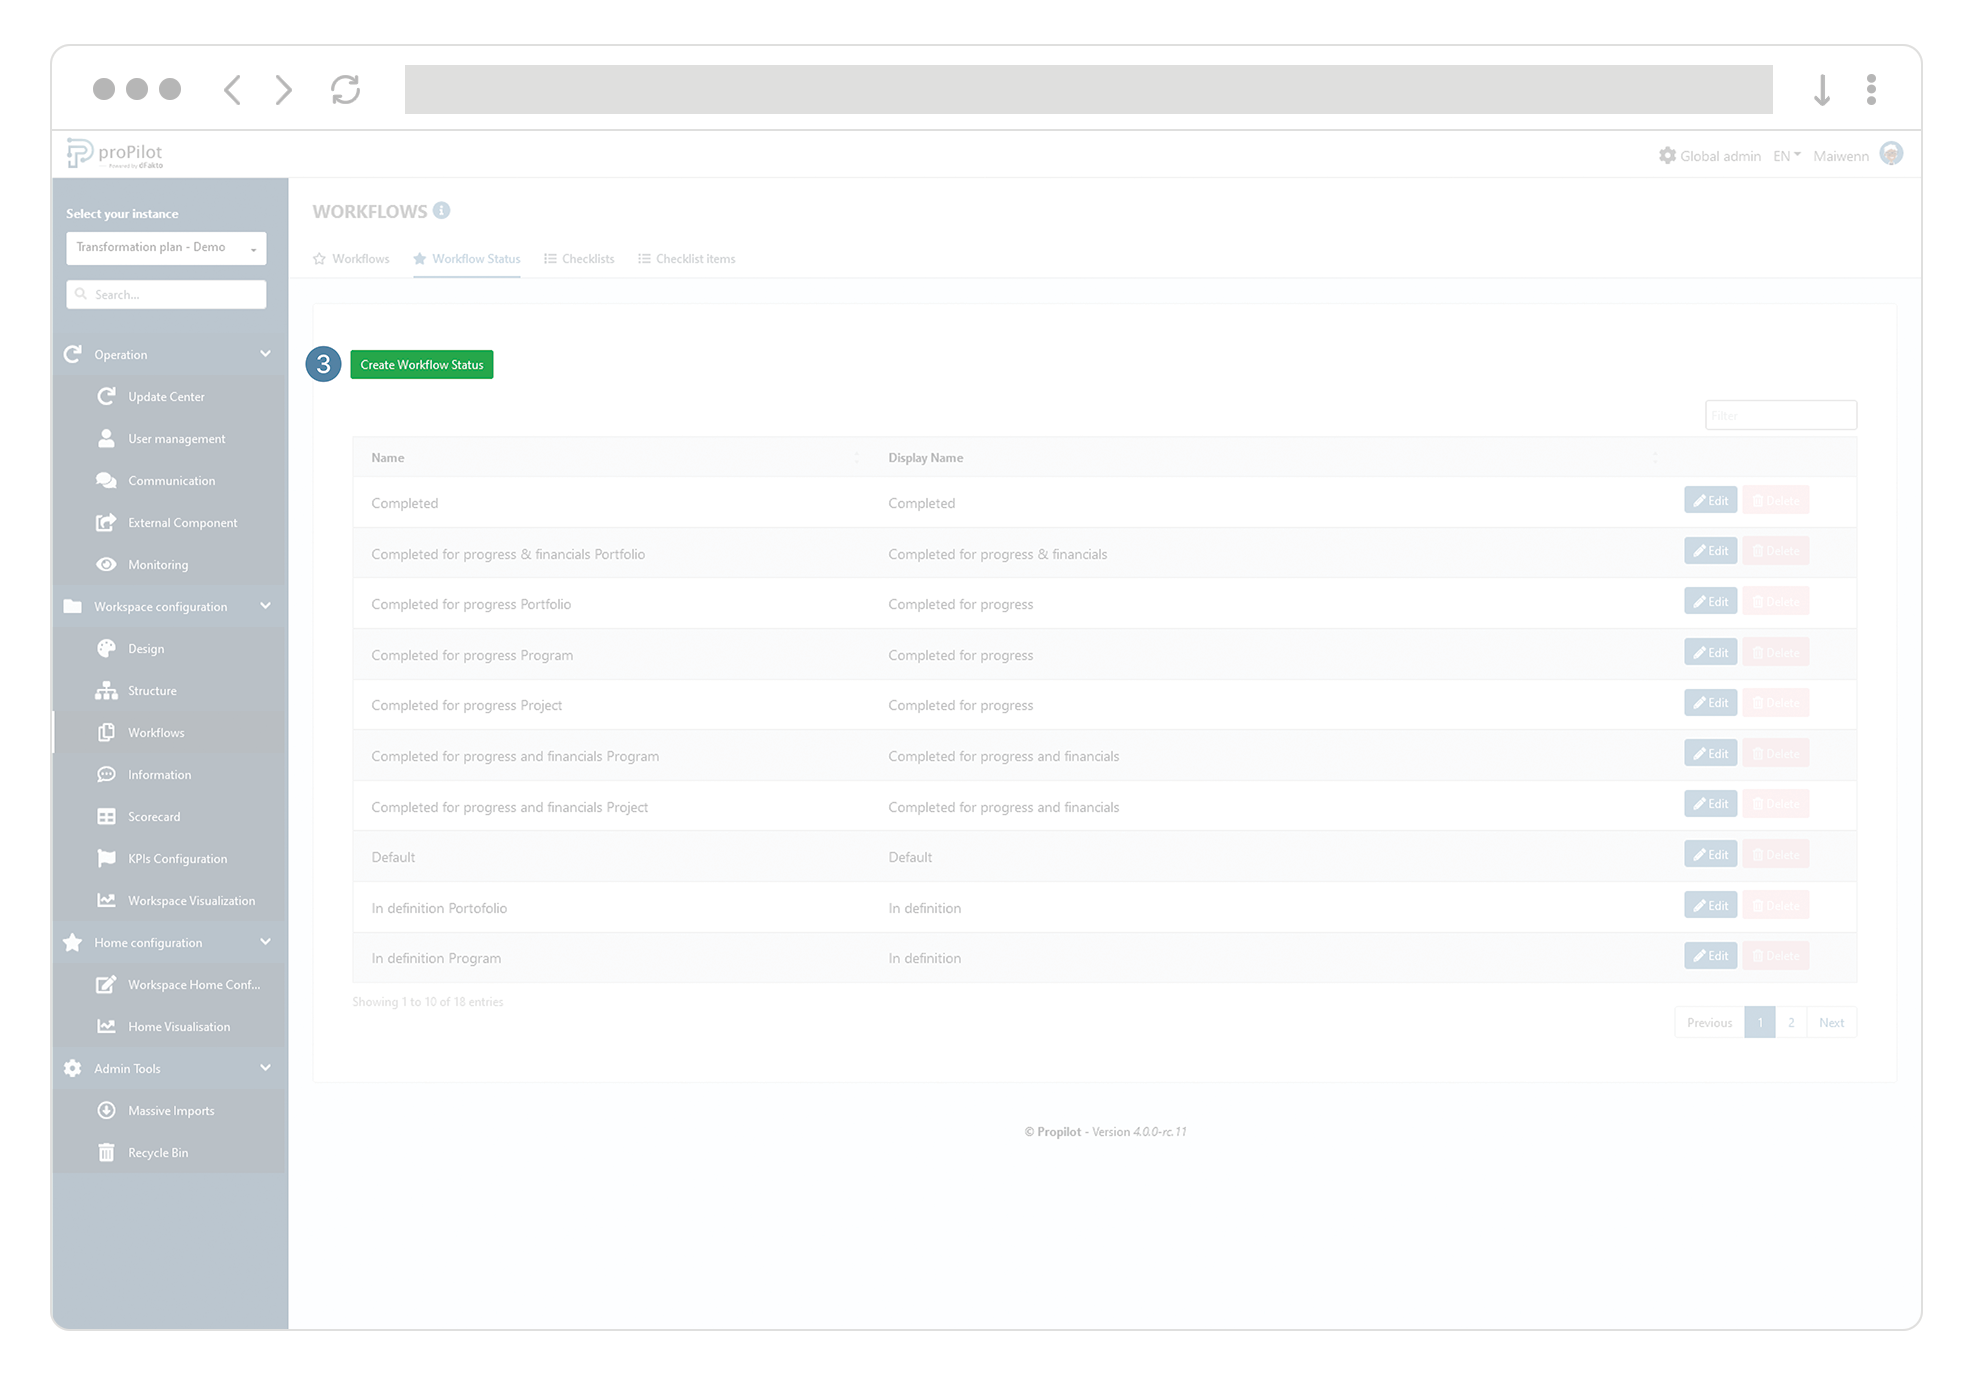
Click on the tab "workflows status". This module allows you to manage the different statuses available.
-
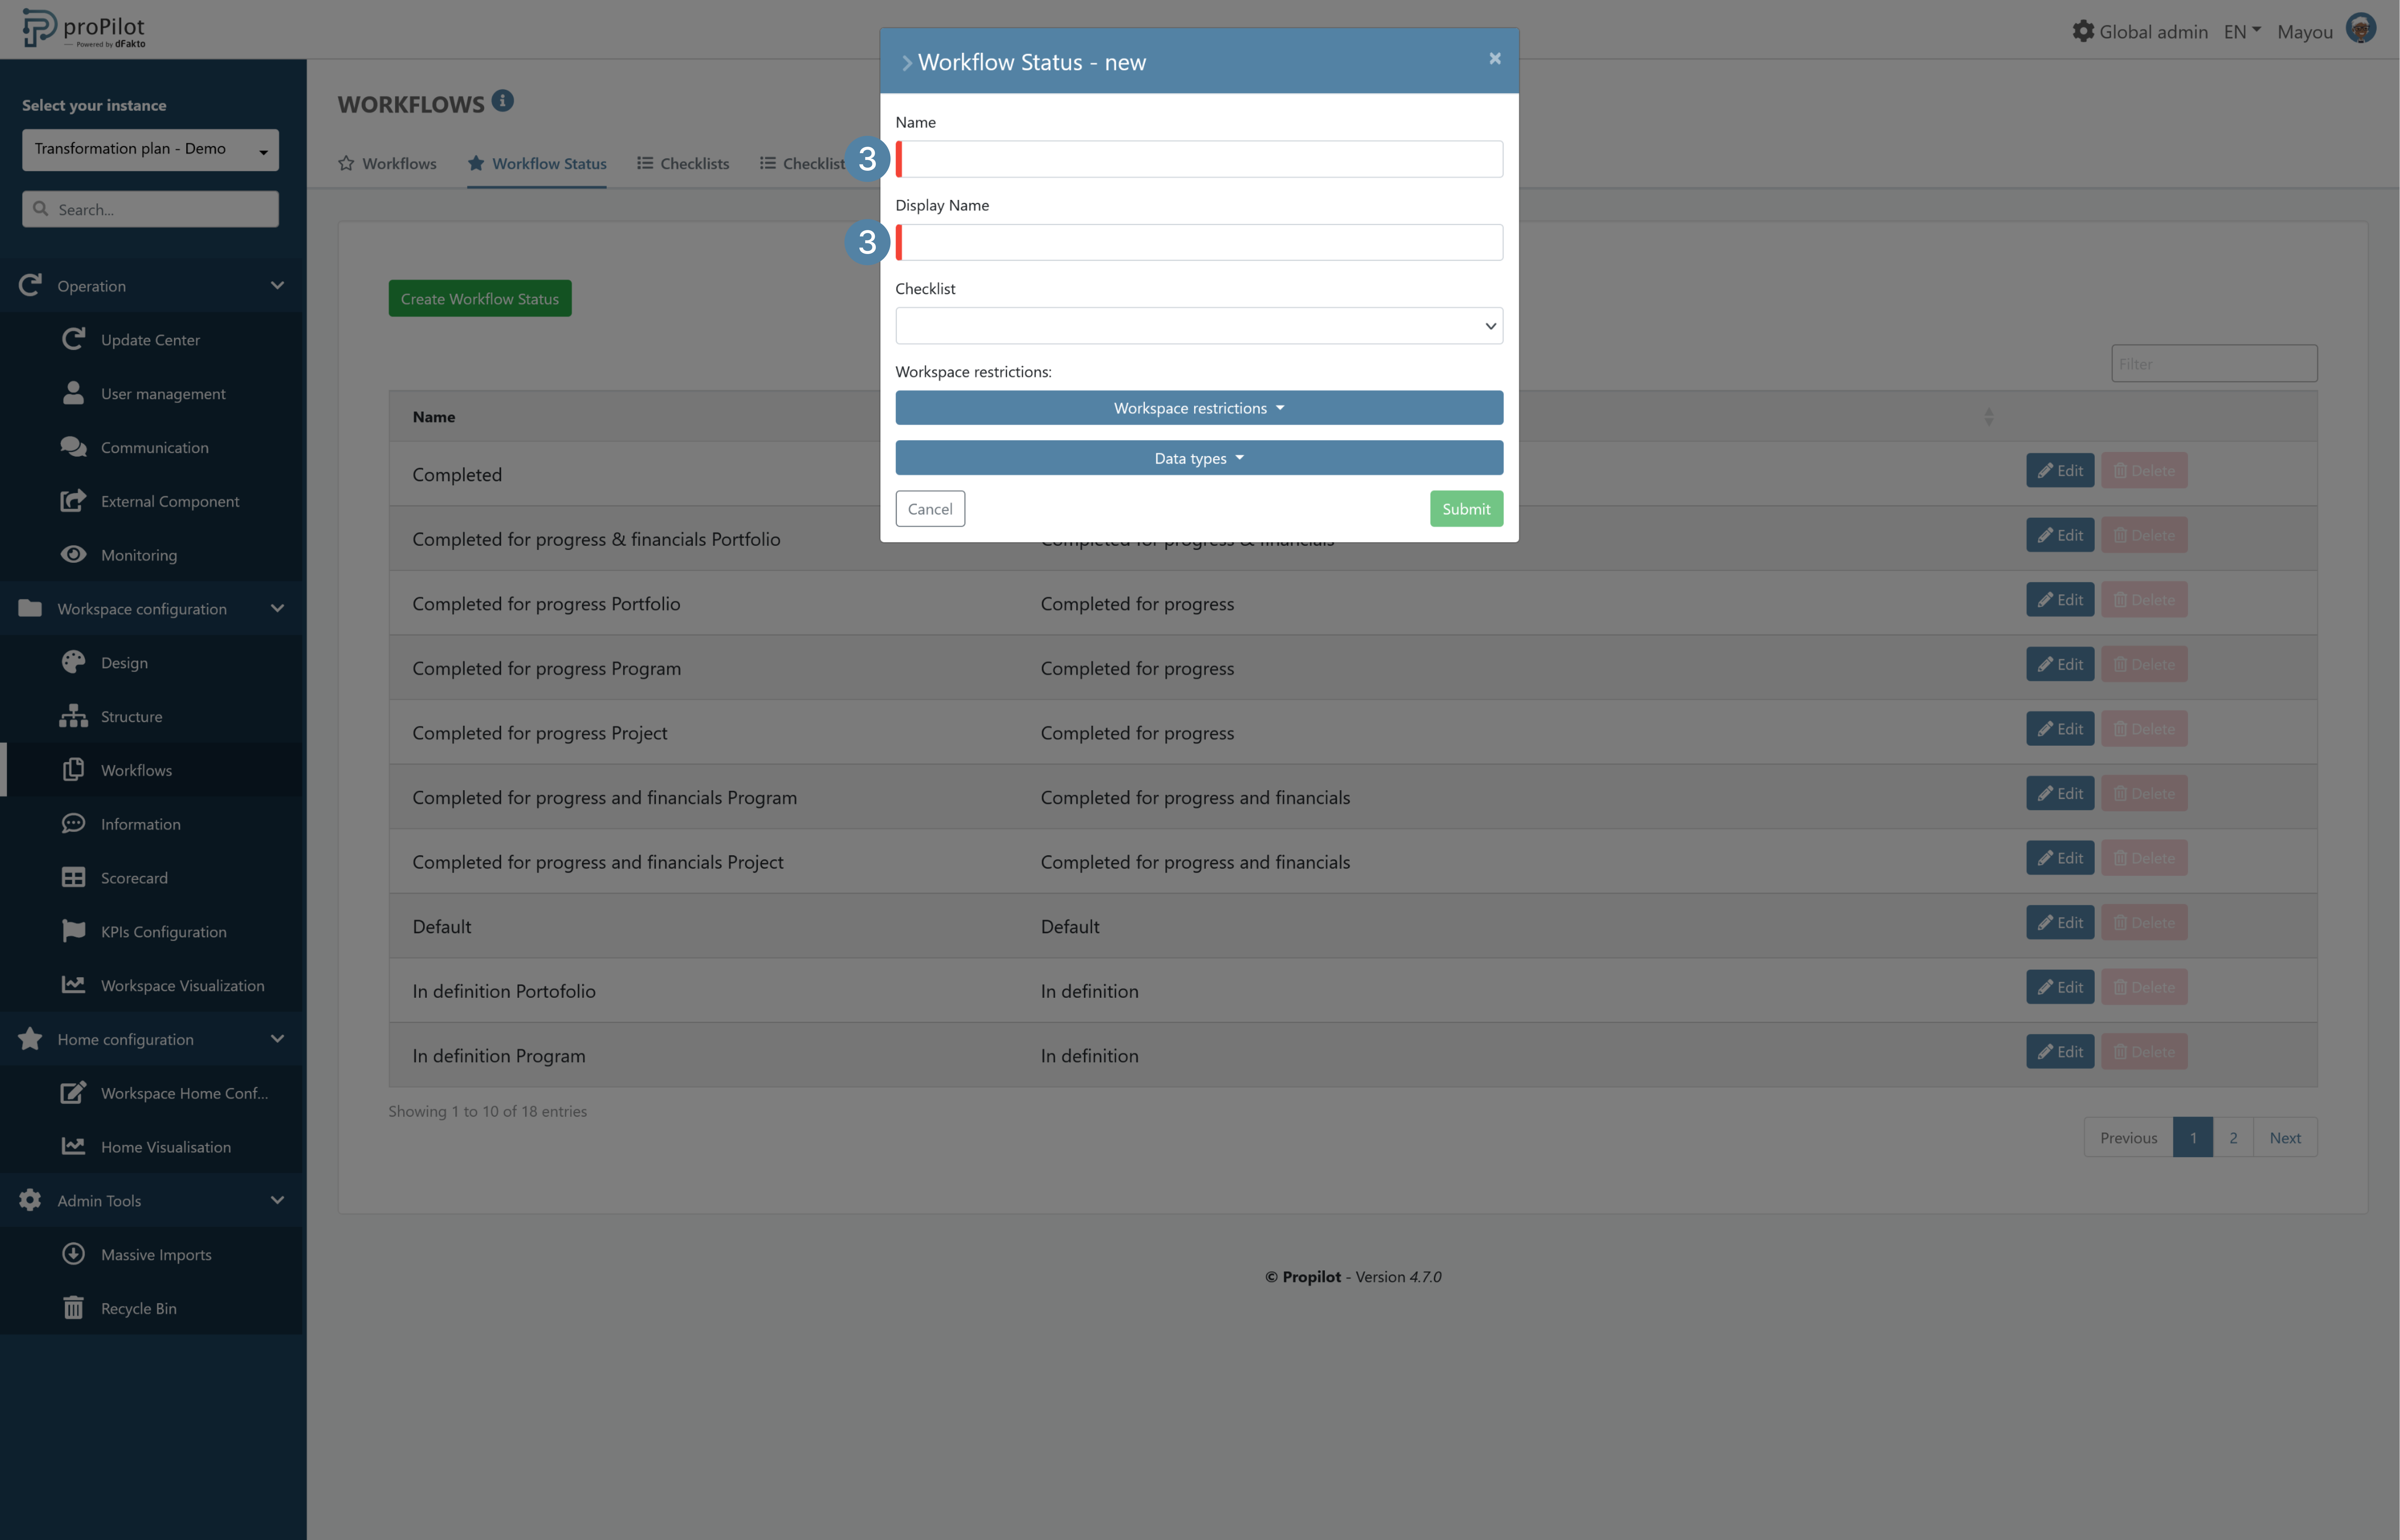
Click on "Create Workflow Status " and enter the (technical) name and the desired display name for it.
-
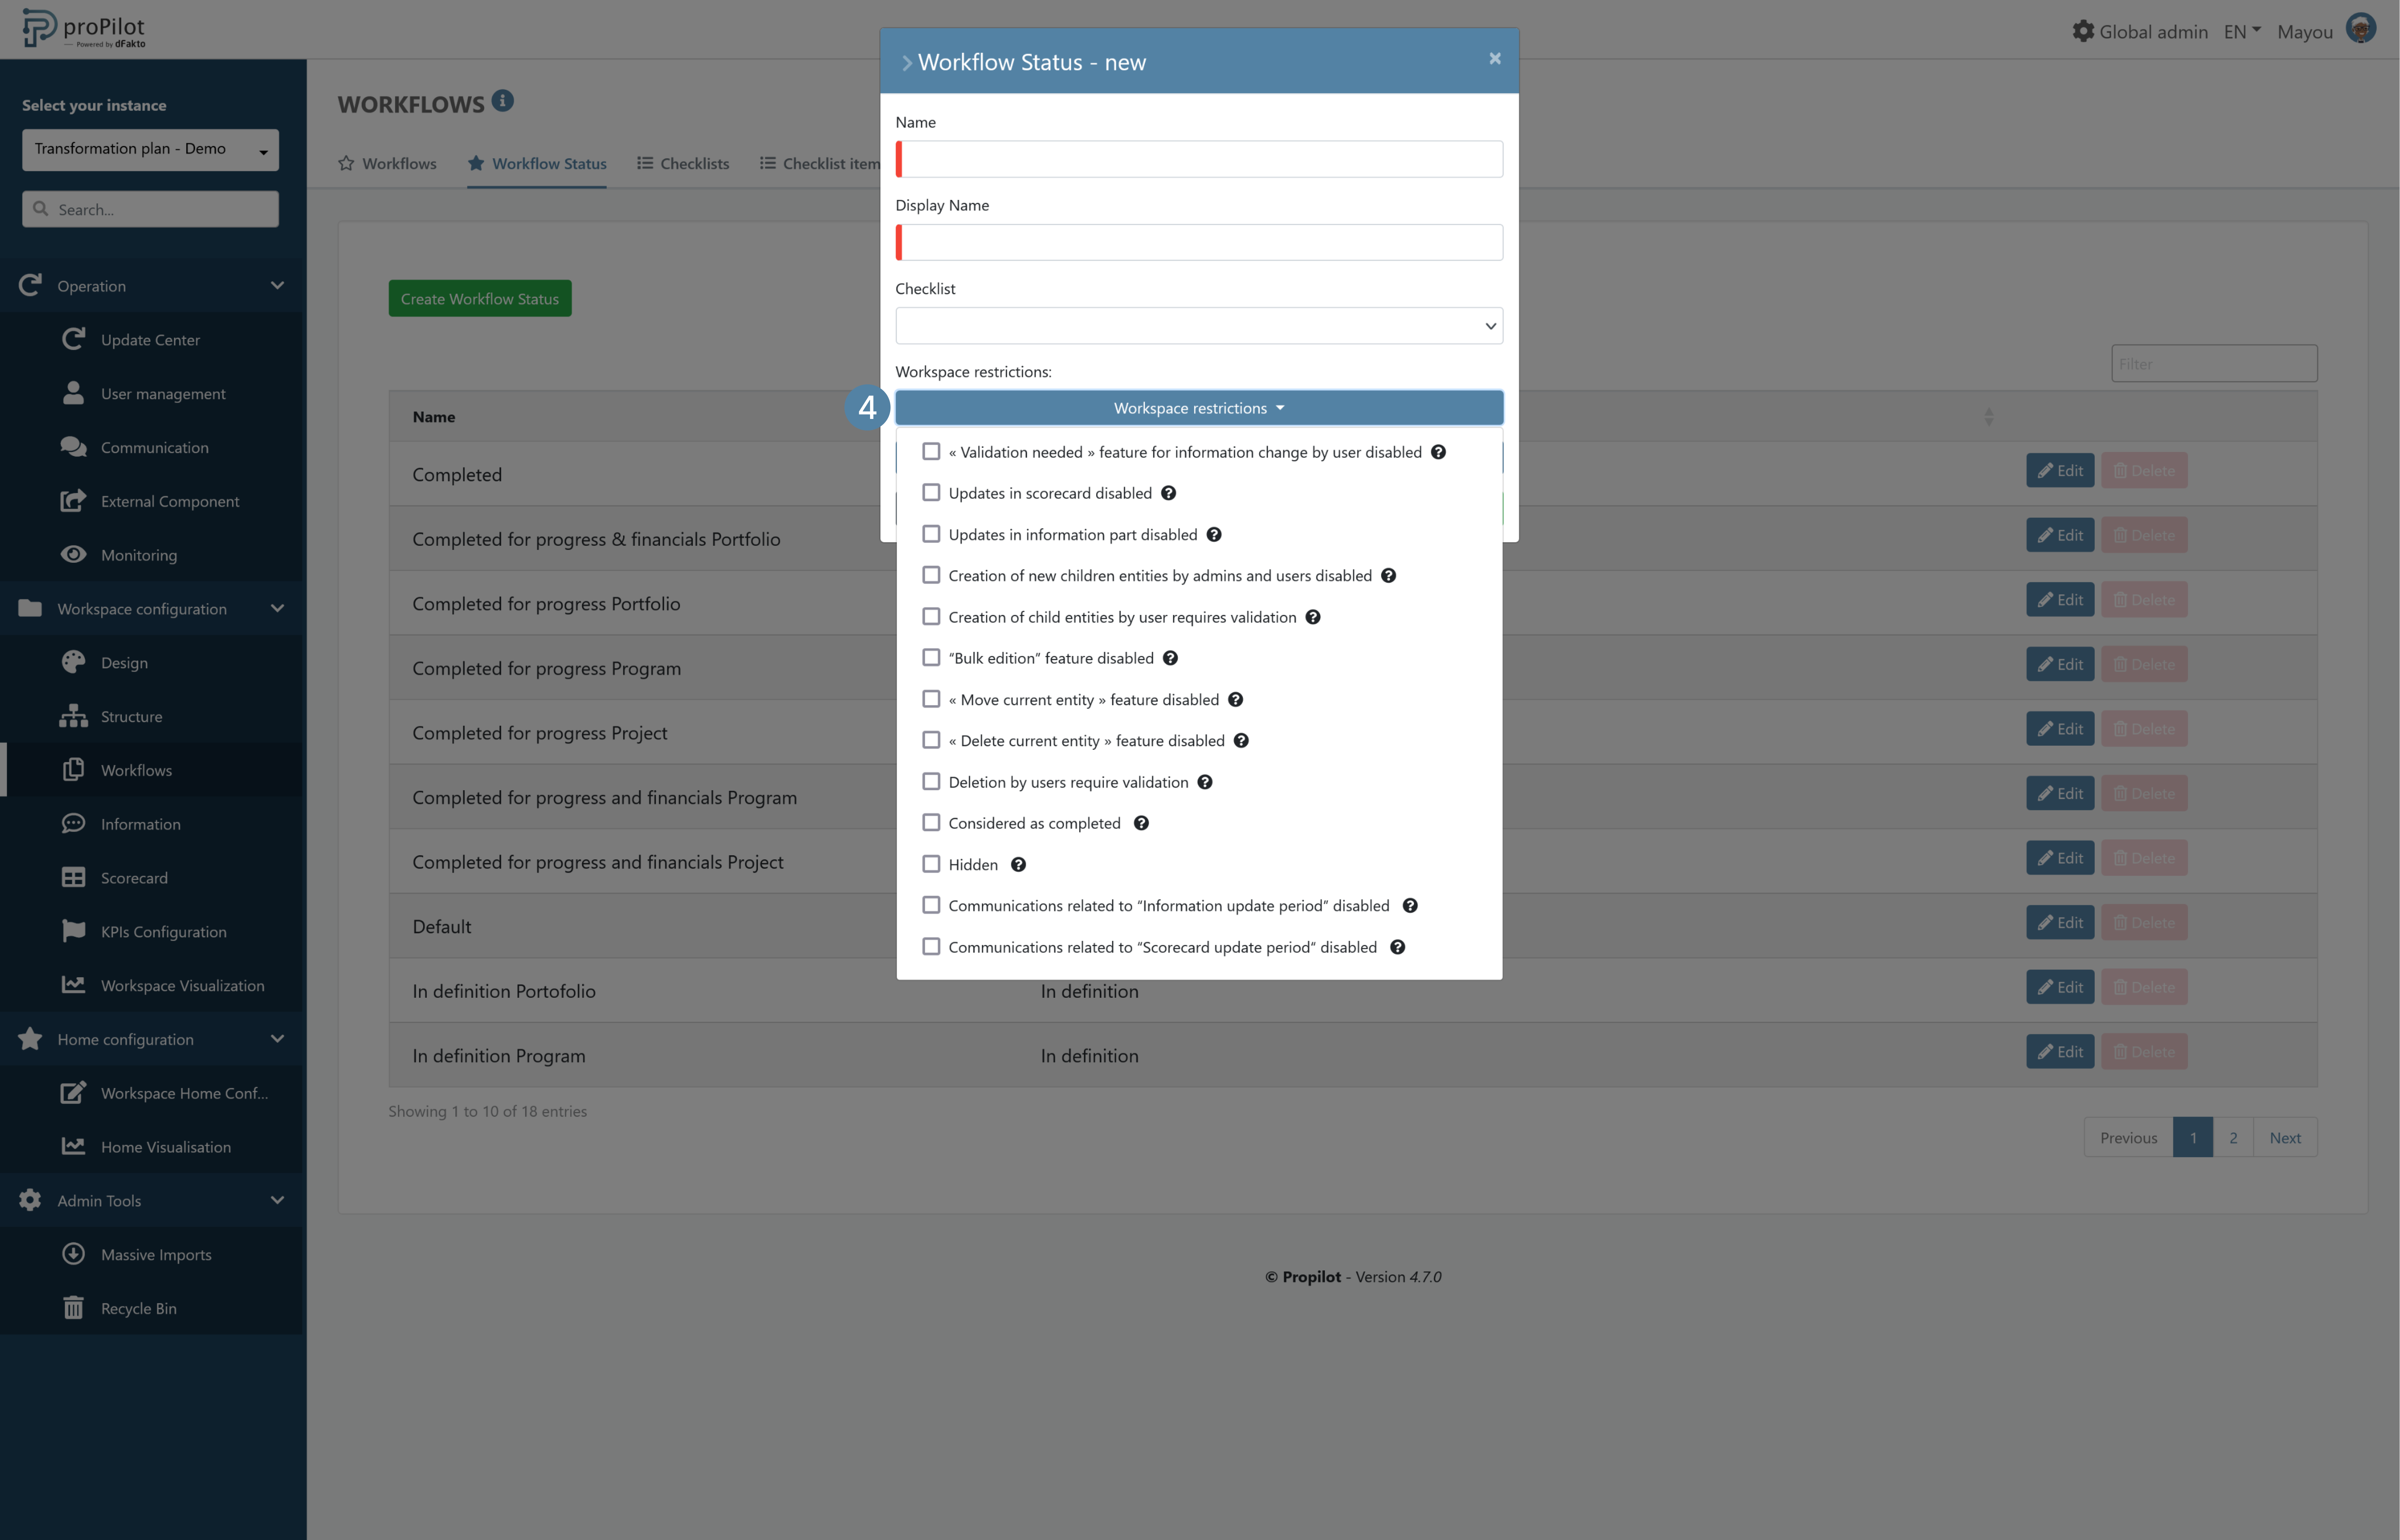
Add any specific configurations:
-
« Validation needed » feature for scorecard change by user disabled
-
« Validation needed » feature for information change by user disabled
-
Updates in scorecard disabled
-
Updates in information part disabled
-
Creation of new children entities by admins and users disabled
-
Creation of child entities by user requires validation
-
“Bulk edition” feature disabled
-
« Move current entity » feature disabled
-
« Delete current entity » feature disabled
-
Deletion by users require validation
-
Considered as completed
-
Hidden
-
Communications related to “Information update period” disabled
-
Communications related to “Scorecard update period“ disabled
-
-
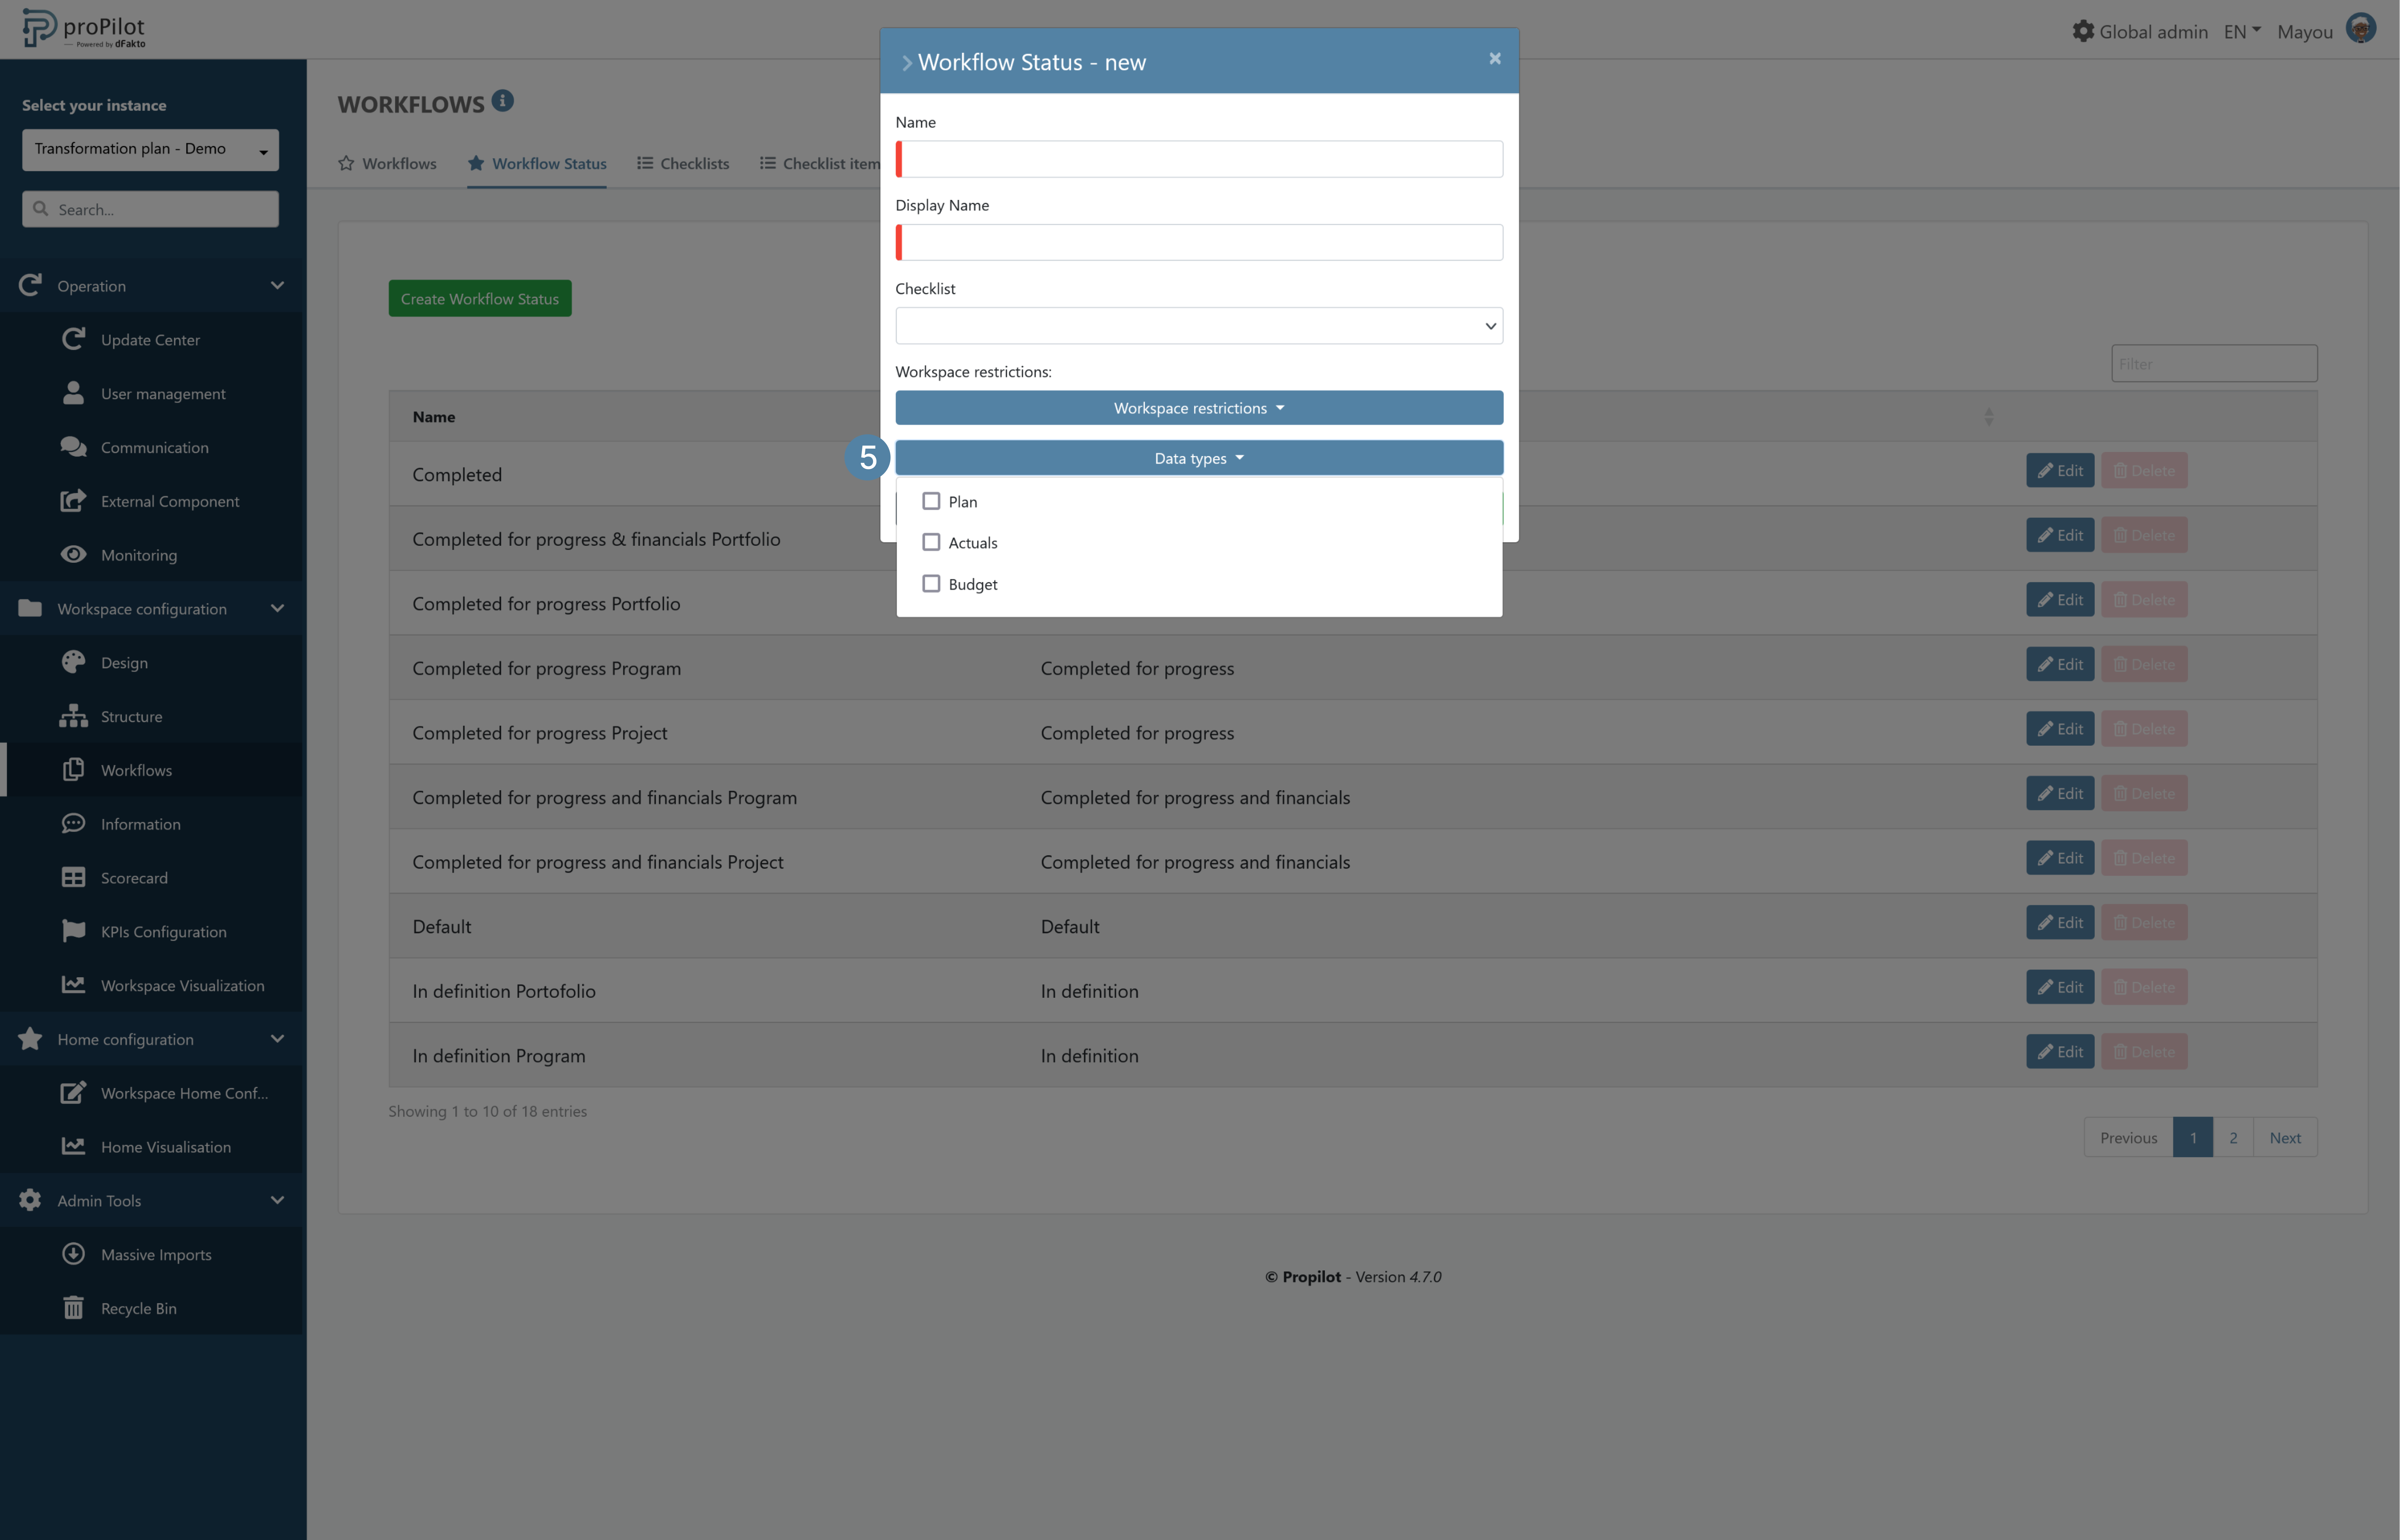
Define what data type would be available on the status.
Add statuses in the Workflow of a given level
-
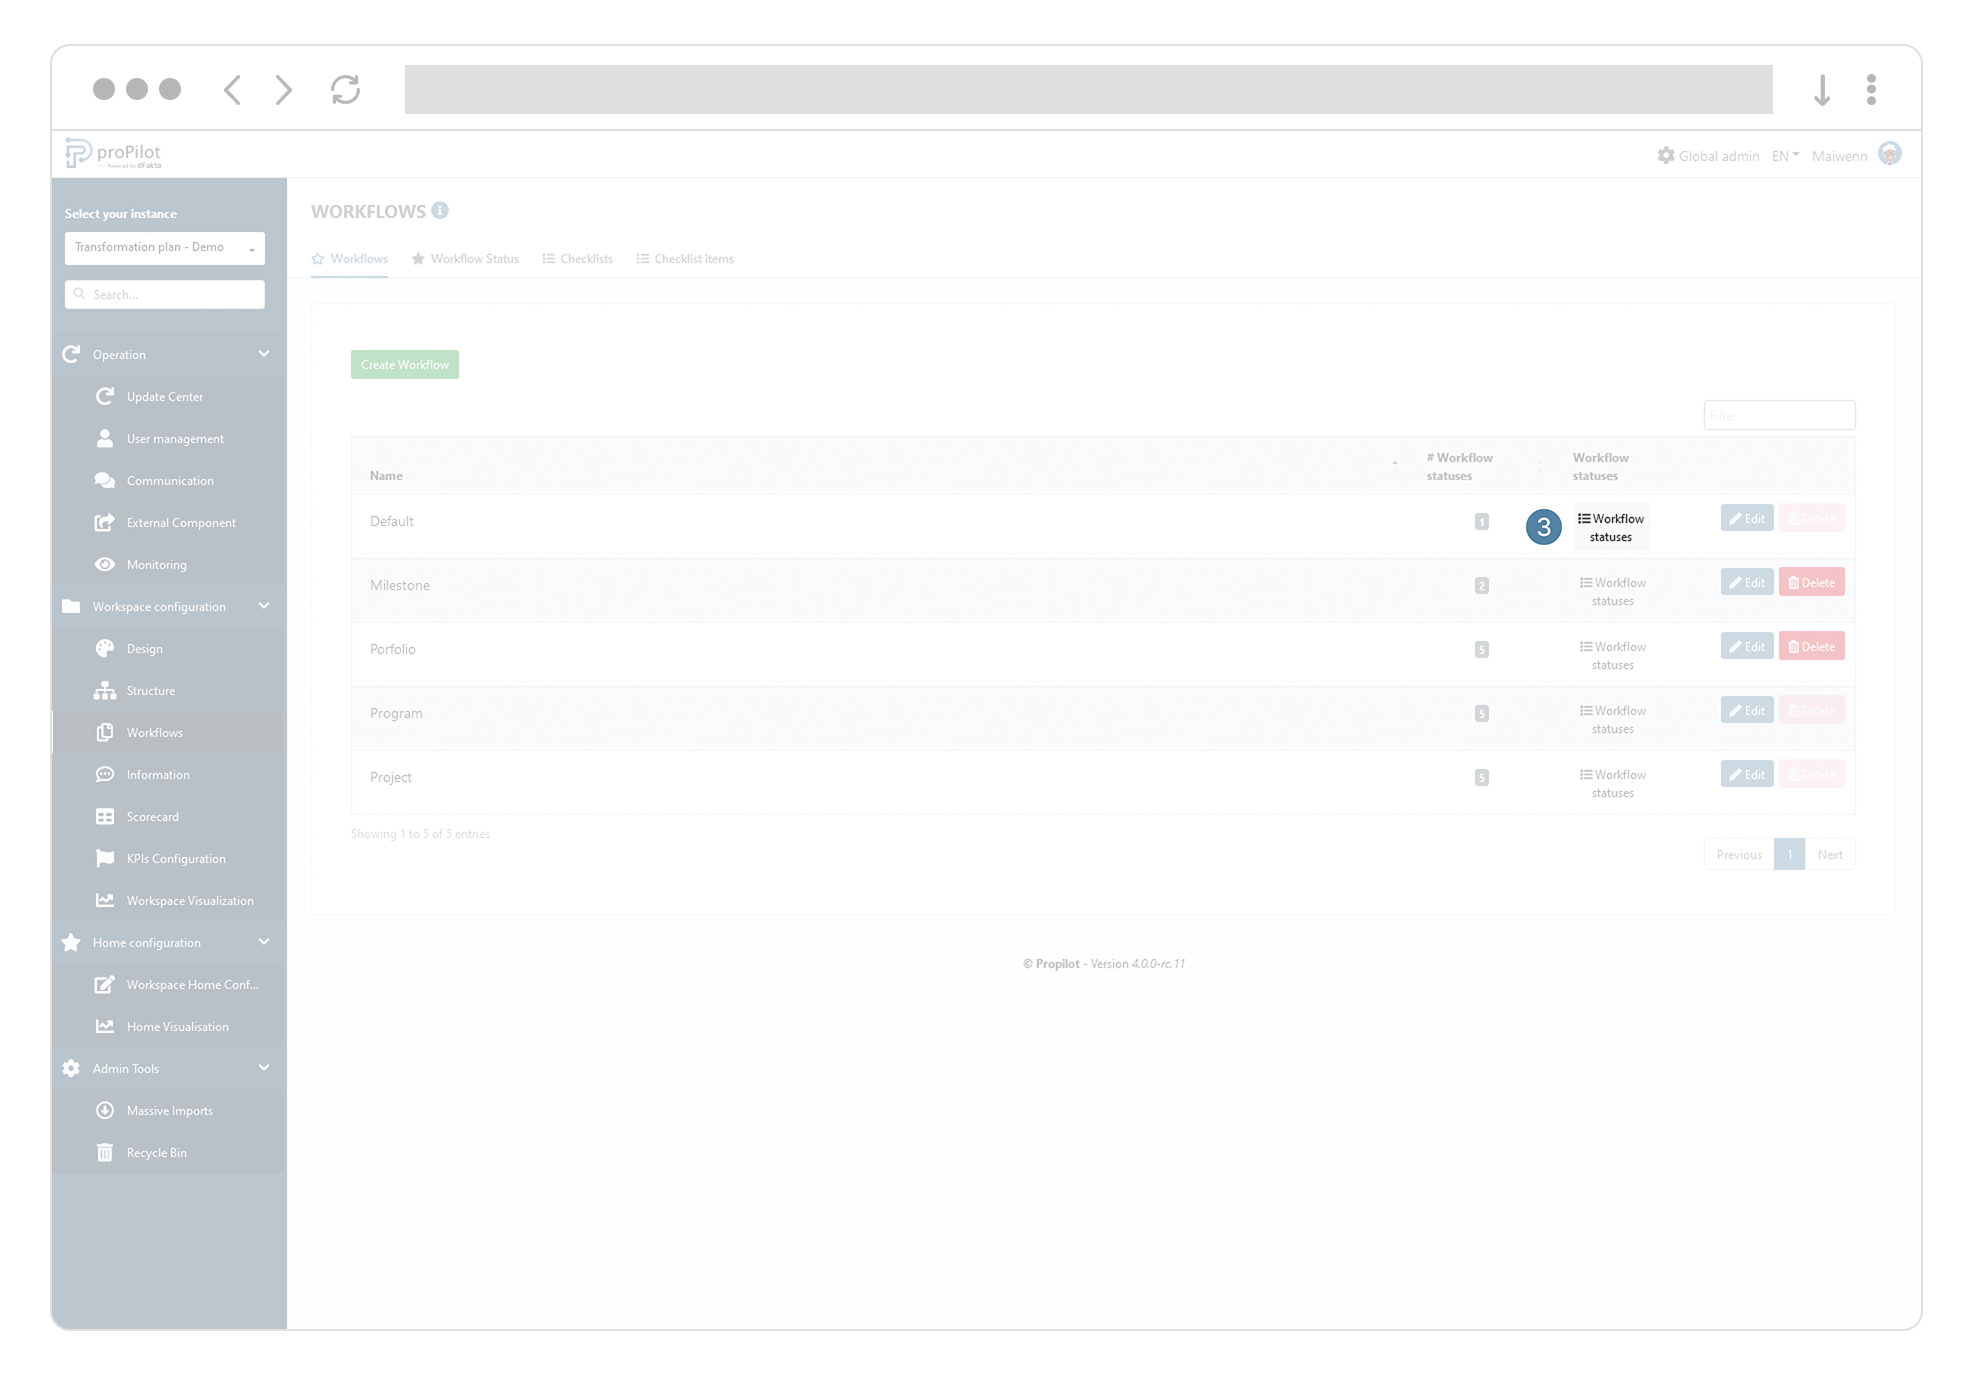
In the left menu, select "Workspace configuration" and then "Workflows".
-
Click on the "Workflows" tab. This module allows you to create a Workflow that can be applied to all the entities of a level.
-
Click on the "Workflow statuses" button of the Workflow for which you want to enter additional information.
-
Click on the "add workflow status" button. A pop-up window will open.

-
In the drop-down list, select the status that you want to integrate into this Workflow.
If the status does not appear, it has already been integrated.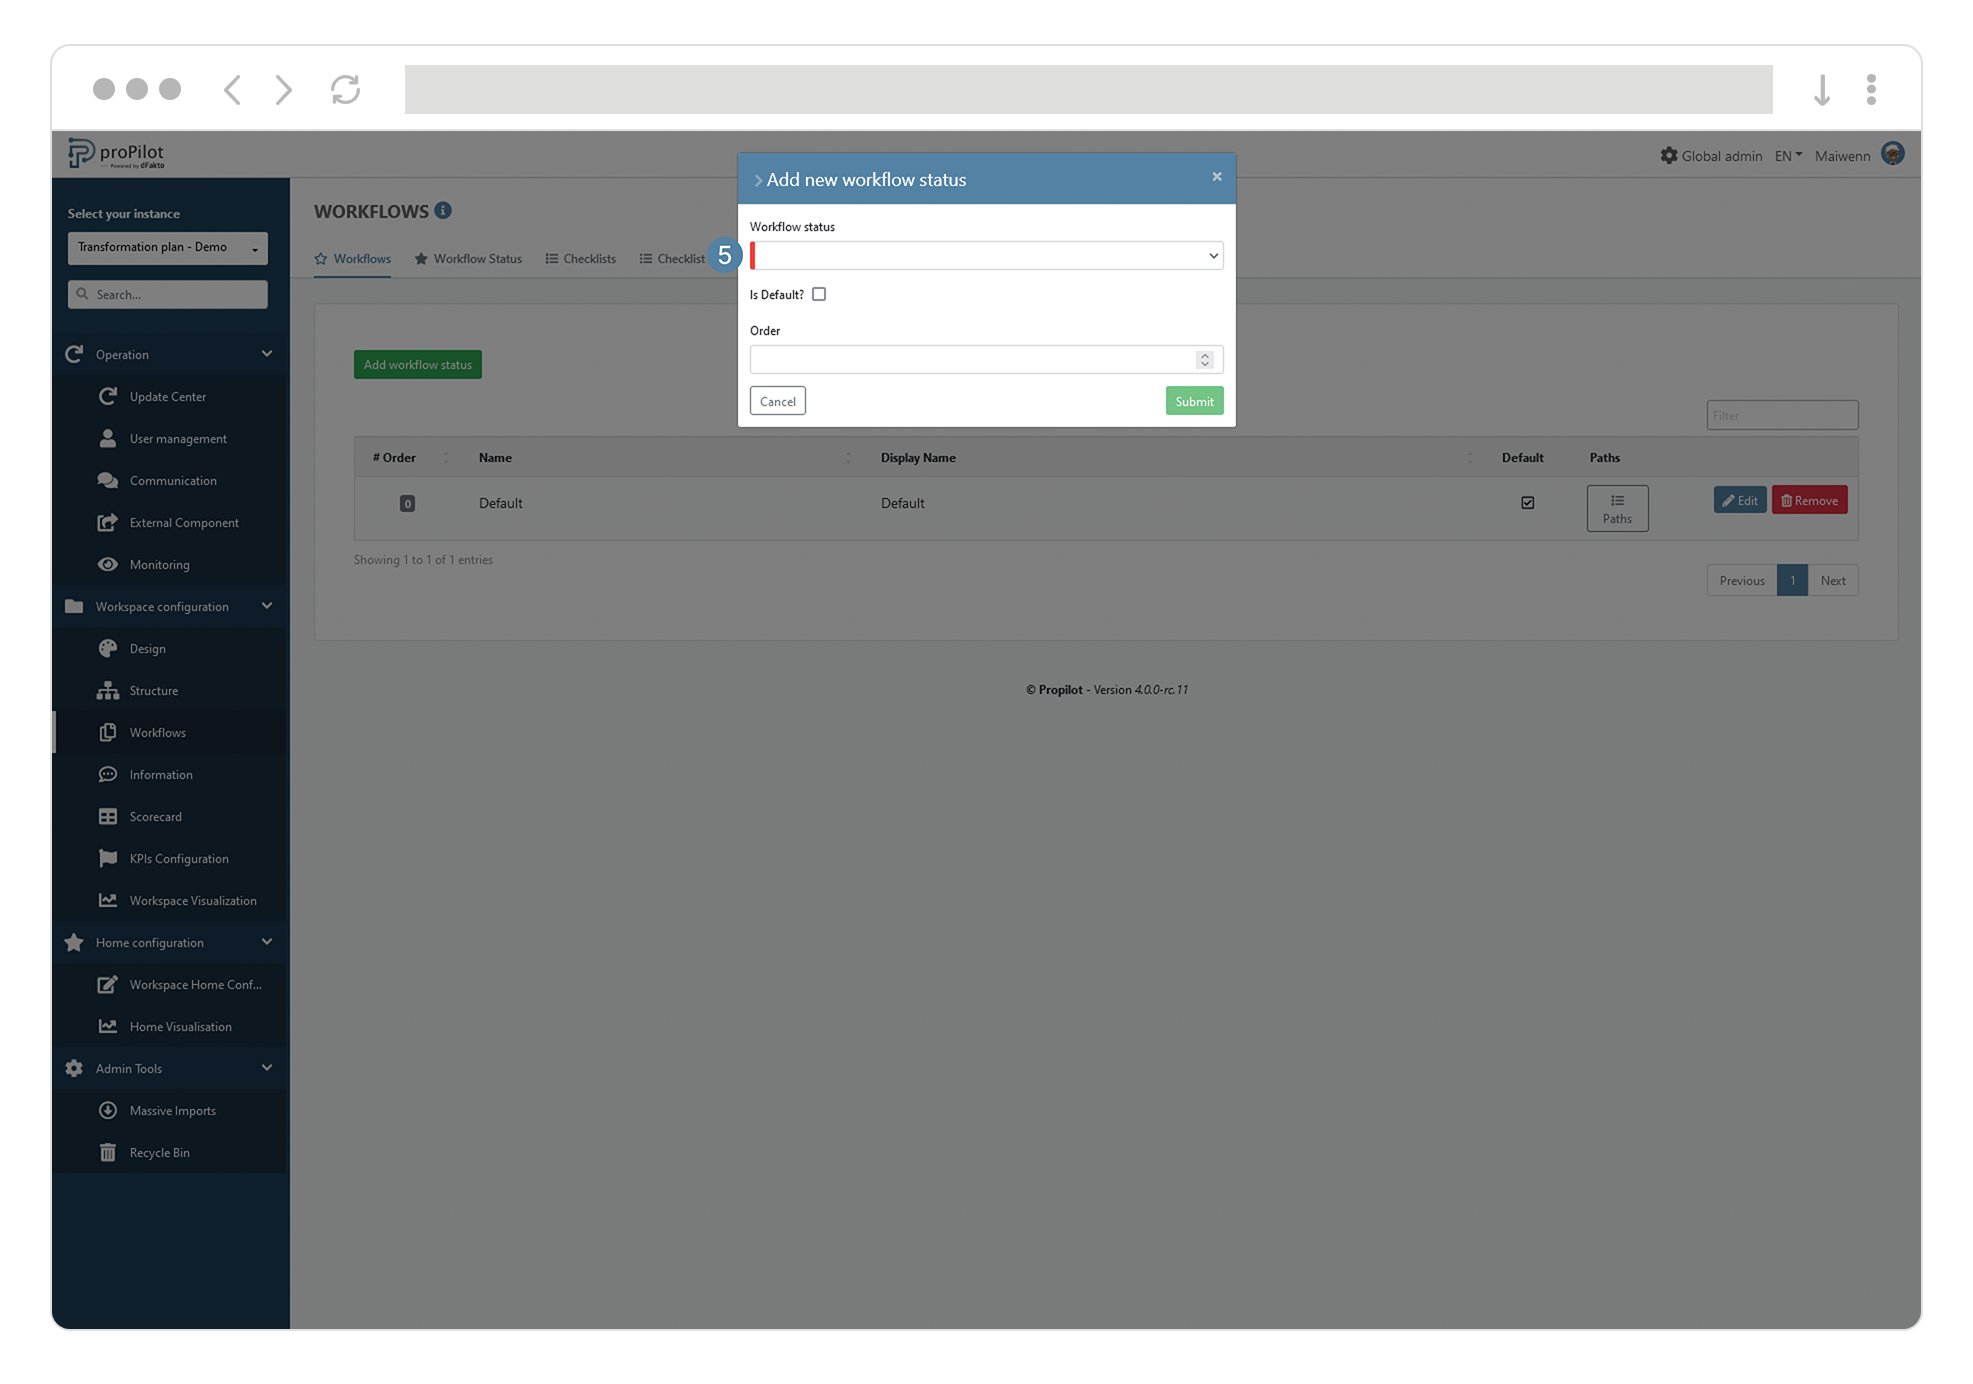
-
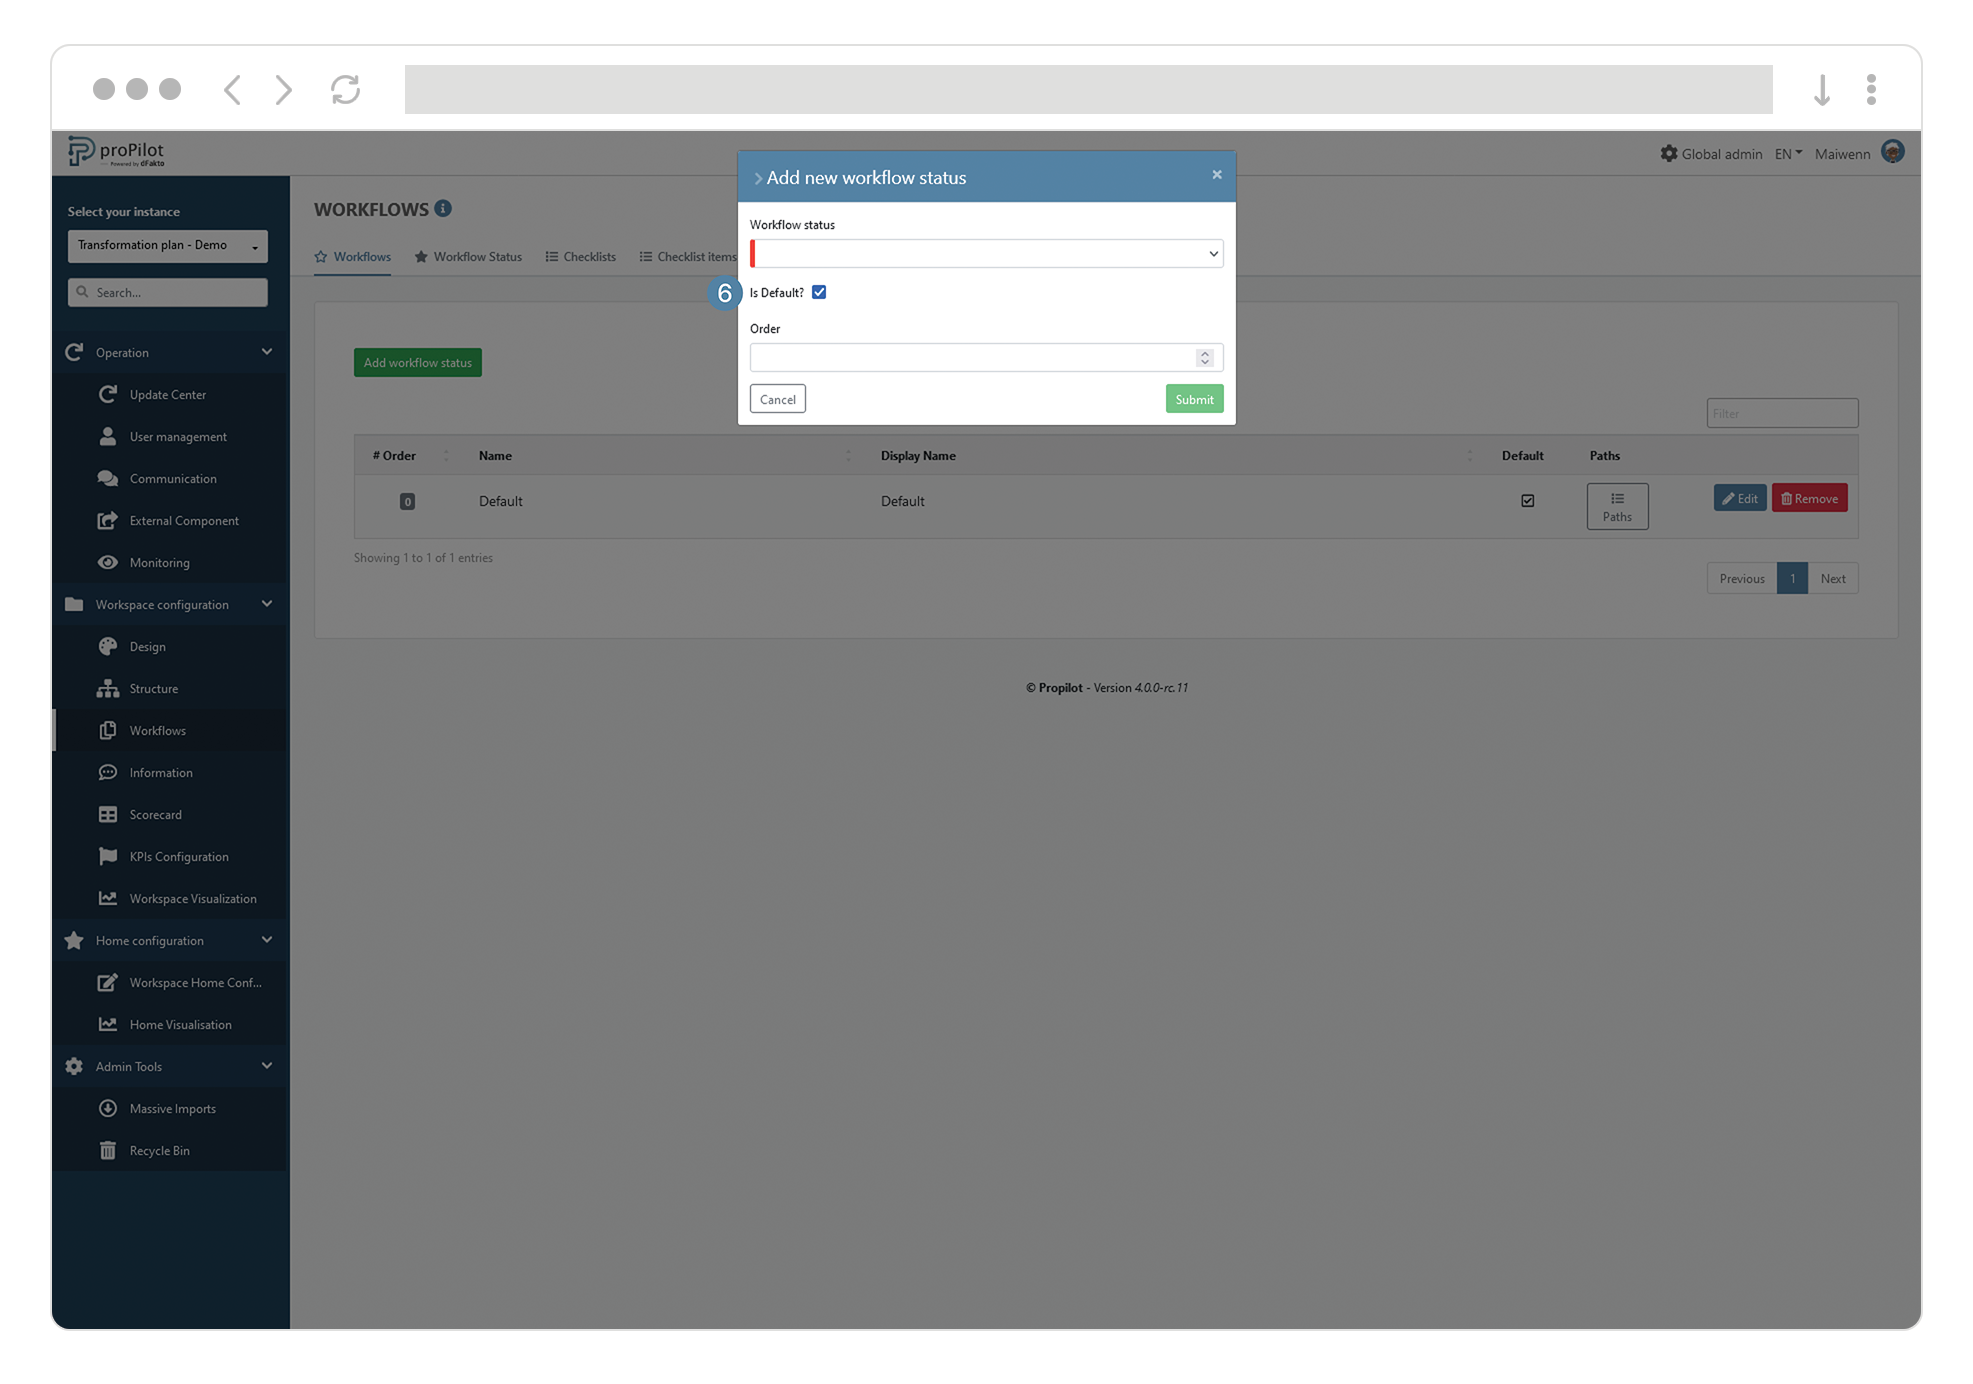
If you want this status to be the default when creating new entities, then check the "default" box.
-
Define an "order" in the configuration list.

Define the flow from one status to another
-
In the left menu, select "Workflow configuration" and then "Workflows".
-
Click on the "Workflows" tab. This module allows you to create a Workflow that can be applied to all the entities of a level.
-
Click on the "Workflow statuses" button of the workflow for which you want to enter additional information.
-
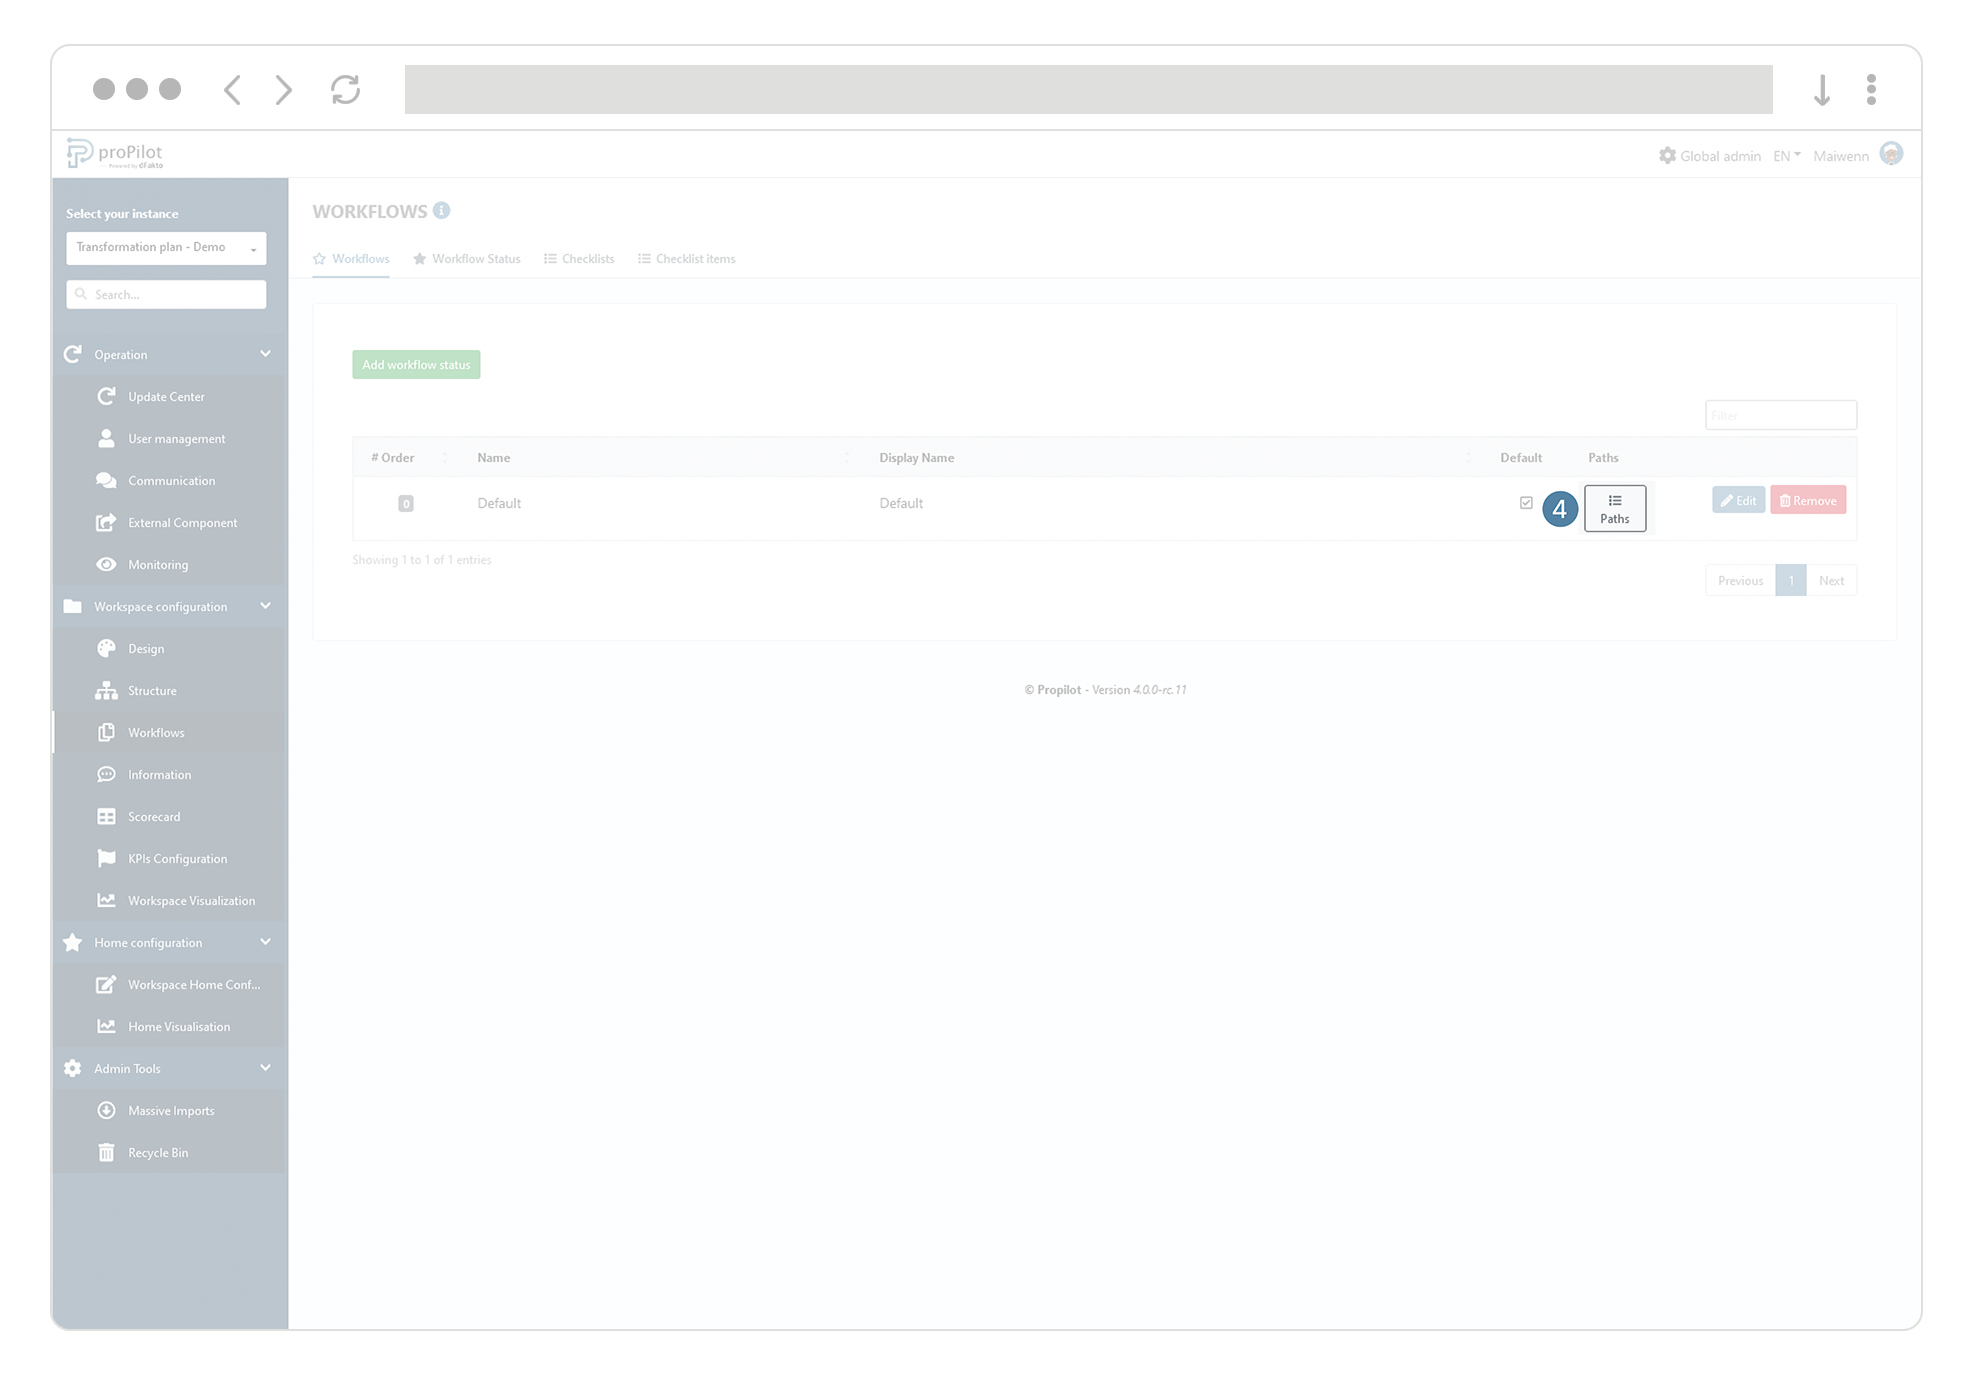
Click on the "path" button of one the status.
-
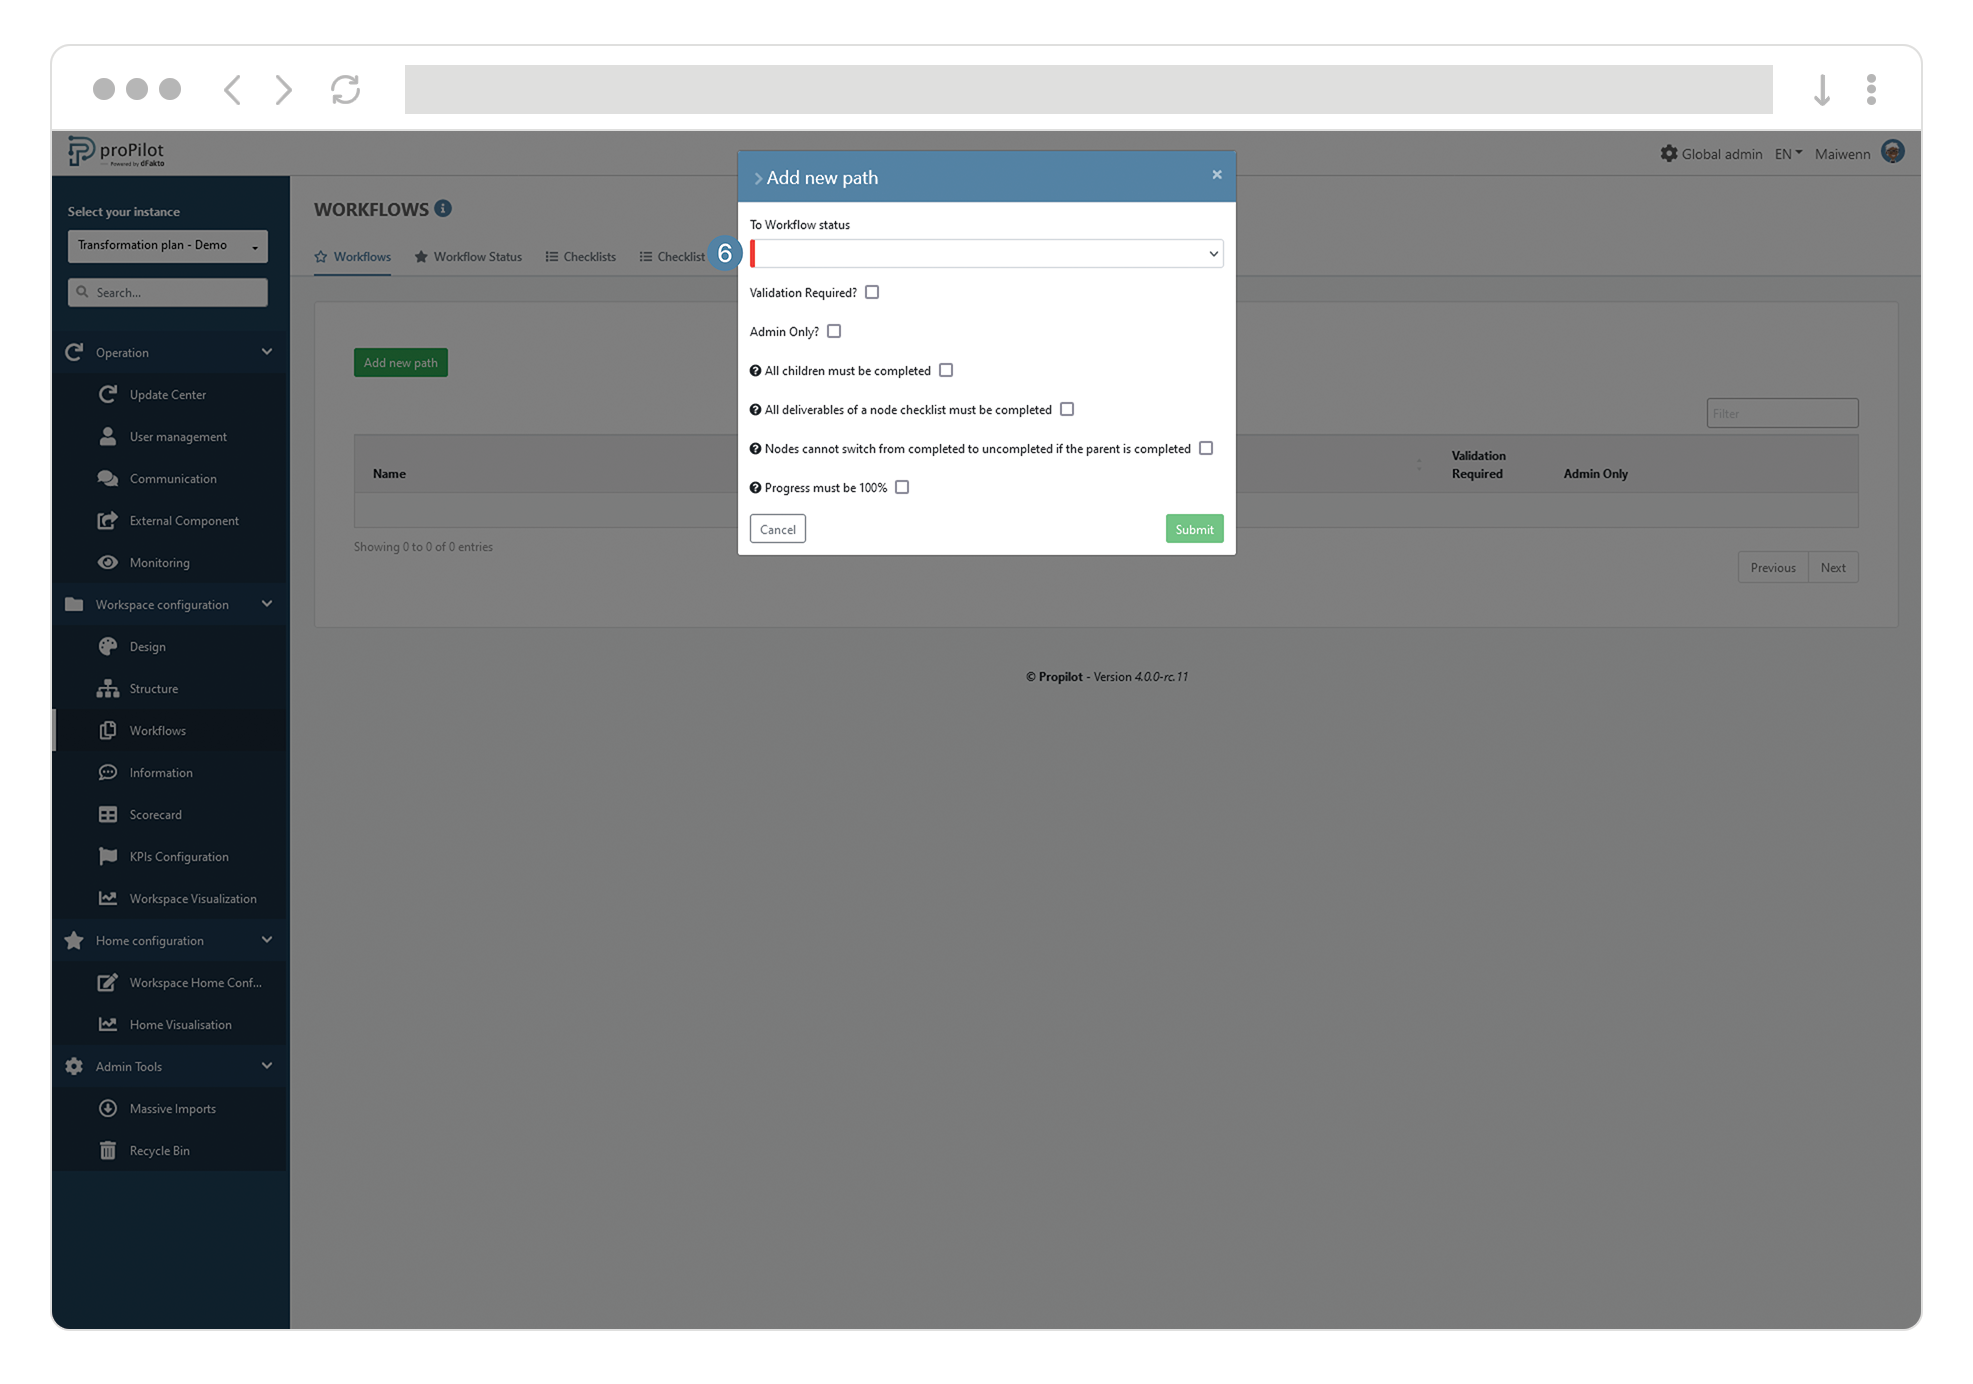
Click on "Add new path" to add a flow to another workflow.
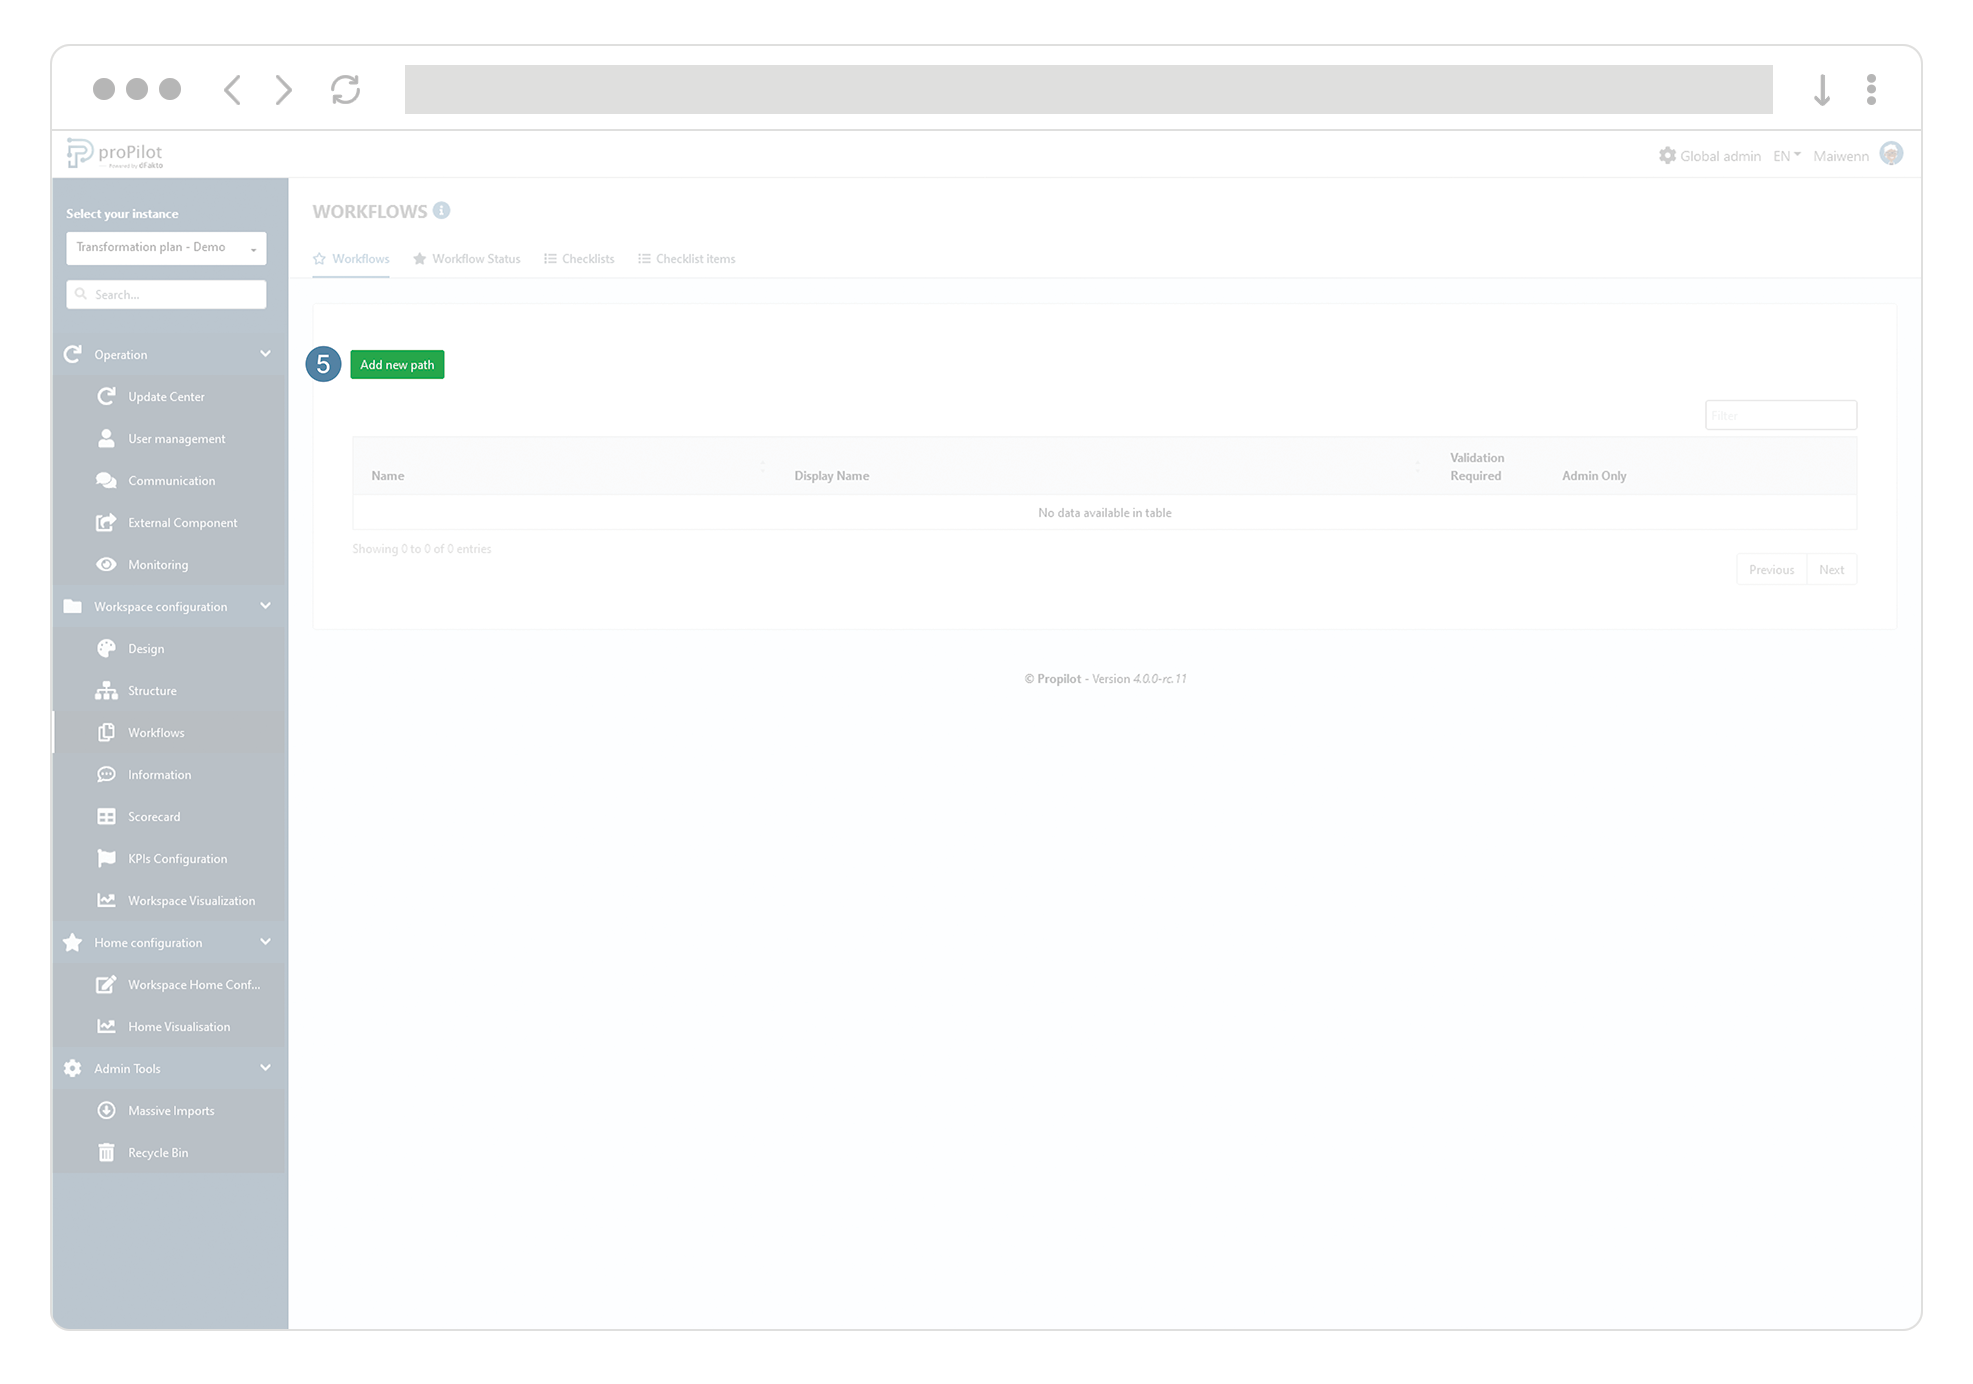
-
If necessary, set conditions before switching from one state to another.
Define a validation to allow the swich from one Workflow status to another
-
In the left menu, select "Workflow configuration" then "Worflows".
-
Click on the "Workflow" tab. This module allows you to create a flow that can be applied to all the entities of a level.
-
Click on the "Workflow status" button of the workflow for which you want to enter additional information.
-
Click on the "paths" button of the status.
-
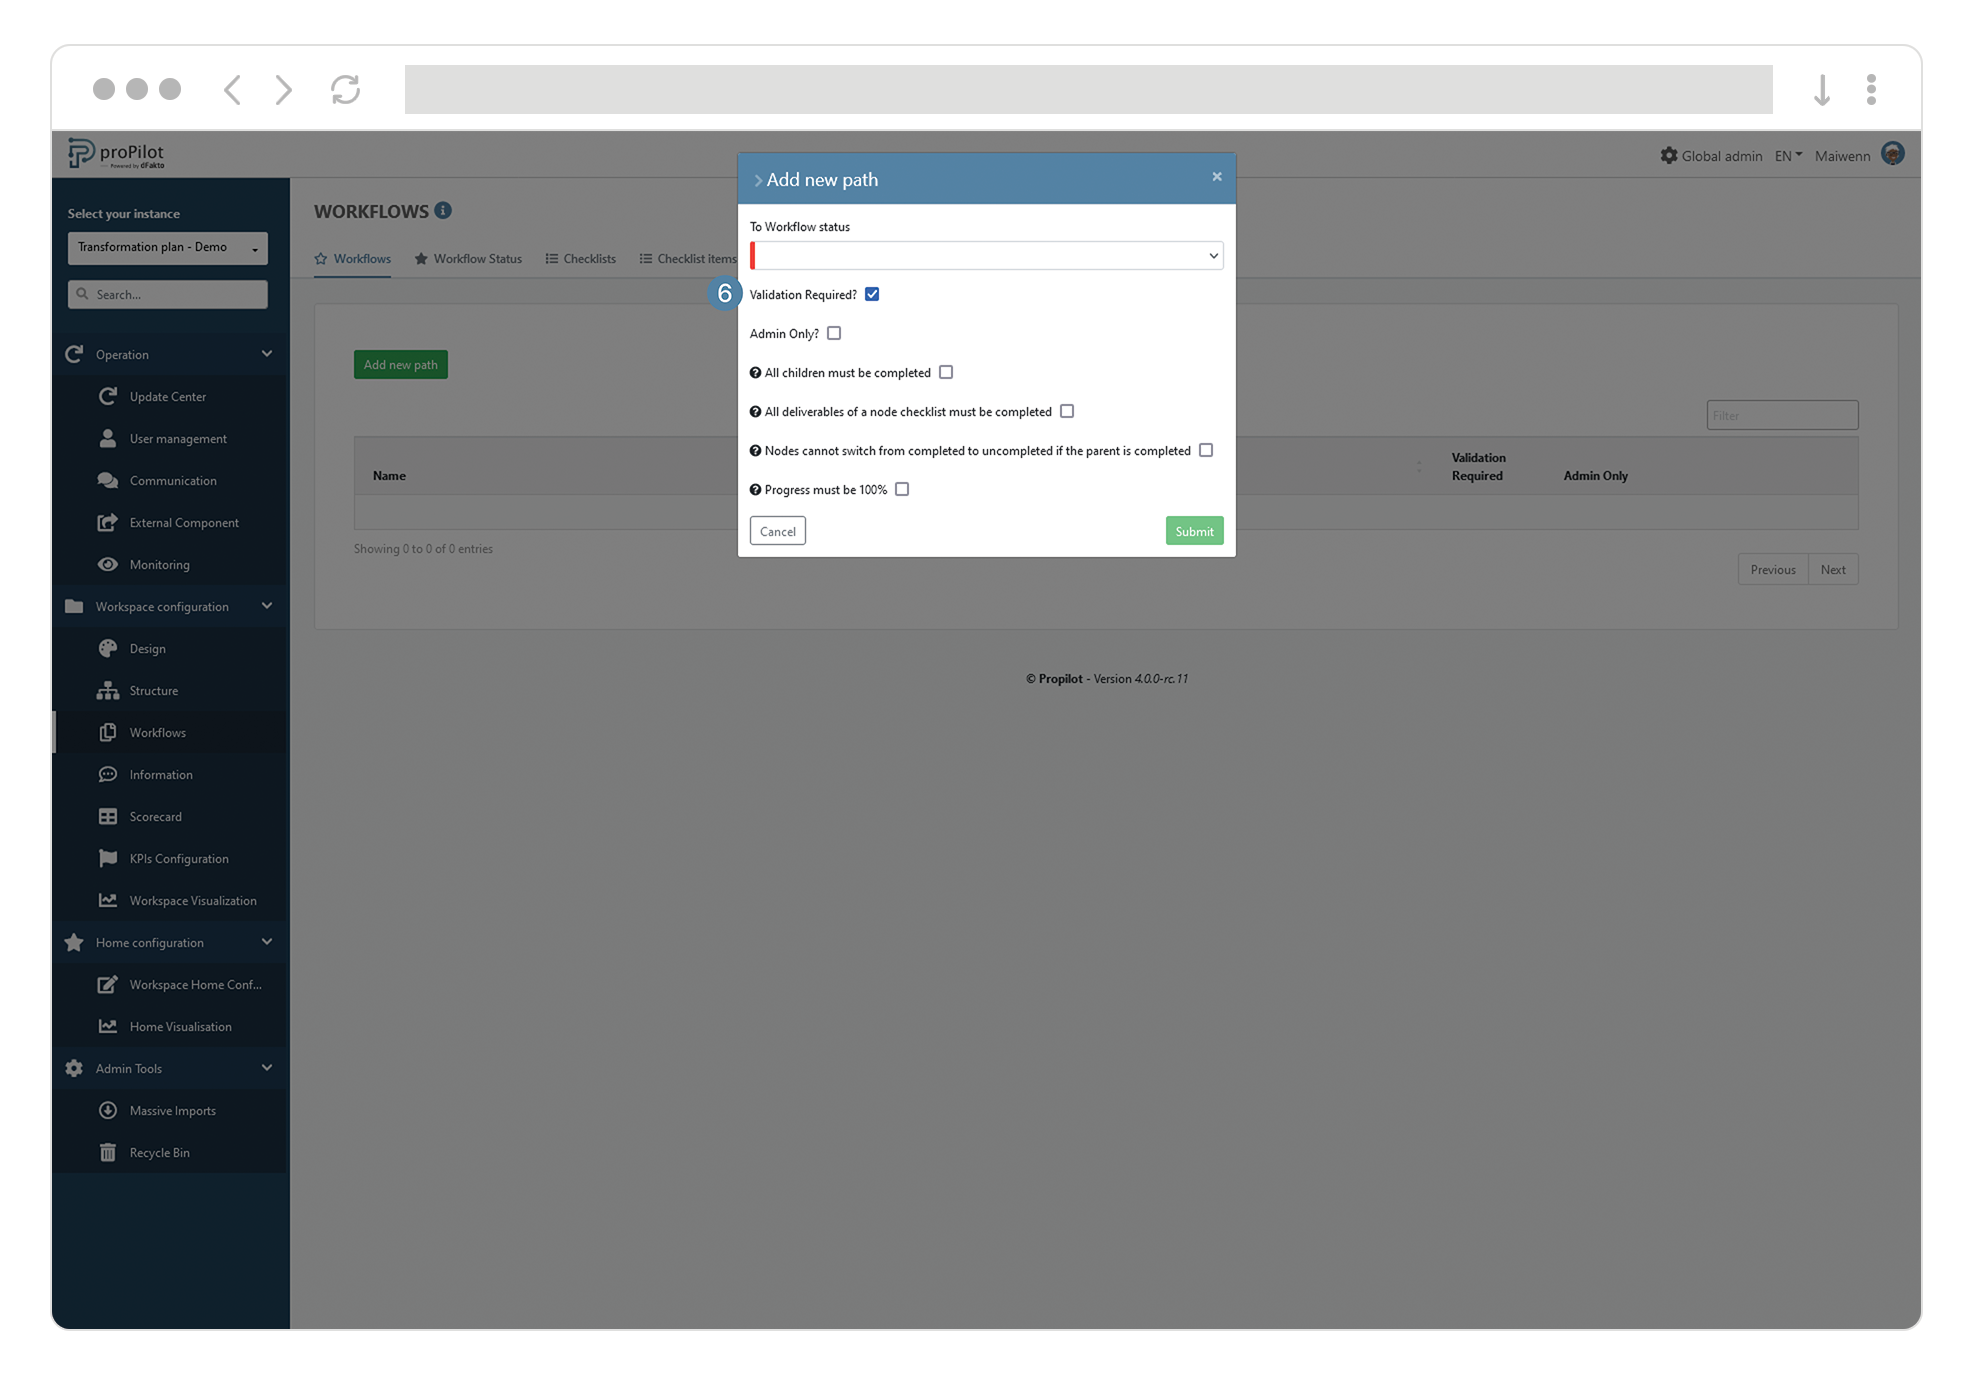
Click on "add new path" to add a path to another status.
-
Check the "validation required" box so that the user can only make a request to move from one status to another. The request will then arrive in the task manager of the person in charge.
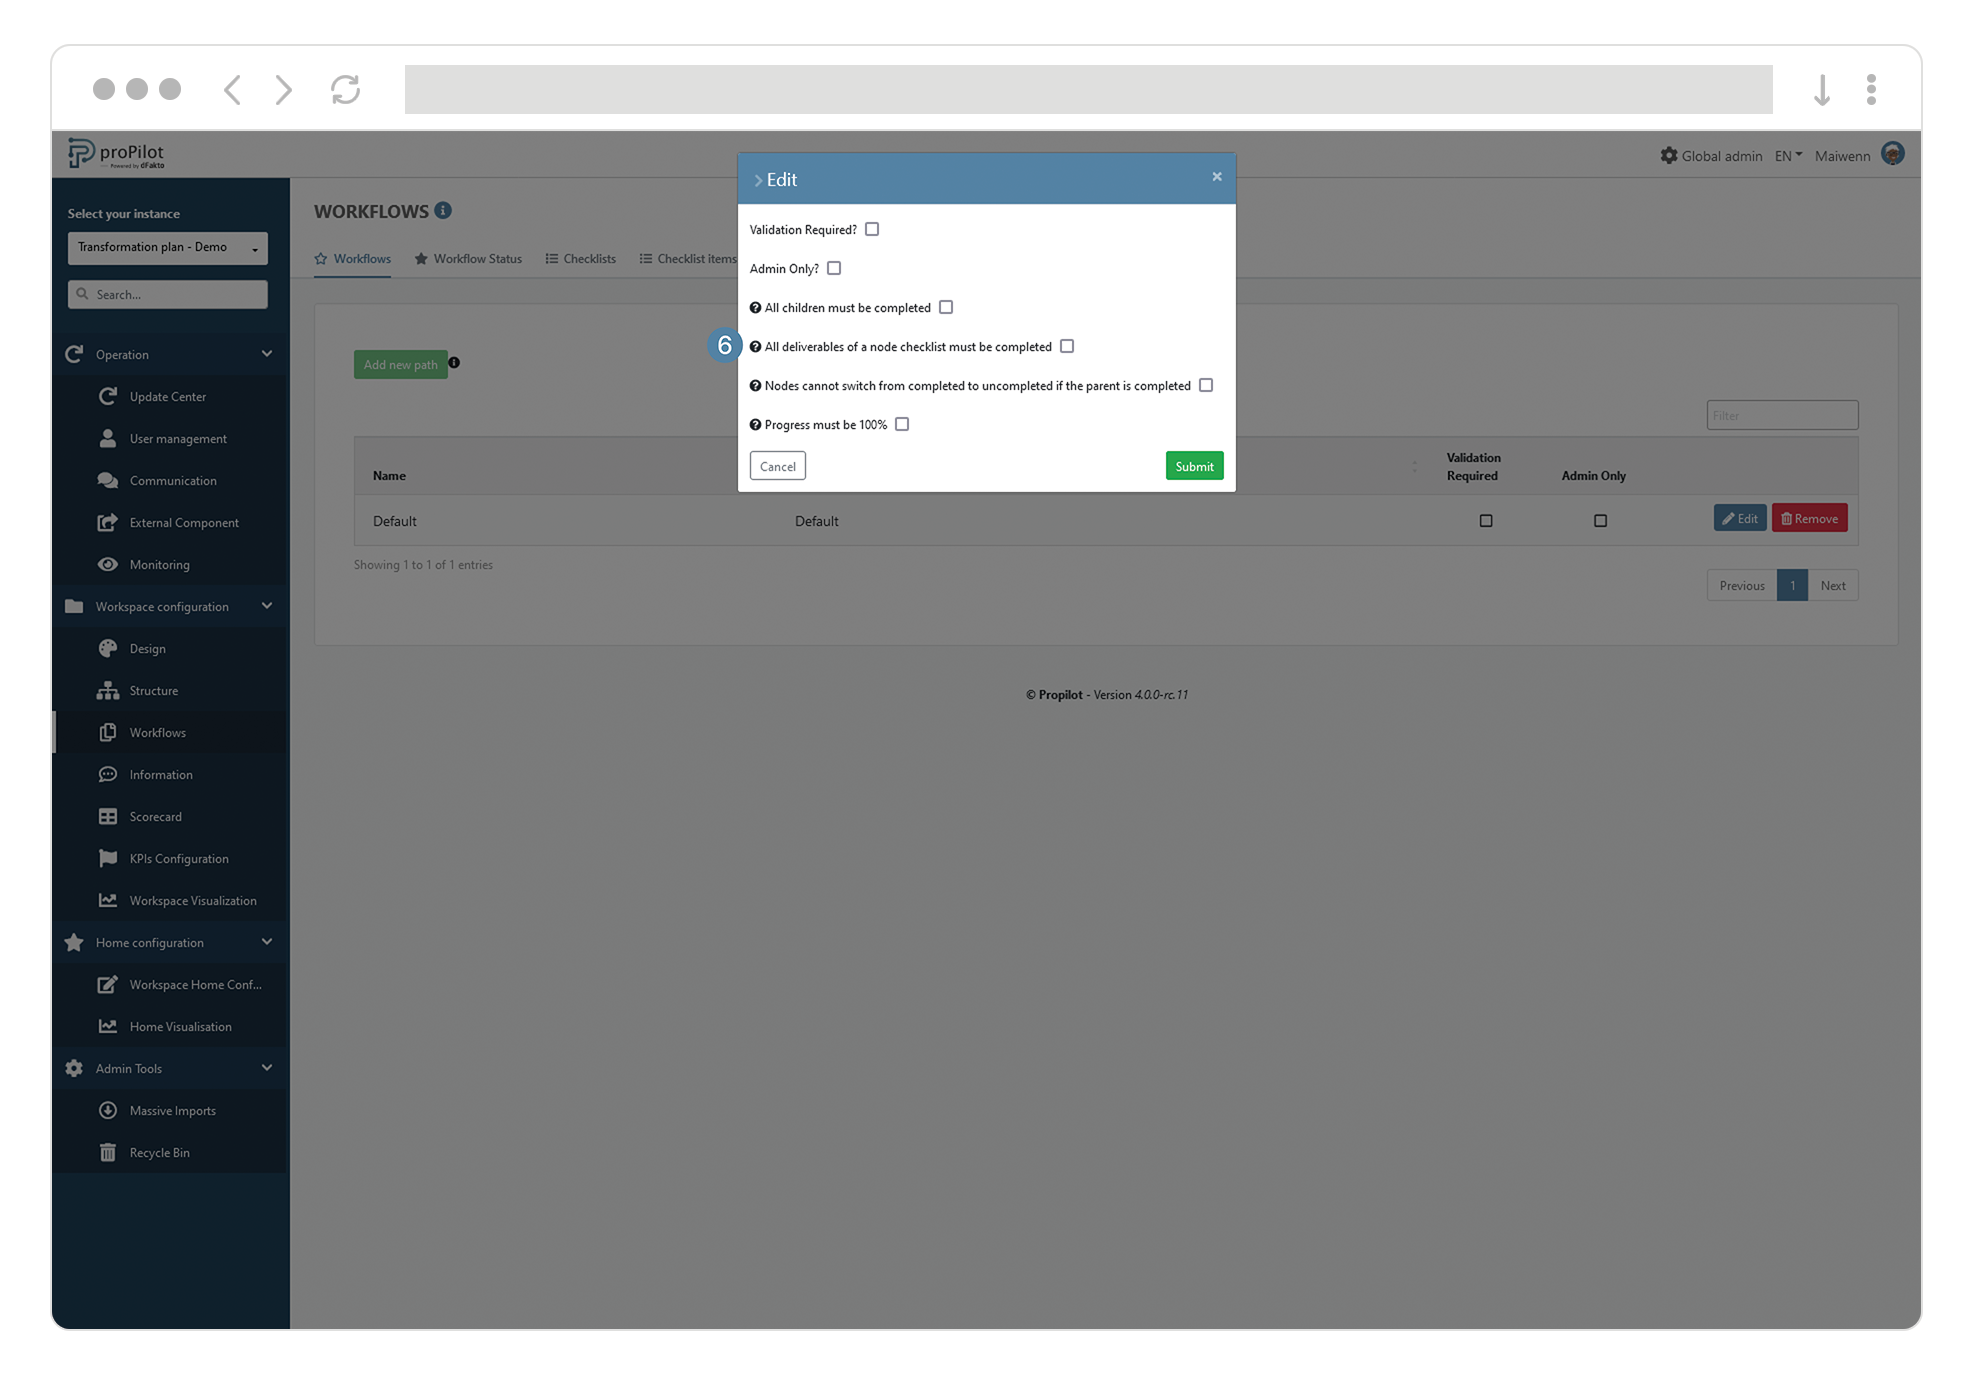
Make sure that the children entities are completed before allowing the passage from one status to another
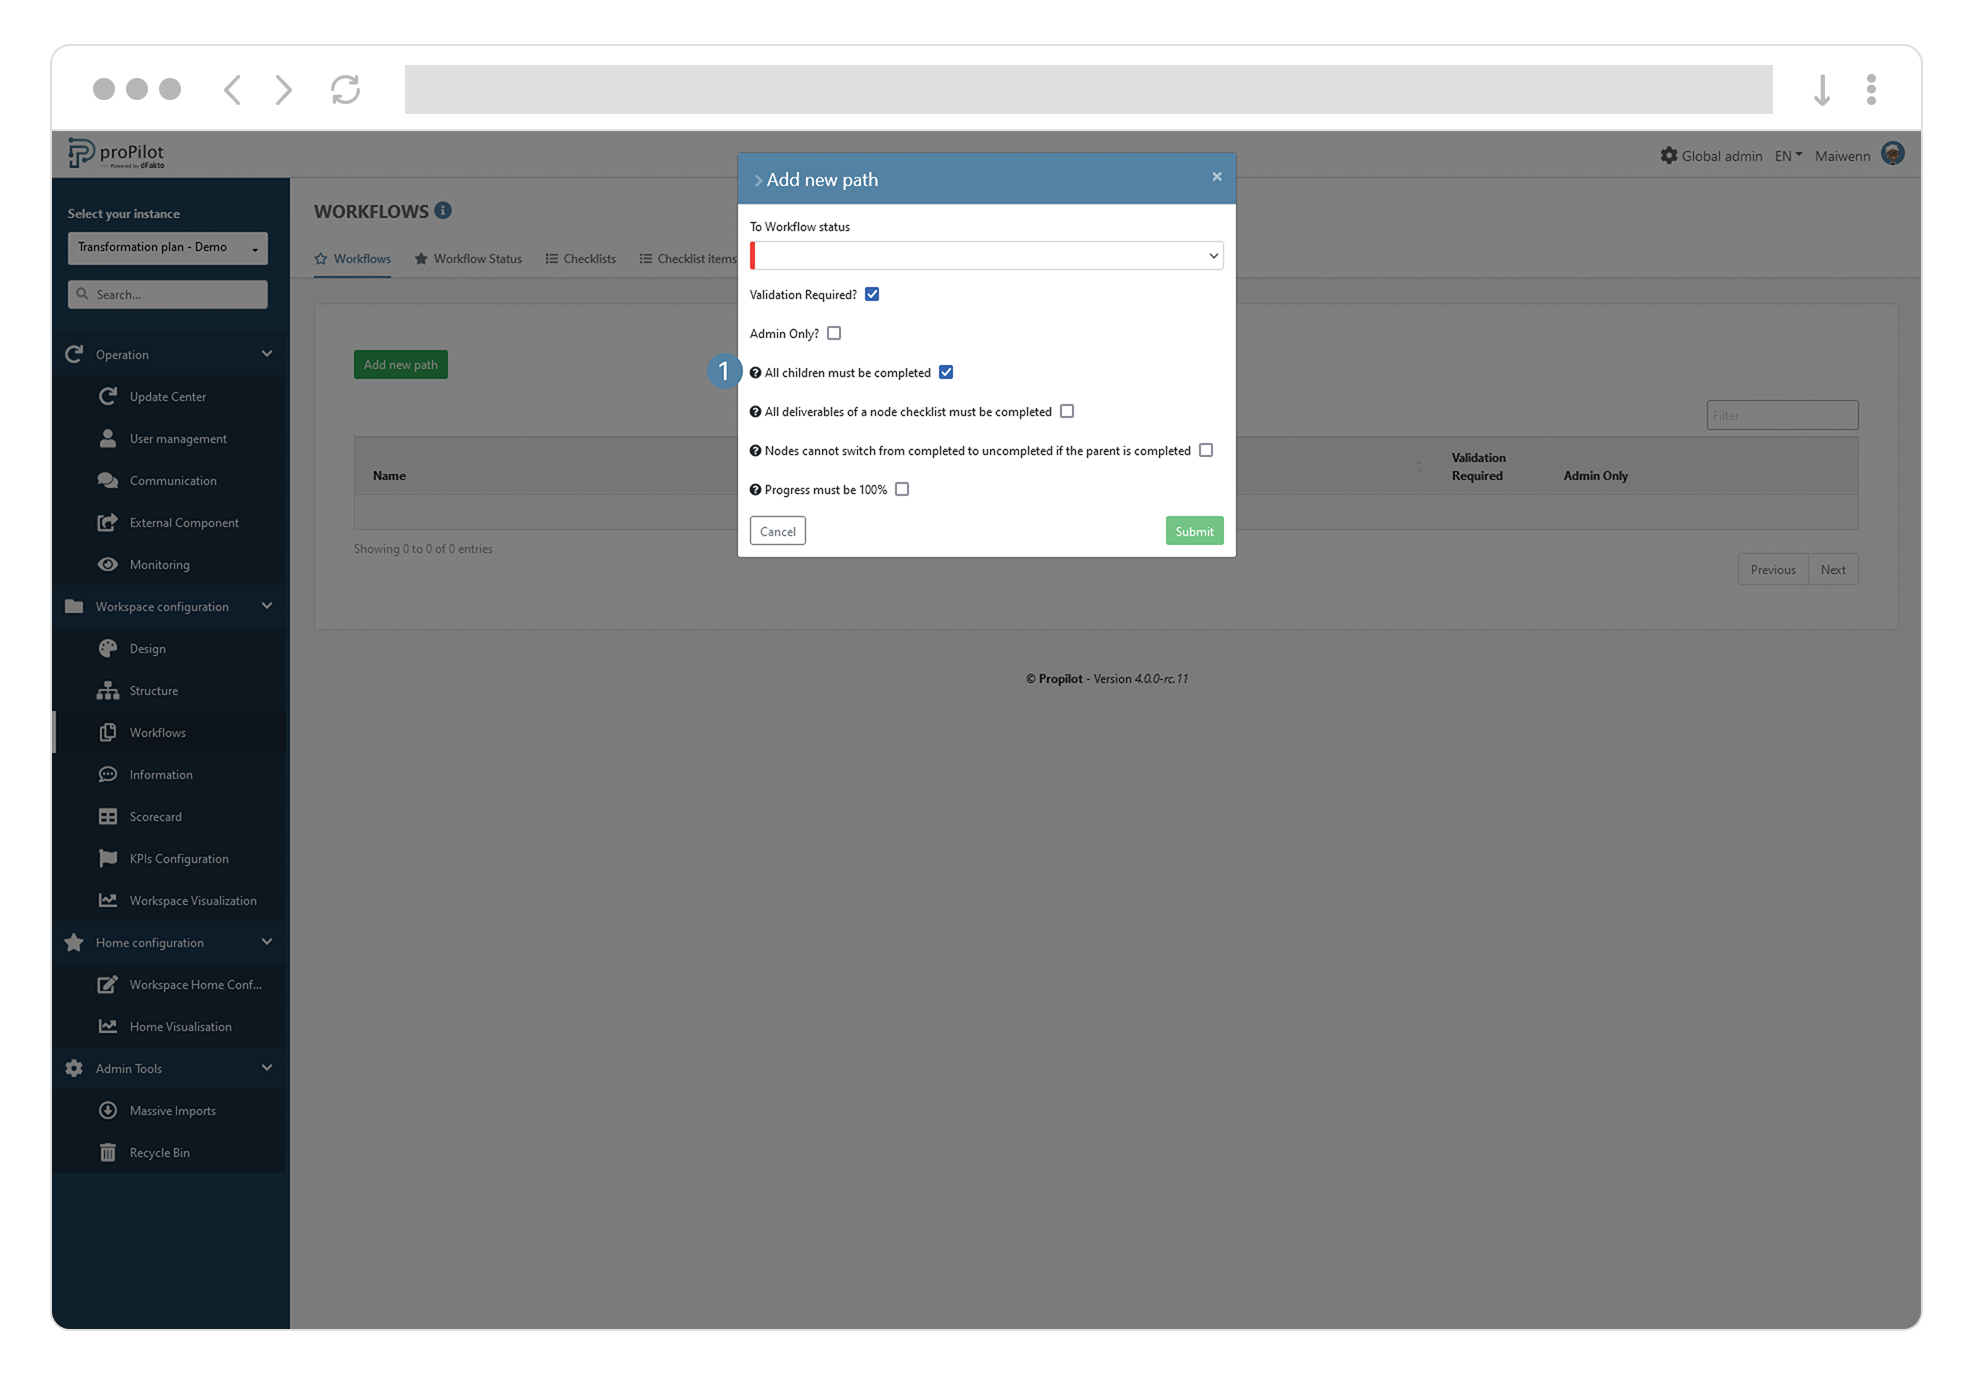
-
Check the "all children entities must be completed" option so that the user can only move from one maturity to another if all children have a "closed" status.
Require that the progress of the entity is 100% before allowing the passage of a status to another
-
Check the "progress must be 100%" option so that the user can only move from one status to another if that entity has 100% progress.

Integrate a specific Workflow for all the entities of a level
-
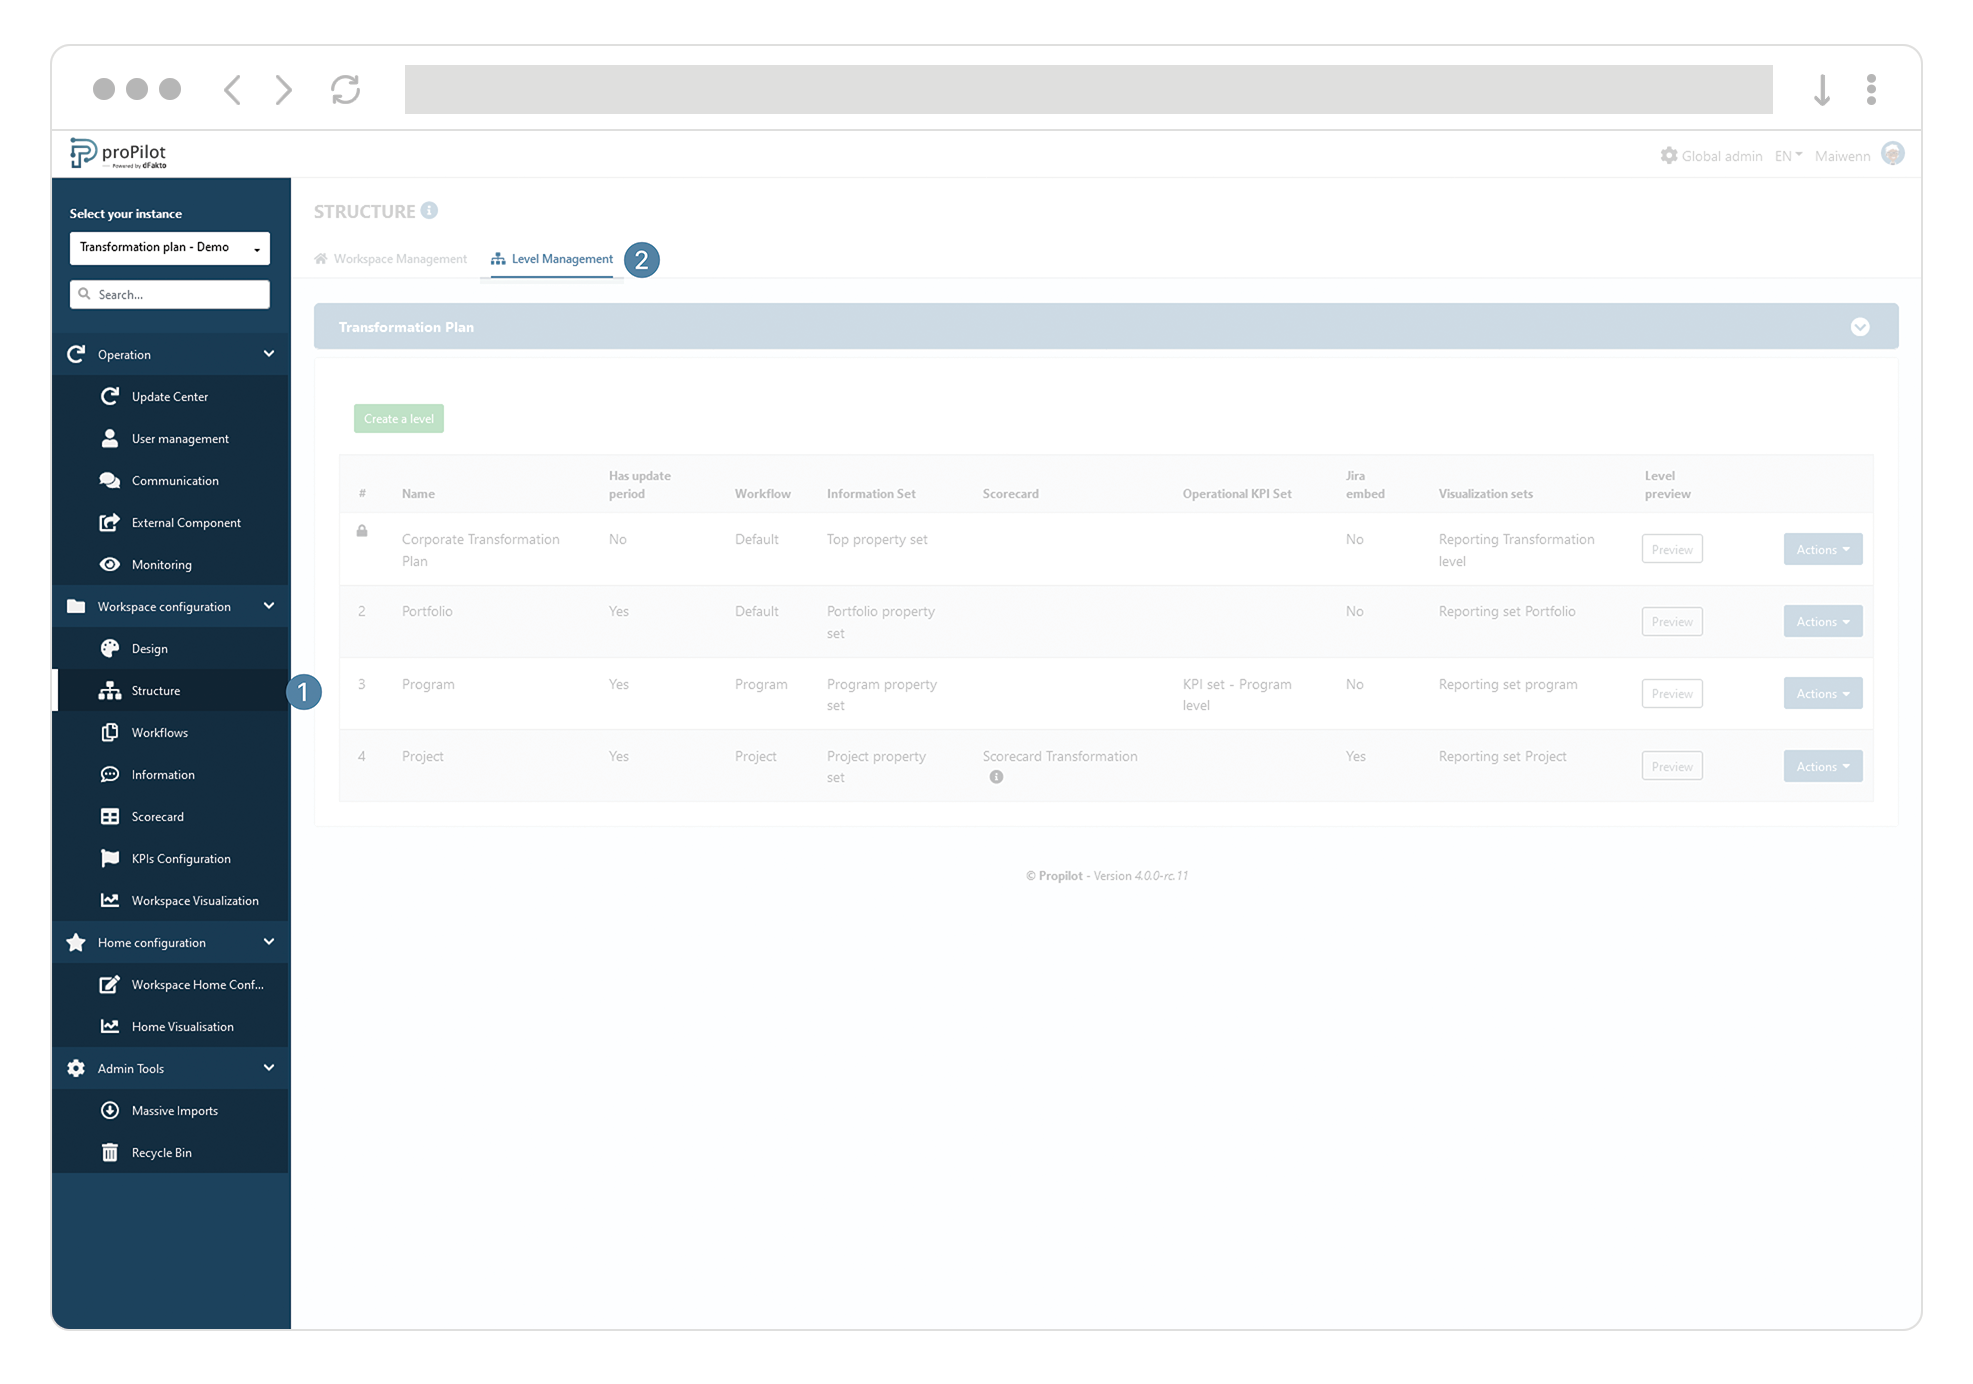
In the left menu, select "Workspace configuration" and then "Structure".
-
Click on the "Level Management" tab and select the workspace you wish to update. This module allows you to manage the levels and their respective configurations.
-
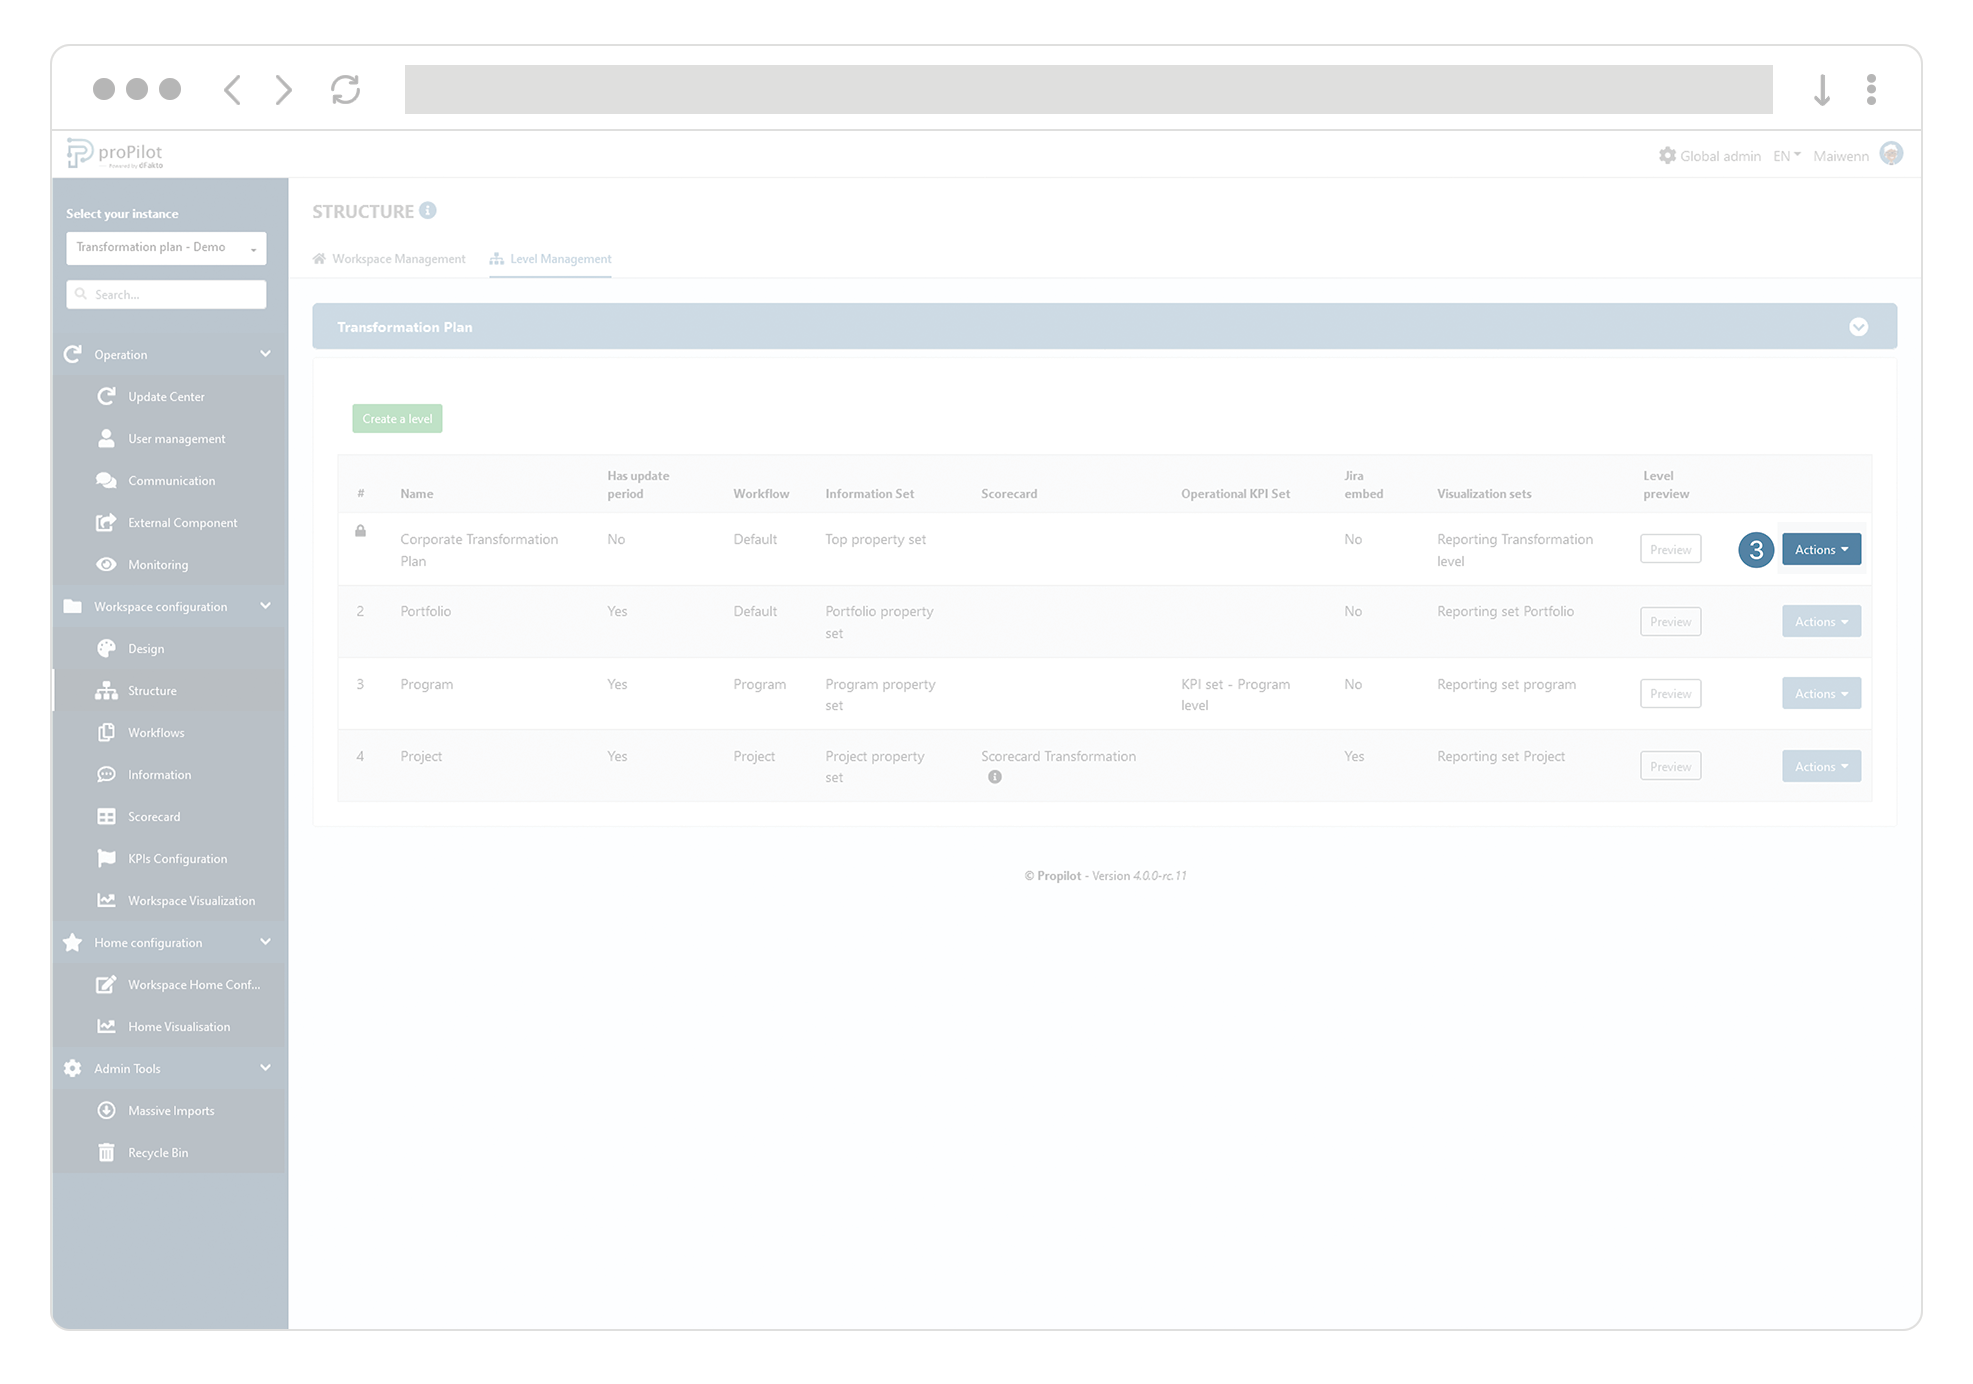
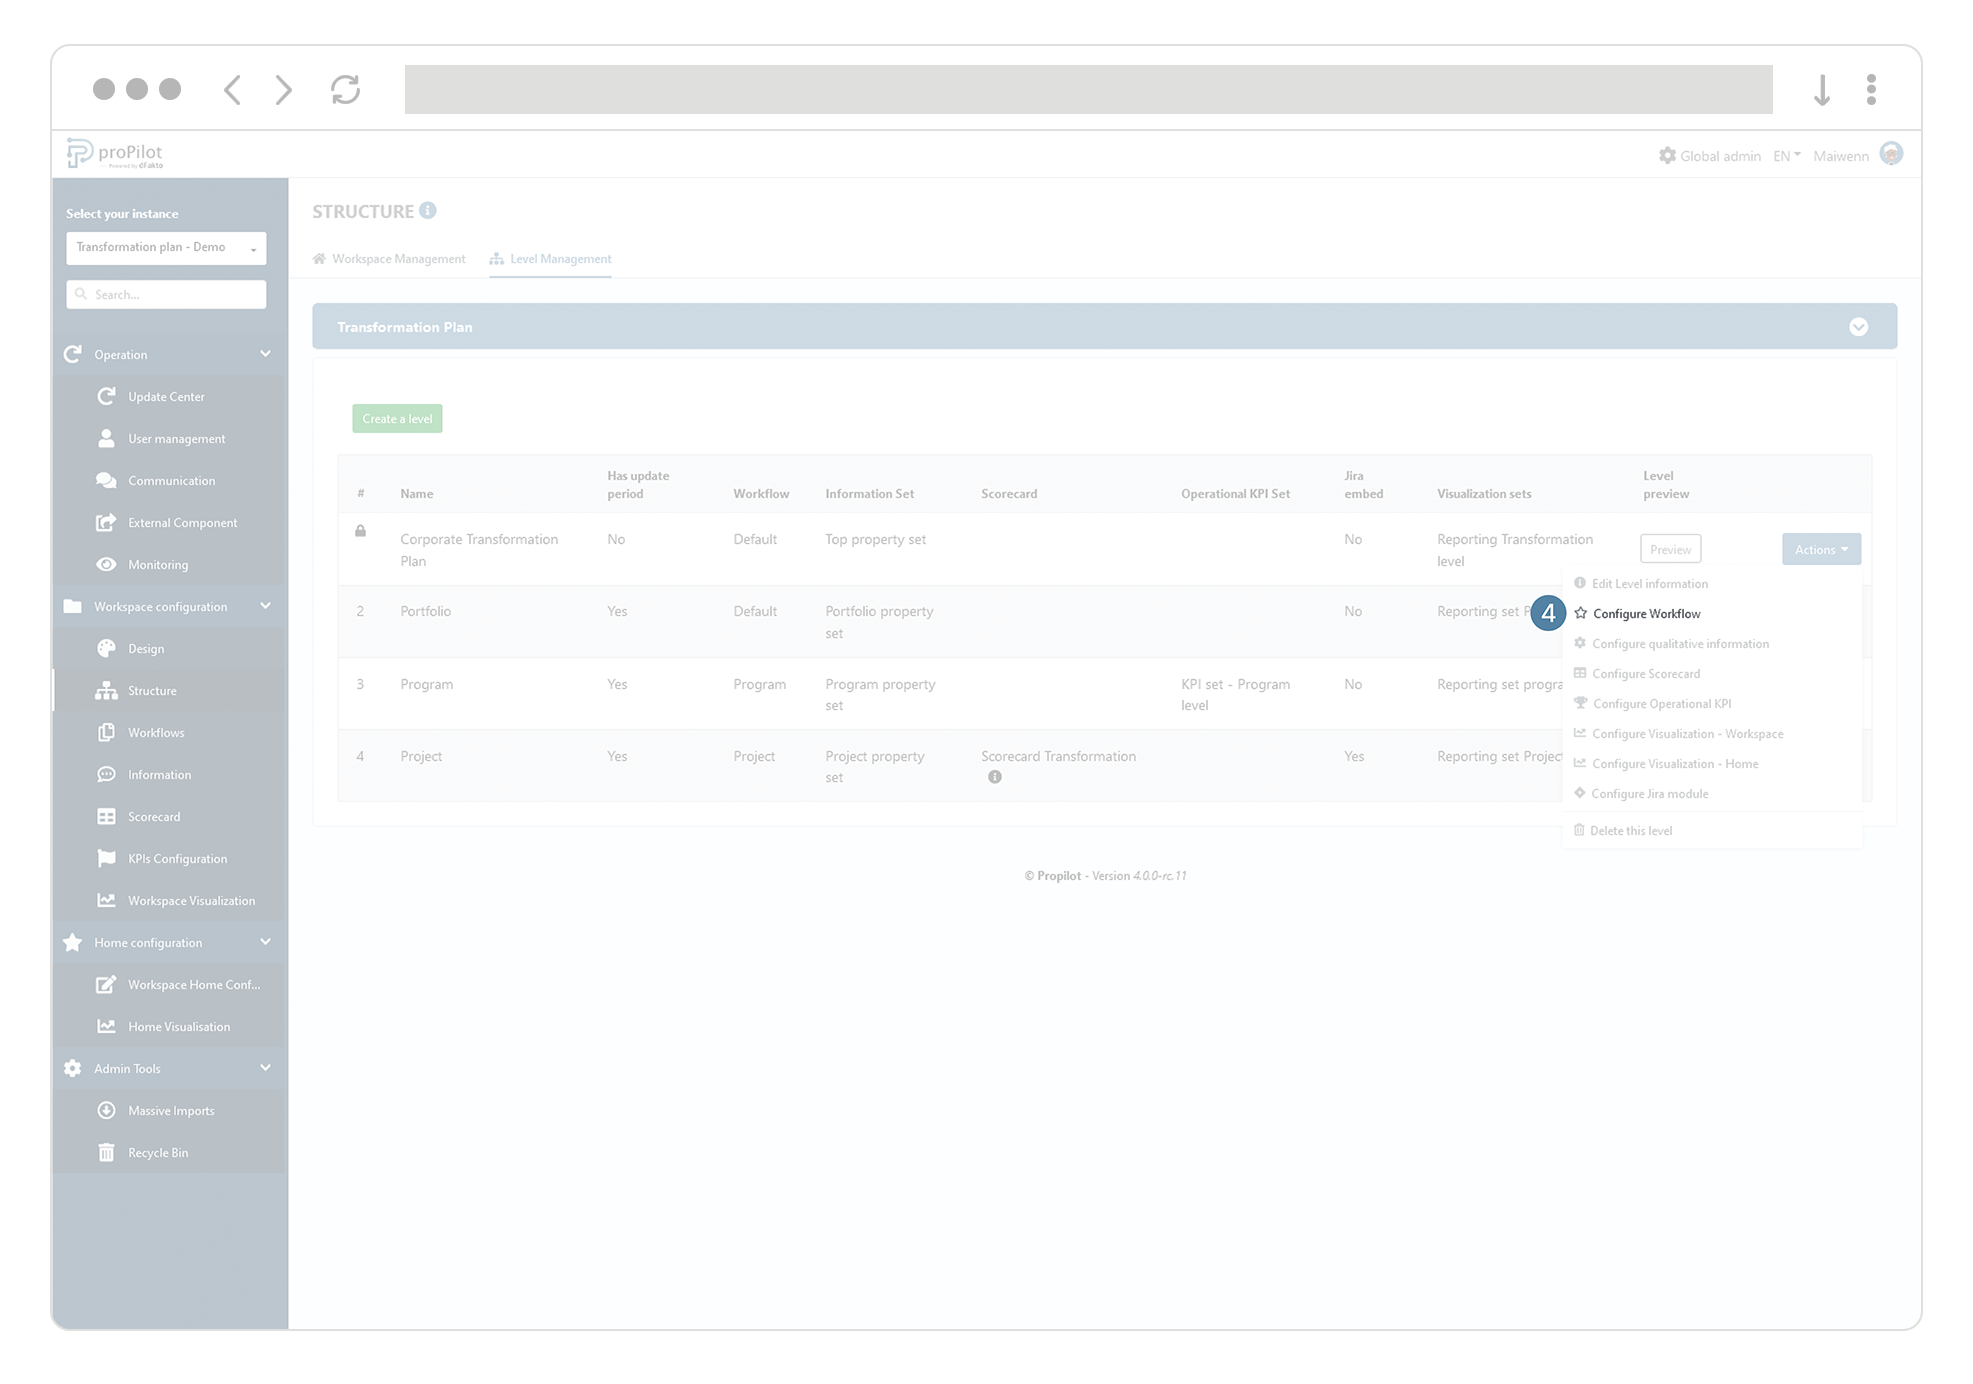
Click on the "Actions" button of the level you wish to update. A pop-up window appears.
-
Click on “Configure Workflow”, then in the drop-down list, select the Workflow you want to integrate for the entities at this level.
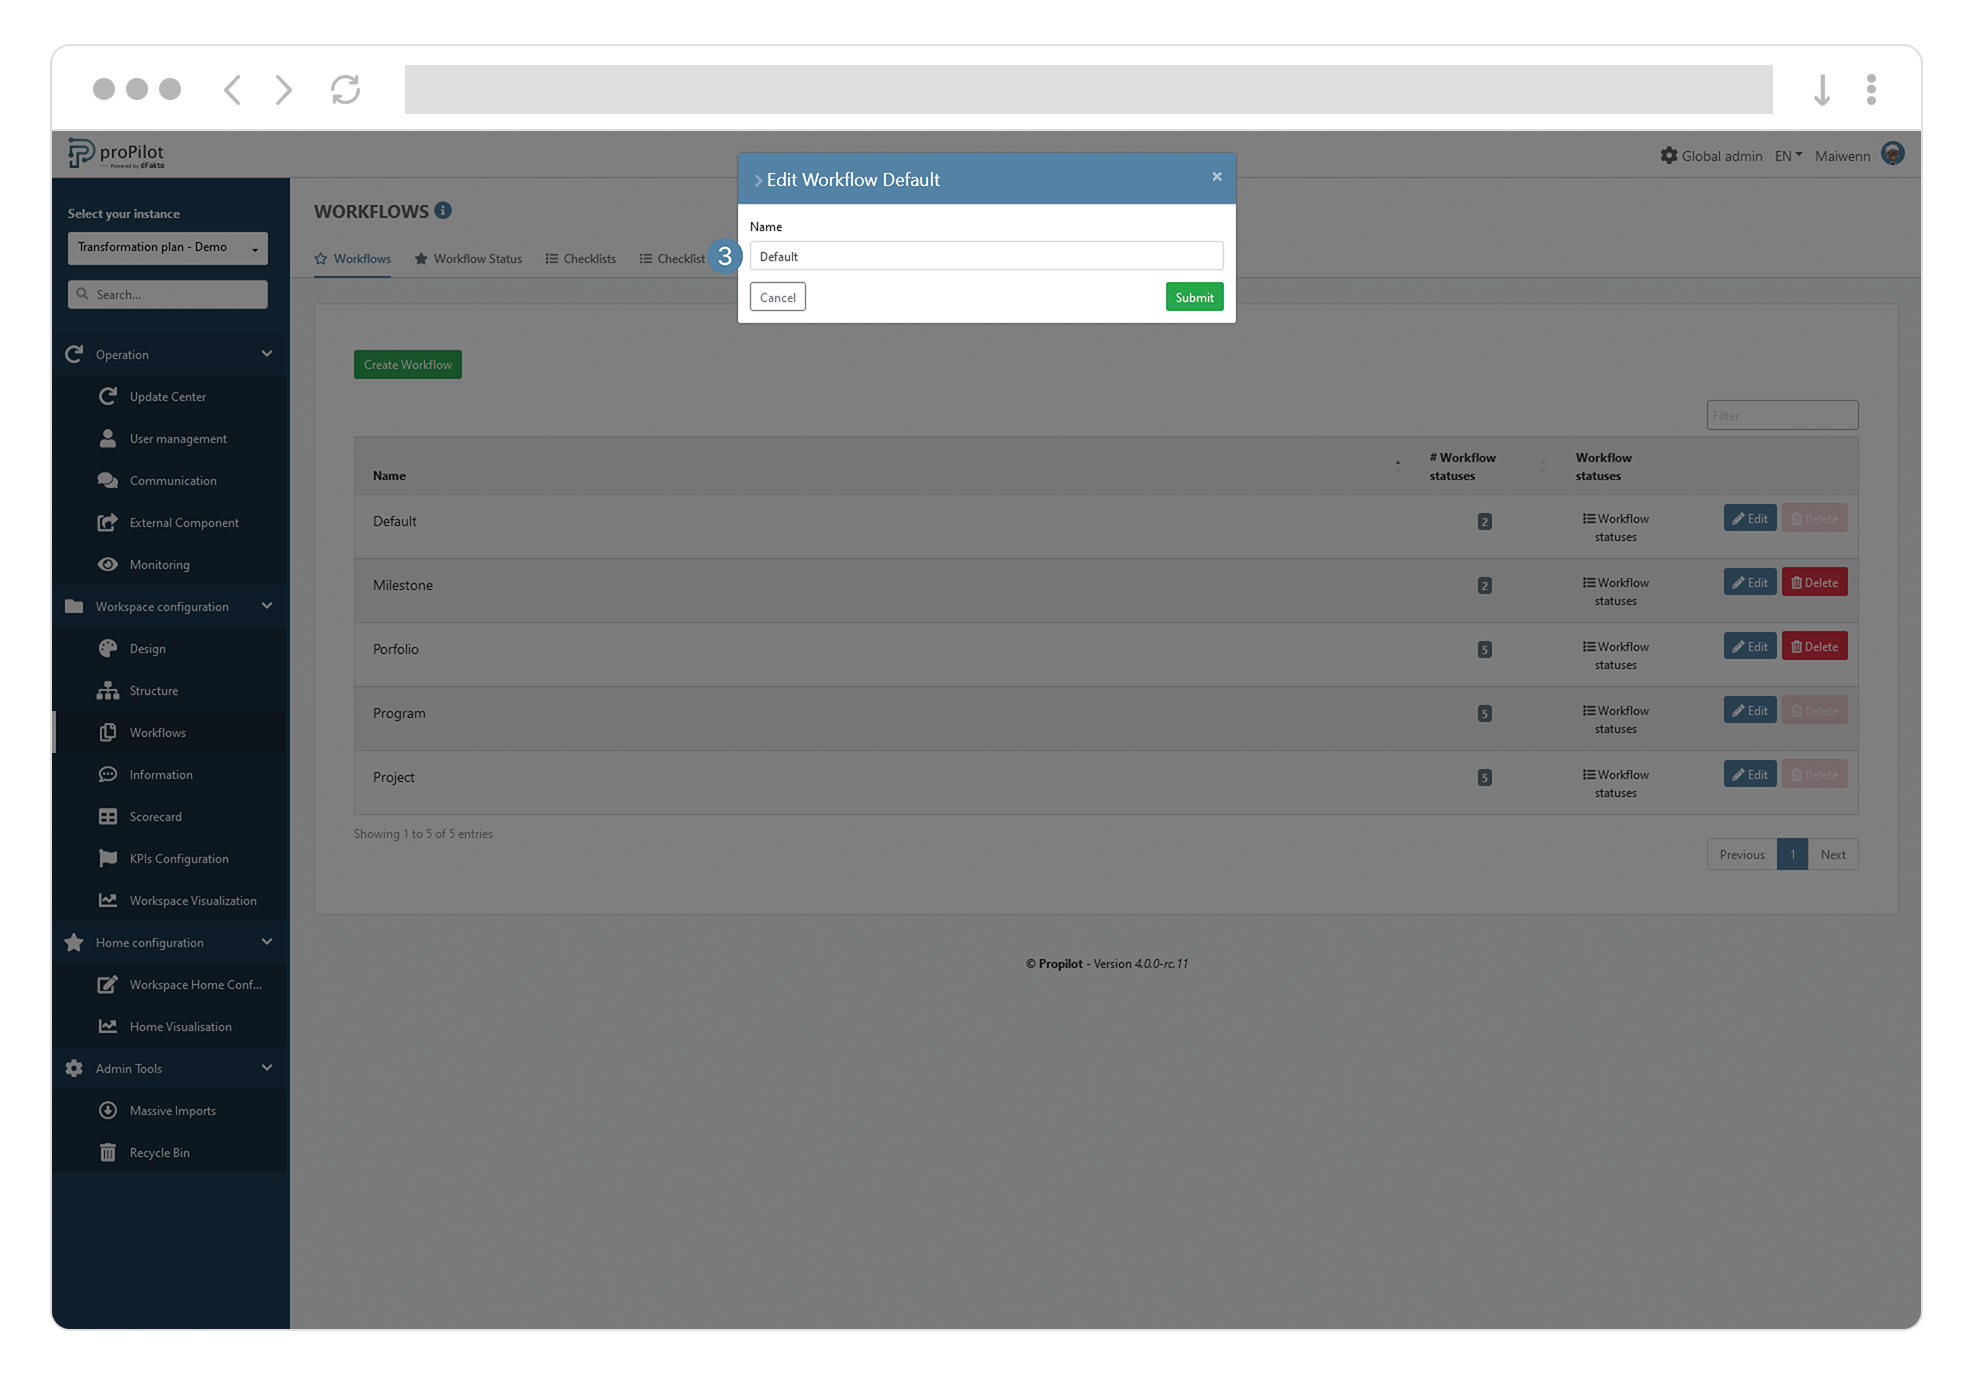
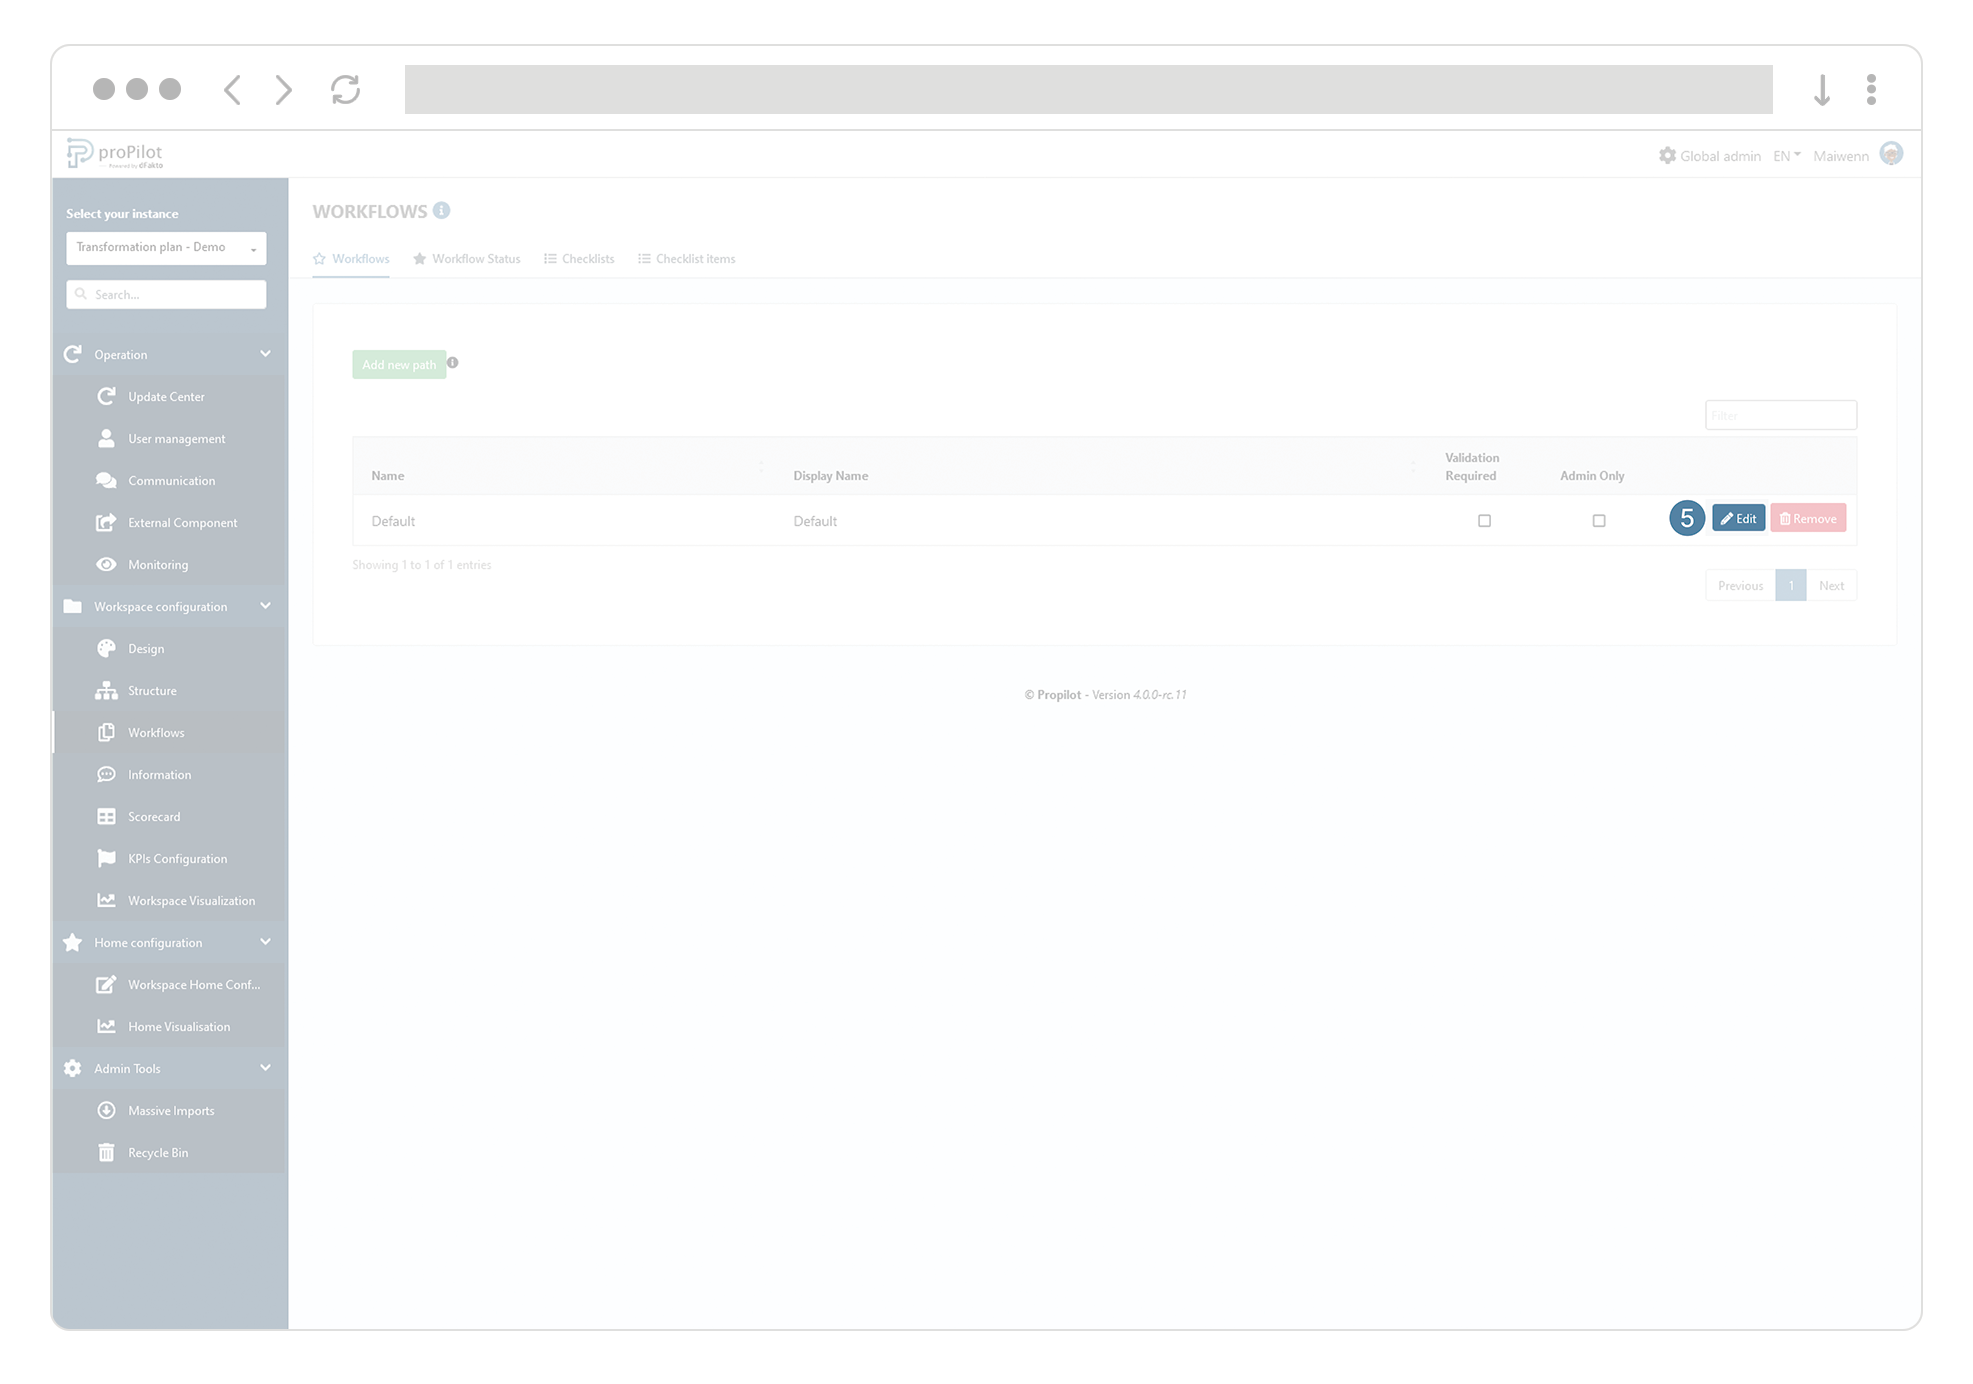
Edit the name of a workflow status
-
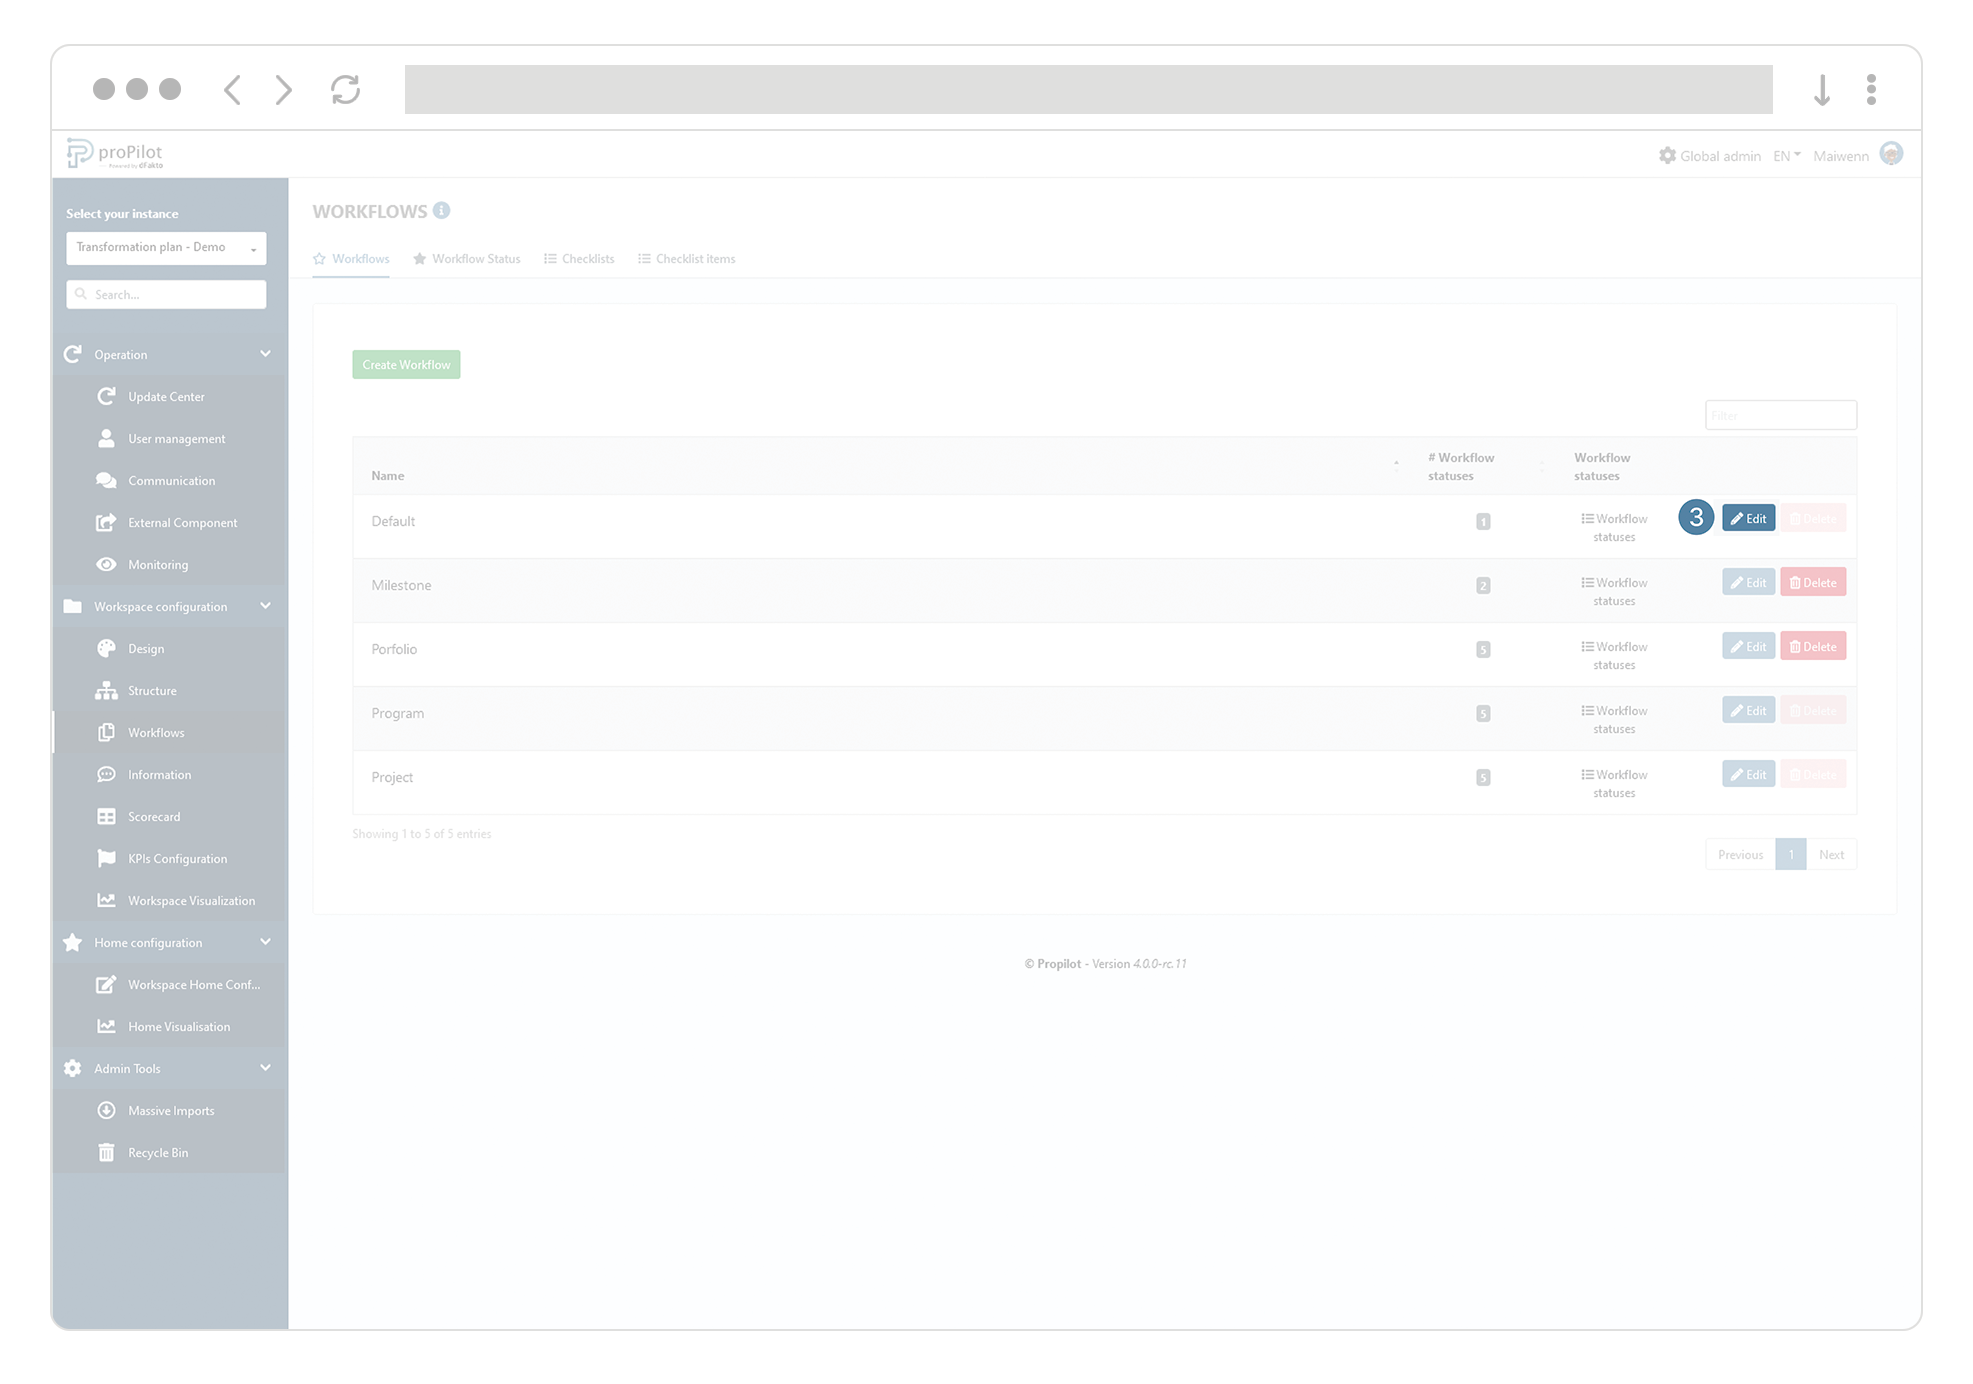
In the left menu, select "Workspace configuration" and then "Workflows".
-
Click on the "Workflows" tab. This module allows you to manage the different statuses available.
-
Click on "Edit" and update the display name for the latter.
Customize the global display name of lifecycles in proPilot
proPilot allows you to customize the column name used to display an initiative’s lifecycle status in built-in reports (Information Tables) and in entity preview tables within the workspace.
-
In the left menu, select “Workspace configuration”, then “Information”.
-
Open the “Information” tab.
-
Select the information field “Maturity”.
-
Edit the “Display name”.
Checklists: create specific validation for your Workflows
Checklists can be set up for a certain Workflow status (maturity) of an entity.
For example, before a project manager closes his project, it can be interesting to force him to fulfill a certain number of conditions before he can close this project.
These conditions are called checklist items and can be integrated in checklists.
The checklists are established at a well-defined maturity of the project. Therefore, each maturity can have its own set of conditions that must be met before moving to the next status.
For example, in order to move an entity (such as a project) from an "in progress" status to a "closed" status, it is possible to set certain conditions in a dedicated checklist. At the time of the status change, the user will be asked to validate the required elements of this list to be able to change the entity to "closed" status.
Manage your checklists
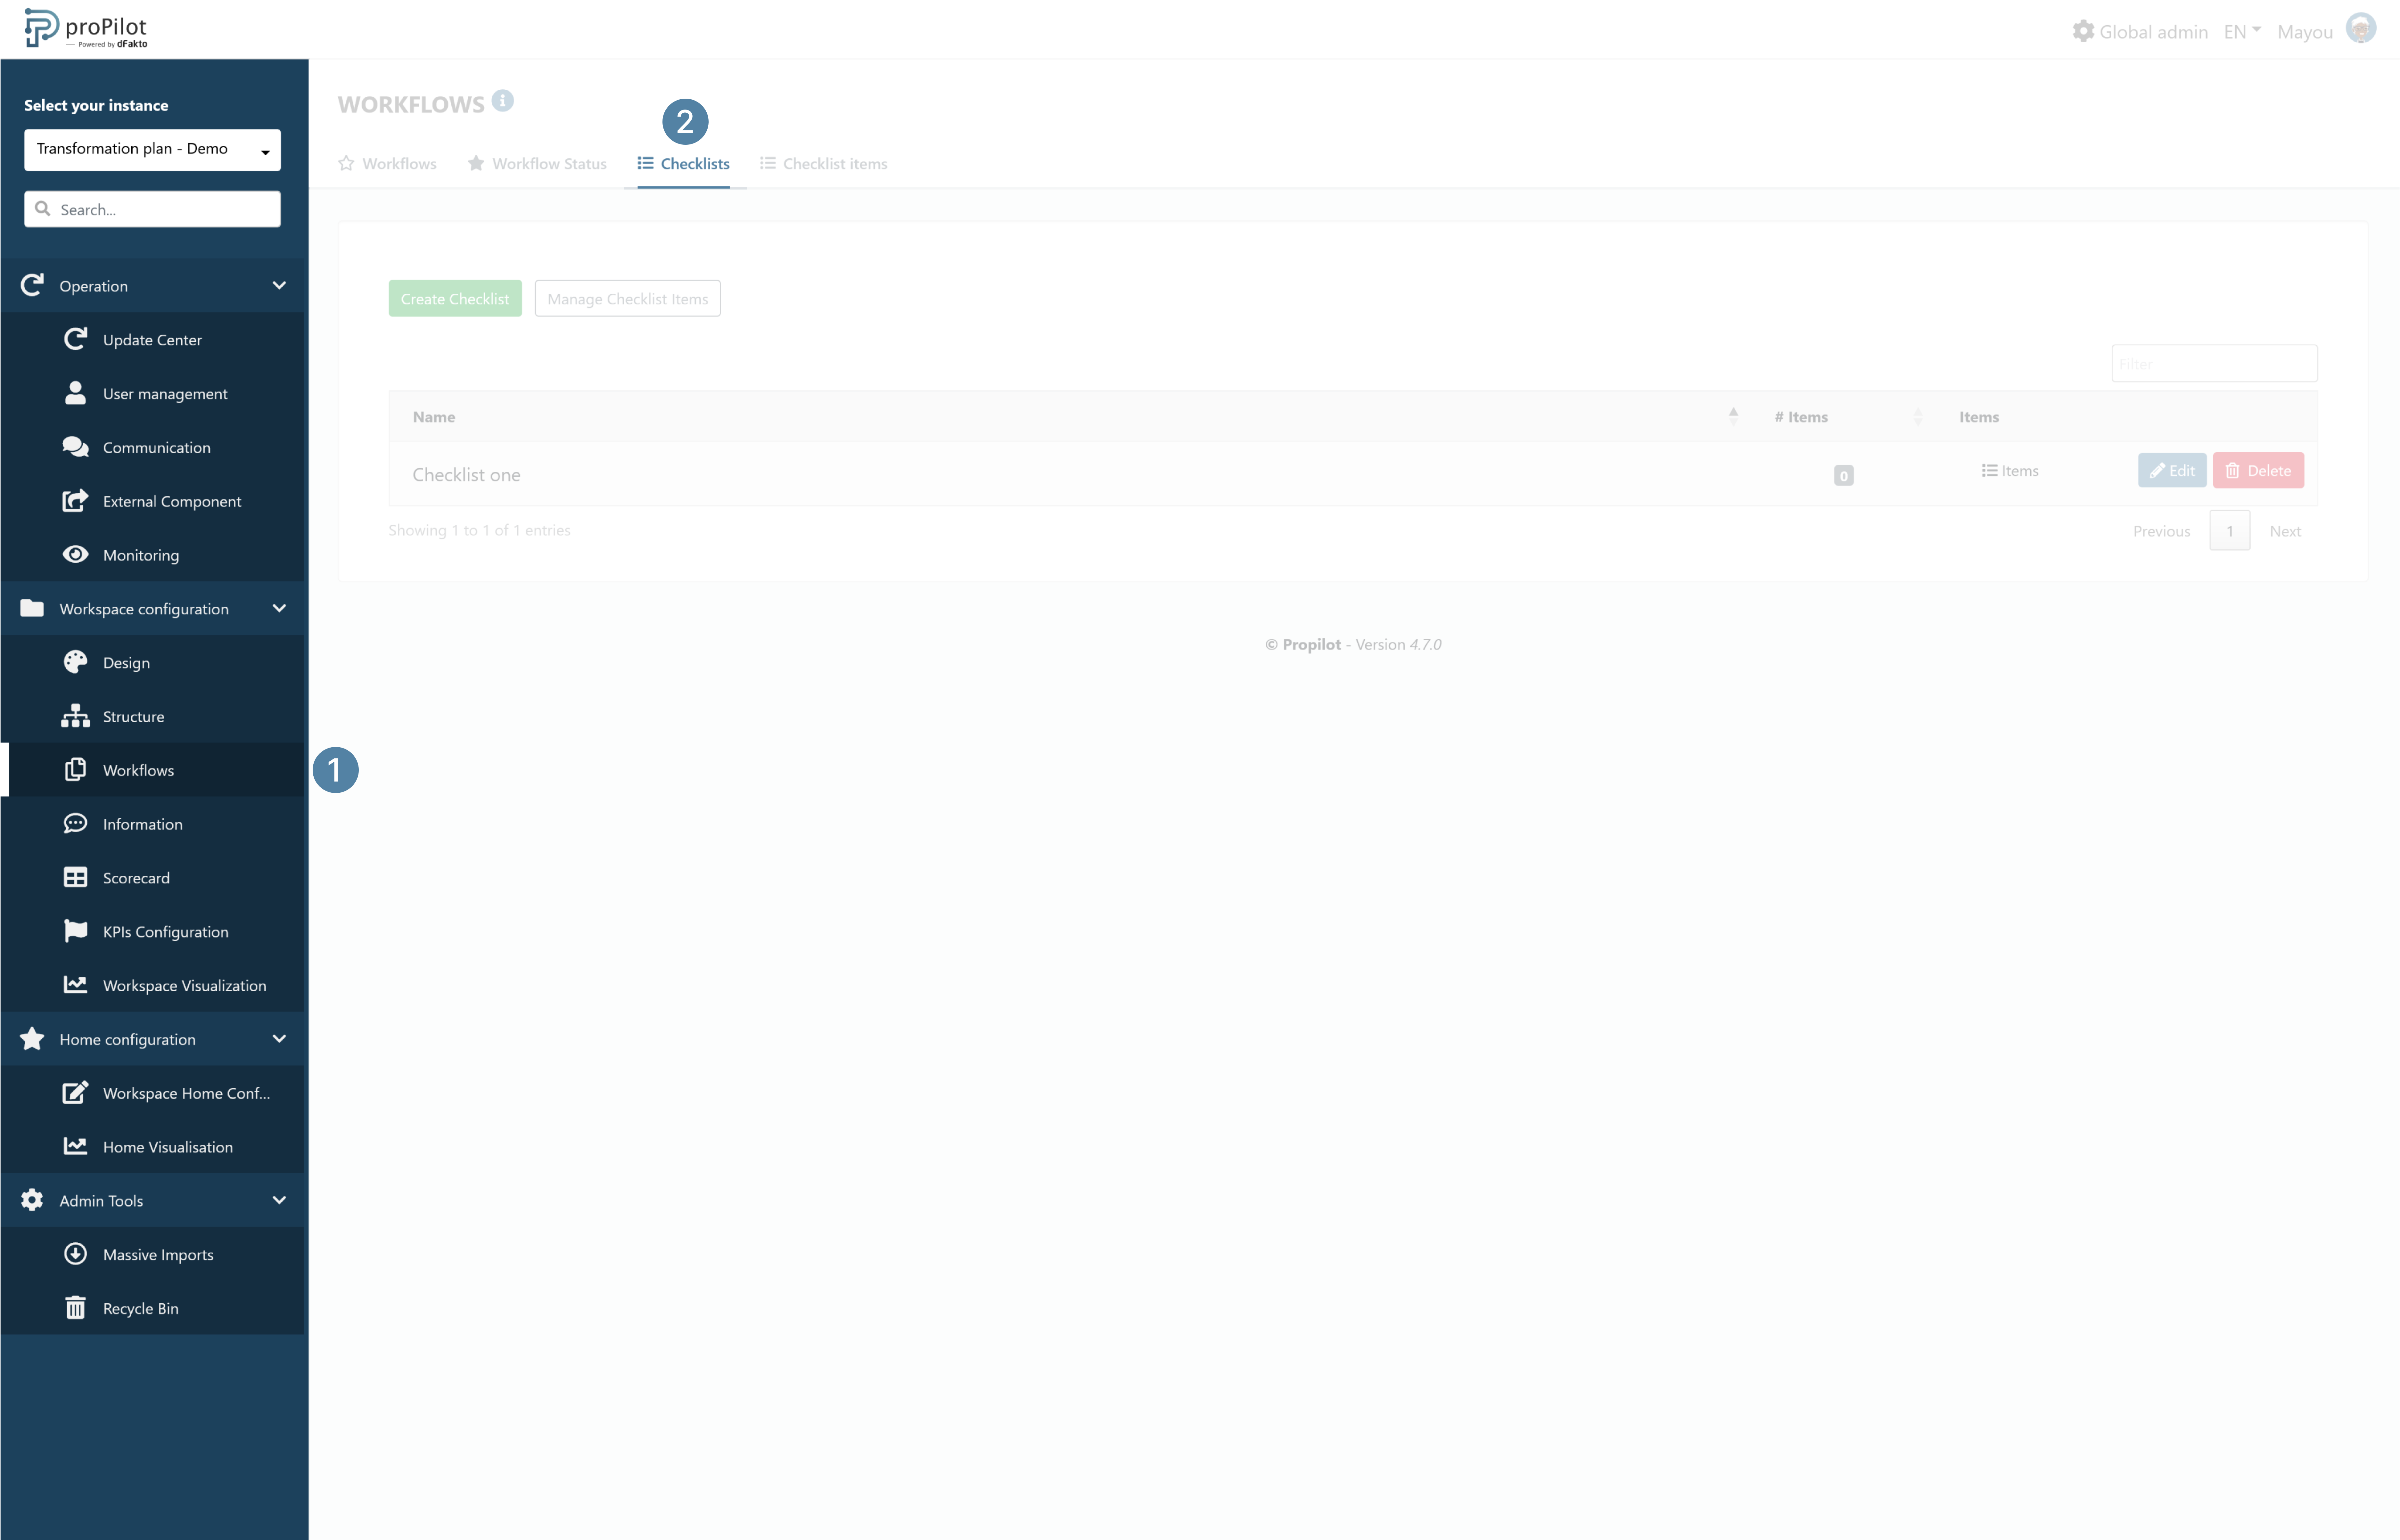
Create a checklist for all the entities of a level
-
In the left menu, select "Workspace Configuration" and then "Workflows".
-
Click on the "Checklists" tab. This module allows you to manage the different checklists you would like to use.
-
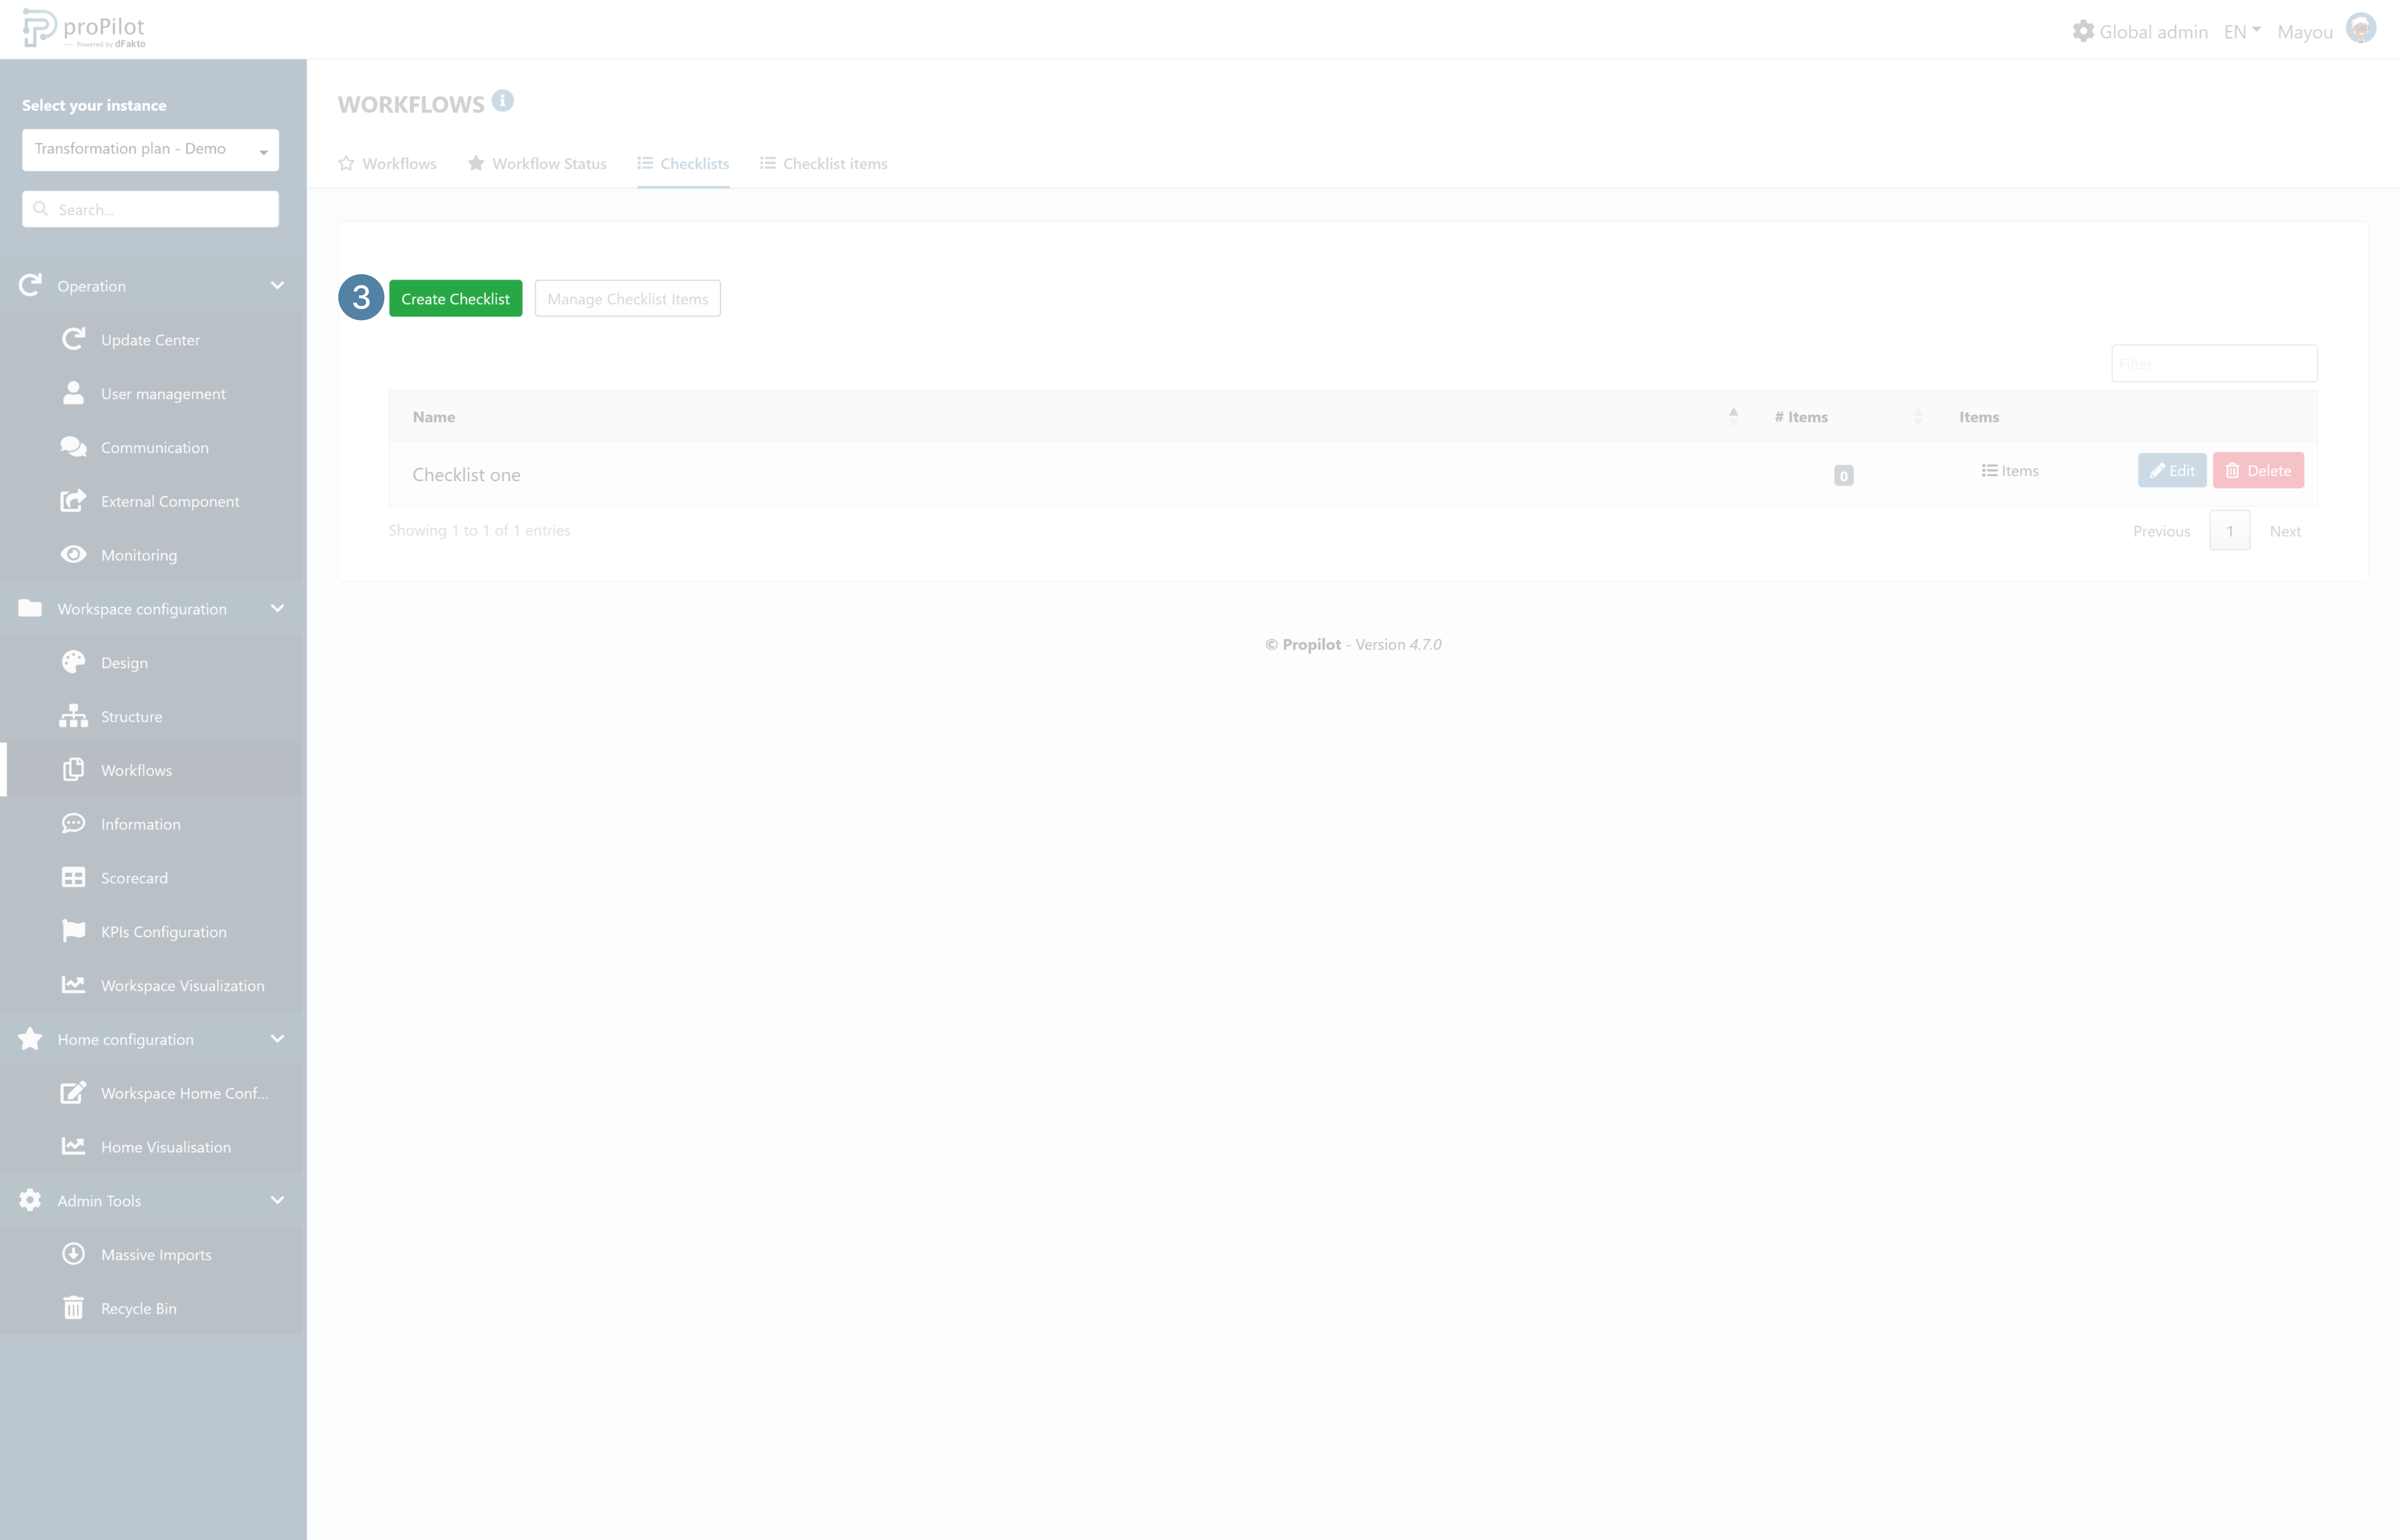
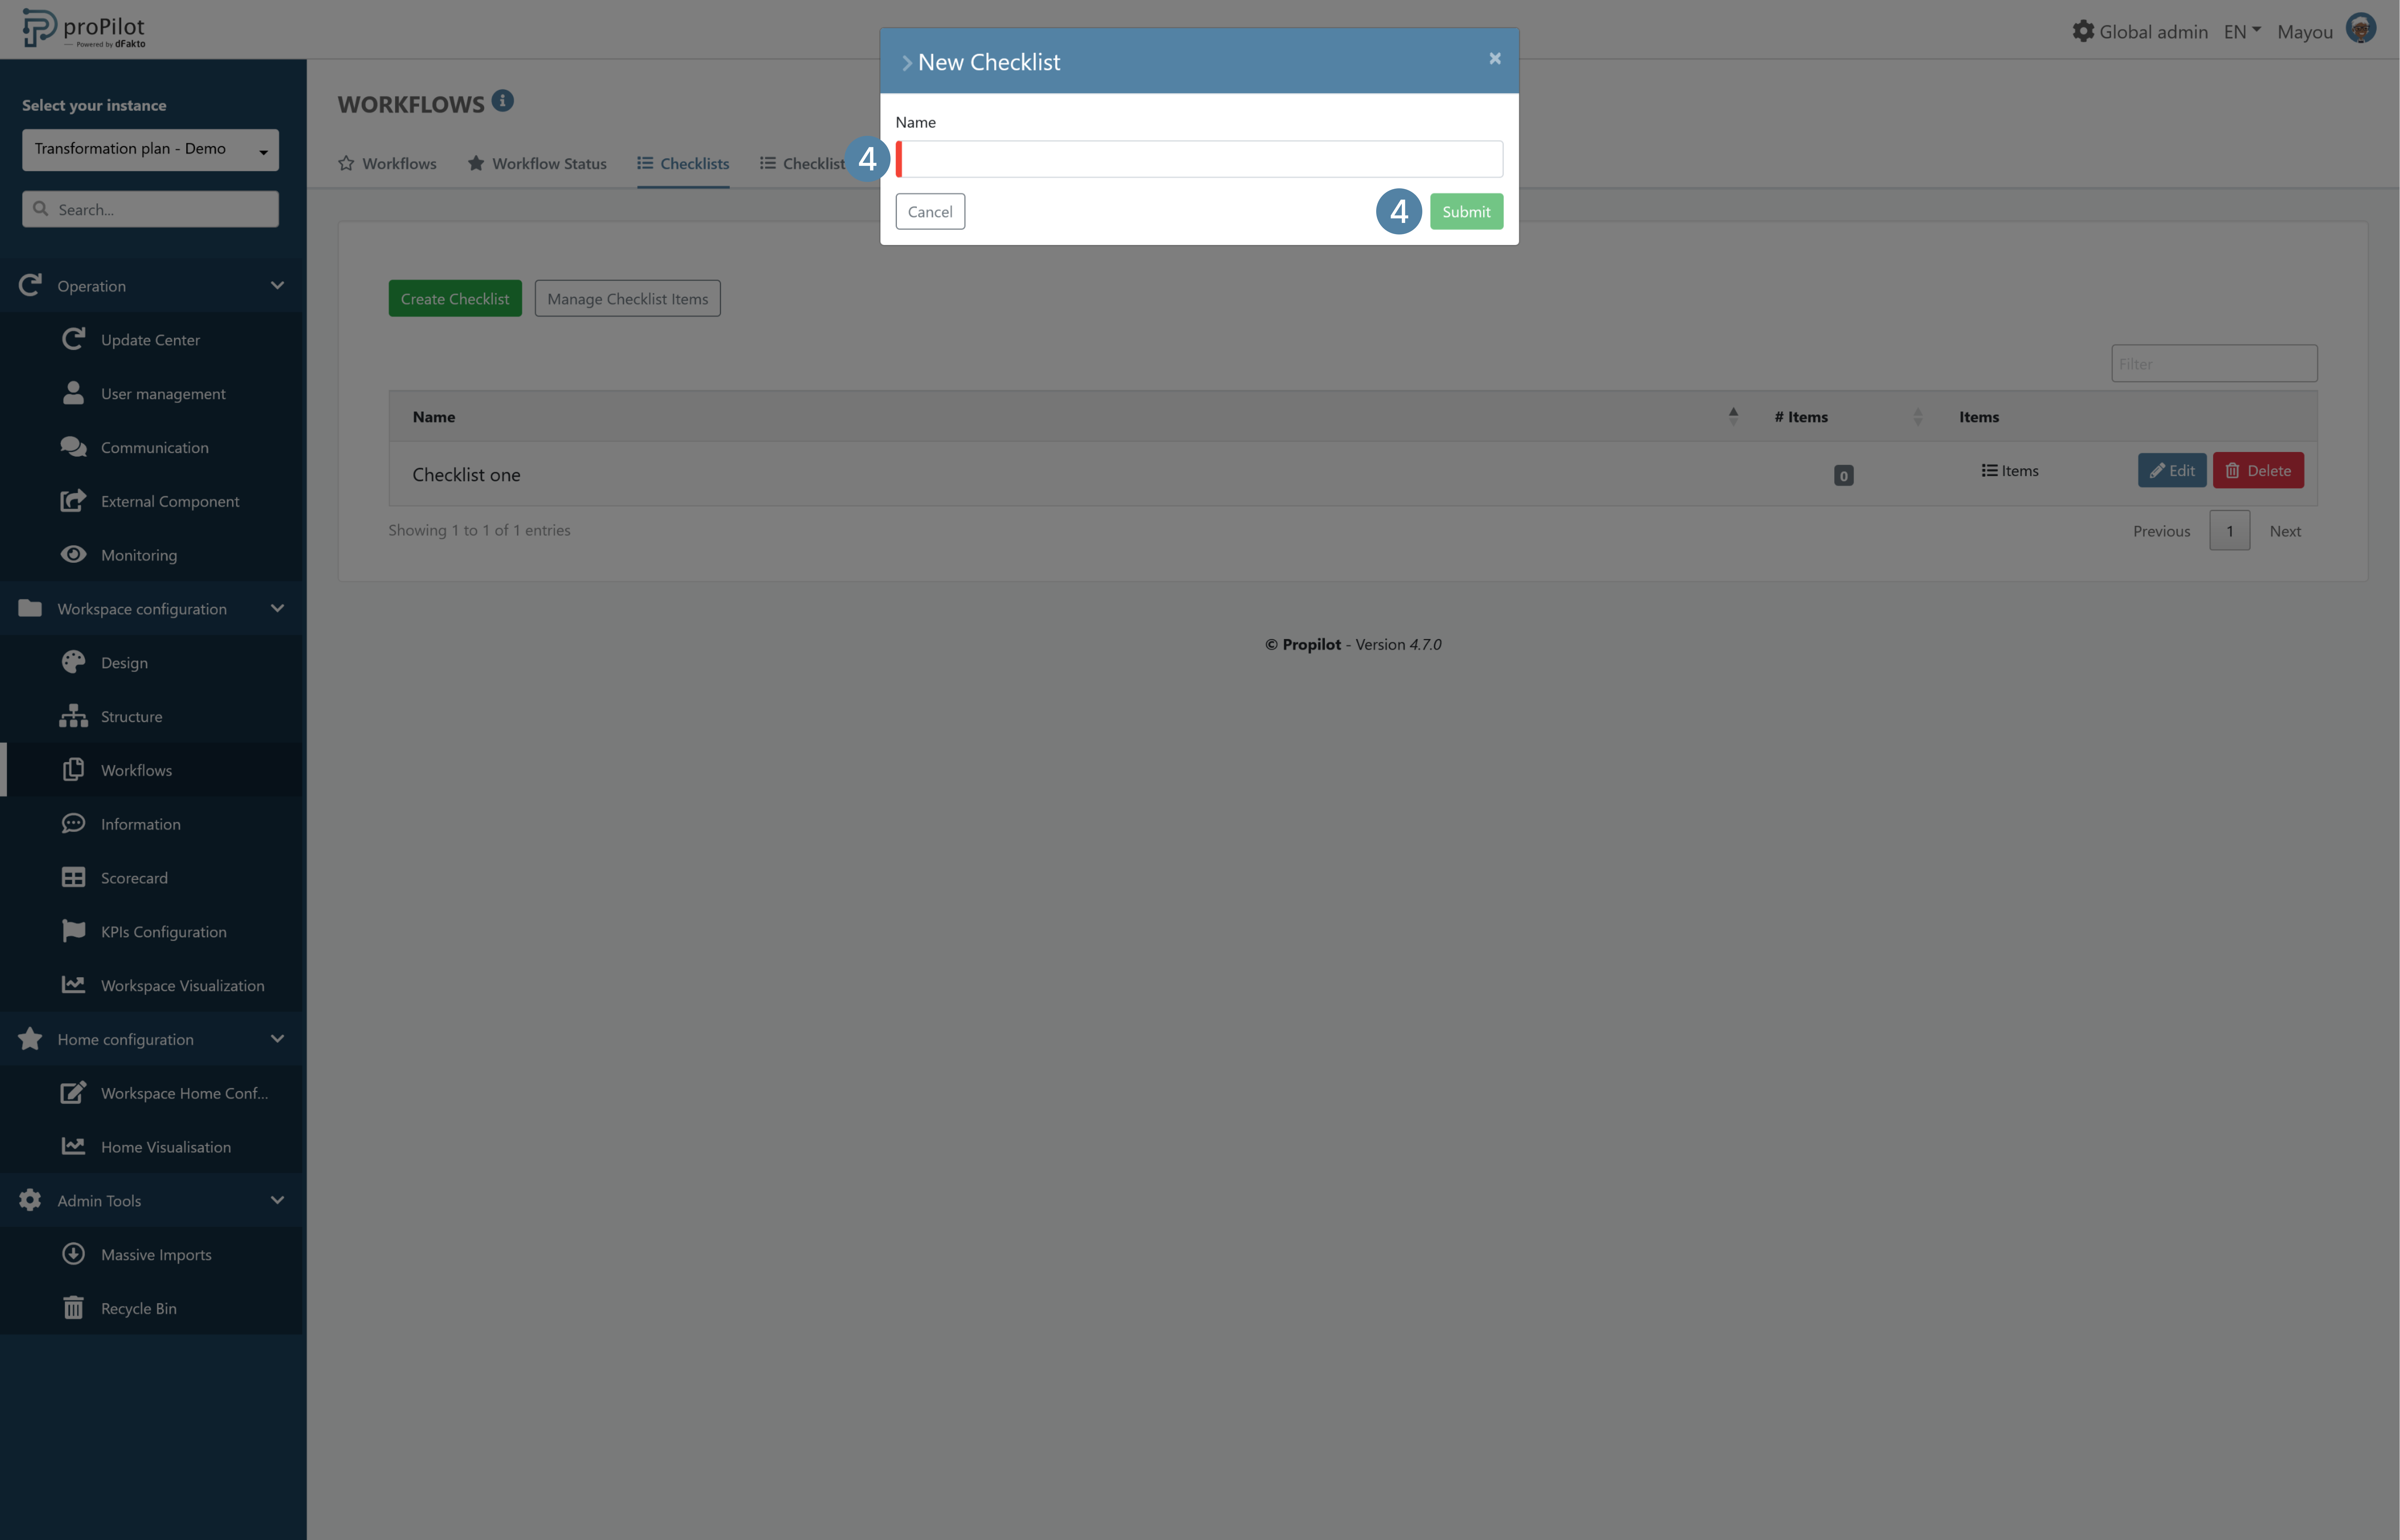
Click on "Create checklist". A pop-up window will open.
-
Define a name for the checklist.
Create checklist items to be included in a checklist
-
In the left-hand menu, select "Workspace configuration" then "Workflows".
-
Click on the "Checklists items" tab. This module allows you to manage the whole items checklists you would like to use.
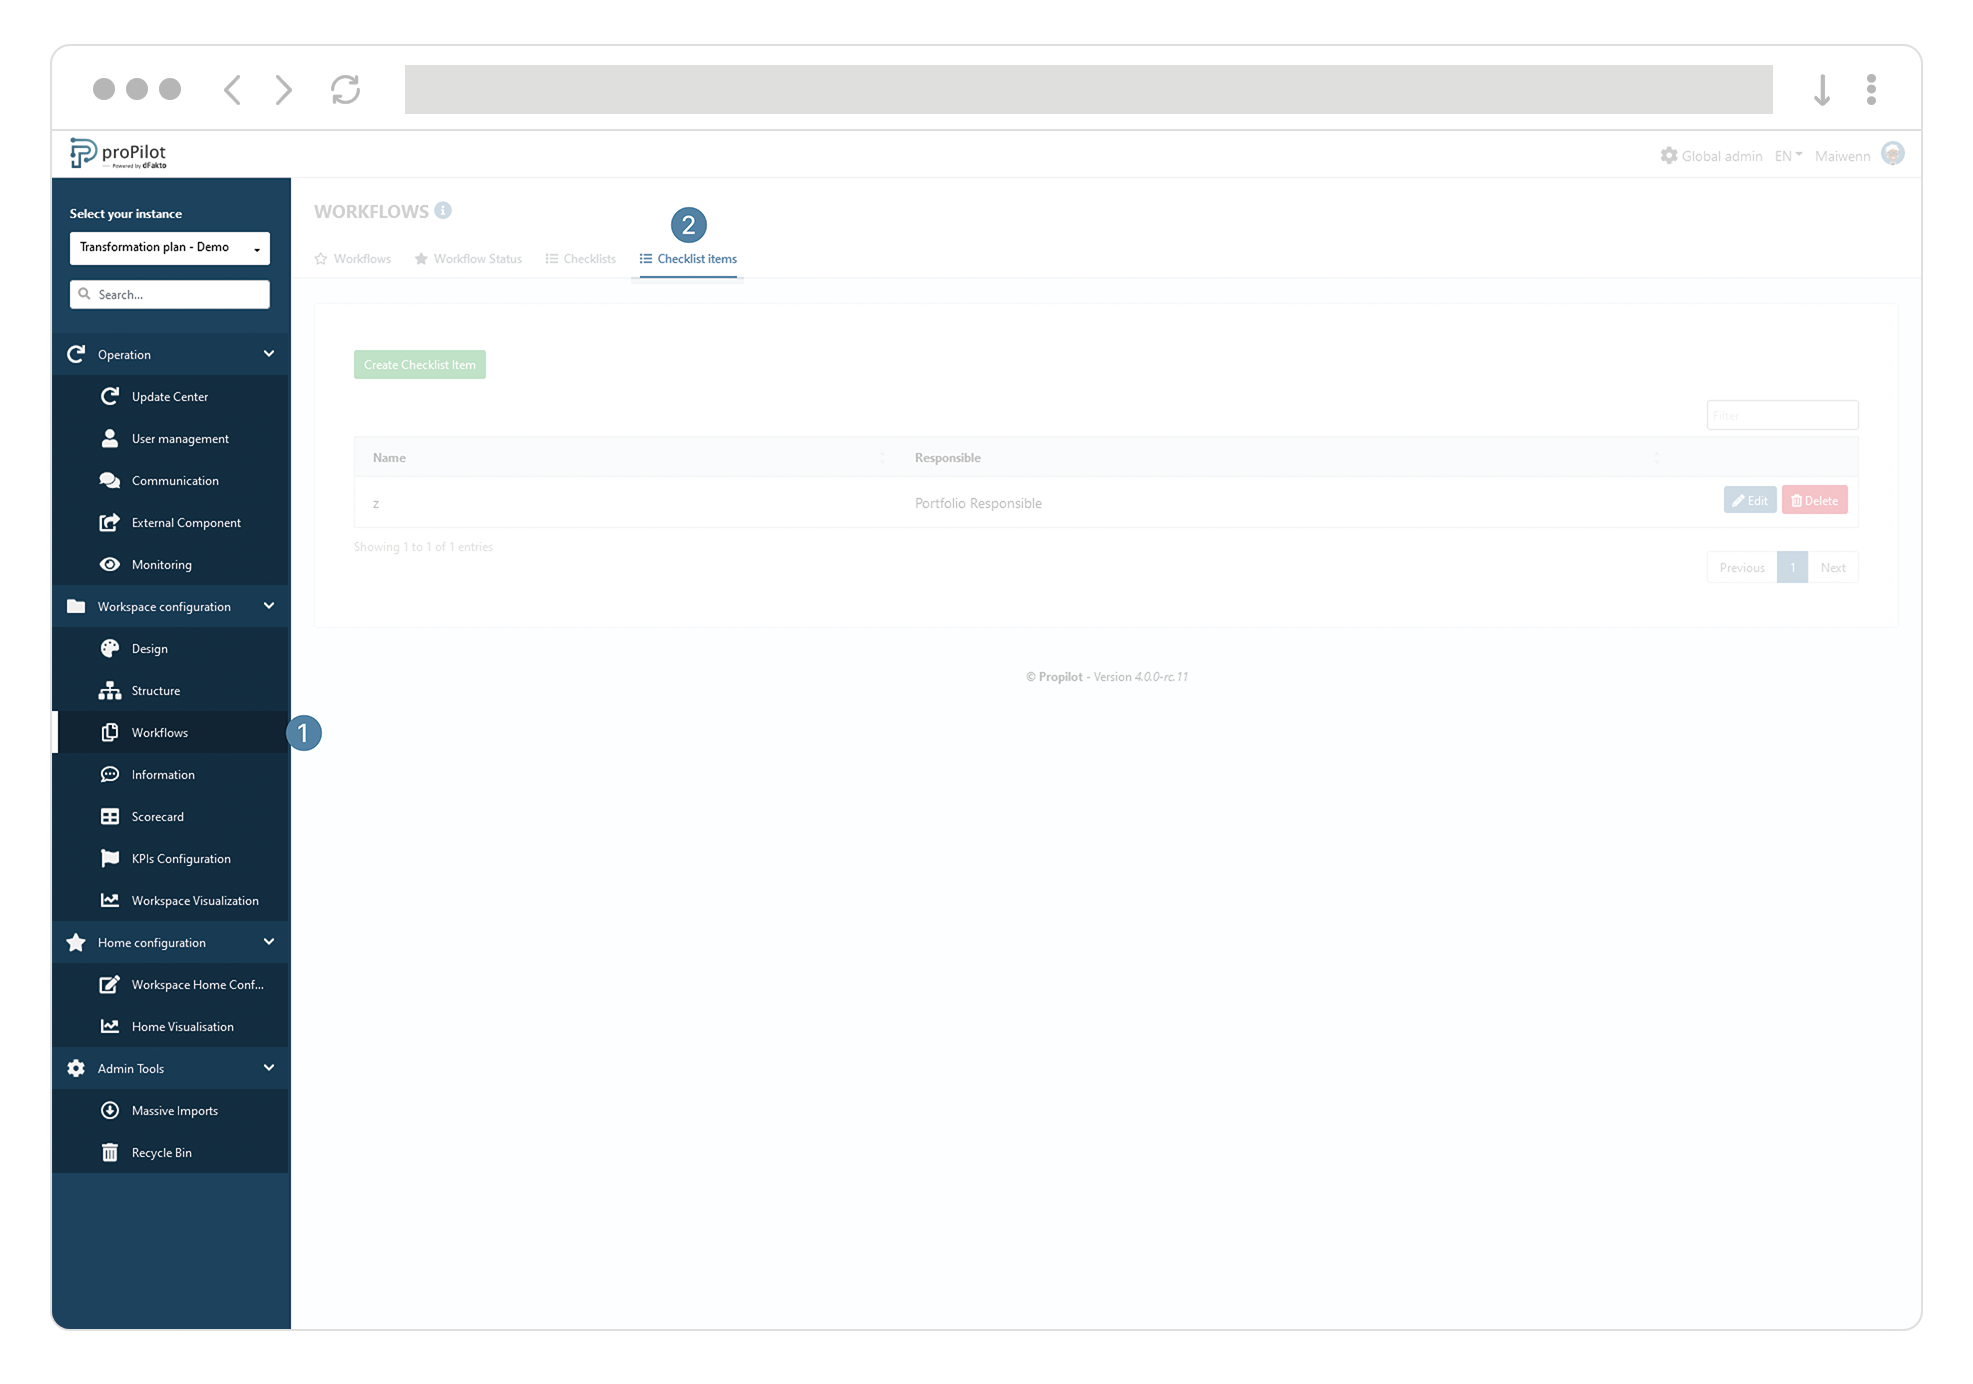
-
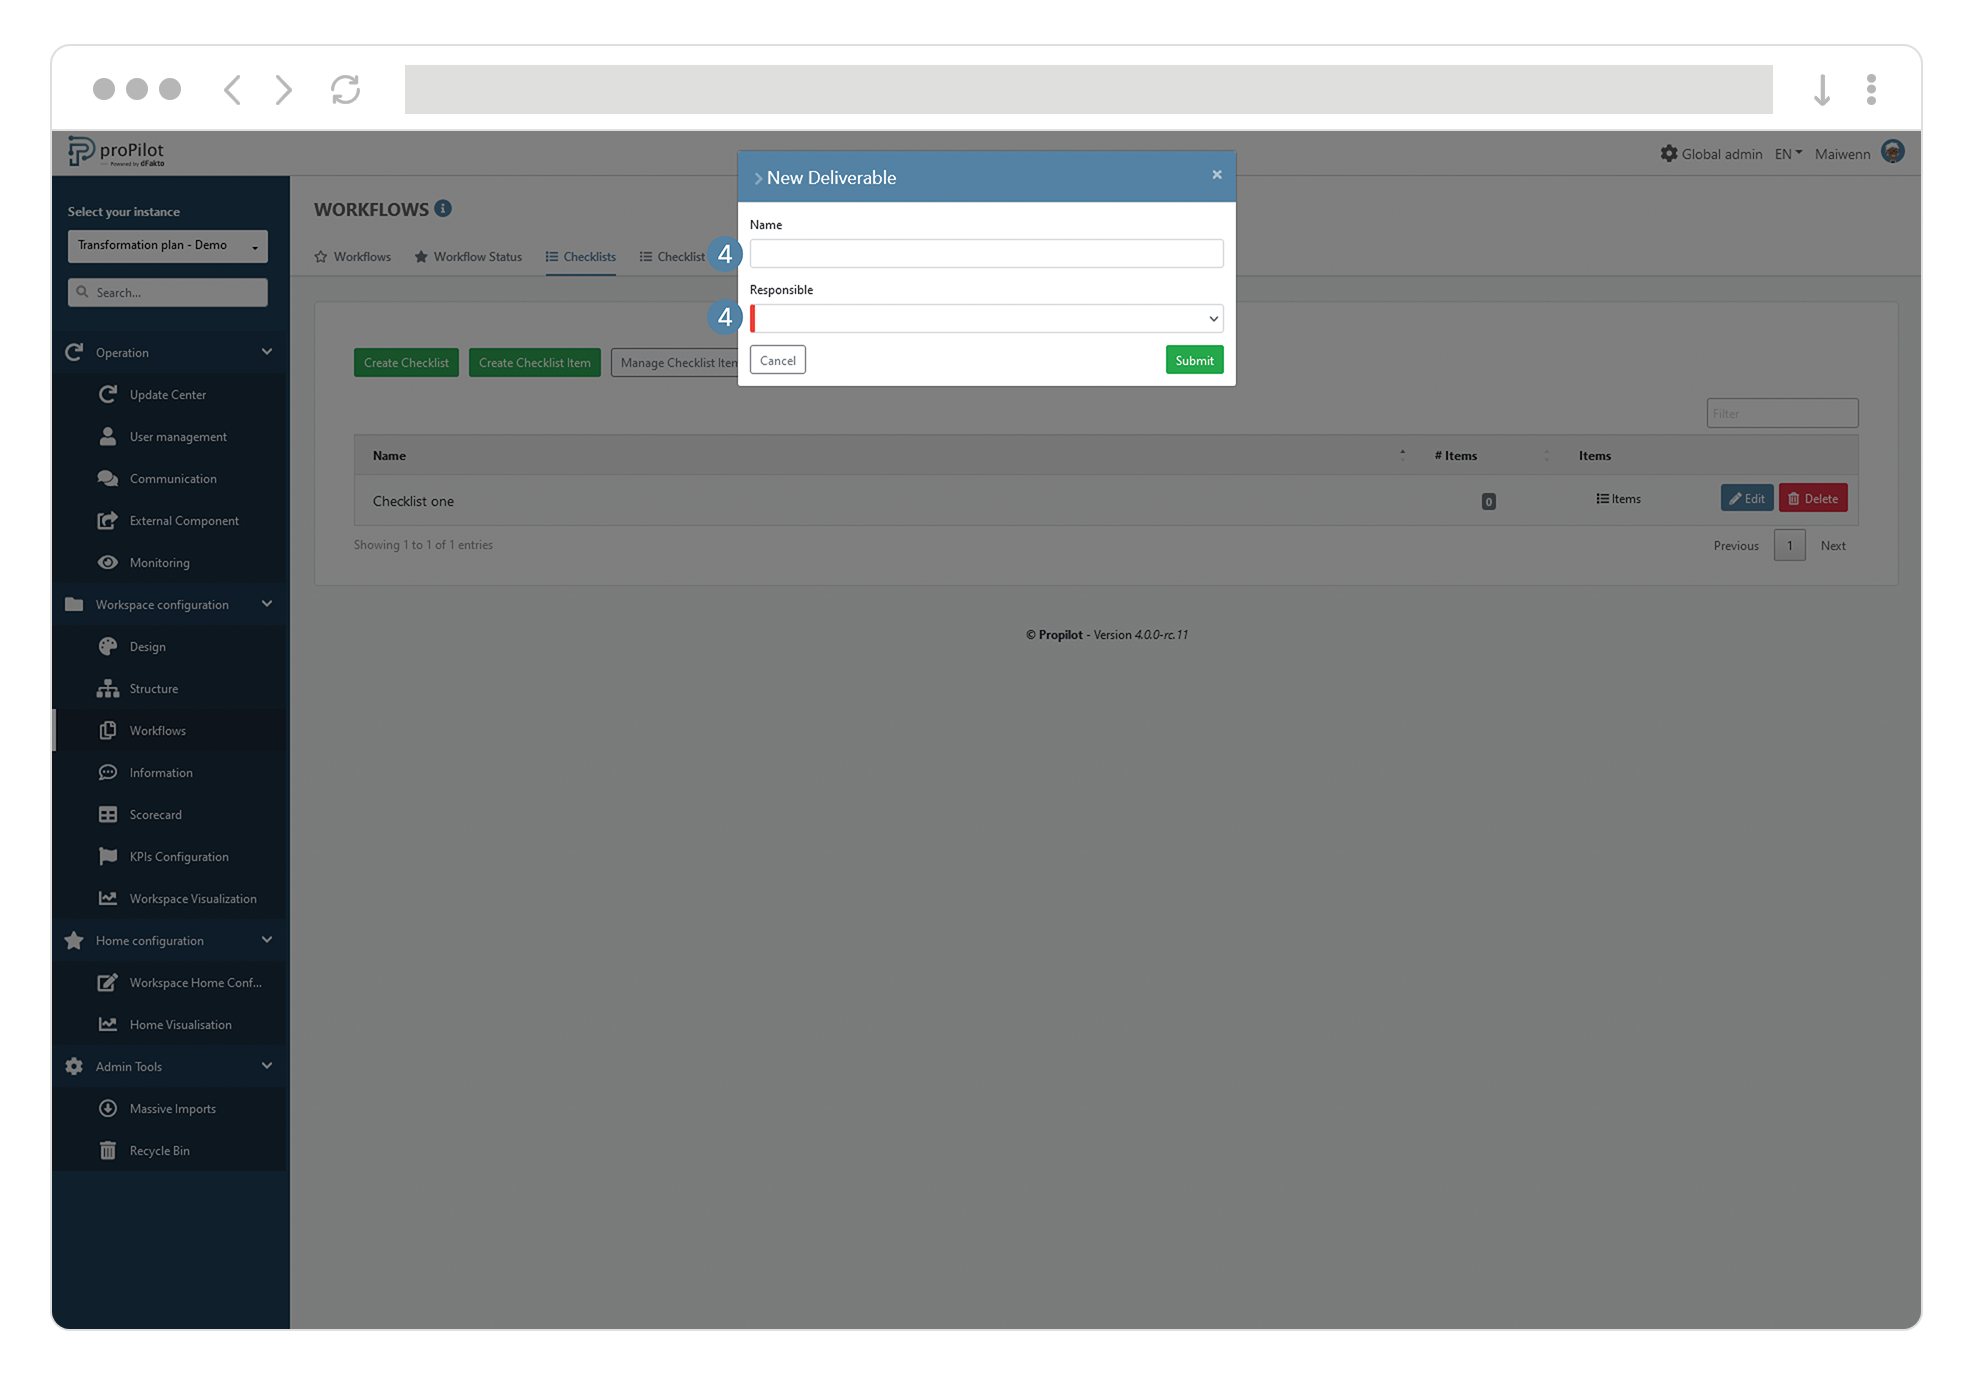
Click on "Create Checklist item". A pop-up window will open.
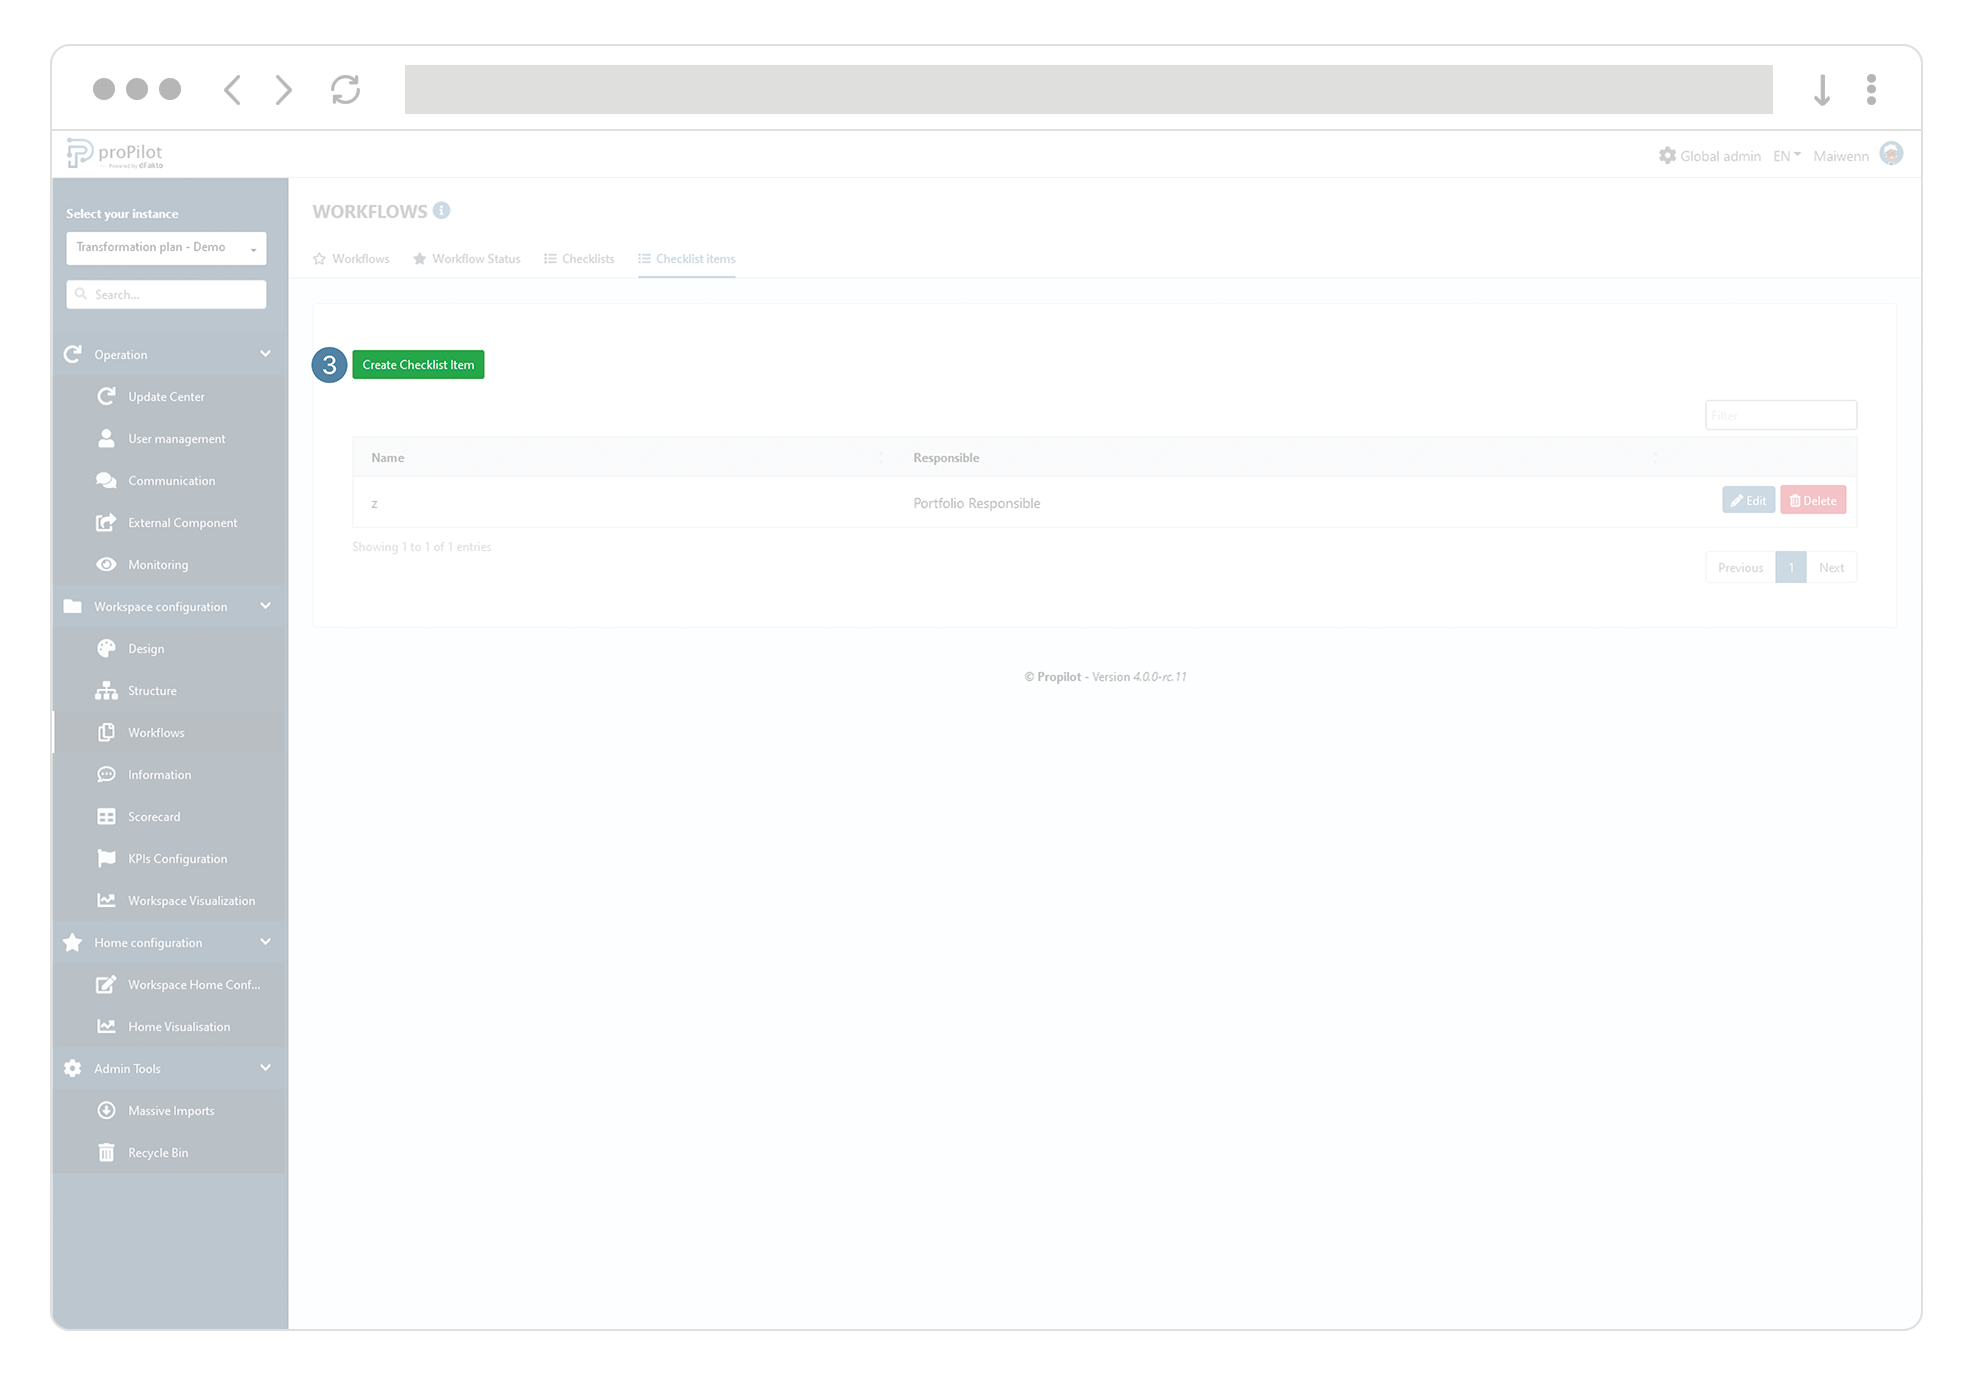
-
Enter a name and add a responsible from the list of available choices. The available responsibles are those active in the user-type information having edition checklist rights.
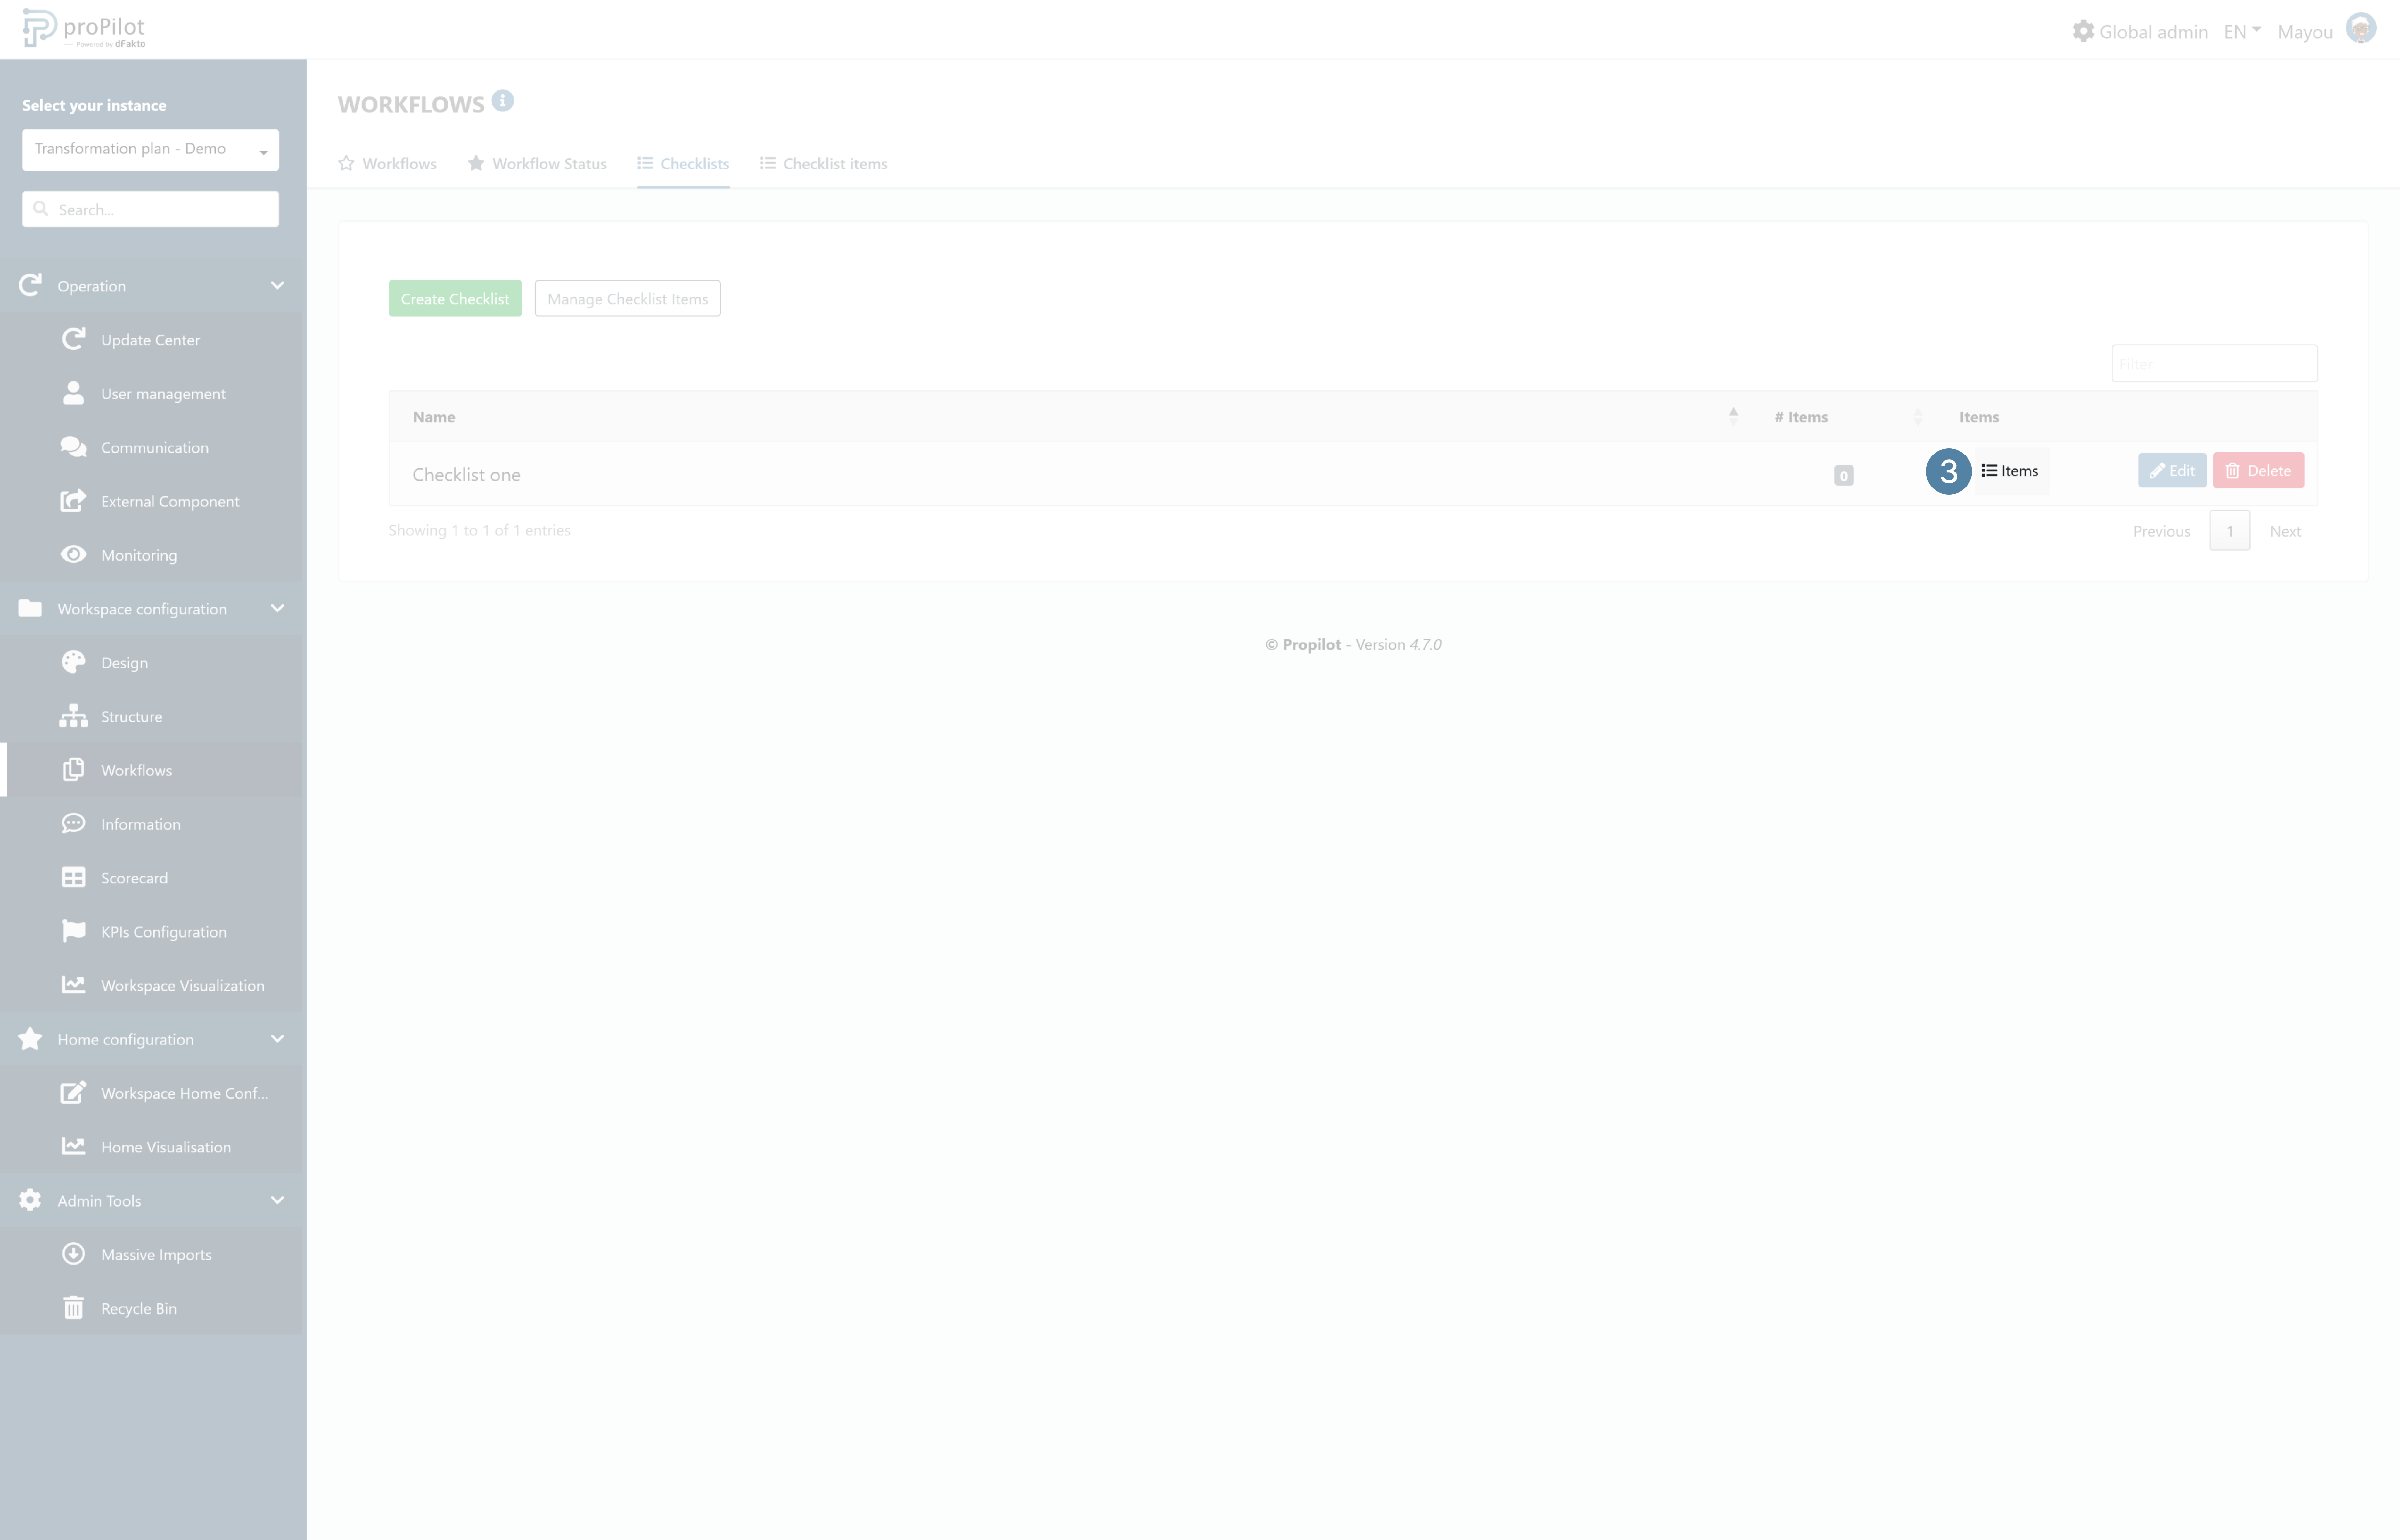
Add or remove checklist items from a checklist
-
In the left-hand menu, select "Workspace configuration" then "Worflows".
-
Click on the "checklists" tab. This module allows you to manage the different checklists you would like to use.
-
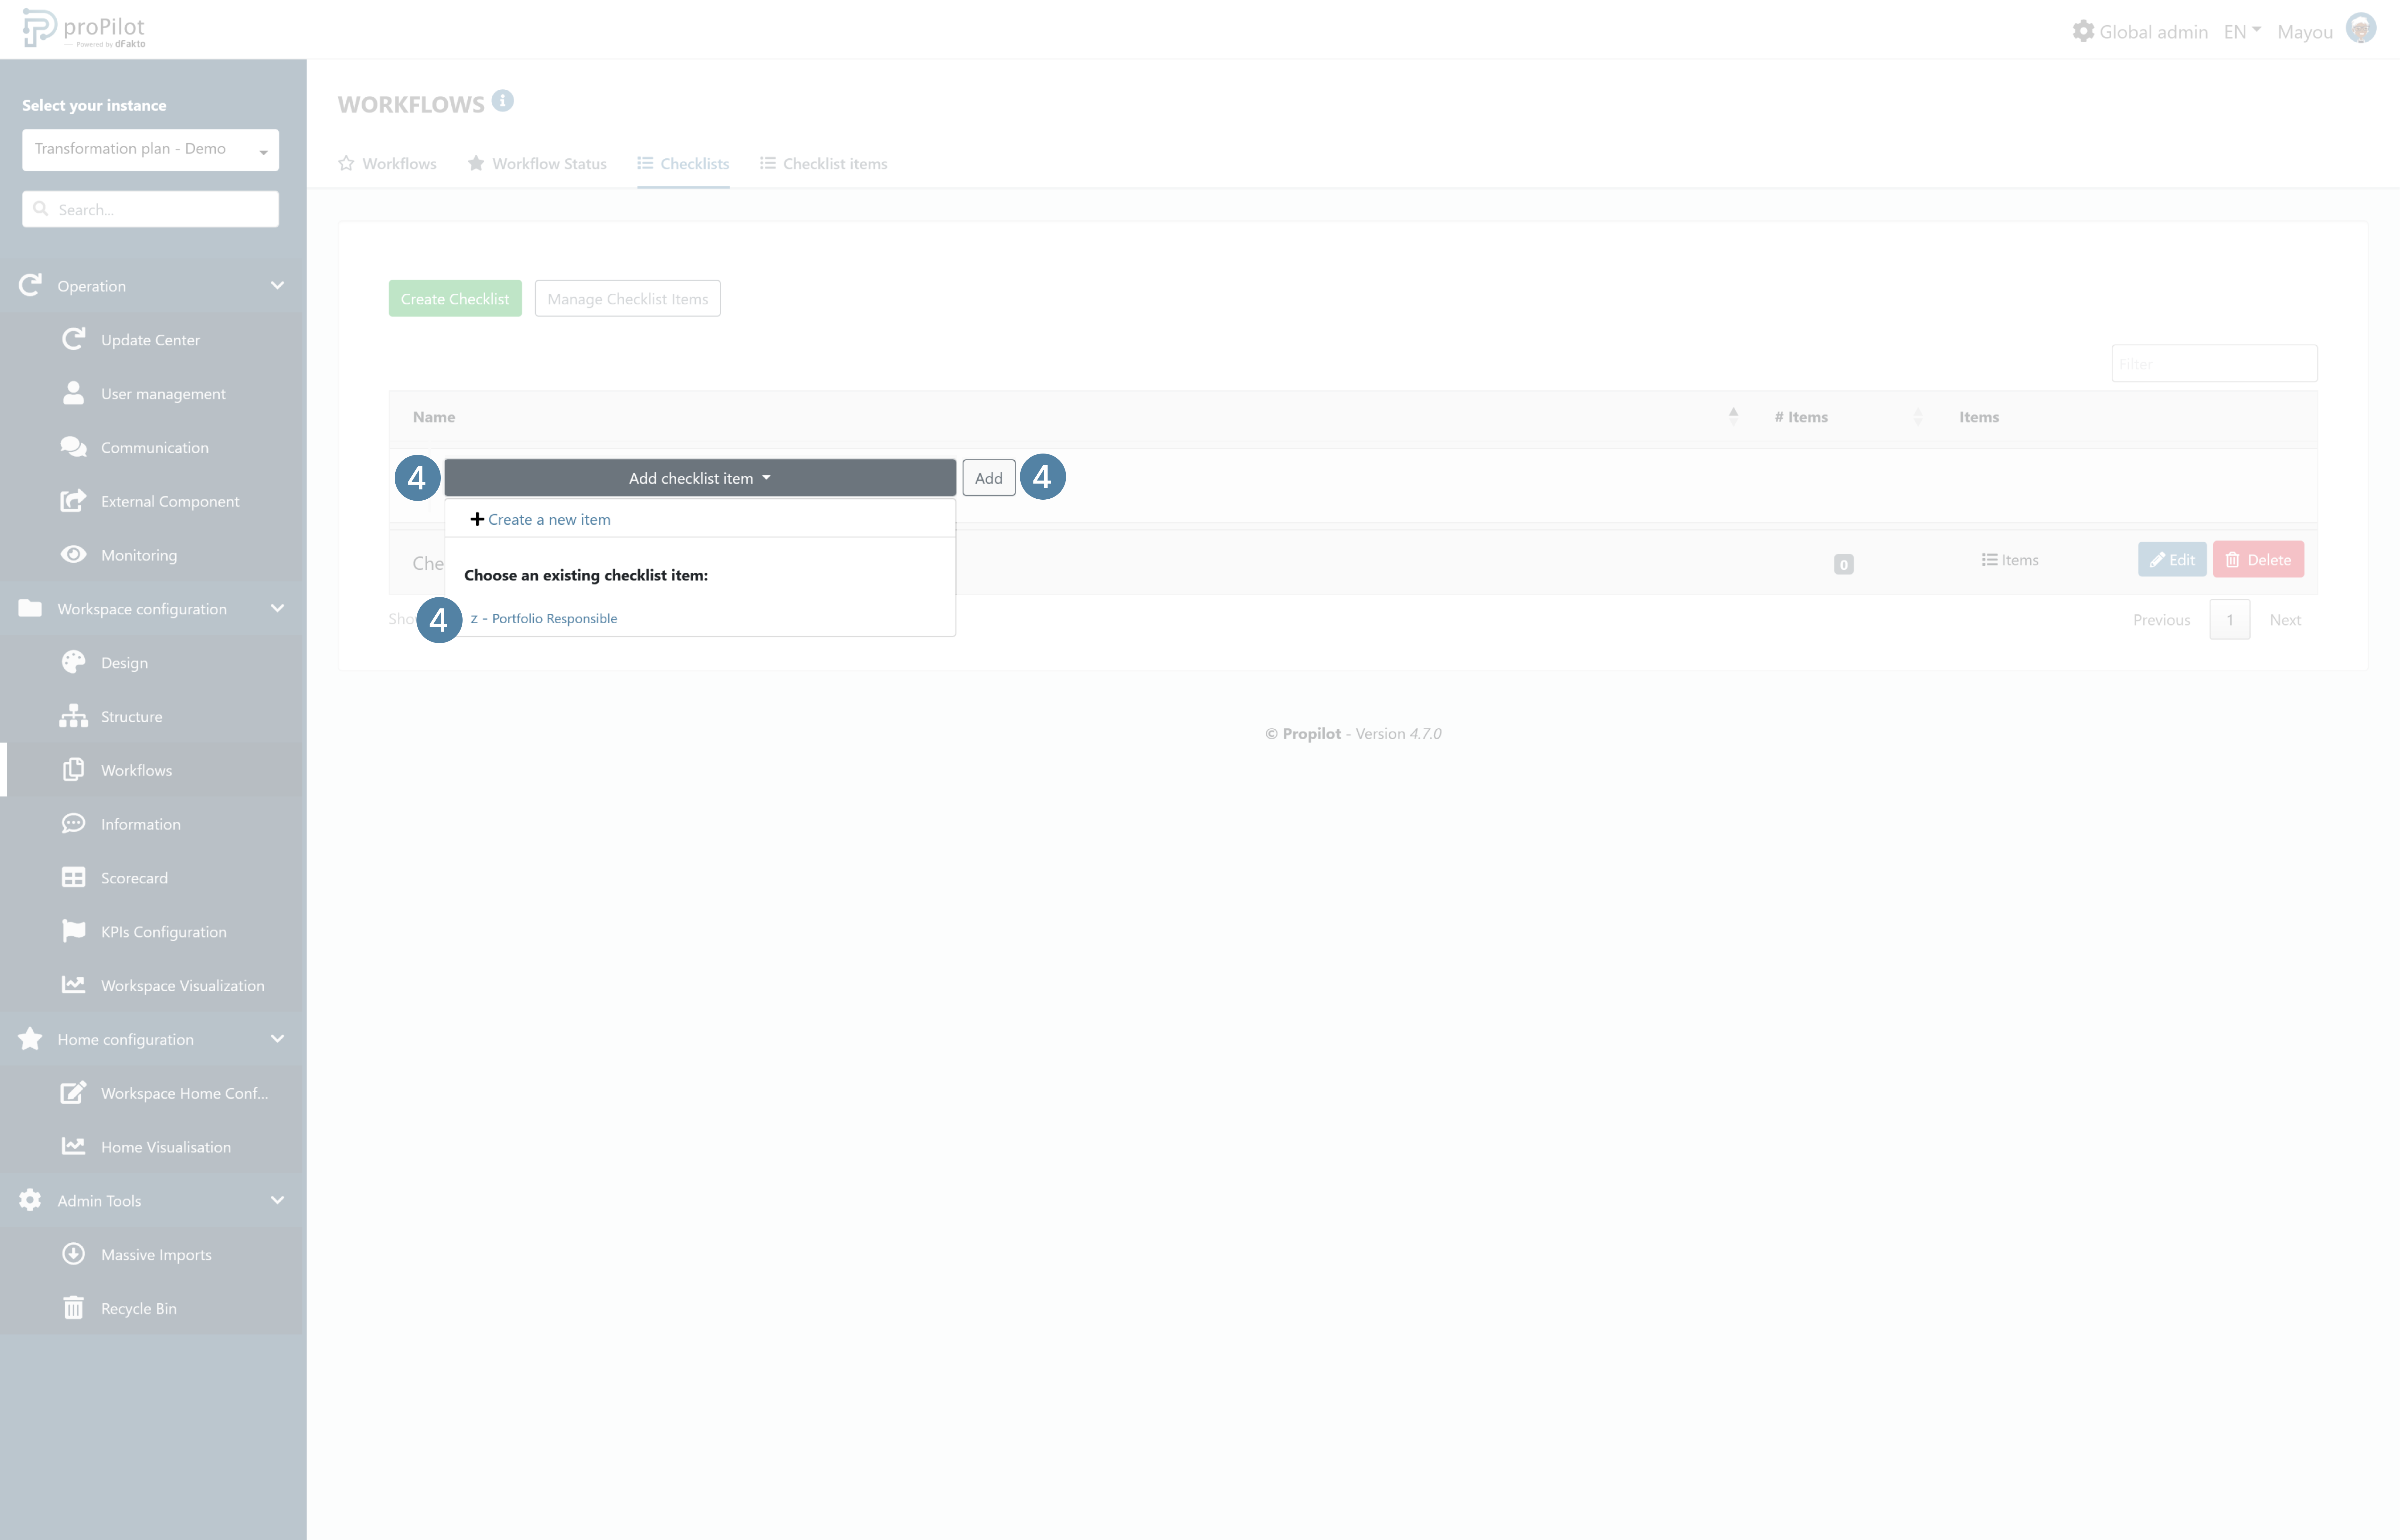
Click on “Items”.
-
Add checklist items by clicking on “Add checklist item” button. Select an item into the dropdown list.
-
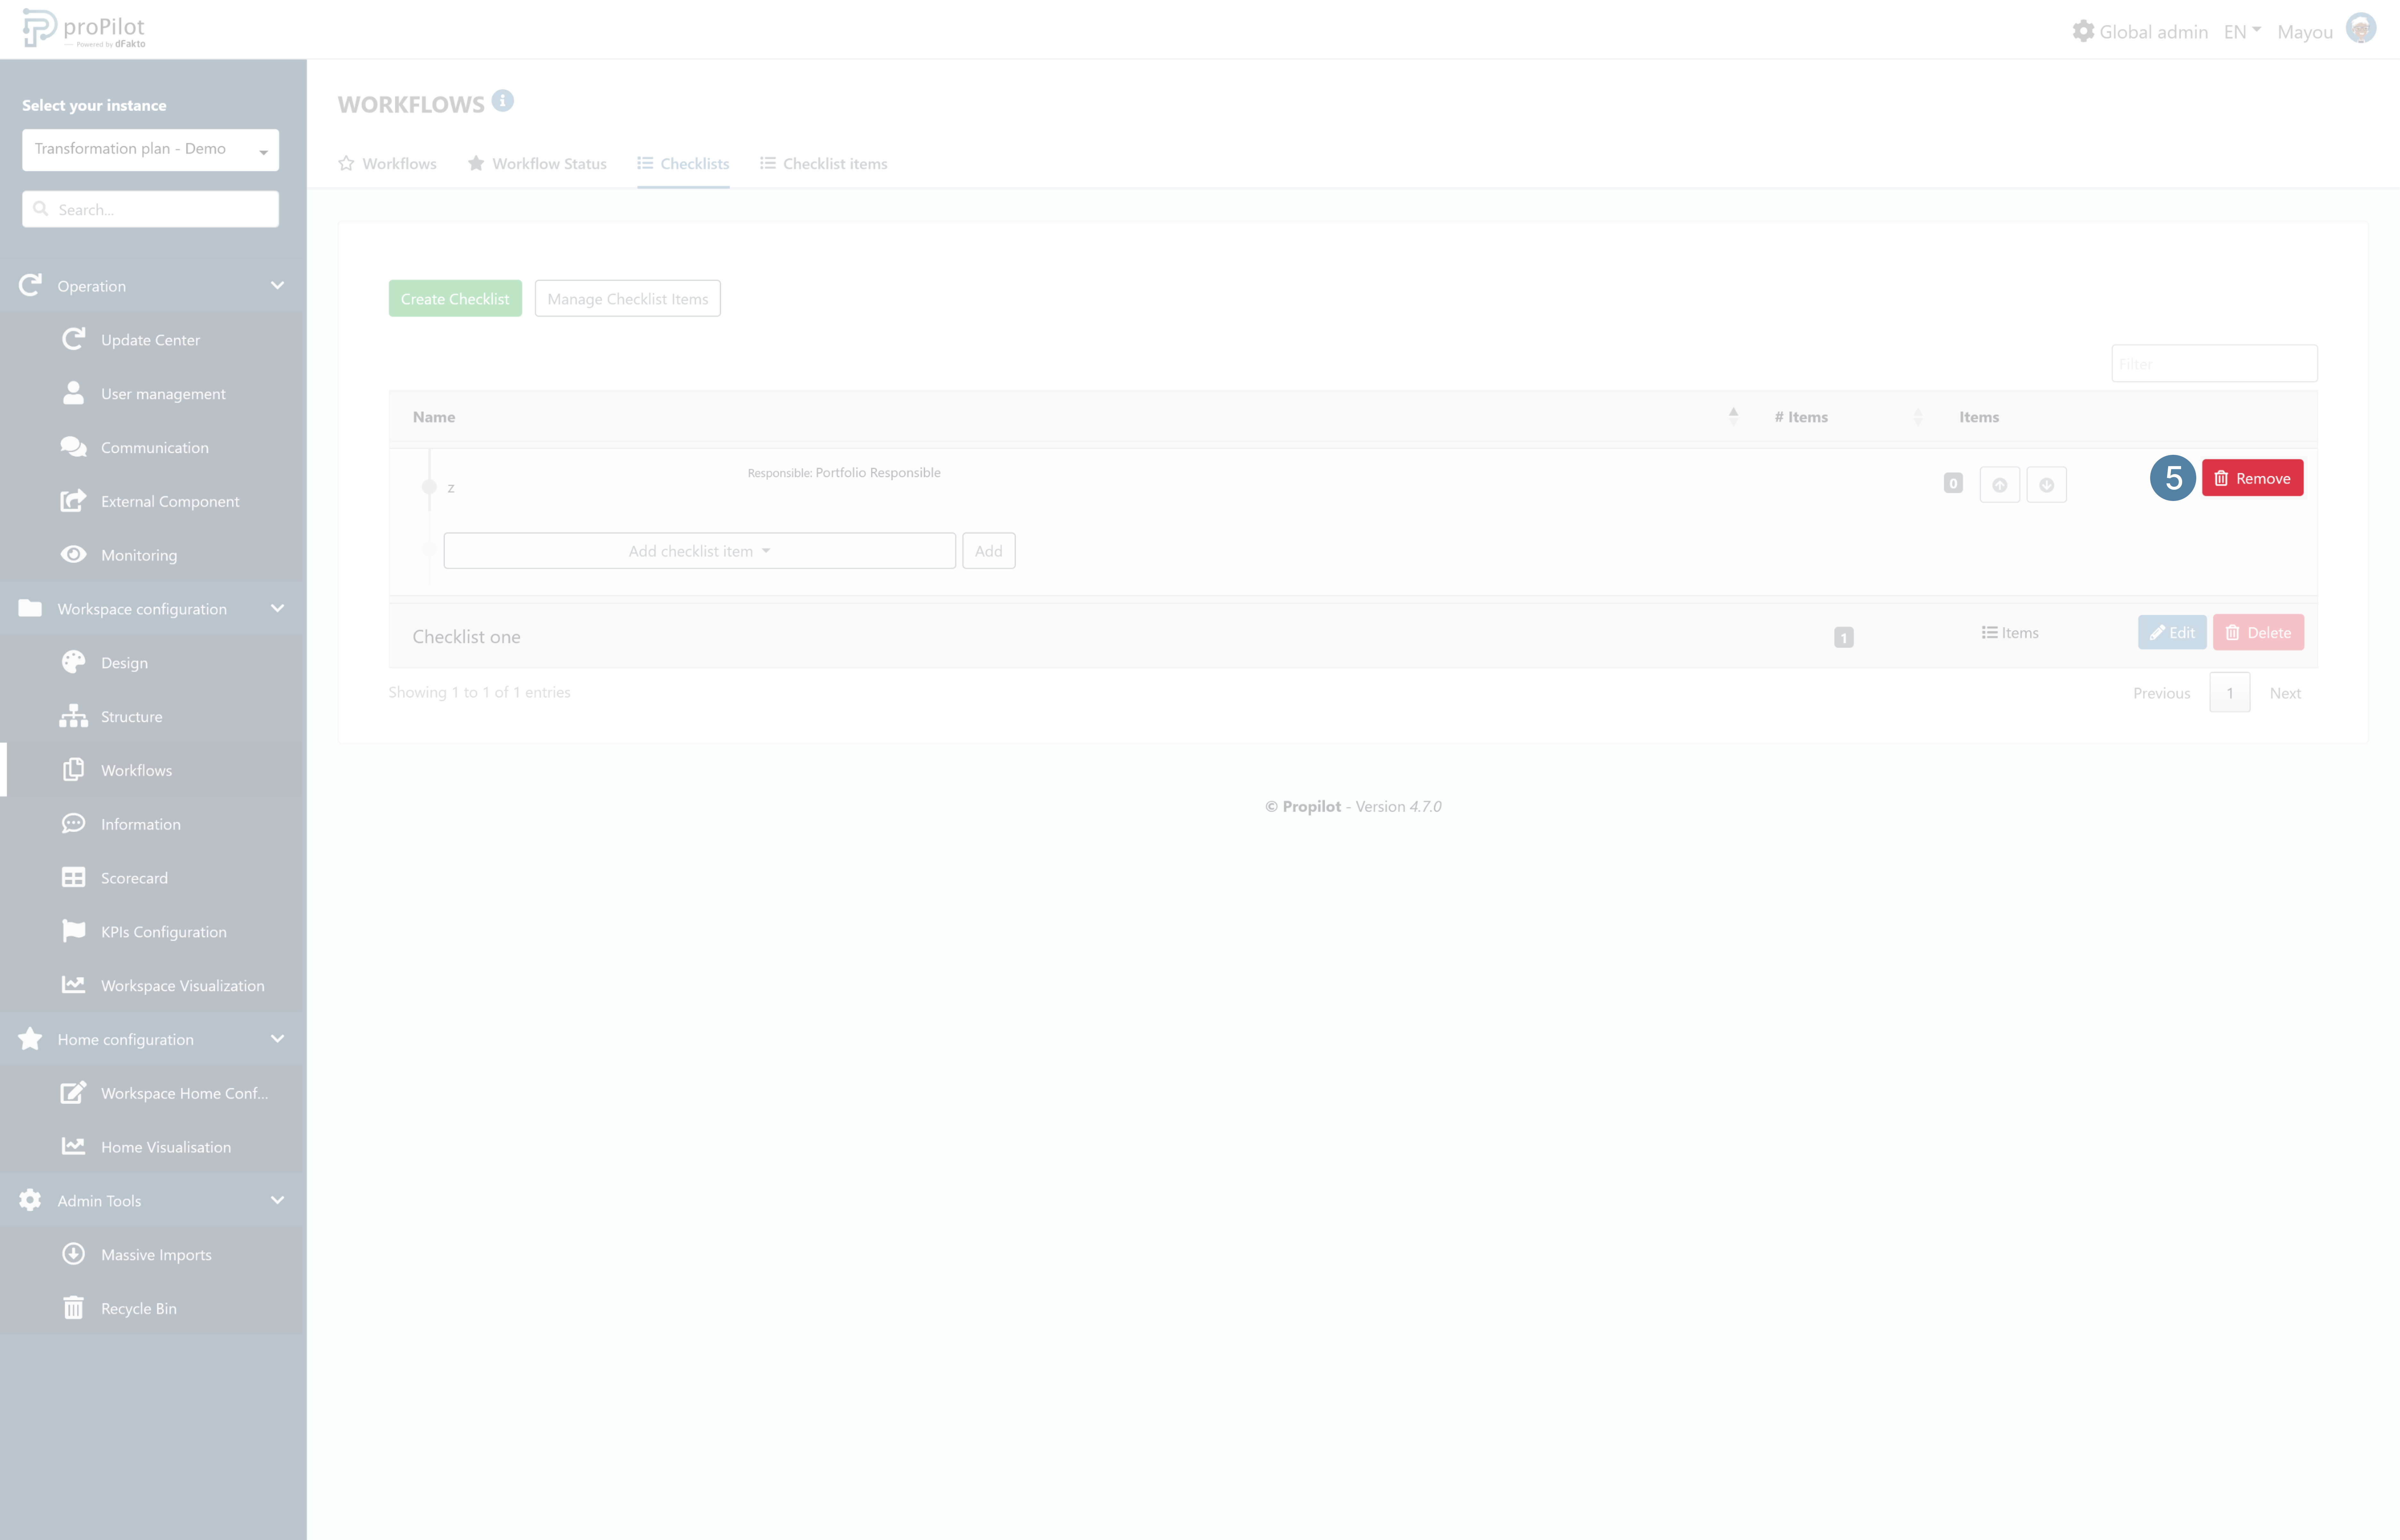
Remove checklists items by clicking on “Remove” button.
-
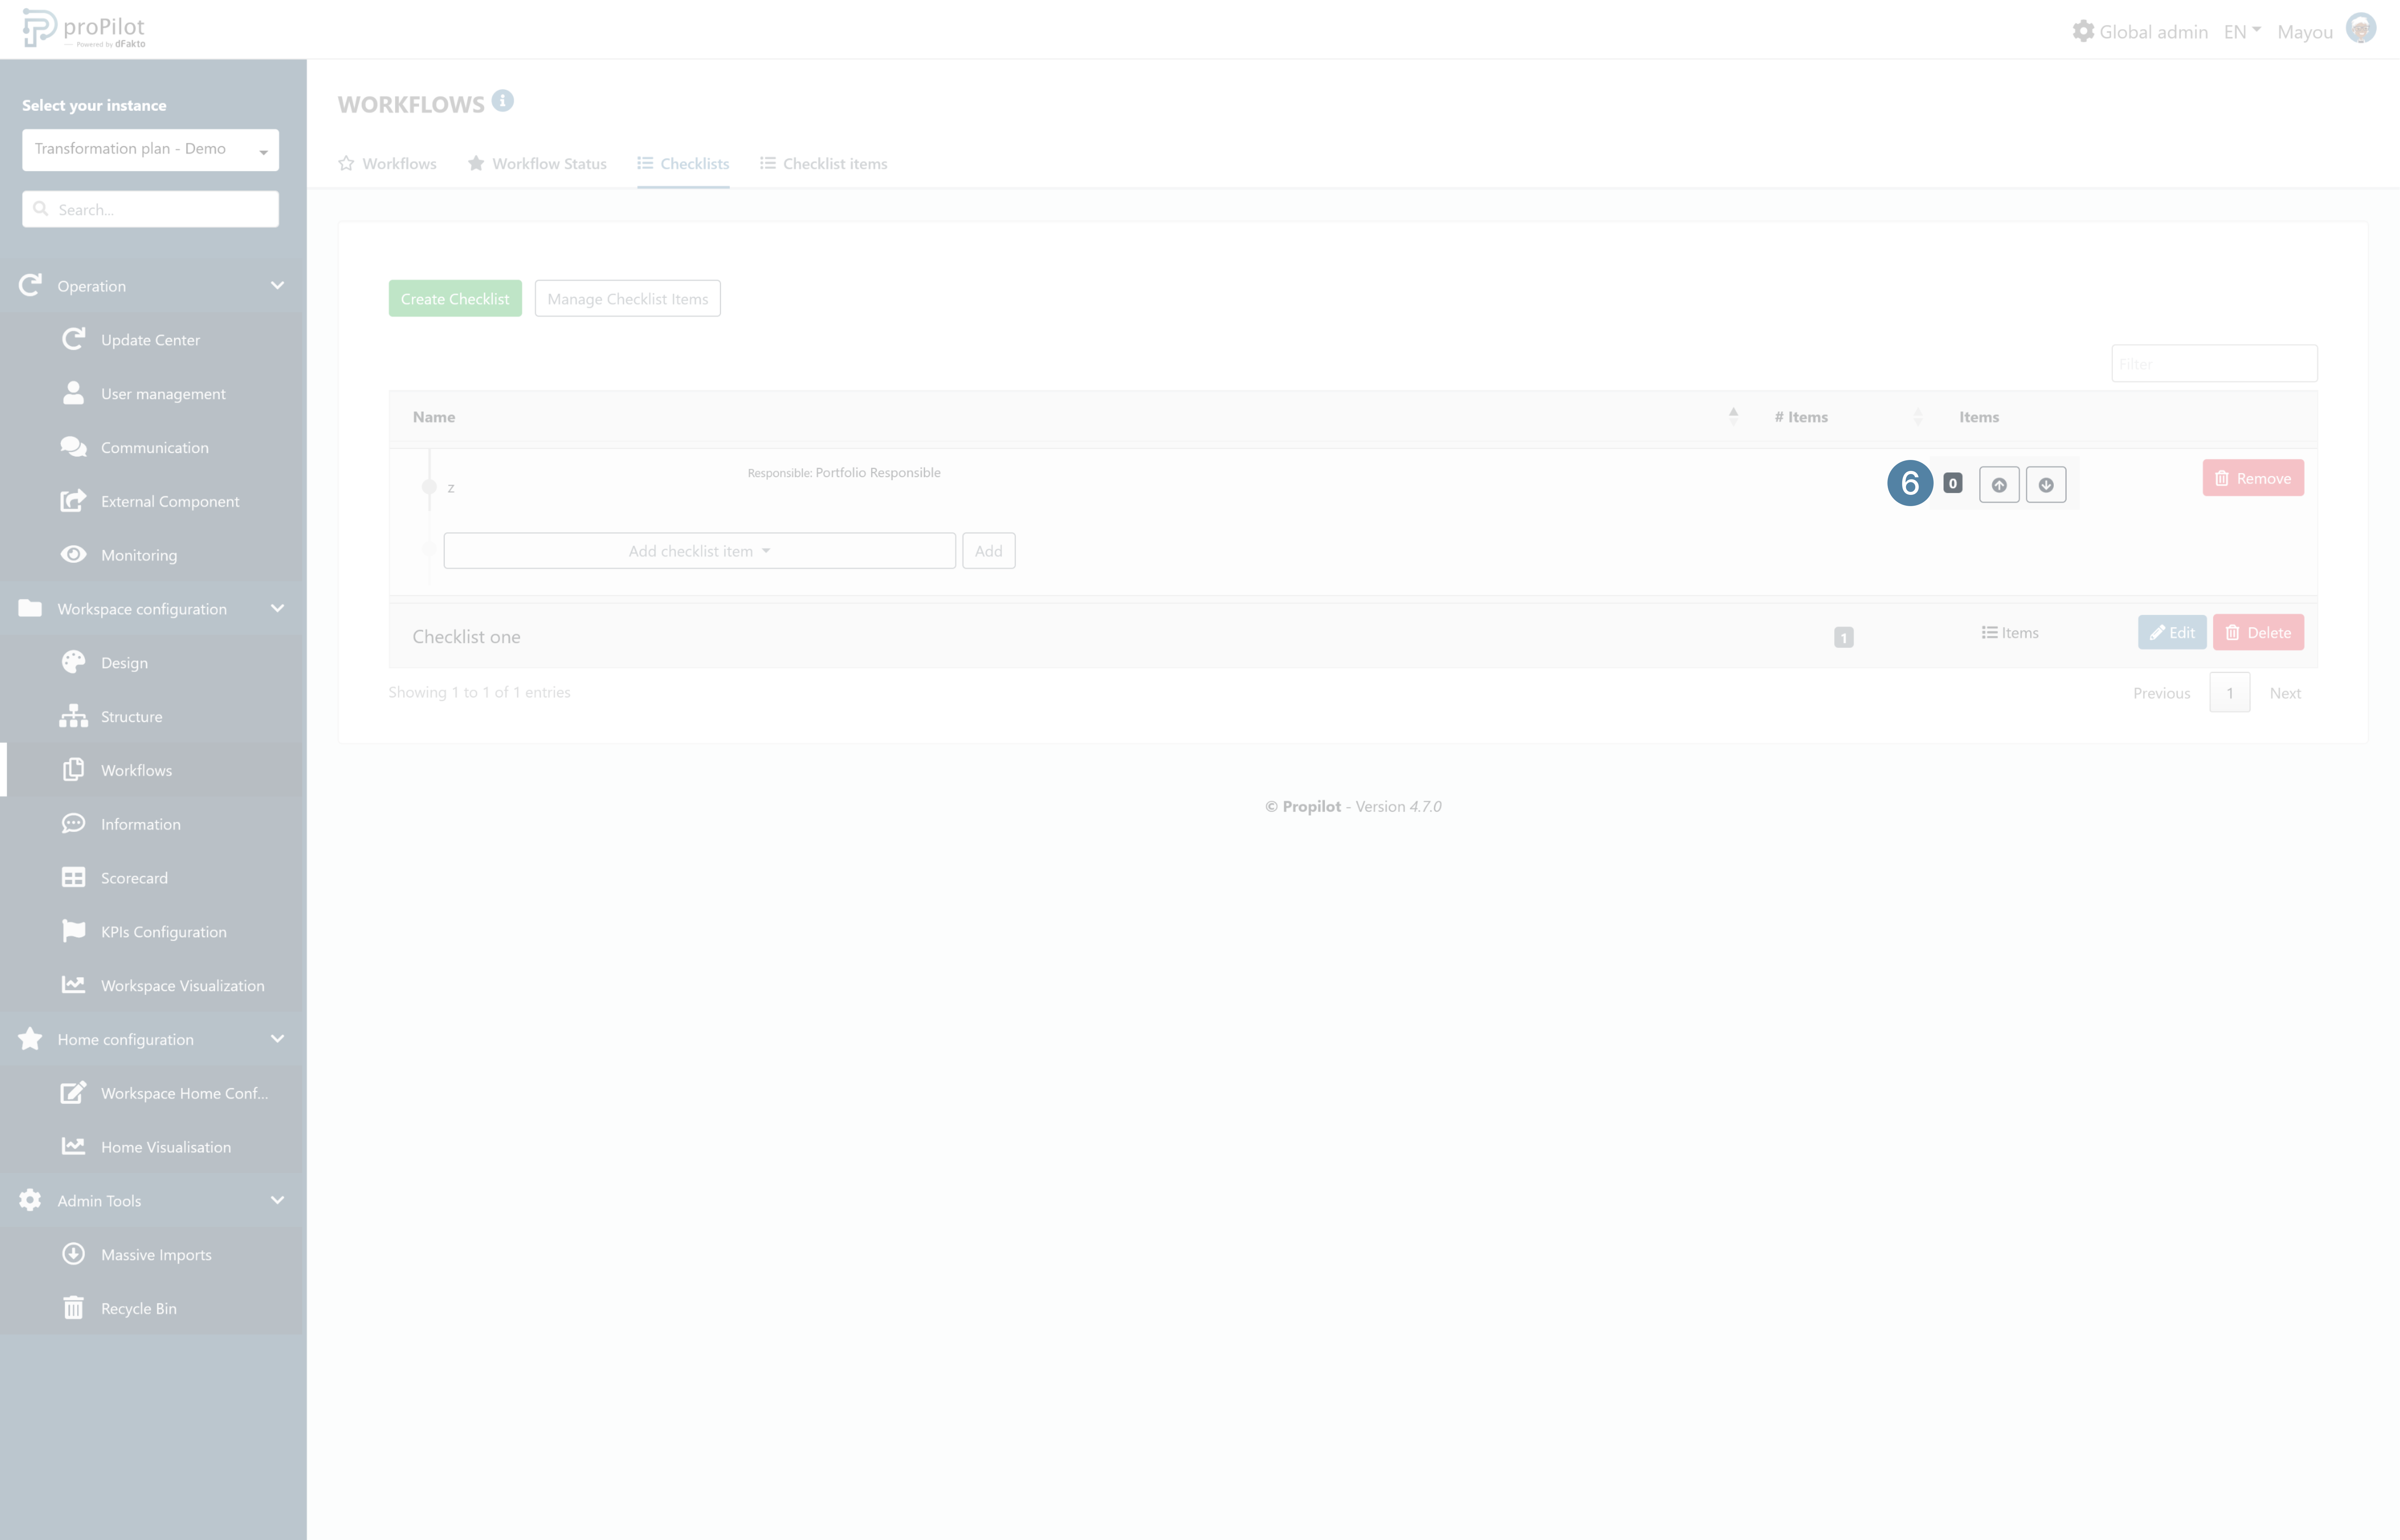
You can order items into the checklist by using the up/down arrows.
Enable a checklist
In order to activate the checklist it is mandatory to link it with with a workflow status.
-
In the left-hand menu, select "Workspace configuration" then "Worflows".
-
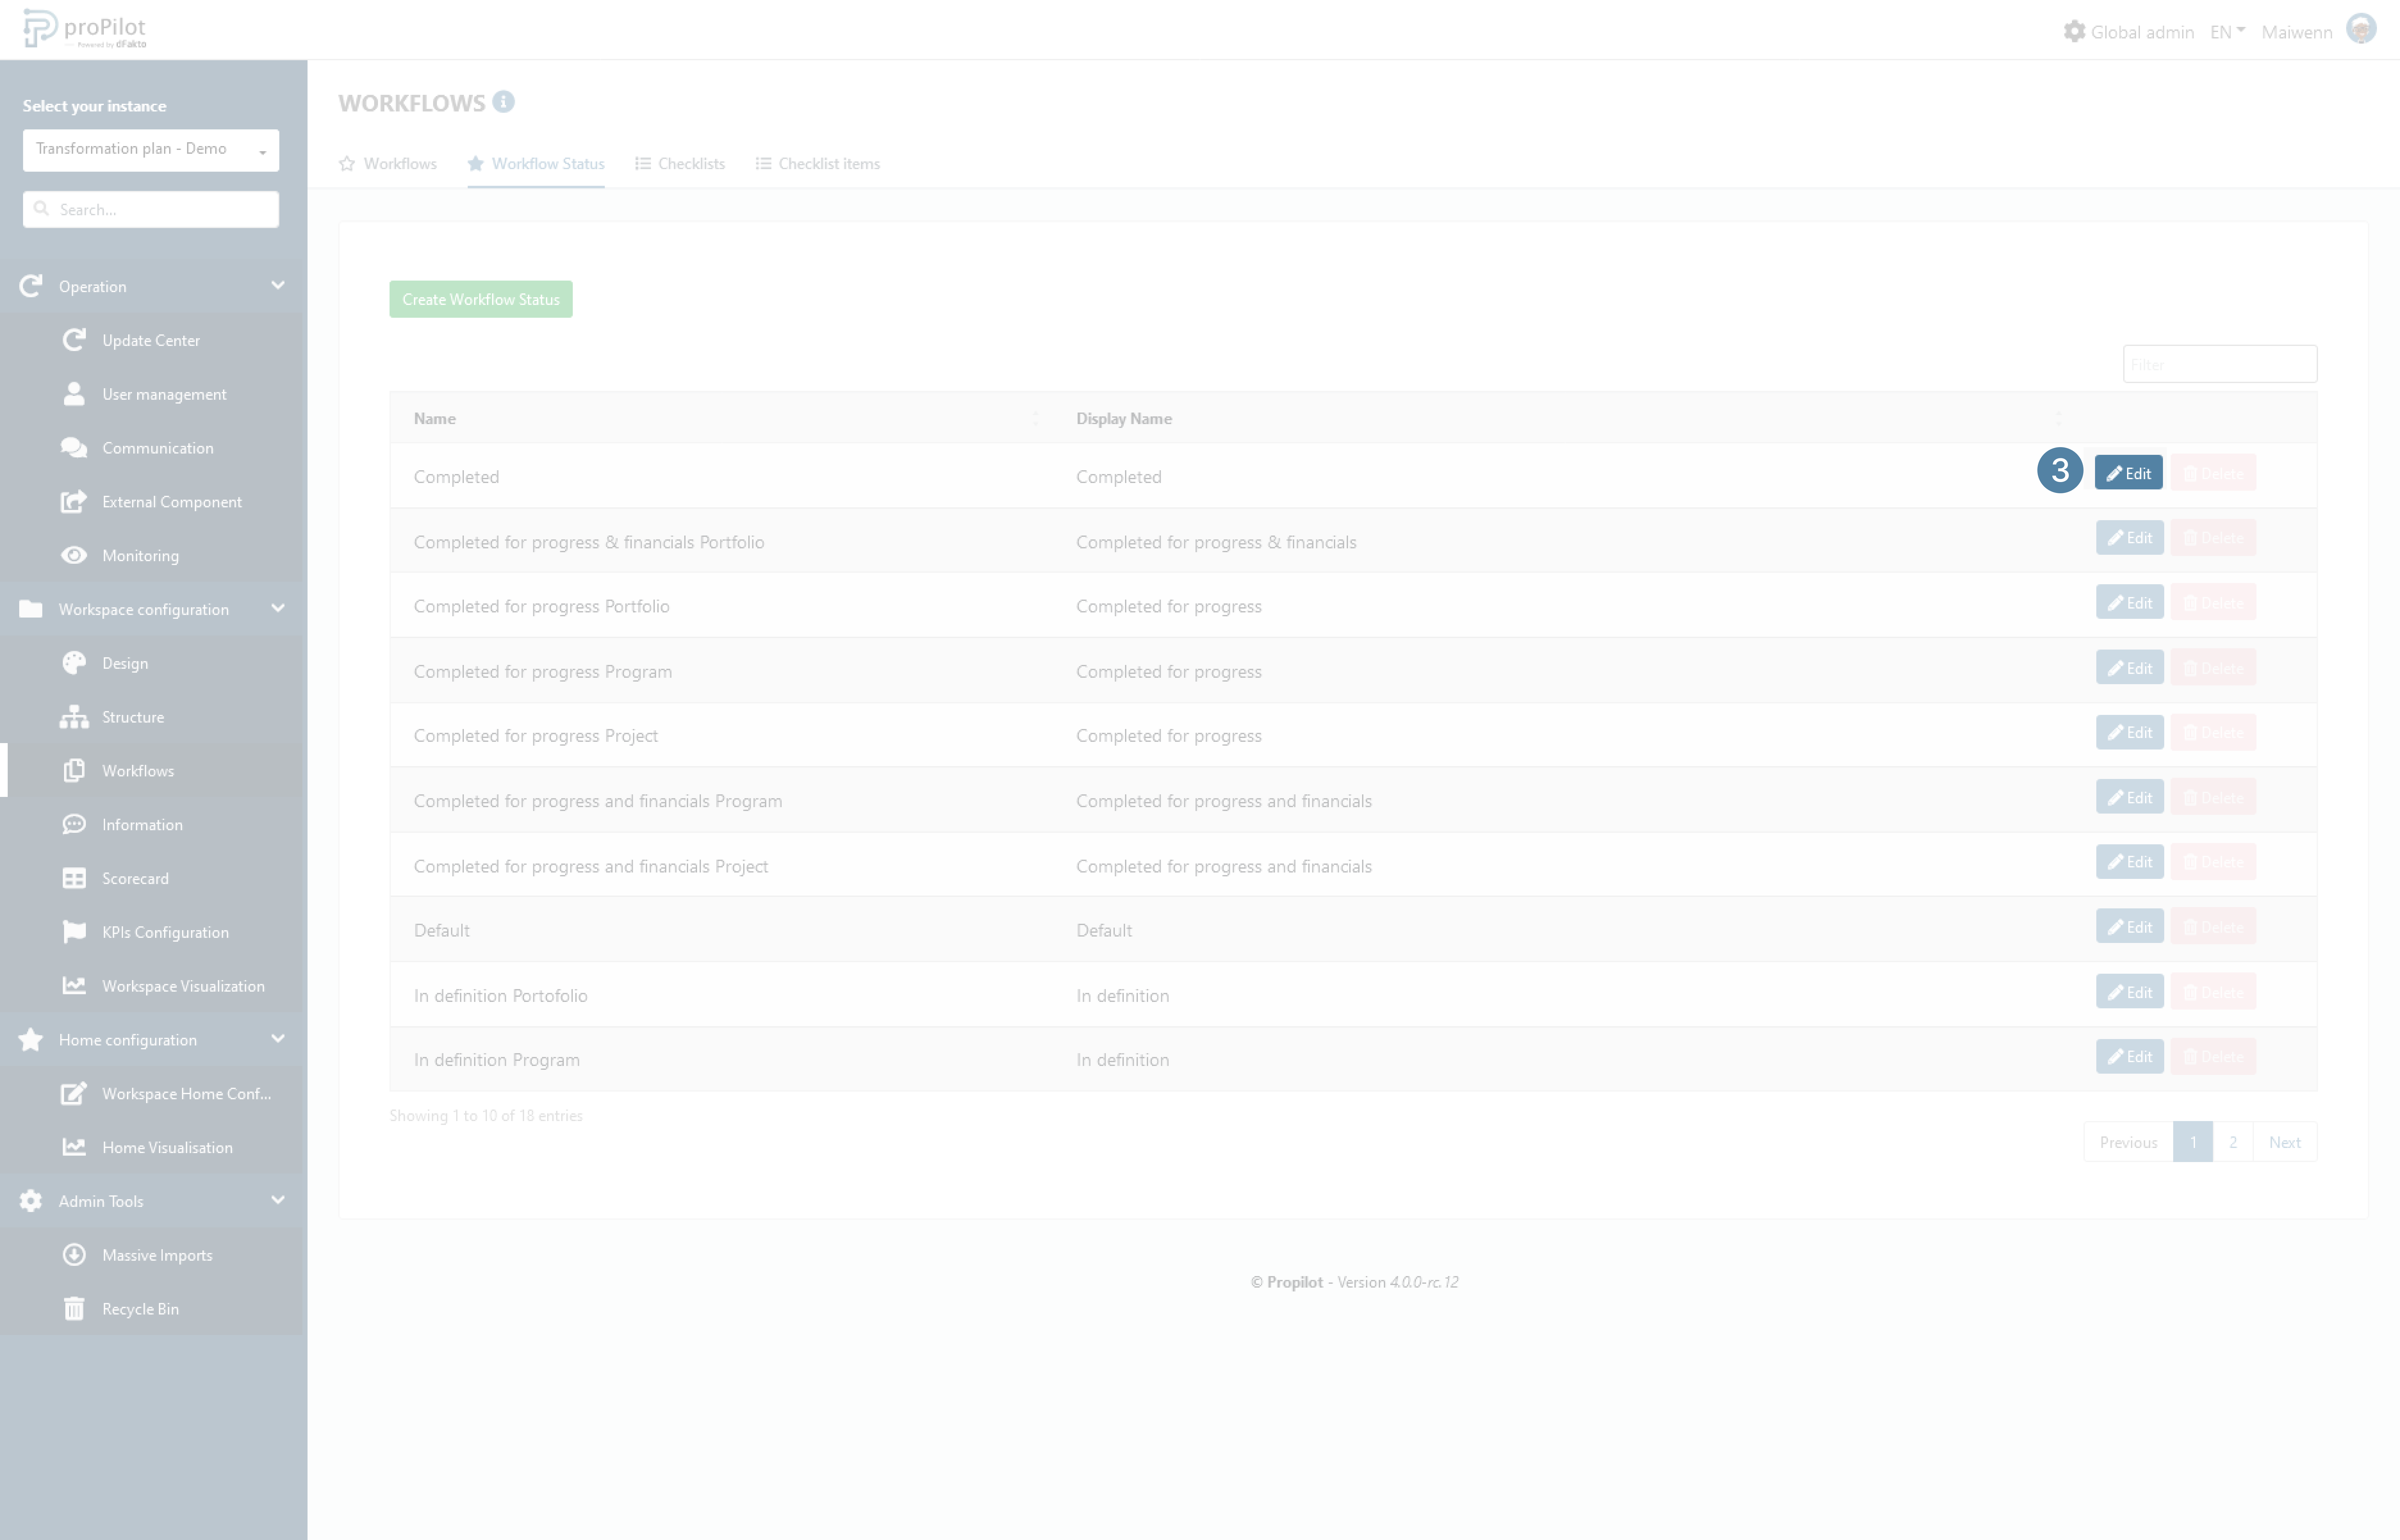
Click on the "Workflow Status" tab. This module allows you to manage the different options related to a status of the workflow.
-
Choose the status where the checklist must be integrated and click on the “Edit” button.
-
In the “Checklist” field, select the list to display.

Require users to complete the checklist before they can move their entity to the next status
-
In the left menu, select "Workspace Configuration" and then "Workflows".
-
Click on the "Workflows" tab.
-
Click on the "Workflow statuses" button of the Workflow for which you wish to enter additional information.
-
Click on the "Path" button of the status from which you wish to force a checklist to be completed.
-
In the available statuses, click on "edit".
-
Check the "All checklist items must be completed" box to force the user to complete all checklist items before switching to this new status.