
Create and manage a new workspace
Workspaces enable to integrate your own data-driven steering strategy.
They have a specific structure associated with a follow-up of specific qualitative and quantitative information.
To ensure a good segmentation of the data and configurations, we recommend creating maximum one workspace per instance.
How to create a workspace
-
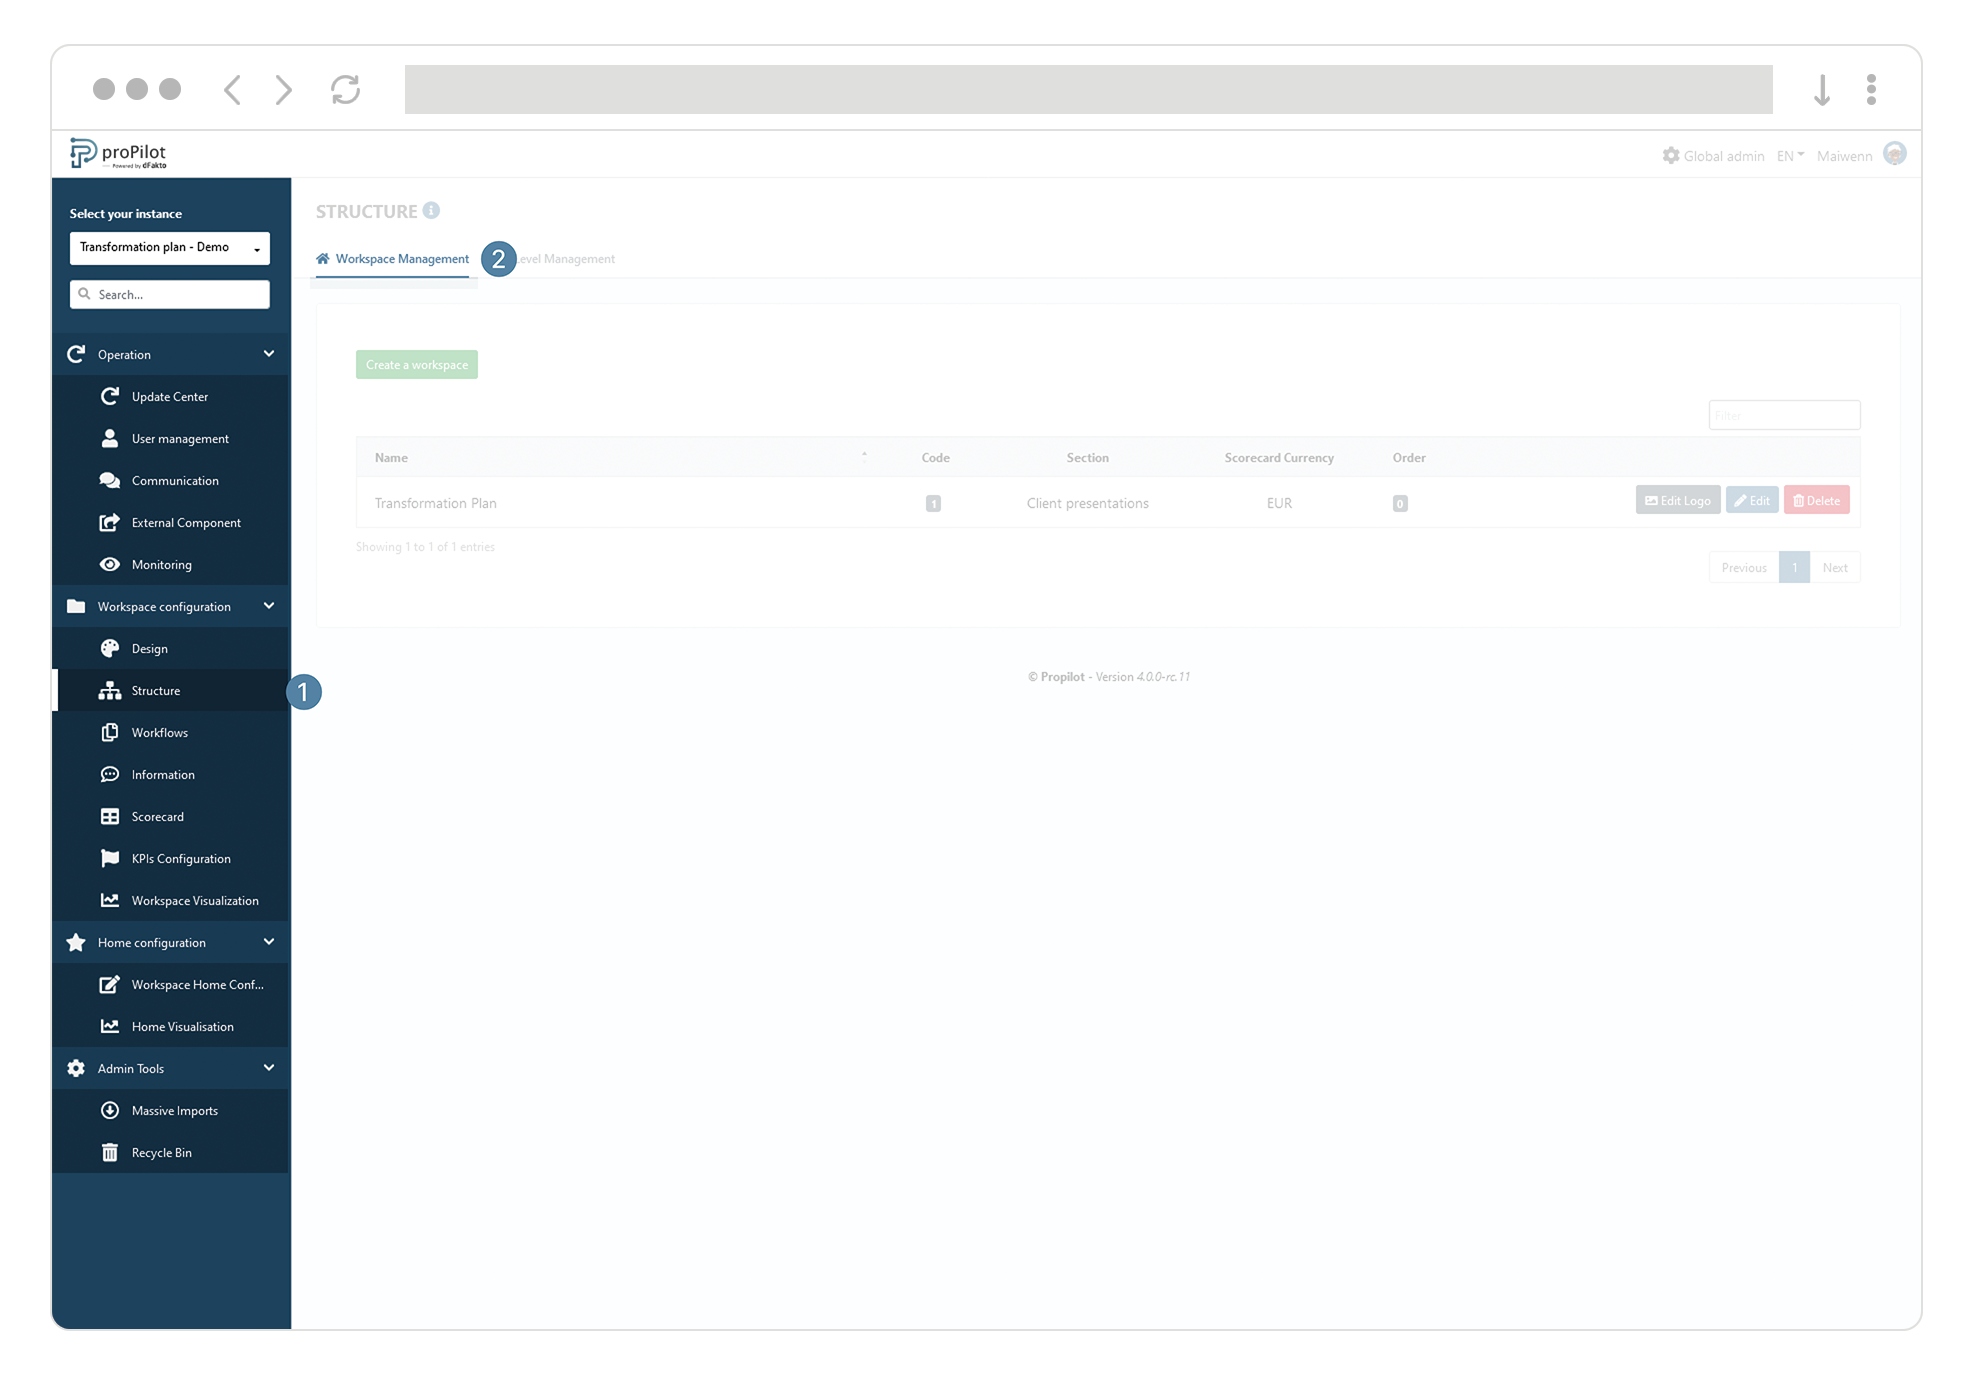
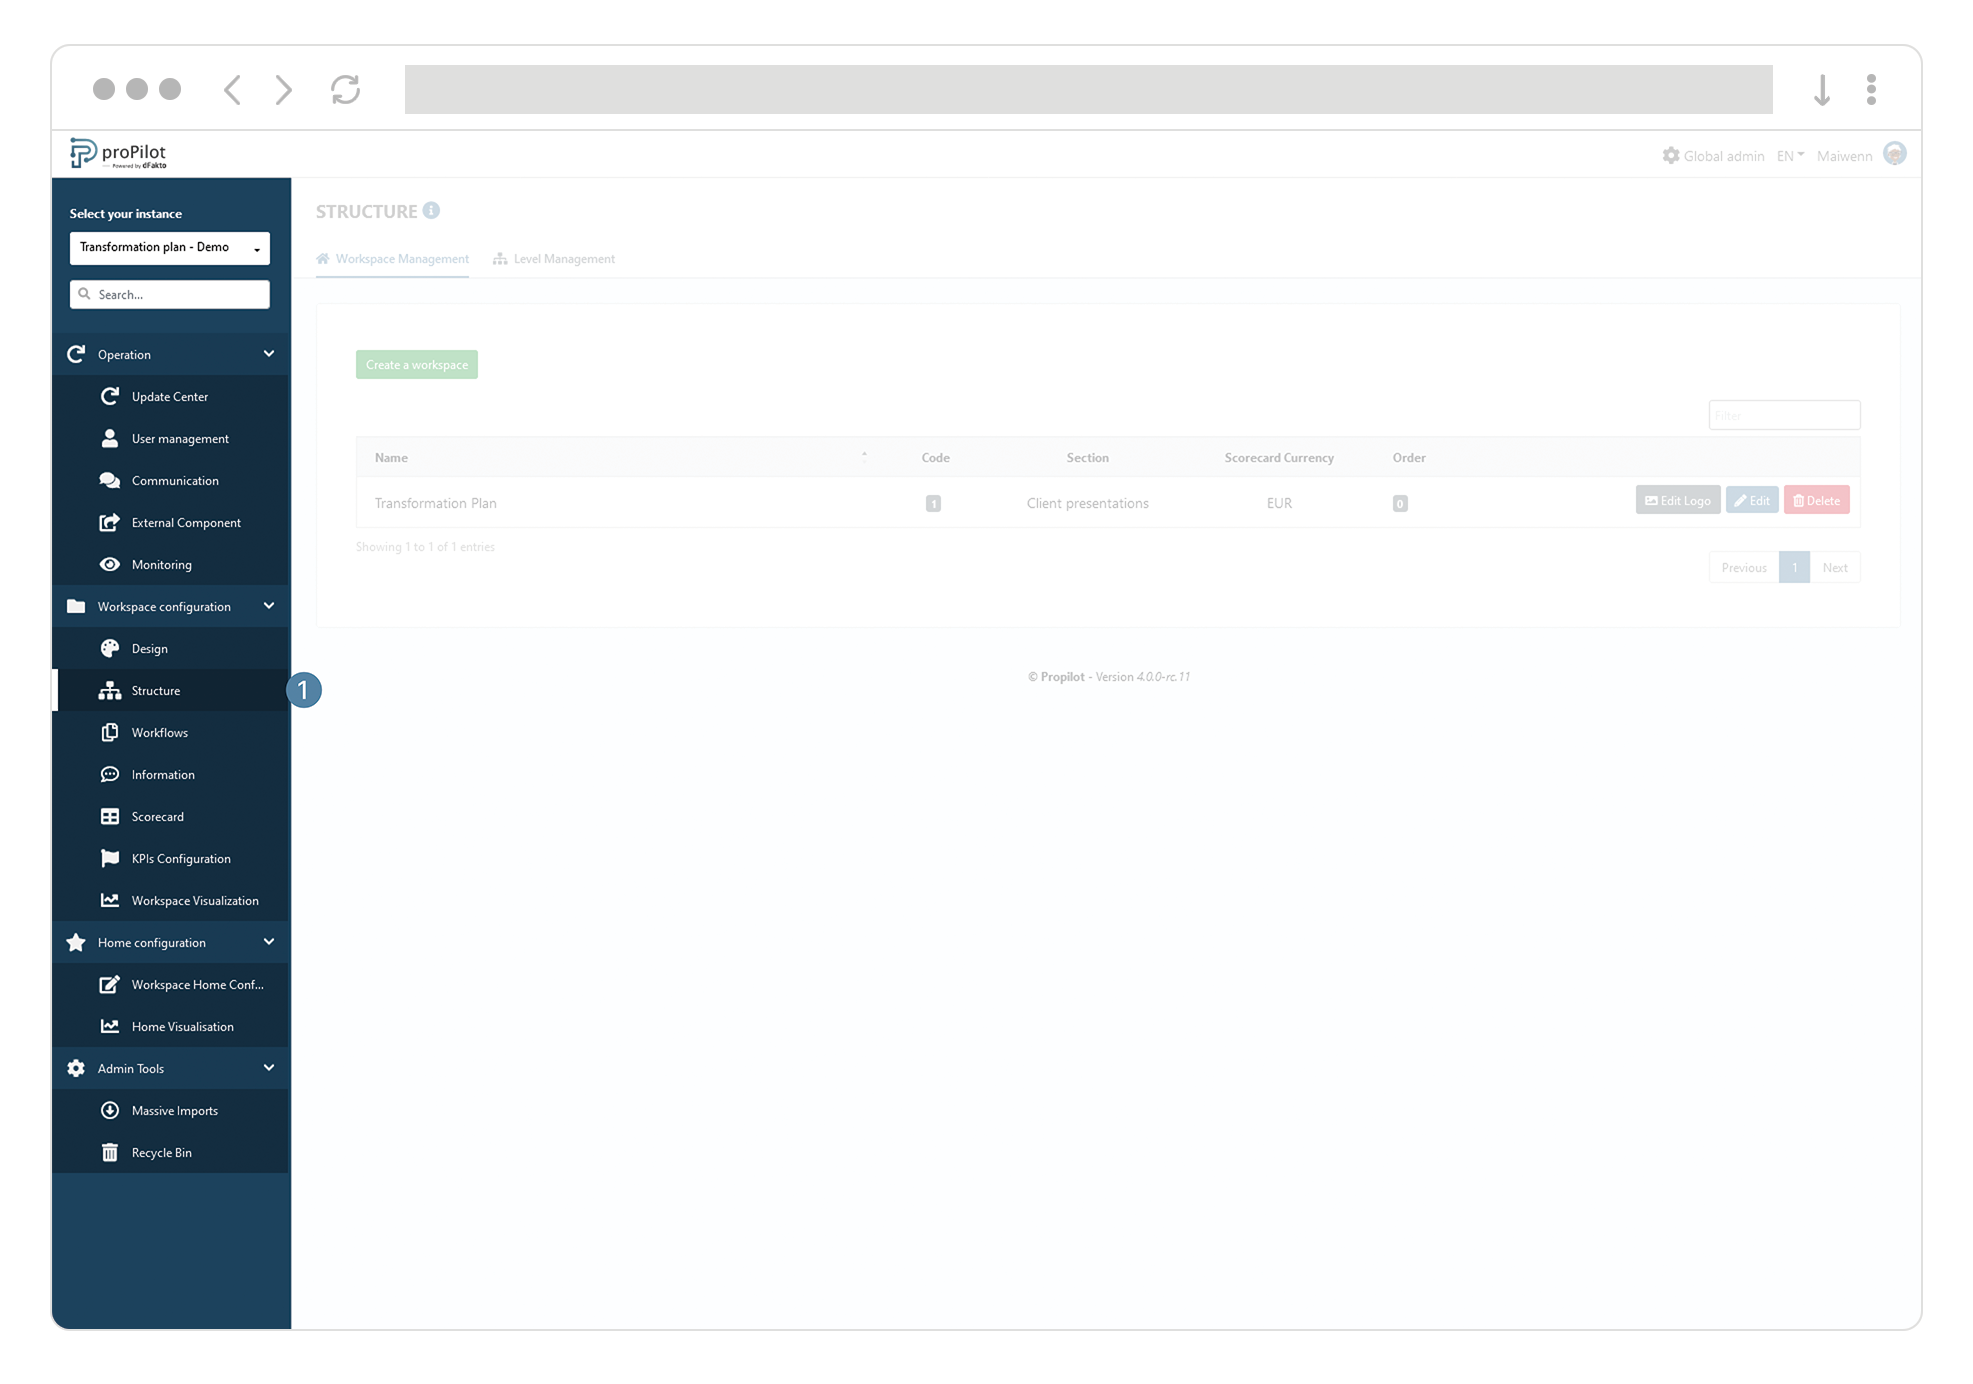
When you are in the admin area of an instance (chosen via the drop-down menu at the top left of the administration screen), open the "Workspace configuration" section in the left-hand menu and then click on the "Structure" option.
-
Open the tab “Workspace Management”.
-
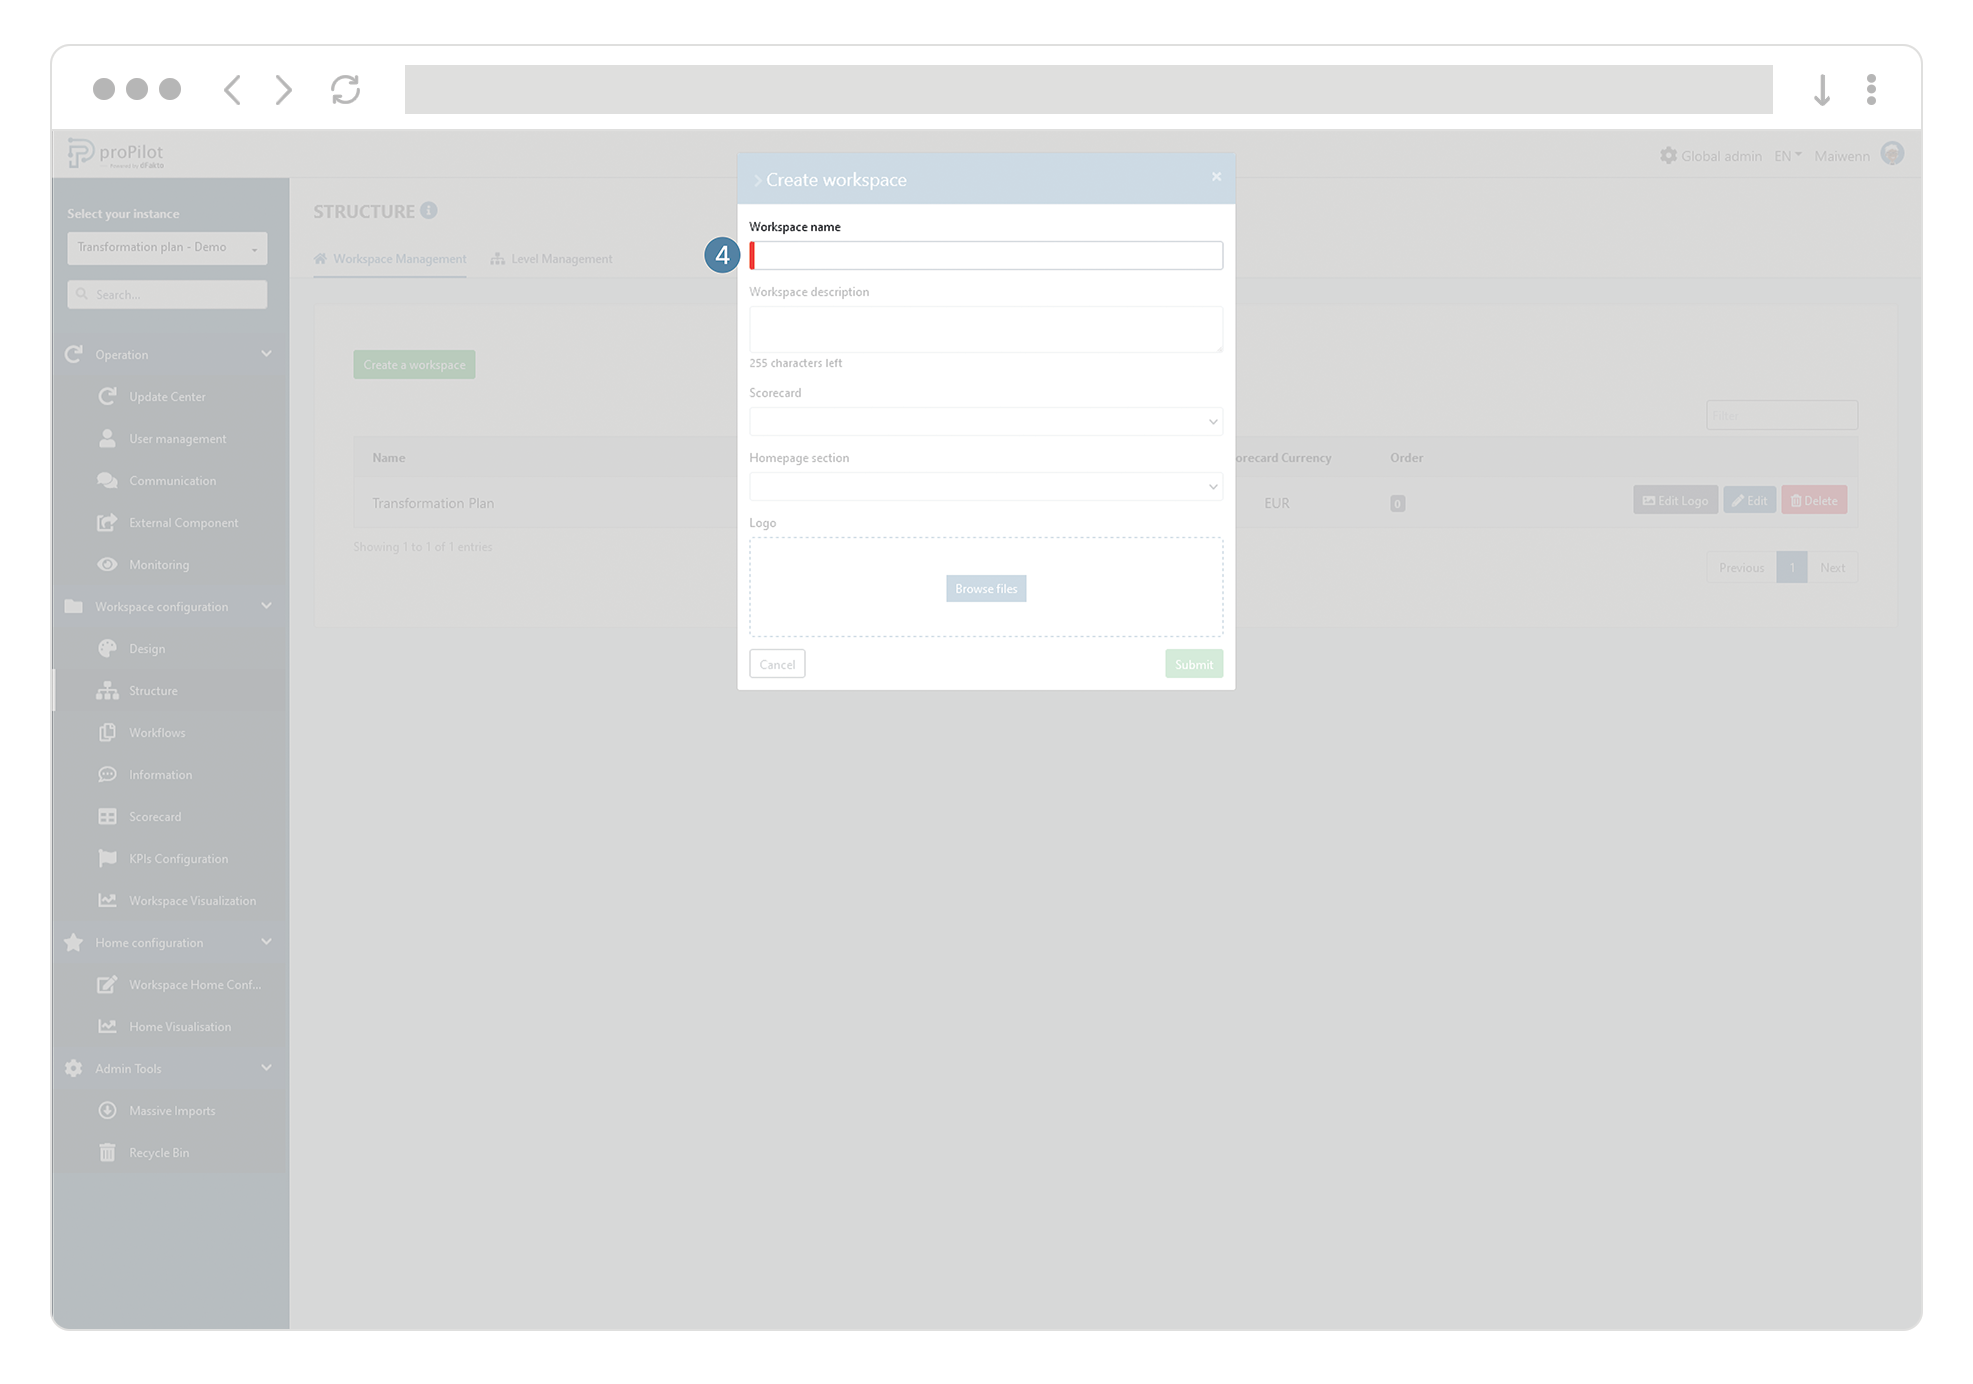
Click on “create a workspace“.

-
Fill in at least the “Workspace name” field.
Insert the workspace in one of the homepage sections
-
Open the “Workspace configuration” in the left-hand menu then click on “Structure”.
-
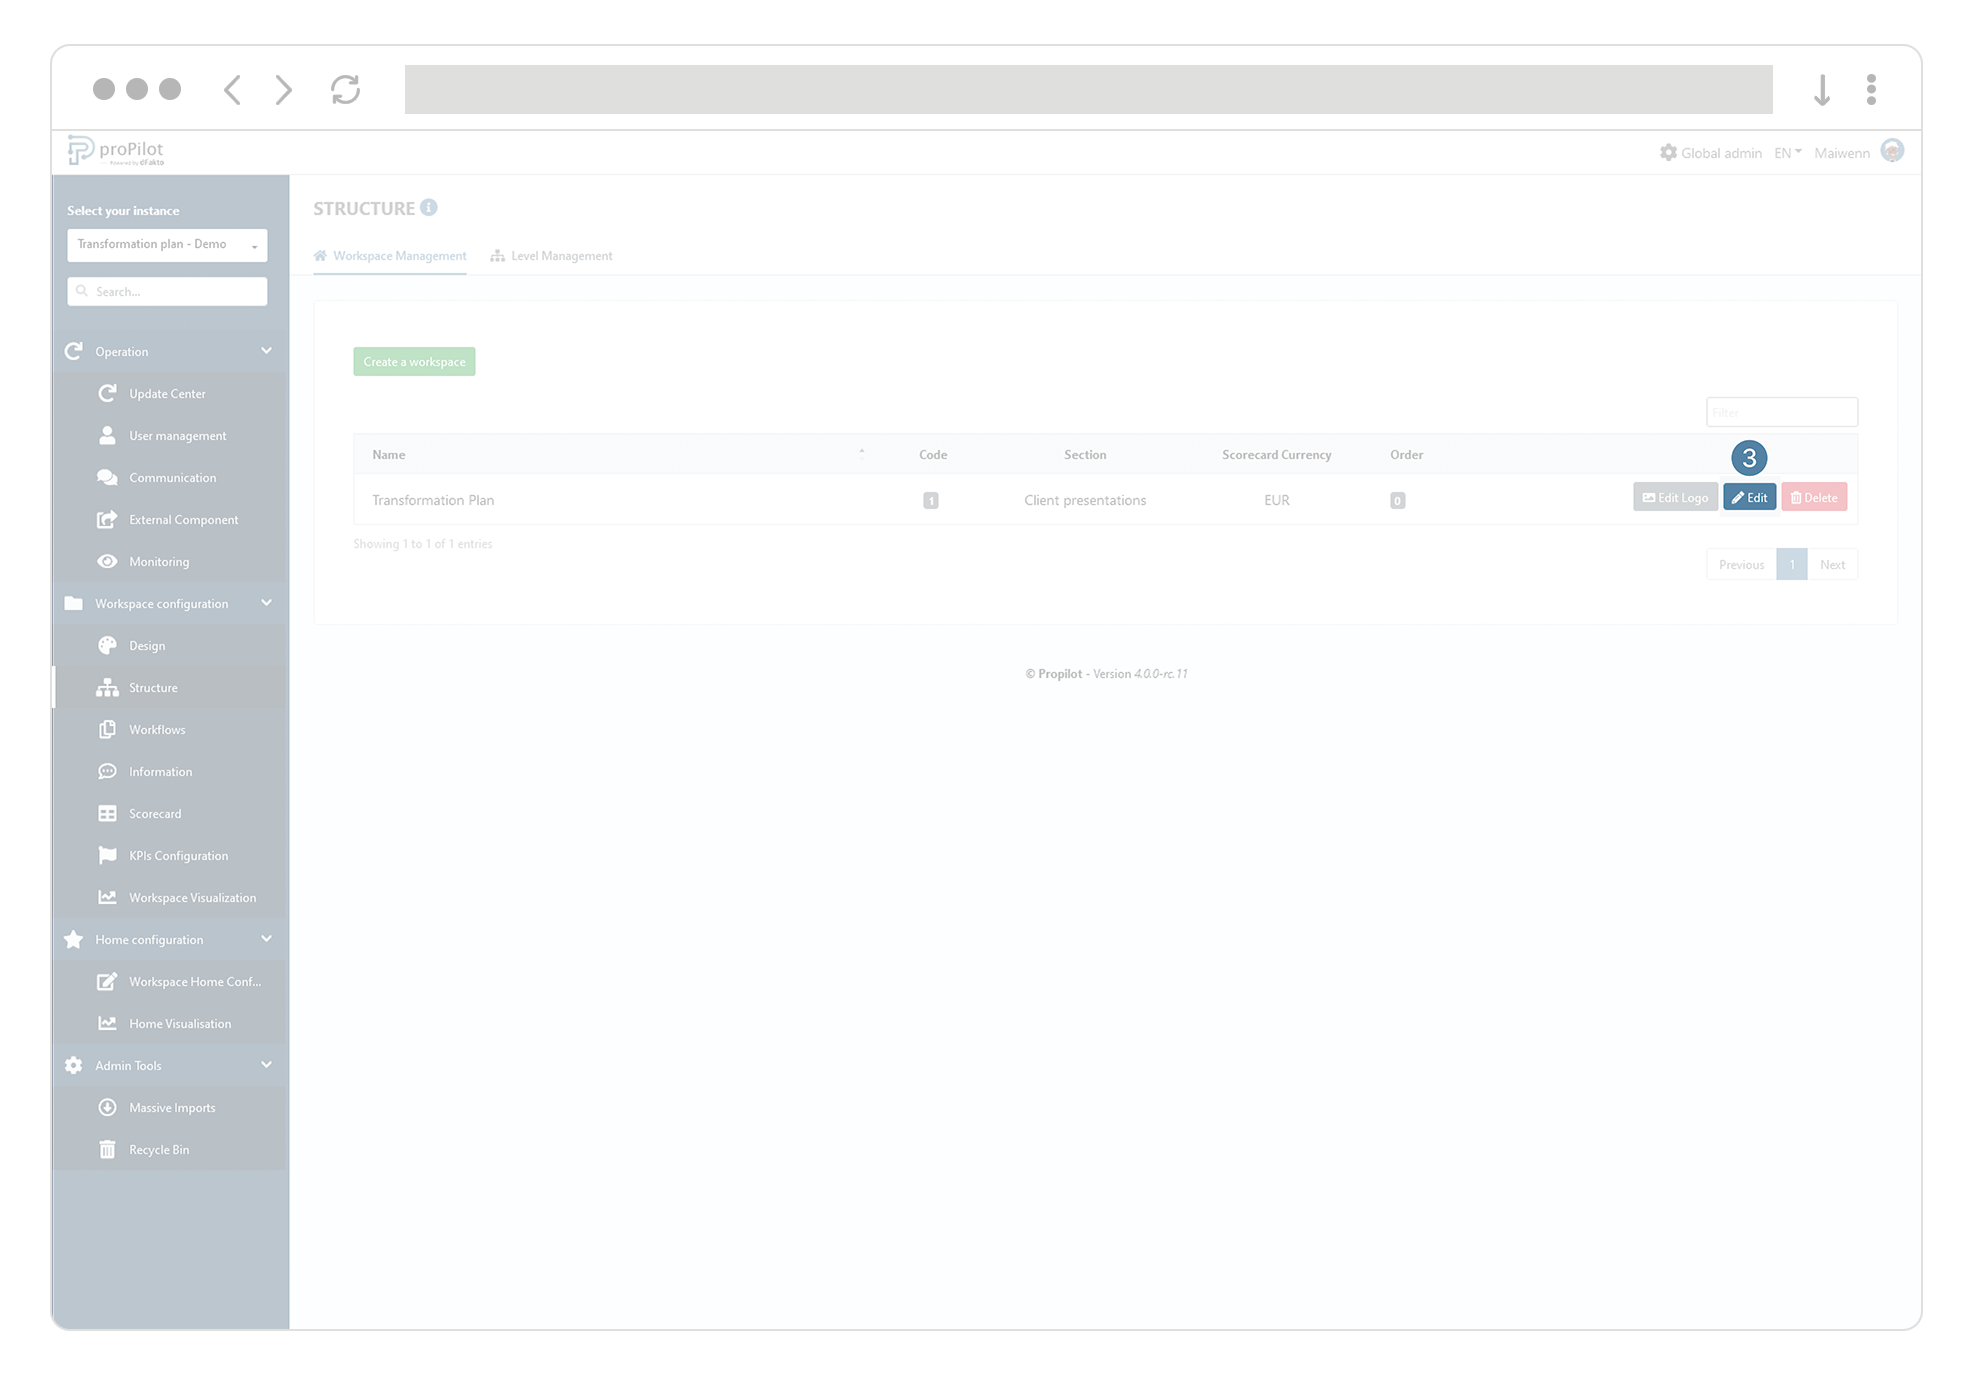
Select the tab “Workspace management ”.
-
Click on the “edit” button of the workspace you would like to edit.
-
Update the following “Homepage section”. You will then be able to determine in which section of your homepage you would like your workspace to be represented.

If the section doesn’t appear, please contact your administrator - It is necessary to add the instance in the section configuration through proPilot’s global admin.
By default, workspaces which aren’t part of a specific section will appear under a specific section called “other”.
Add a description to your workspace
-
Open the “Workspace configuration” option in the left-handed menu and click on the tab “Structure”.
-
Open the “Workspace management” tab.
-
Click on the “edit” button of the workspace you would like to edit.
-
Fill in the “Workspace description” field.
Your description will then be displayed on the homepage.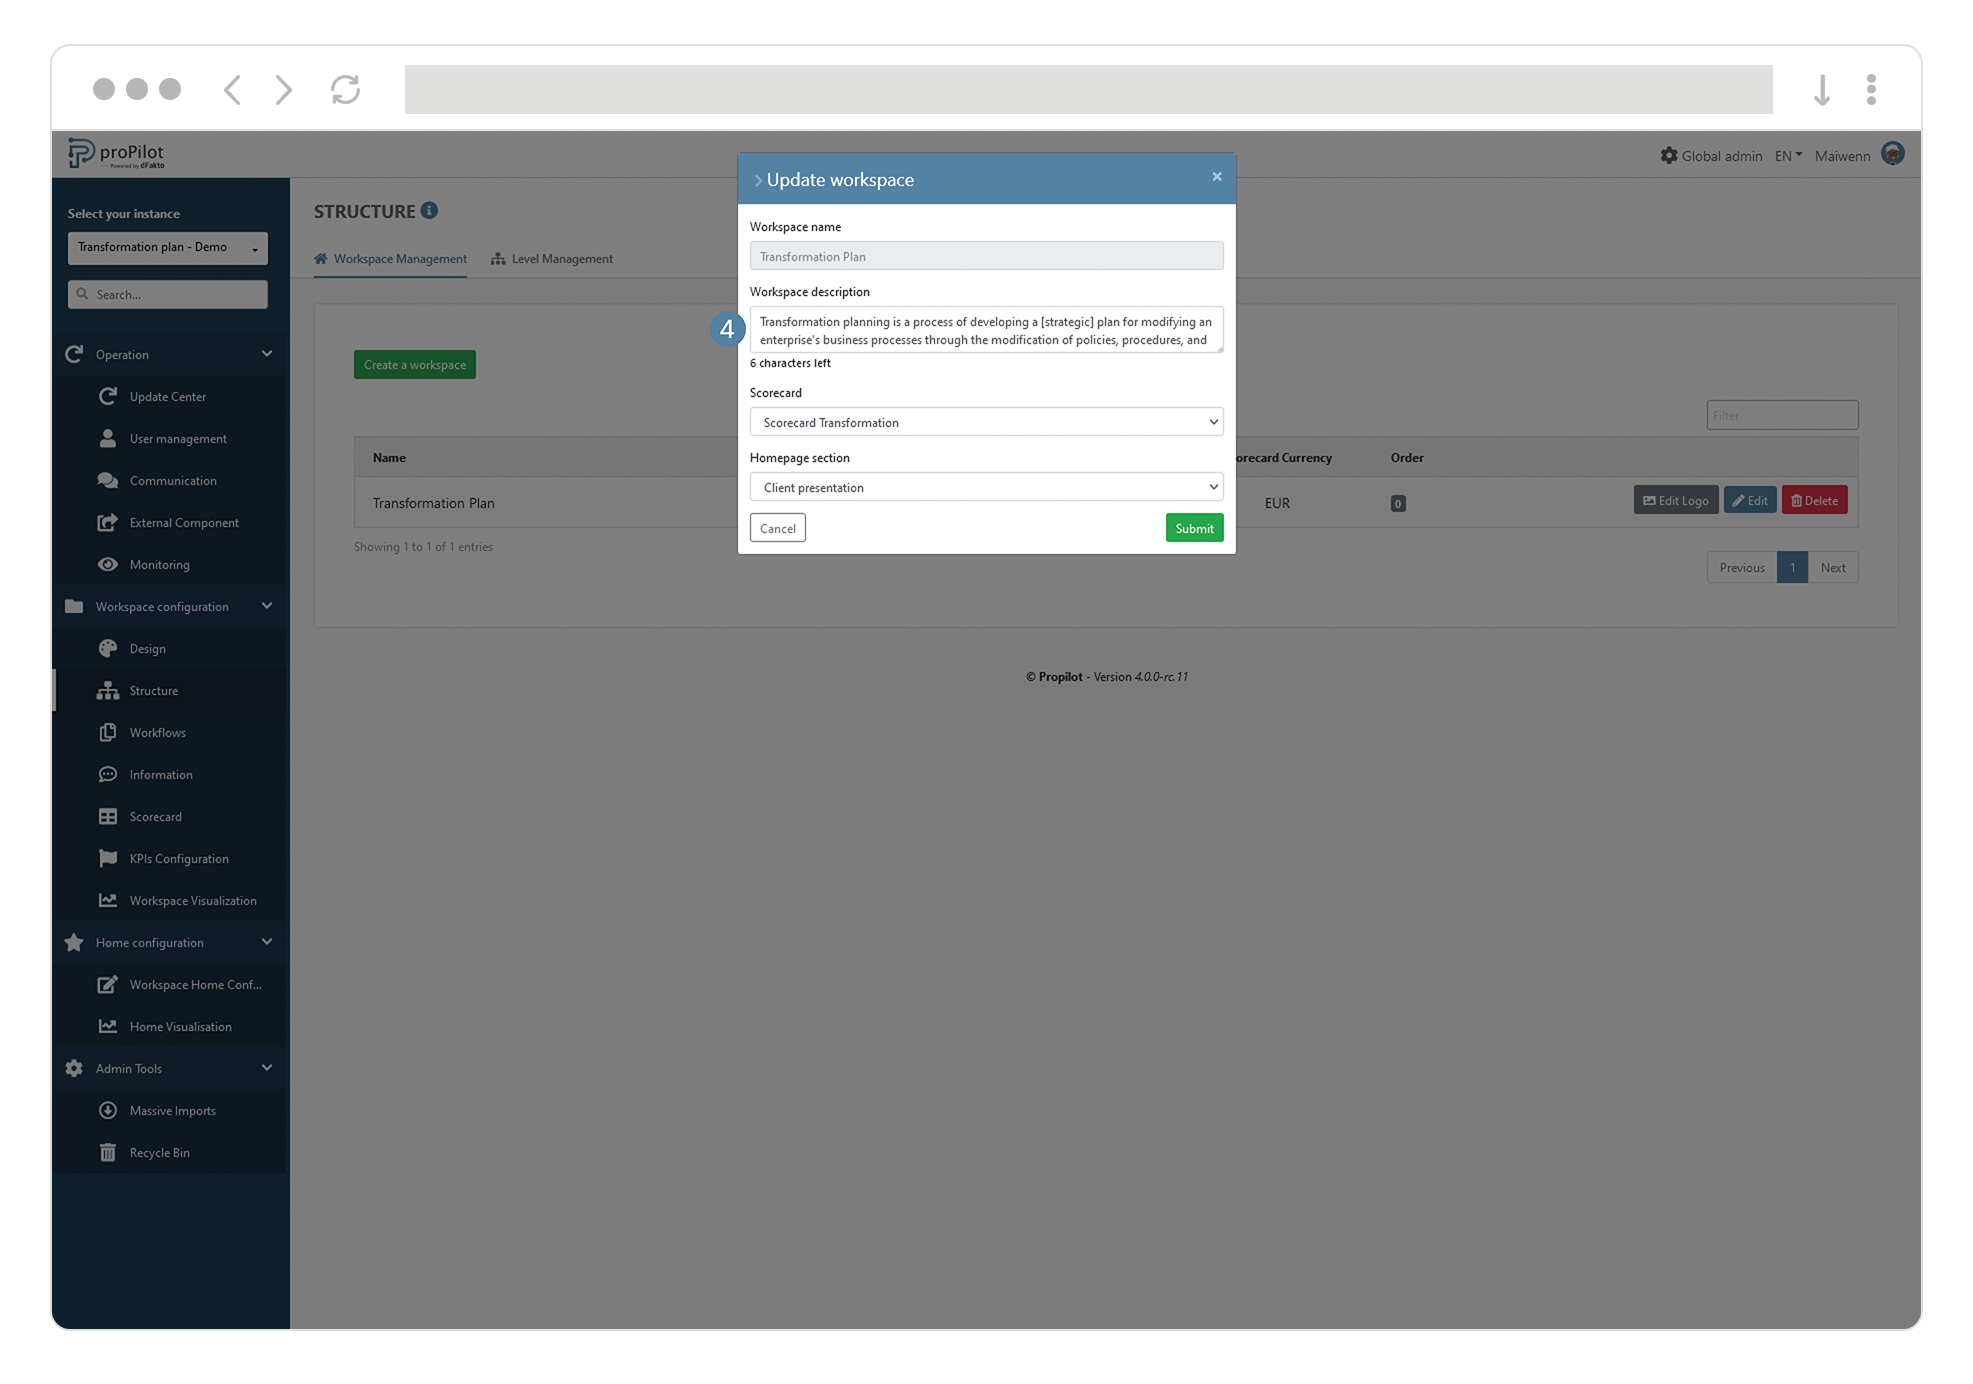
Edit the logo of an existing workspace
-
Open the “Workspace configuration” in the left-handed menu, then click on the tab “Structure” of this menu.
-
Open the option “Workspace management”.
-
Click on the button “Edit logo” to change your workspace’s logo you’d like to update.
This logo will be displayed on the homepage next to your workspace name and description.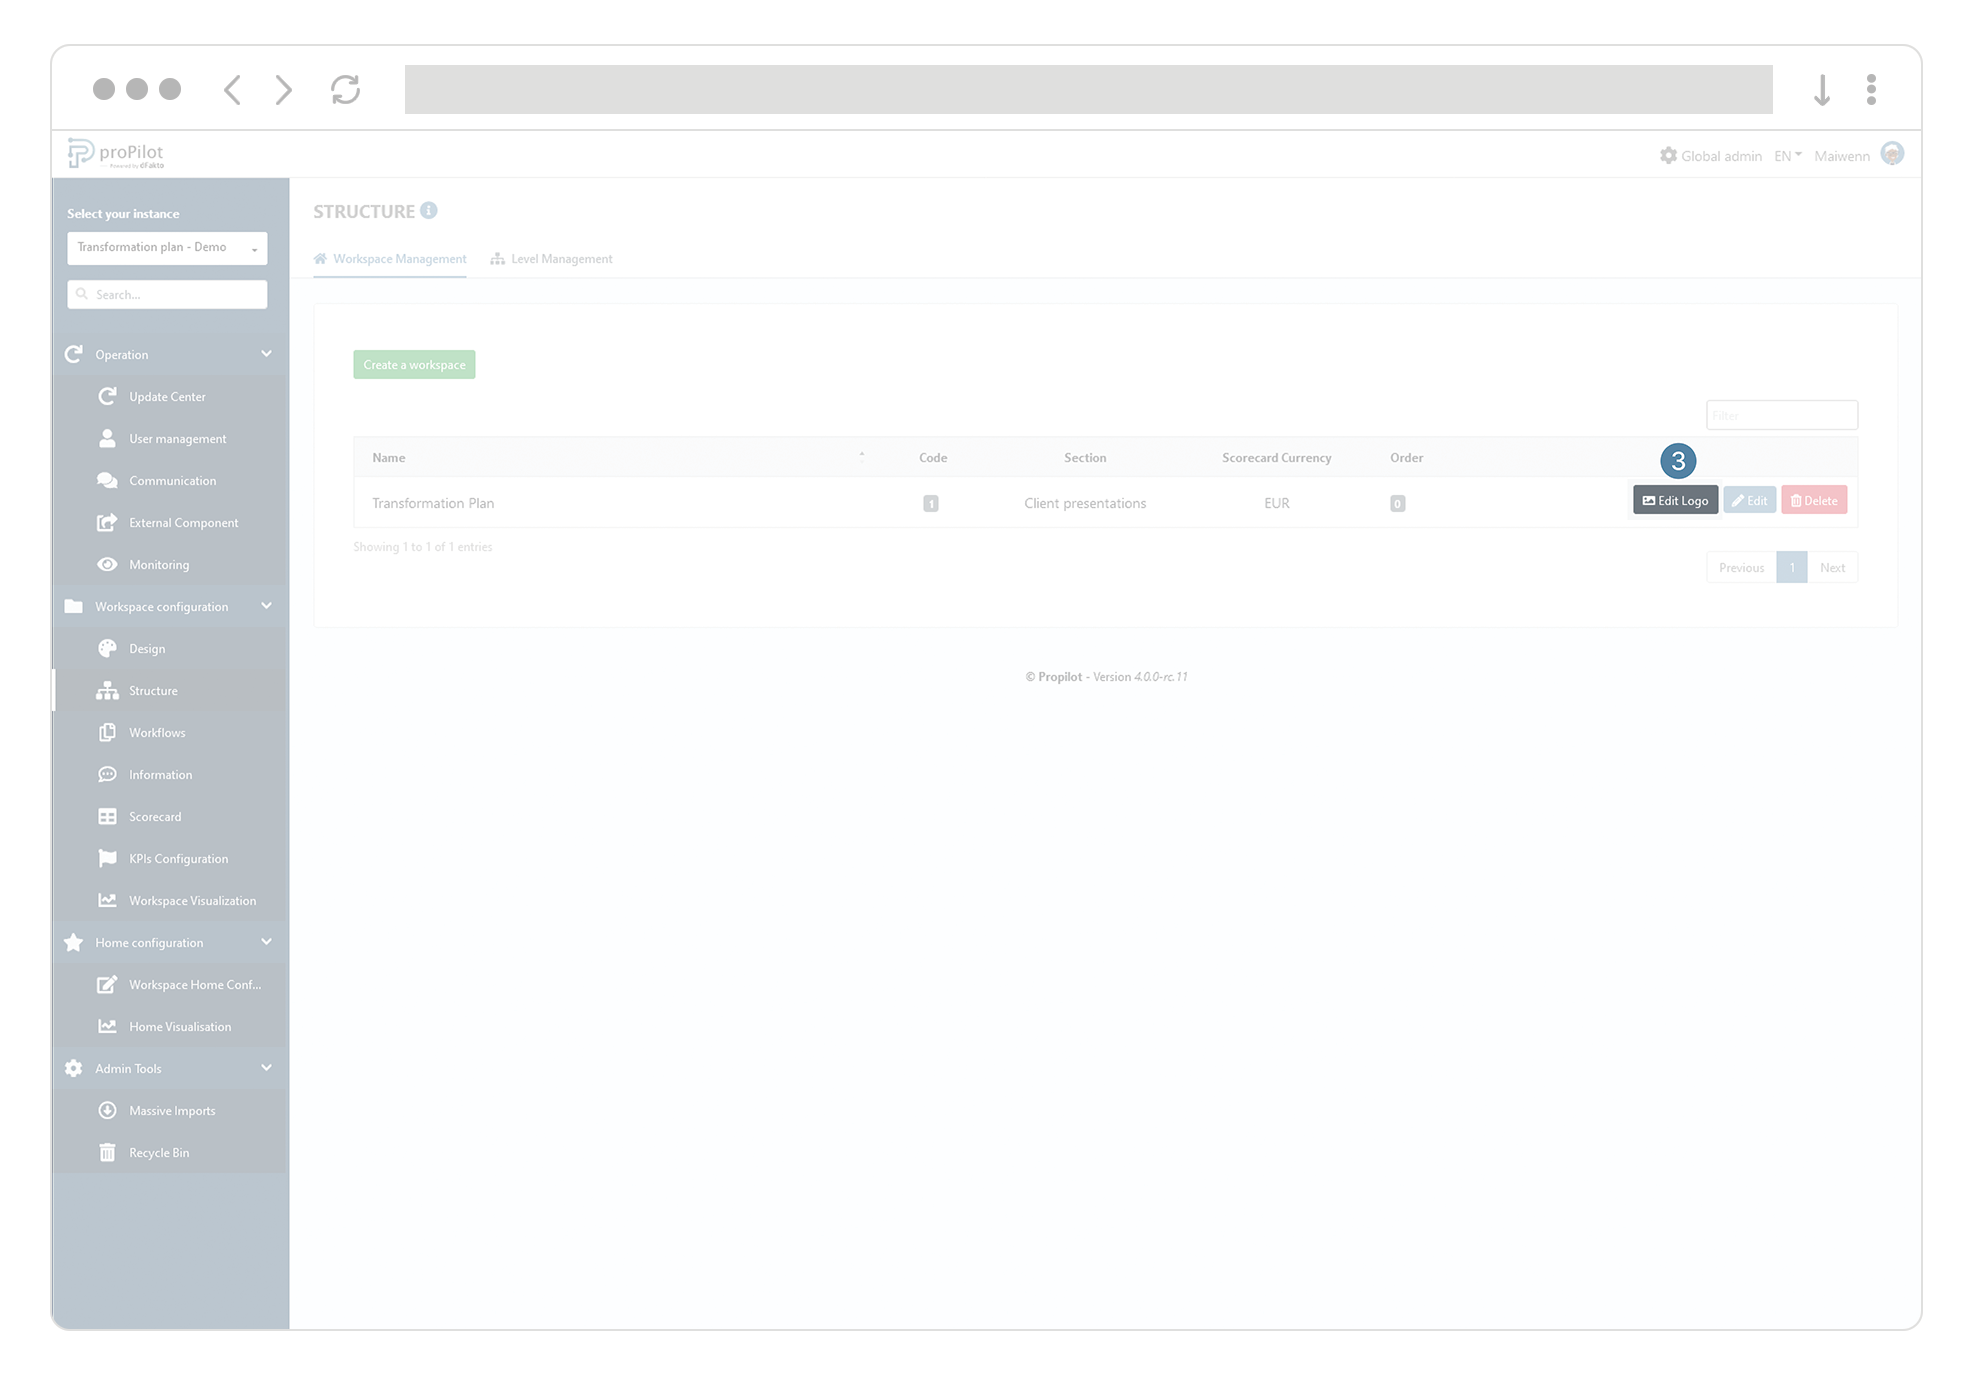
If no specific logo is integrated, then a default icon will be displayed.
Edit the name of an existing workspace
Whenever you create a workspace, an entity is automatically created at the top level of the workspace structure, bearing the name of your workspace.
To modify the name of your workspace, you must modify the name of this entity.
-
Access your workspace from the proPilot homepage or from your instance administration homepage.
-
On the top level entity which bears the name of your workspace : on the “Information” tab, locate the “Name” information.
-
Click on the information and edit its value. Your workspace will then appear under this new name at every place in the proPilot.
Manage levels: Structure of your data-driven strategy
Each workspace allows you to benefit from a multi-level tree structure, called "structure". For each level, you have the possibility to integrate several entities.
For each workspace, it is possible to define several levels as well as a number of associated qualitative and quantitative information.
The highest level of the workspace is called "workspace" by default. It can be adapted according to the data-driven strategy implemented.
The following levels will then represent finer meshes of the structure. For example, in the case of a "project" level, this level allows the creation of different "projects" with common information to collect.
Managing the workspace structure
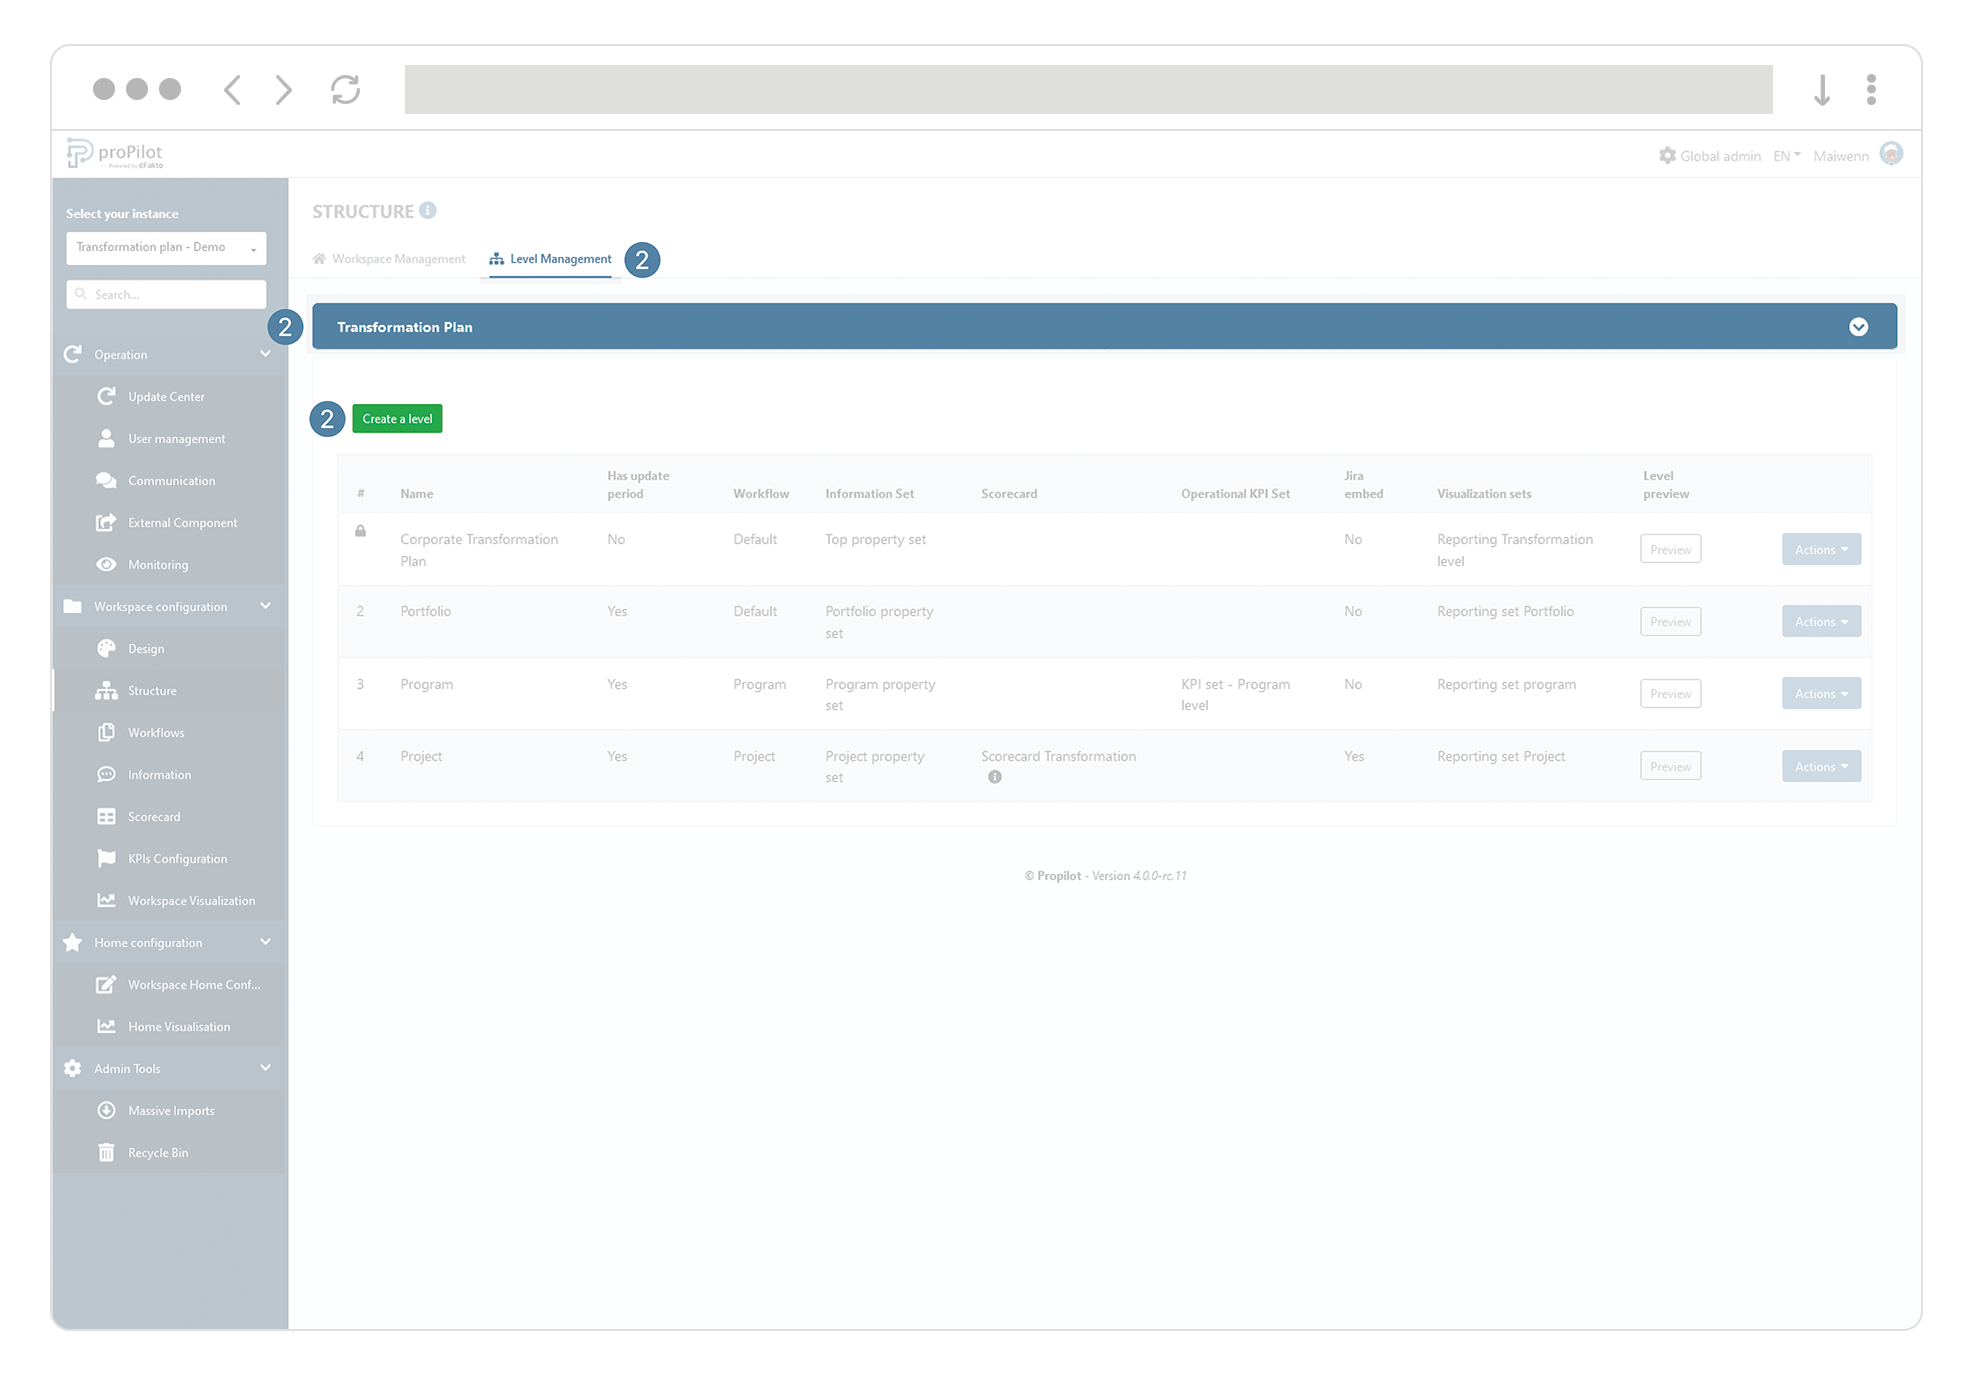
Create the levels of the structure of your workspace
-
Open the "Workspace configuration" section in the left menu and then click on the "Structure" tab in this menu.
-
Open the "Level management" tab and, select the applicable workspace and then click on the "Create level" button.
-
Include at least the following parameters:
-
Name (of the level): It can refer to the type of entities that will be created at this level. For example: "projects".
-
Level: It allows to define the order of the levels. Note that workspace represents the highest level 0.
-
Information set: Allows you to define which set of information you want to integrate for this level. Select an option from the drop-down list.

-
More information about the configuration of qualitative information in the "Information set" section.
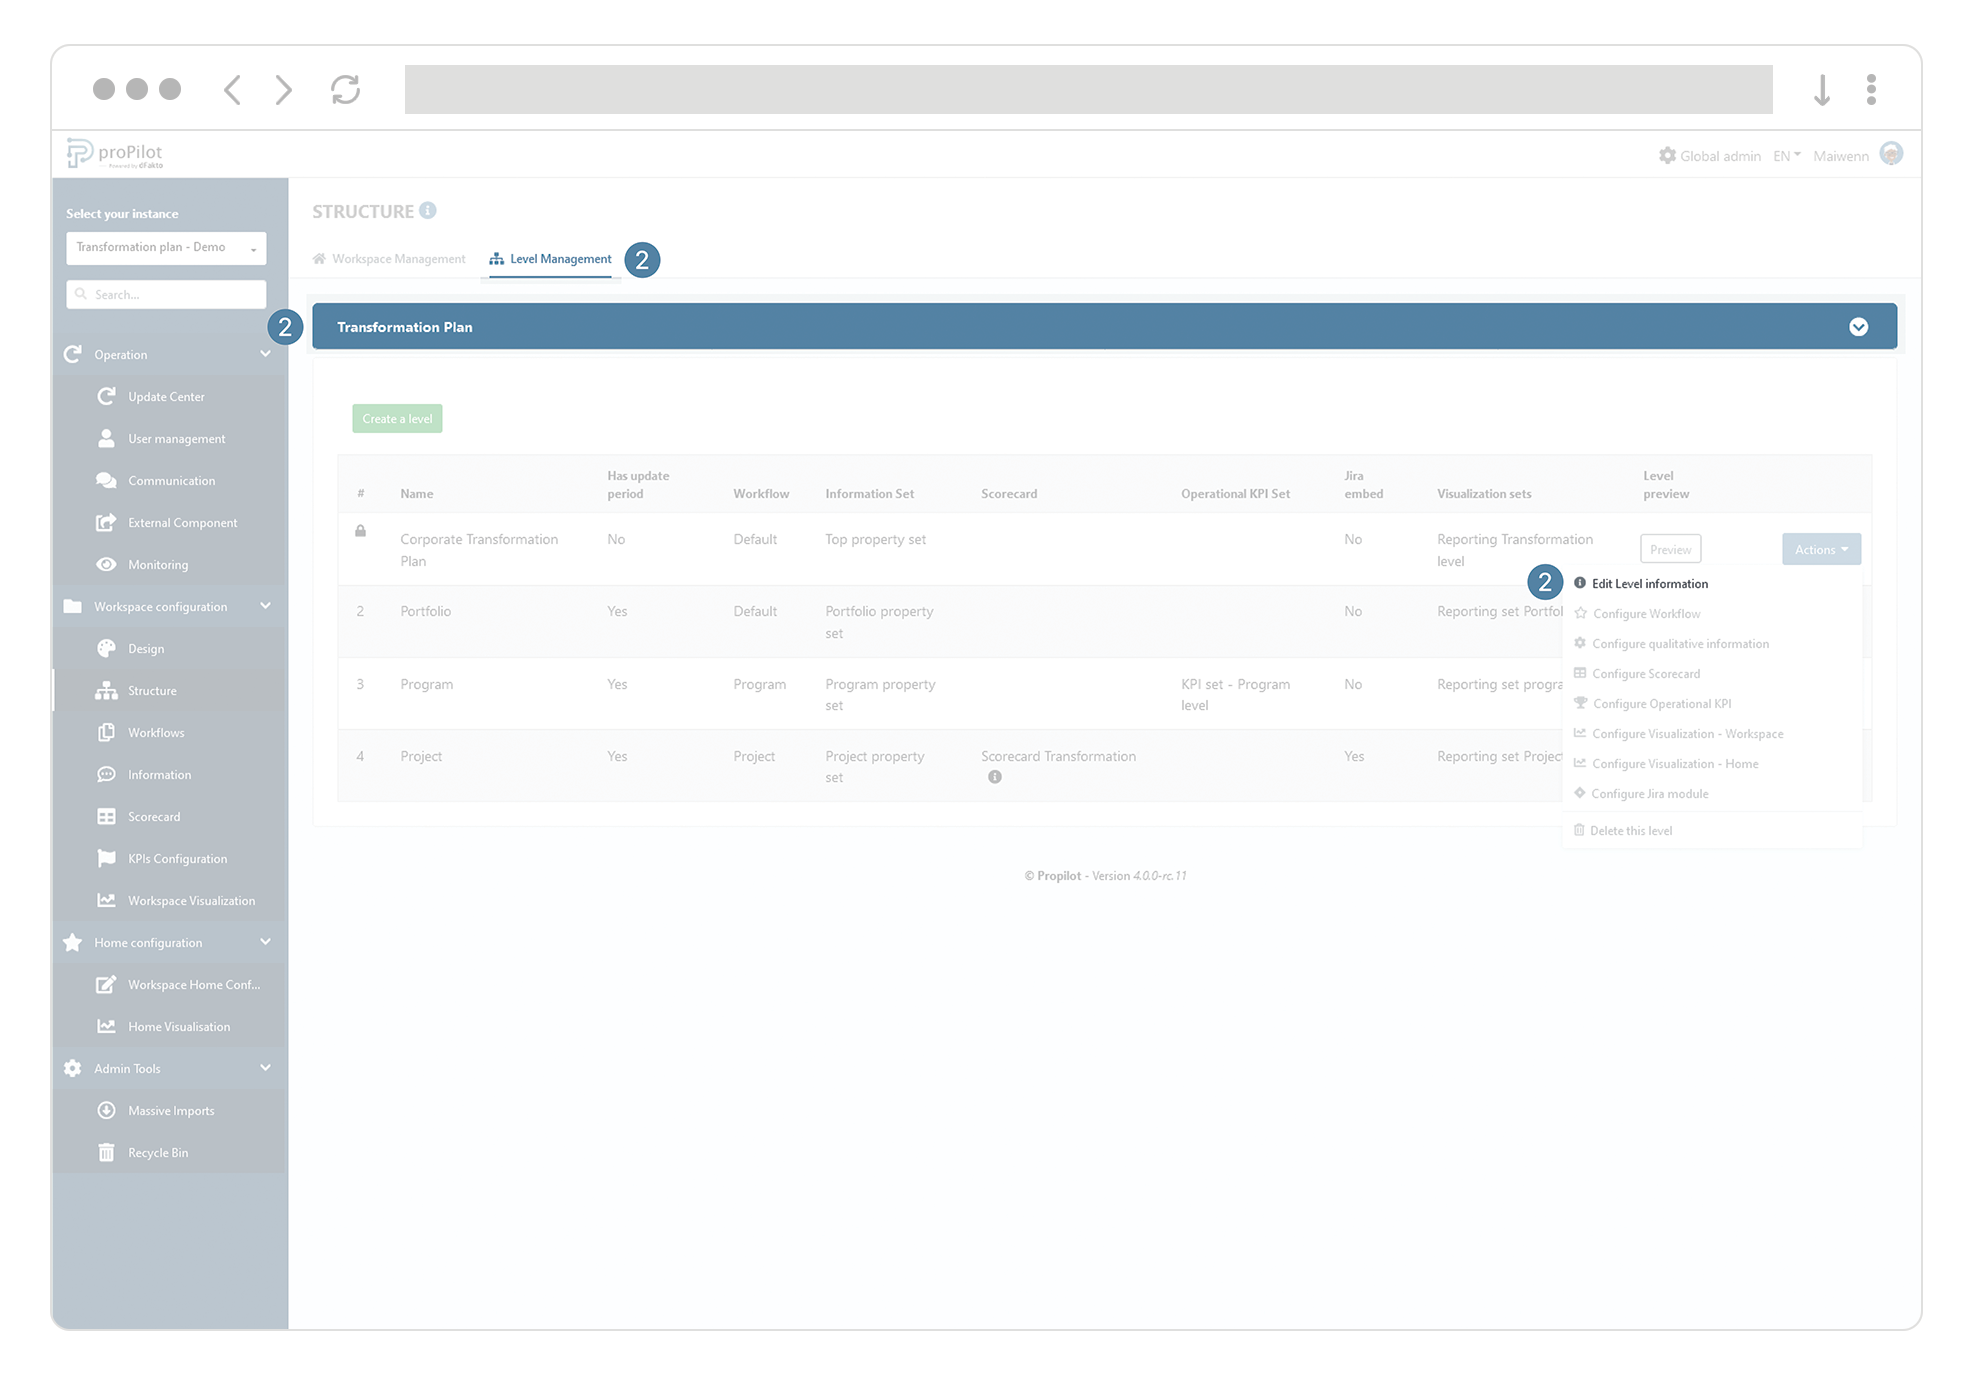
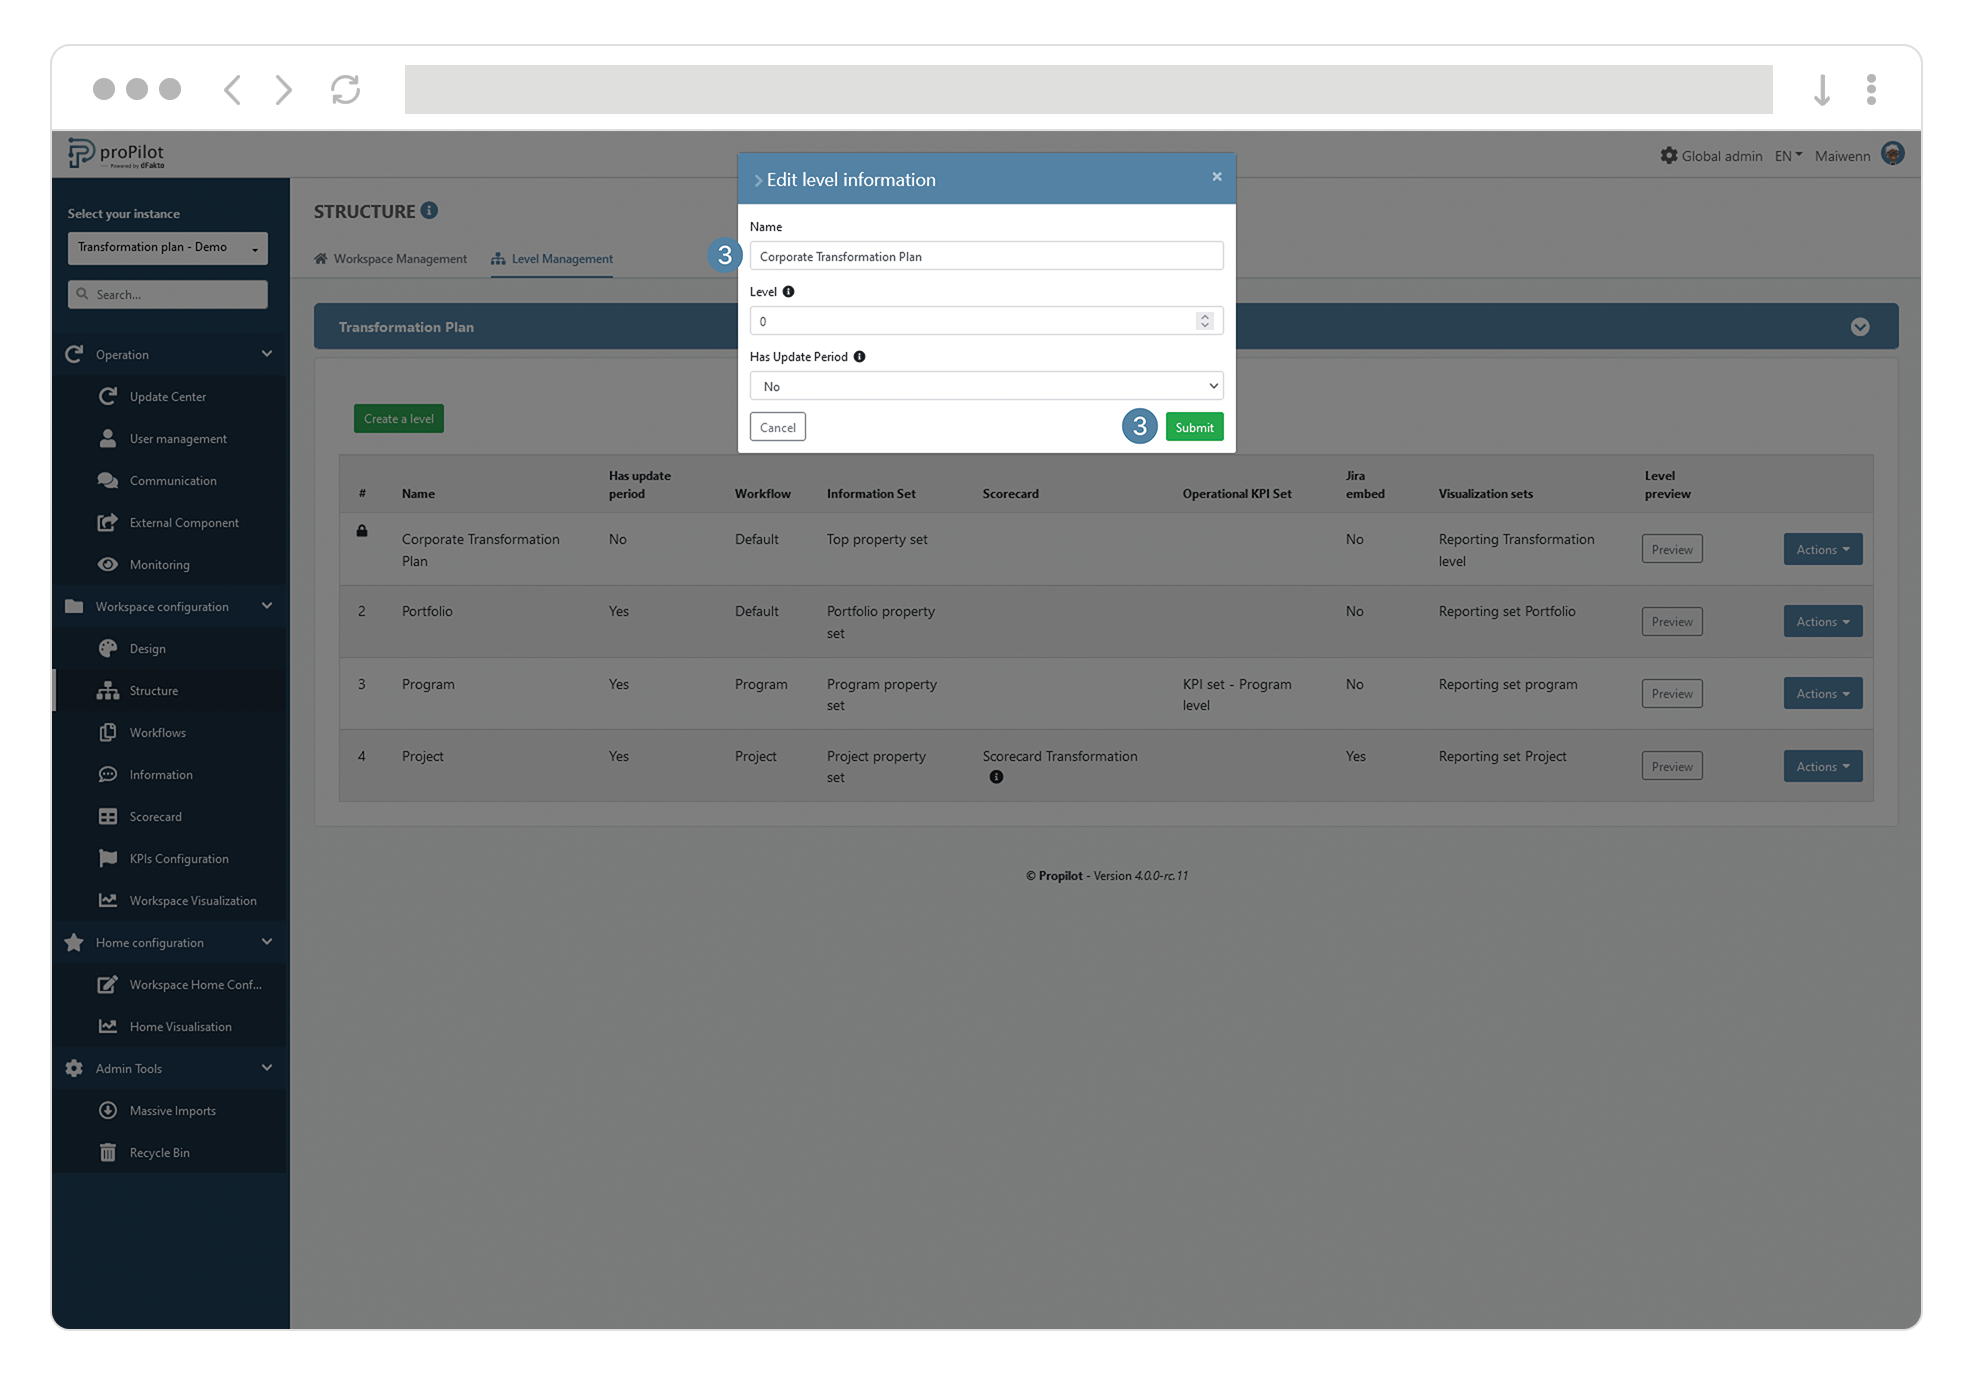
Modify the entity configuration for the existing levels of your workspace
-
Open the "Workspace configuration" section in the left menu and then click on the "Structure" tab in this menu.
-
Open the "Level management" tab, select the workspace from the drop-down list and click on the "Edit" button of the concerned level.
-
Update the name of the relevant level. This is usually the type of entities that will be tracked at this level. For example: "projects".
Remove levels from your workspace
-
Open the "Workspace configuration" module in the left menu and then click on the "Structure" tab of this menu.
-
Open the "Level management" tab and, select the applicable workspace within the instance (if applicable).
-
Click on the "Action" button of the concerned level, then on “Delete this level”.
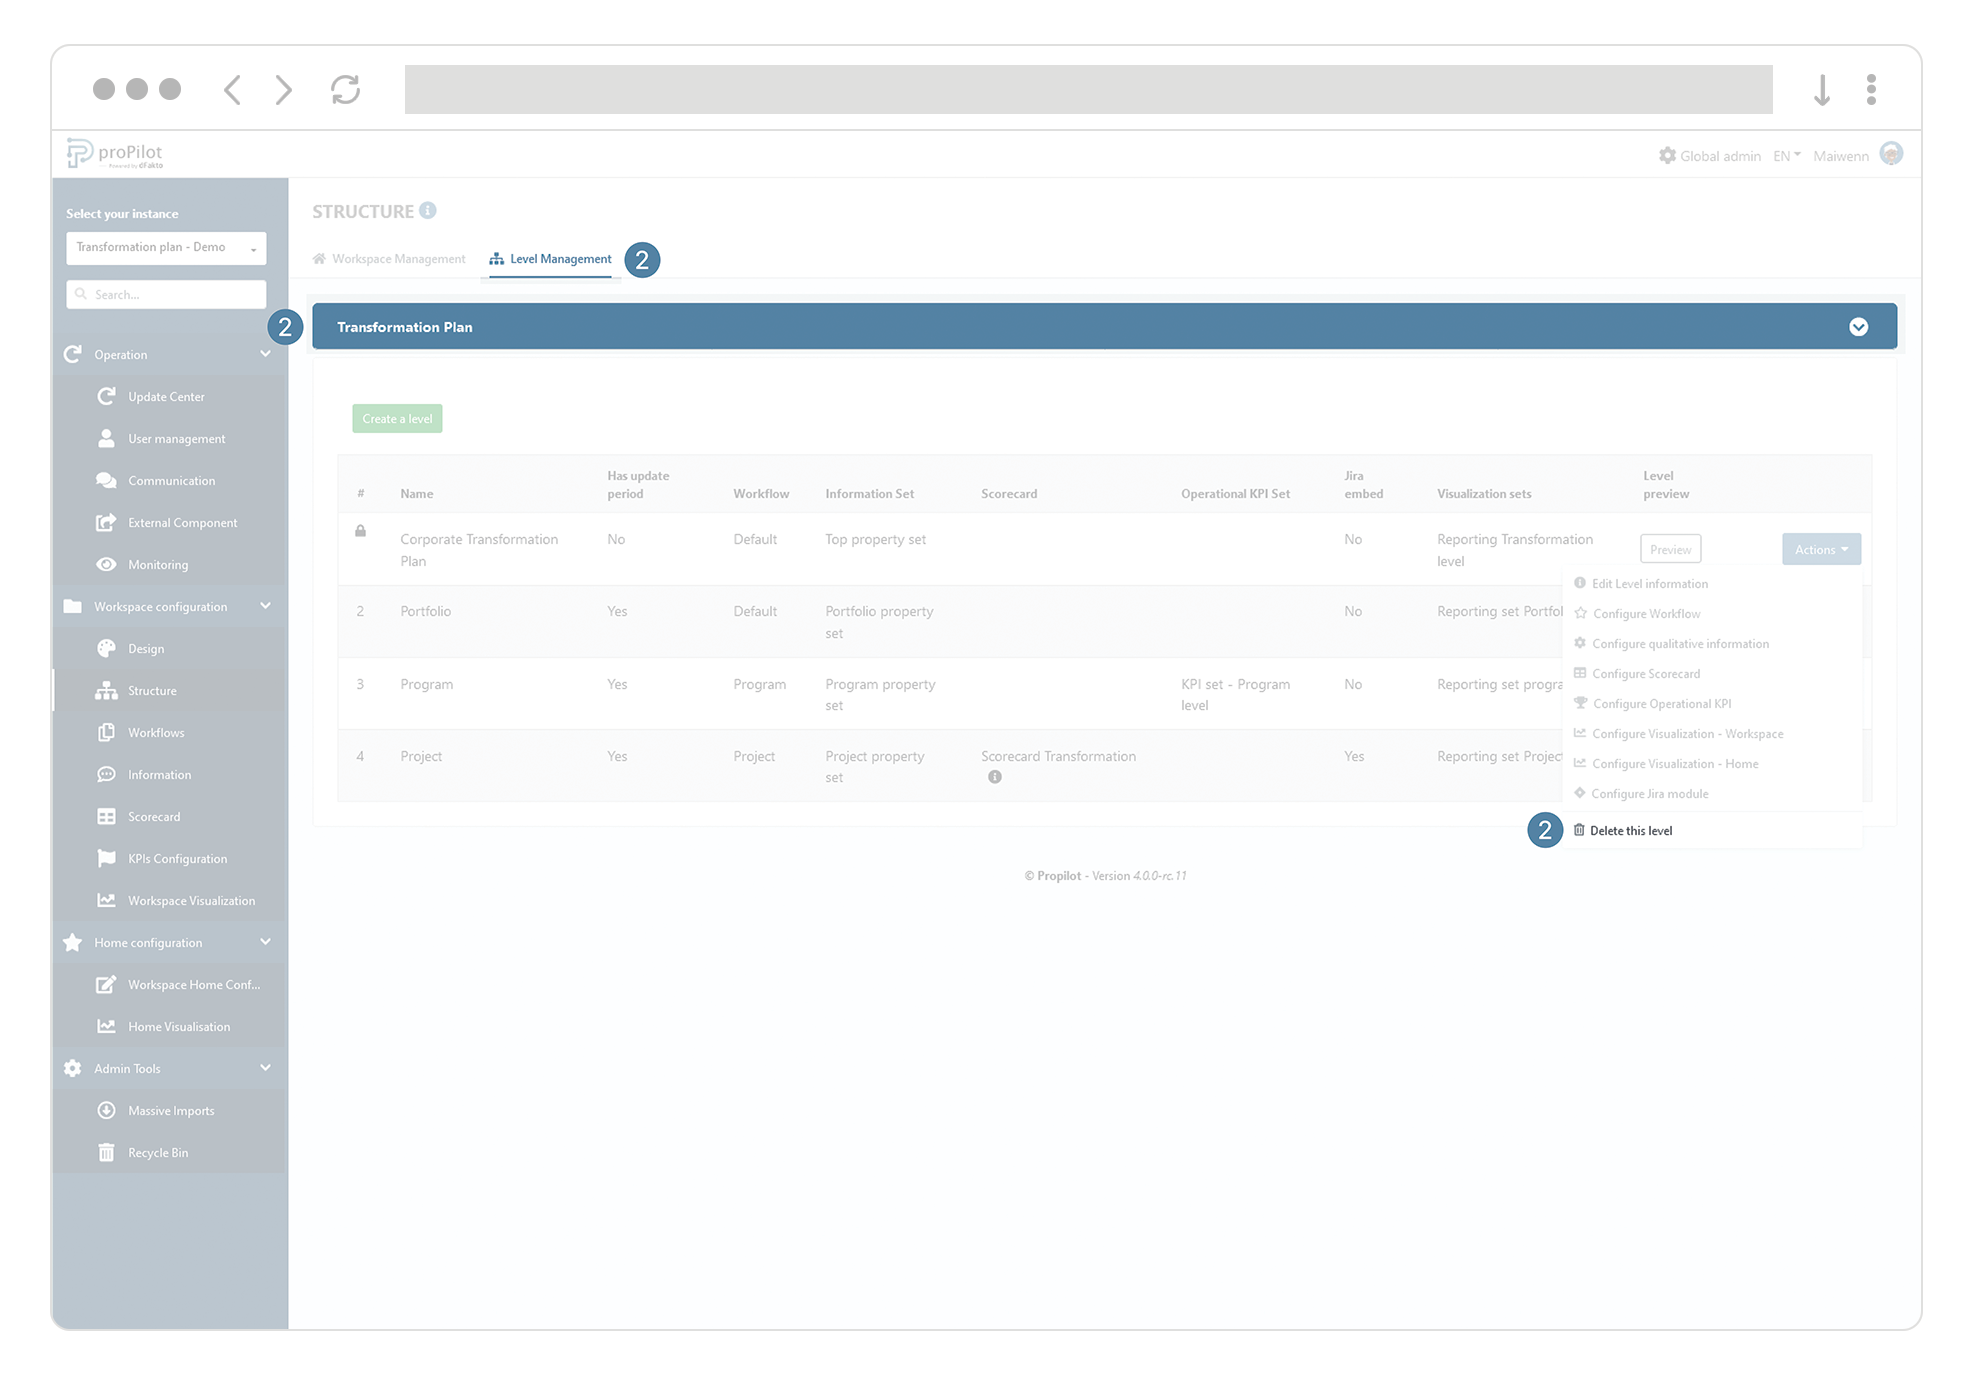
In order to make this change, it is necessary that no entities are integrated for this level. To do this you have the possibility to delete the entities. More information in the part "delete an entity".